-

Now available for $24.95 including shipping. -

Now available for $21.00 including postage. Vendors I Like
 Click Here to buy from Cobrahead
Starting from Seeds: It’s Time to Get Ready!
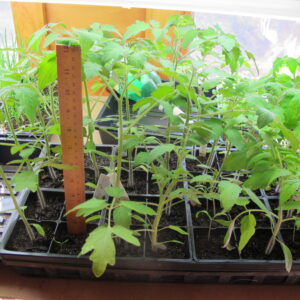
Tomato seedlings that are almost ready for the garden
First, some basics: you need lights over your seedlings in order to get good plants. Yes, I know some people grow things on a bright windowsill for a few weeks, but getting sturdy tomato plants or zesty zinnias requires supplemental lighting.
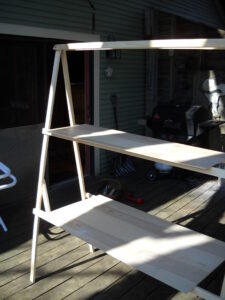
A simple homemade plant stand
If you have a warm basement, I’d suggest that the easiest approach for a starting a few things would be to use a card table and 4-foot fluorescent fixtures hanging from the ceiling. Put plastic over the table to protect it from water spills.
Your hardware store can sell you something called “jack-chain” that will allow you to adjust the height of your lights as your plants grow. Ideally, your lights will hang about 6 inches above the top of your plants. Two four-foot fixtures, each with 2 tubes, hanging a few inches apart will illuminate 4 flats (or trays) of seedlings. When you buy your flats, be sure to get those that do not have holes in the bottom, as some do.
The flimsy 6-packs tend to self-destruct easily, particularly if you try to wash them out for re-use. But there are heavy duty planting trays and cells that will last many years. Gardeners Supply sells them, along with clear domes to go over them. They cost more, but will last forever, and some have self-watering features.
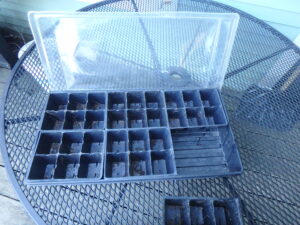
A flat with 6 packs for starting seeds and a plastic cover to contain moisture
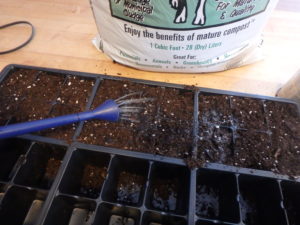
What about the soil mix for growing? Buy good quality “Seed starting mix” labeled as such. I mix it with high quality compost in a 50-50 ratio. Sometimes I make my own starting mix using peat moss, perlite, vermiculite, compost and a slow-release organic bagged fertilizer. I start about 10 flats of plants each year, so there are cost savings for making my own mix.
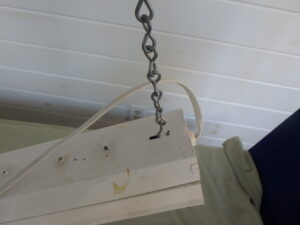
Jack chain easily allows you to adjust the height of your lights
Lastly, water them. I like a soda bottle for watering, as it can deliver a nice slow trickle. Water the soil mix before planting, because if it is too dry, it is resistant to absorbing water.
Tips for Starting Seeds Indoors
By mid-March I generally am getting a bit squirrelly. Winter is nearly over but mud season is ahead. It is still many weeks until the snow is gone, the soil warm and dry enough that I can work in my garden. This is the time I like to start a few seedlings indoors to keep my spirits up.
If you’ve never tried starting plants indoors, there are a few things you should know:
- Lights are essential. Growing on a windowsill will only result in long, lanky and dispirited plants. Four-foot fluorescent or LED fixtures will provide plenty of light and help you to grow good plants.
- You can’t grow seedling indoors in soil. You need a potting mix to grow them in those little 6-packs available at the garden center.
- Temperature is important, too. Electric heat mats under your flats of seeds will help them to germinate earlier and better. After that? Not too hot. 65 degrees or less during the day and 50 to 55 at night are good temperatures.
- Plants quickly use up any fertilizer that comes in your potting soil. If you are an organic grower, you can water with a dilute fish or seaweed fertilizer to provide what is needed for healthy growth. But don’t make your dilution too strong. More is not better, so read the directions. Fertilize once or twice a week.
- Don’t let your seeds or seedlings dry out. Check daily.
- Timing is important. Most seedlings only need 6 to 8 weeks of growth indoors before going outside. You don’t want your plants to get root bound. Most seed packages or catalogs will give you information about timing.
- Seedlings need their rest, too. Don’t run your lights all the time. They need 10 hours or more of rest – no lights – each 24 hours.
Start the process by setting up a growing area in a spare bedroom or bathroom or perhaps in the basement. Depending on your budget and how many seedlings you wish to start, you can use a card table and a fluorescent or LED fixture hung from the ceiling – or something more elaborate.
Years ago I built a simple A-frame plant-starting frame that I use every year. I used one inch-by two-inch pine boards. The legs are each 6 feet long and each pair of legs is joined using a small gate hinge at the top. The two pairs of legs are five feet apart, and connected on 3 levels with 1-by-2 inch wood to support lights and plywood platforms.
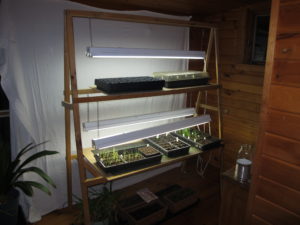
Homemade plant stand
The A-frame has 3 growing areas: top shelf, middle shelf, and the floor. I used thin plywood for the two shelves, one piece 16 by 48 inches for the top shelf, the other 24 by 48 inches for the middle shelf.
I used short sections of 1-by-2 to brace the structure, including a piece between the side supports of the wider shelf, which might droop if not supported.
I placed cup hooks on the cross pieces to support the fluorescent lights on jack chain, one 2-bulb fixture for the top shelf, 2 two-bulb fixtures for the other growing areas. This system will handle up to 10 flats of seedlings. Of course, you don’t have to use it all, especially when you are just learning how to manage growing seedlings indoors.
The jack-chain mentioned above is a light-weight chain that is sold in hardware stores. You can open up the chain on each end with needle-nose pliers to attach it to a hook or to poke into slot on the back of the fixtures. It’s important to have something you can easily adjust in length, as you will want to keep the lights about 6 inches above your plants. My tomatoes get more than a foot tall, so I keep shortening the chain to pull up the lights.
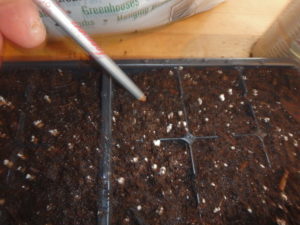
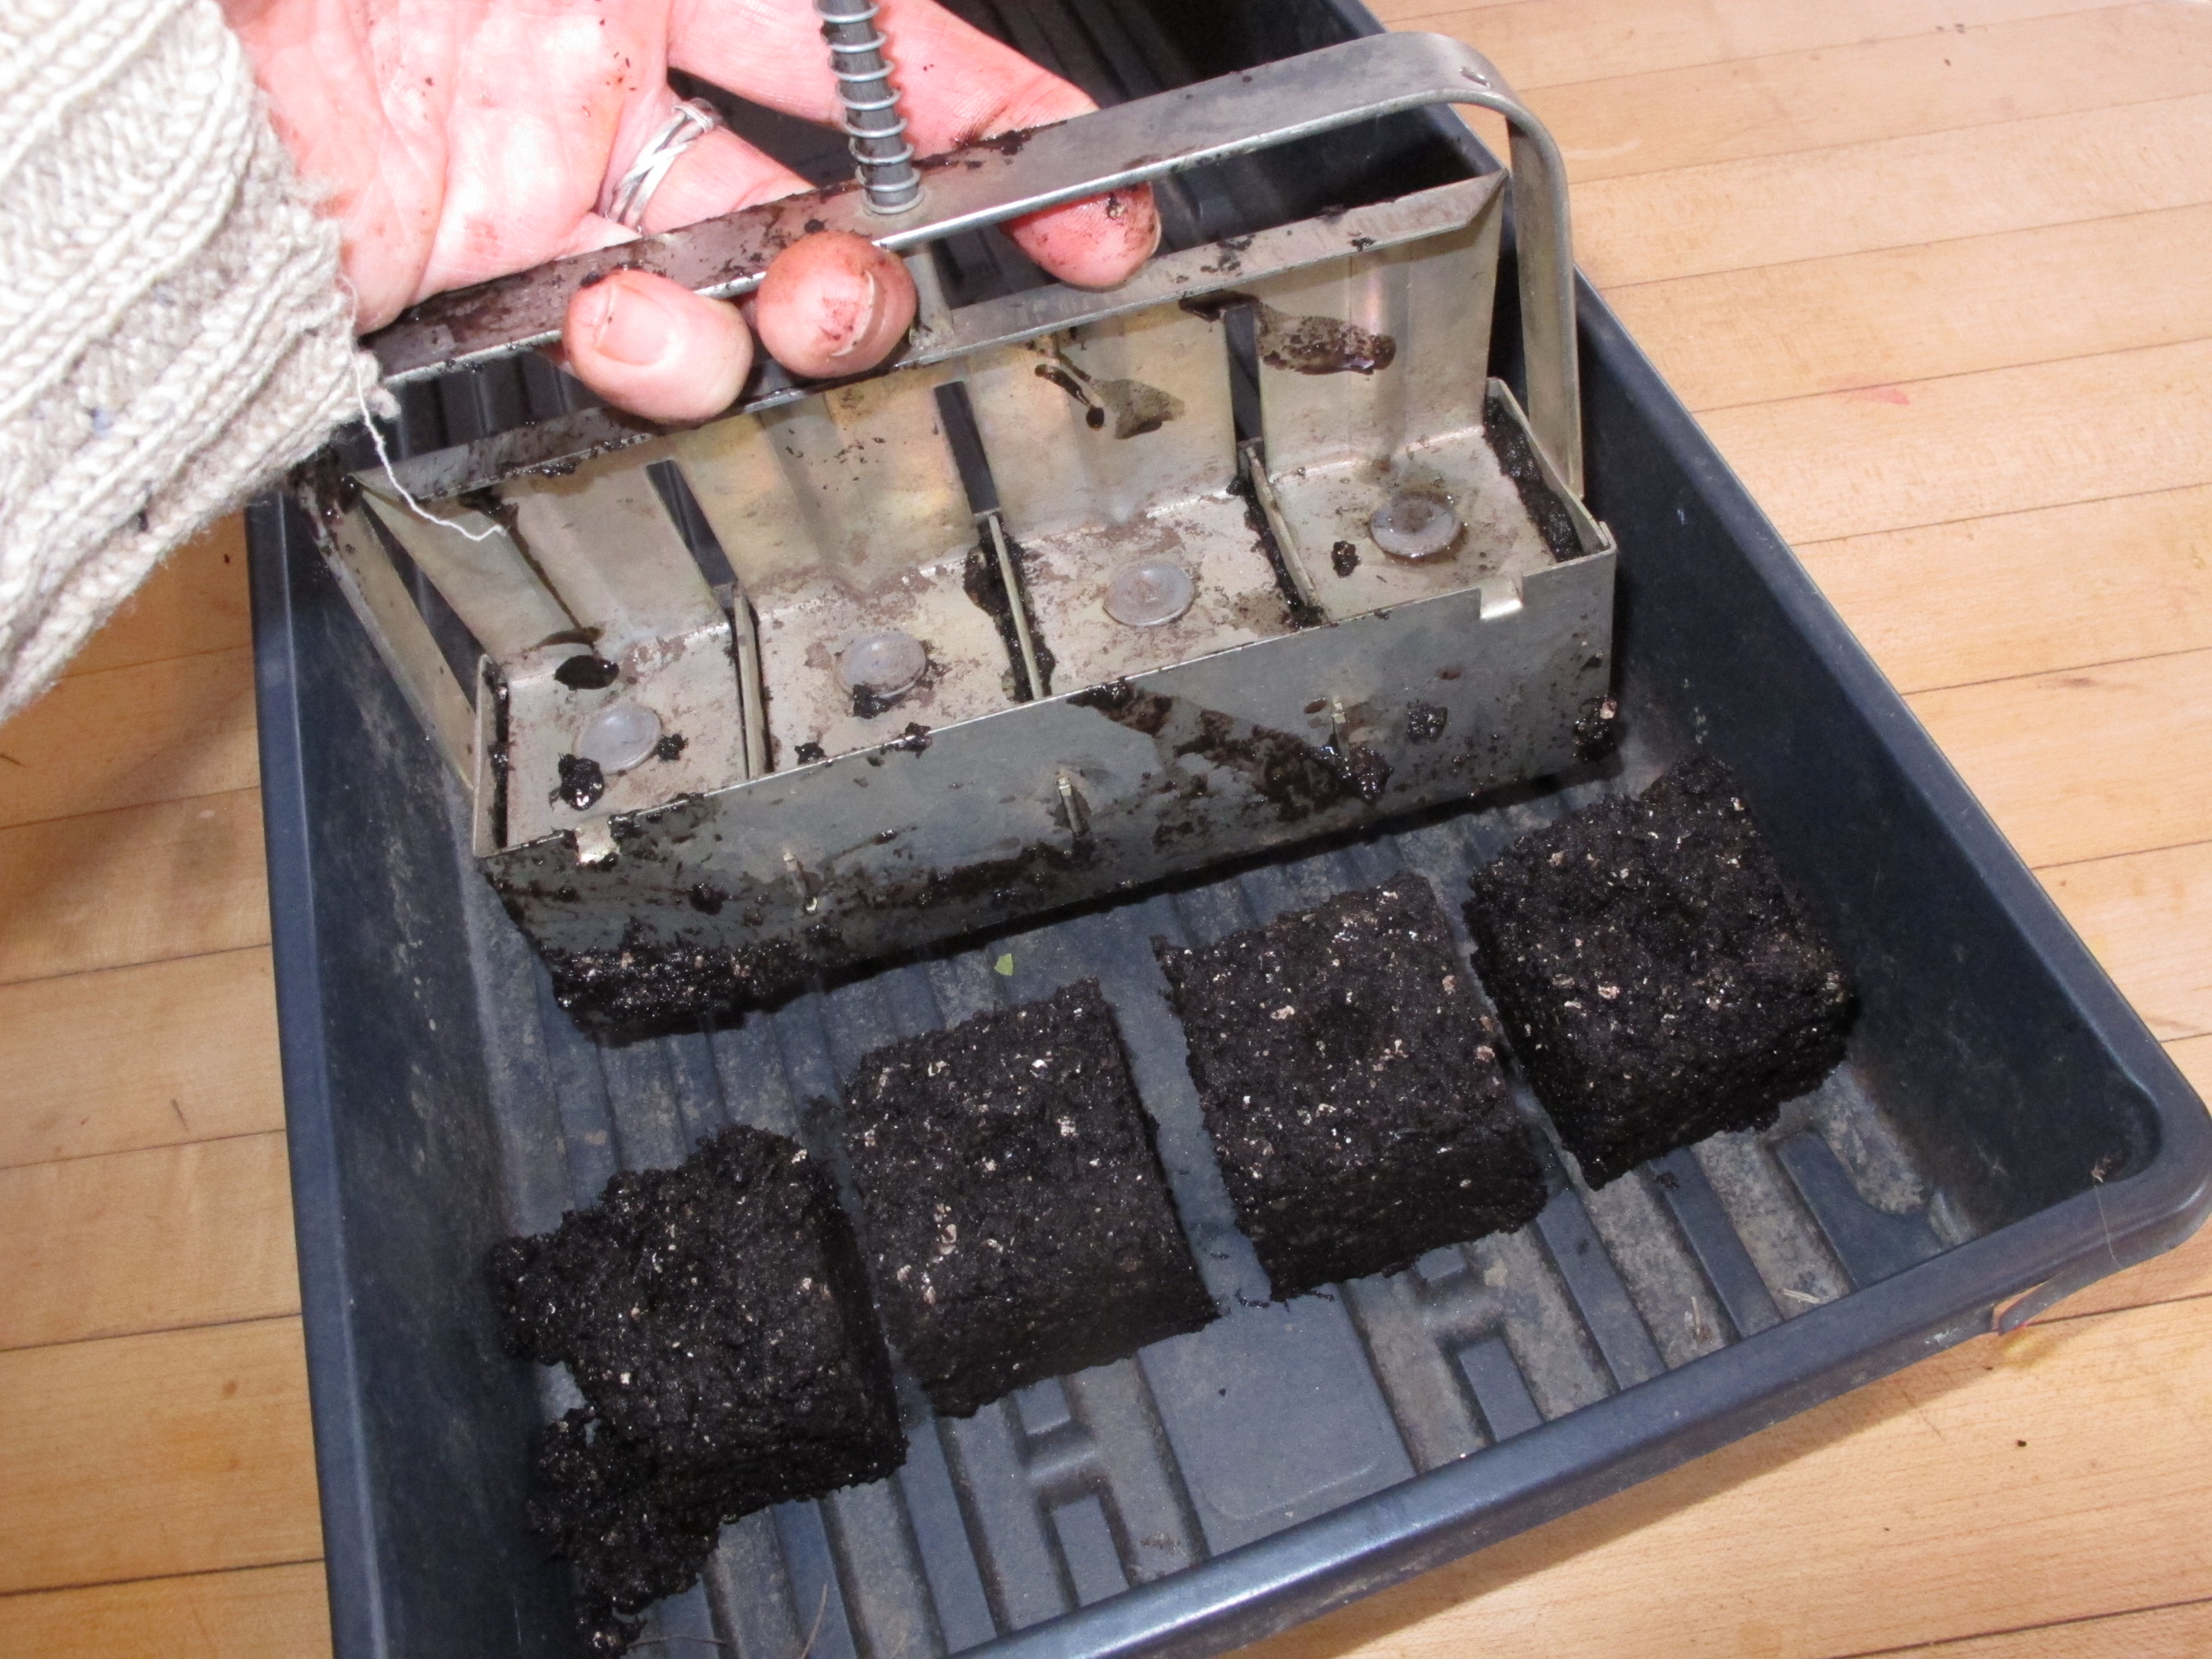
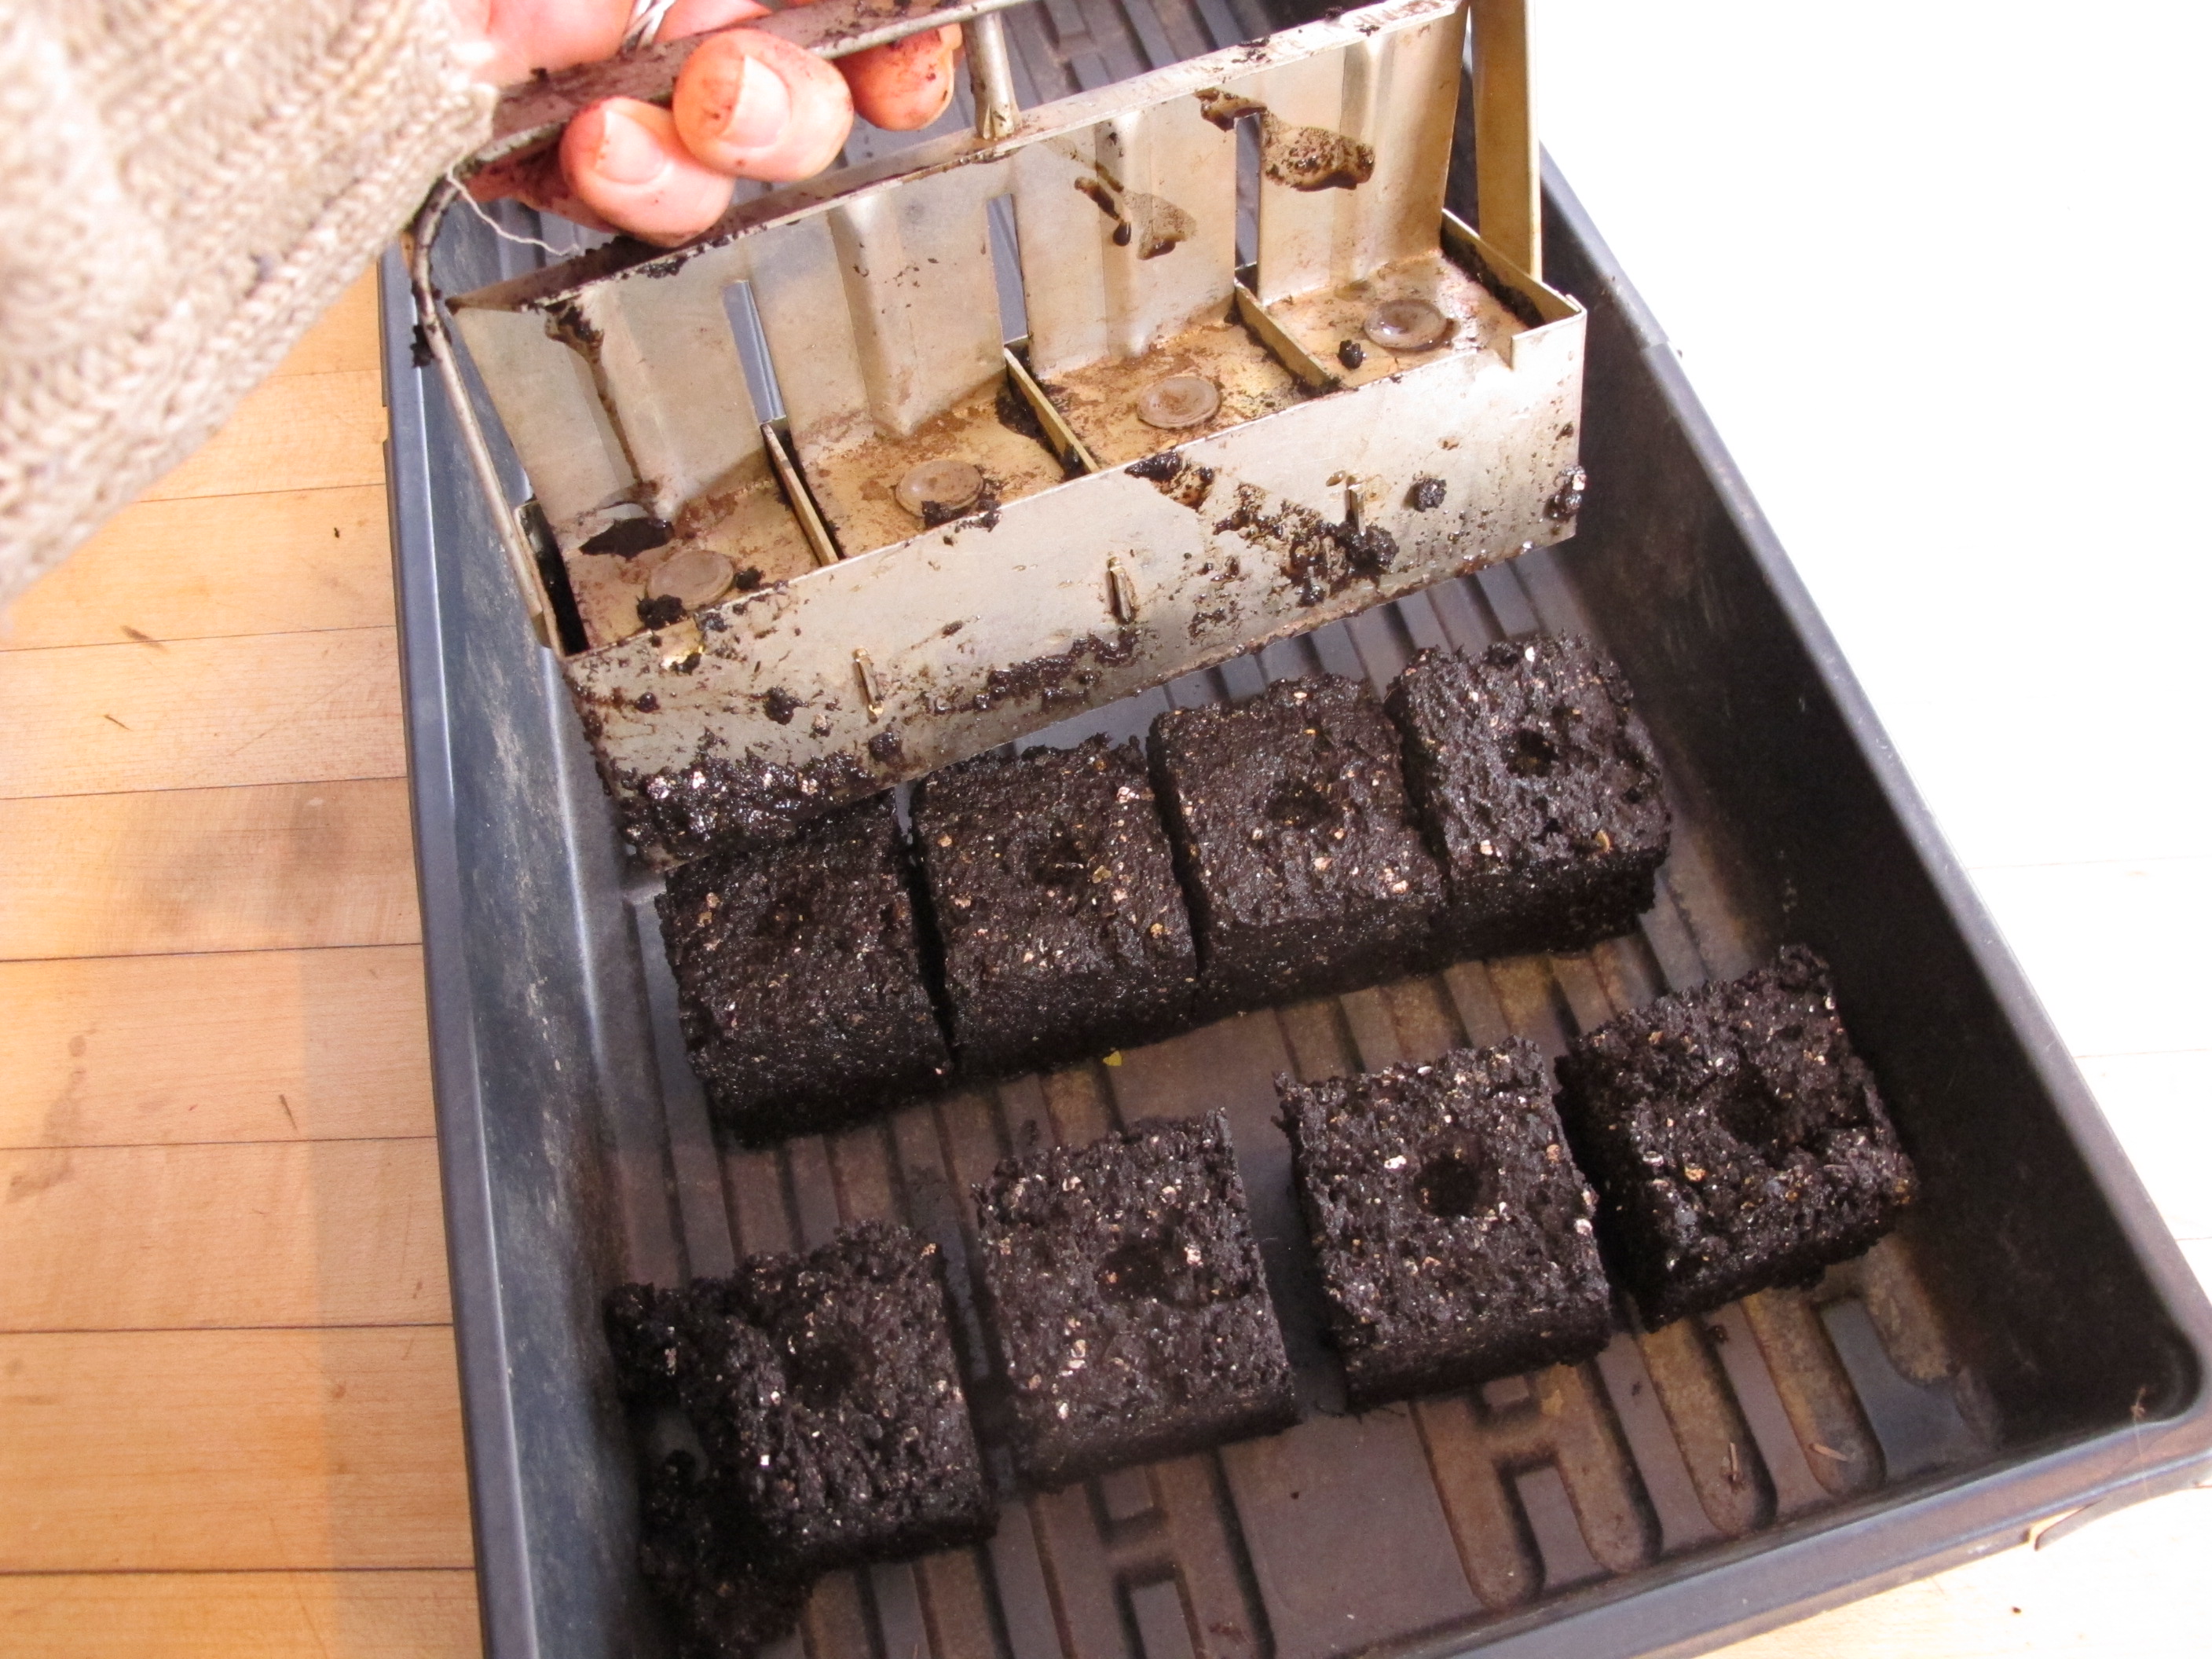
Making a divot for the seed
Fill your 6-packs with potting soil, wipe off any excess, and then water. The material will settle. Let it drain, and then plant. Make a divot with a pencil for each seed. The bigger the seed, the deeper the divot, per directions on seed packs. Or you can drop the seed on the surface, and push it into the potting mix with the eraser end of a pencil, and cover with more potting mix. Lightly water again.
What to plant indoors, what outdoors? Root crops should always be direct seeded outdoors, with the possible exception of beets. Although many plant cucumbers and squash by seed outdoors, I plant then indoors in May to prevent beetles from decimating them when they are small. I put them out when vines are about 6 inches long.
Tomatoes I usually start around April 10. The biodynamic calendar I use,
Moisten potting mix before planting seeds
Stella Natura, tells me to plant fruit crops this year on Saturday afternoon, April 6 or Sunday afternoon, April 14th. I believe the sun and moon are good guides, and that calendar helps me.
Right now? I’m planting peppers, hot and sweet. Onions are good to plant by seed indoors in March, too, though you can buy plants or sets to plant outdoors later.
Try a few things indoors by seed this year if you haven’t before. I think you’ll enjoy it.
Henry can be reached at henry.homeyer@comcast.net or PO Box 364, Cornish Flat, NH 03746.
Getting Ready to Plant Seeds
Ground Hog’s Day has come and gone. That means we’re coming down home stretch. Winter is more than half gone. It’s time to think about ordering seeds, if you haven’t yet.
I know that many great gardeners just don’t bother starting seedlings indoors. They say it takes too much time and effort. And now days, there are great nurseries in most areas that produce all kind of fine heirloom tomatoes and crunchy red lettuces. But I love to pamper my little tomato seedlings under lights, watering and fussing over them every day. It helps me stay sane. Of course it’s still too early for most things.
I love ordering specialty seeds and trying new things each year and look forward to the catalogs. Many of the seed companies are now depending on our ability to choose seeds and order them on-line. I love the old fashioned seed catalogs, catalogs I can hold in my hand and study at my leisure – even in the bath tub.
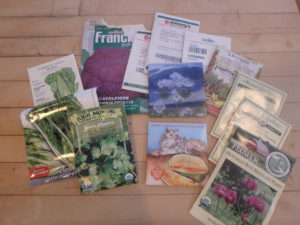
Seed Catalogs
I recently got a catalog from Seeds of Italy, an importer in Nebraska. Dan Nagengast, the co-owner, worked in West Africa with me decades ago so I decided to give him a call to talk seeds. What are some of his best tasting tomatoes, I asked? He says his most popular tomato is one called Red Pear. Unlike American pear tomatoes, this is a big one: 8 to18 ounces. Great flavor, and meaty with few seeds.
Another tomato I am ordering from Seeds of Italy is an old French one called Marmande. It’s said to have good fruit set even in cool weather, and is described as “semi-determinate”. Determinate tomato plants grow to a certain size, set fruit, and stop growing. Indeterminate tomatoes keep growing until frost or disease kills them. But semi-determinate? I’ll grow these, and find out just what they do. Dan said another favorite is St Pierre, an indeterminate heirloom with great flavor.
As you go through your catalogs or read them on-line, you might be confused by the term heirloom. Heirloom means that the plant stays true to its characteristics year after year. They breed true, so you can save seeds. Baker Creek Heirloom Seeds is the biggest heirloom seed producer in America, offering some 1800 heirloom varieties. They have more weird veggies than you can shake a stick at!

Heirloom tomatoes 2010
Hybrid tomatoes, in contrast, result from crossing two different varieties of tomatoes. The first generation after crossing them yields a plant that has characteristics of both parents and is generally superior to both. If you save seeds, you’ll get progeny that are like the original parents as well as some of the hybrid you wanted. But you can’t tell what the seedlings will produce, so it’s not recommended.
Another seed company I like is Hudson Valley Seed Company. They are new in the marketplace, just eight years in existence. Co-owner Ken Greene started it as a seed library – a service offered to library patrons in Gardiner, NY. Library members could get free heirloom seeds, grow plants, save seeds and then pay back the library with seeds they saved. Obviously, an important education component was part of the process as many plants will hybridize on their own unless spaced appropriately.
No longer a seed library, Hudson Valley Seed Company is certified organic. When Ken Greene came to my part of the world this winter, I bought a few seeds including one for cold-weather watermelons that originally came from Russia. Watermelons are not usually a big success in New Hampshire, so it will be good to see what they will produce.
Johnny’s Selected Seeds of Winslow, Maine is one of my favorites. They are the go-to company for many farmers around the country because their seeds are always top quality, and they have just about every type of seed one could want. Home gardeners can benefit from the extensive cultural information they provide on their website or in their catalog.
Unlike some seed companies, Johnny’s does research and development at their home base in Maine. Obviously they have growers who produce much of their seed, but I am confident that their seeds are good for my climate, not somewhere down south. It is also an employee-owned business. The sell both organic and conventional seed.
You may wonder about the advantages of buying organic seed. Yes, it costs a little more, but by buying organic seed you are supporting farmers who treat the soil and environment with care and respect – just like you do. If you are an organic gardener, you probably will want organic seeds because the mother plants have survived and thrived without chemicals – just like they will have to do at your house.
High Mowing Seed Company of Vermont is a company that only sells organic seeds. And unlike many seed companies, they ship free if you order over $10 worth of seeds. Renees Garden Seeds is another one of my favorite seed companies, with many organic seeds.
Lastly, check out the Seed Savers Exchange. This is a non-profit that since 1975 has been collecting, saving and selling heirloom seeds. Join so you can access their amazing collection of heirloom seeds.
Henry may be reached at henry.homeyer@comcast.net. See his blog posts at https://dailyuv.com/
Starting Seeds Indoors
After arguably the coldest, snowiest winter on record, I am ready for spring. Okay, maybe the winter of 1934 was colder. So what? I still have snow, and my woodpile is pathetic. I am picking up sticks and burning soggy remnants of previous woodpiles. To keep my spirits up on raw, gray days, I plant seeds indoors.
I started back in March, planting artichokes, onions, leeks and peppers. Now I am planting the brassicas: Brussels sprouts, broccoli and kale. Those hardy souls can go out around the time of the last frost, even if the ground is still cool. My tomatoes, the queens of the garden, I will start closer to mid-April and go in the garden in June – well after the last frost – when the soil warms up to 60 or more.
One key to success with plants indoors is having enough light. A bright, sunny windowsill might be enough for the first couple of weeks in a plant’s life, but to grow good healthy tomato plants for 8 weeks requires artificial lighting.
Shop lights are relatively inexpensive: a two-tube, four-foot fluorescent fixture should cost under $20, plus the bulbs to go in them – which vary widely in price. You don’t need fancy “Gro-Lights”. Those mimic the spectrum of daylight, but for starting lettuce and tomatoes for the garden, ordinary cheap tubes work just fine. And if you can mix cool white and warm white tubes, you can have something close to daylight wave lengths.
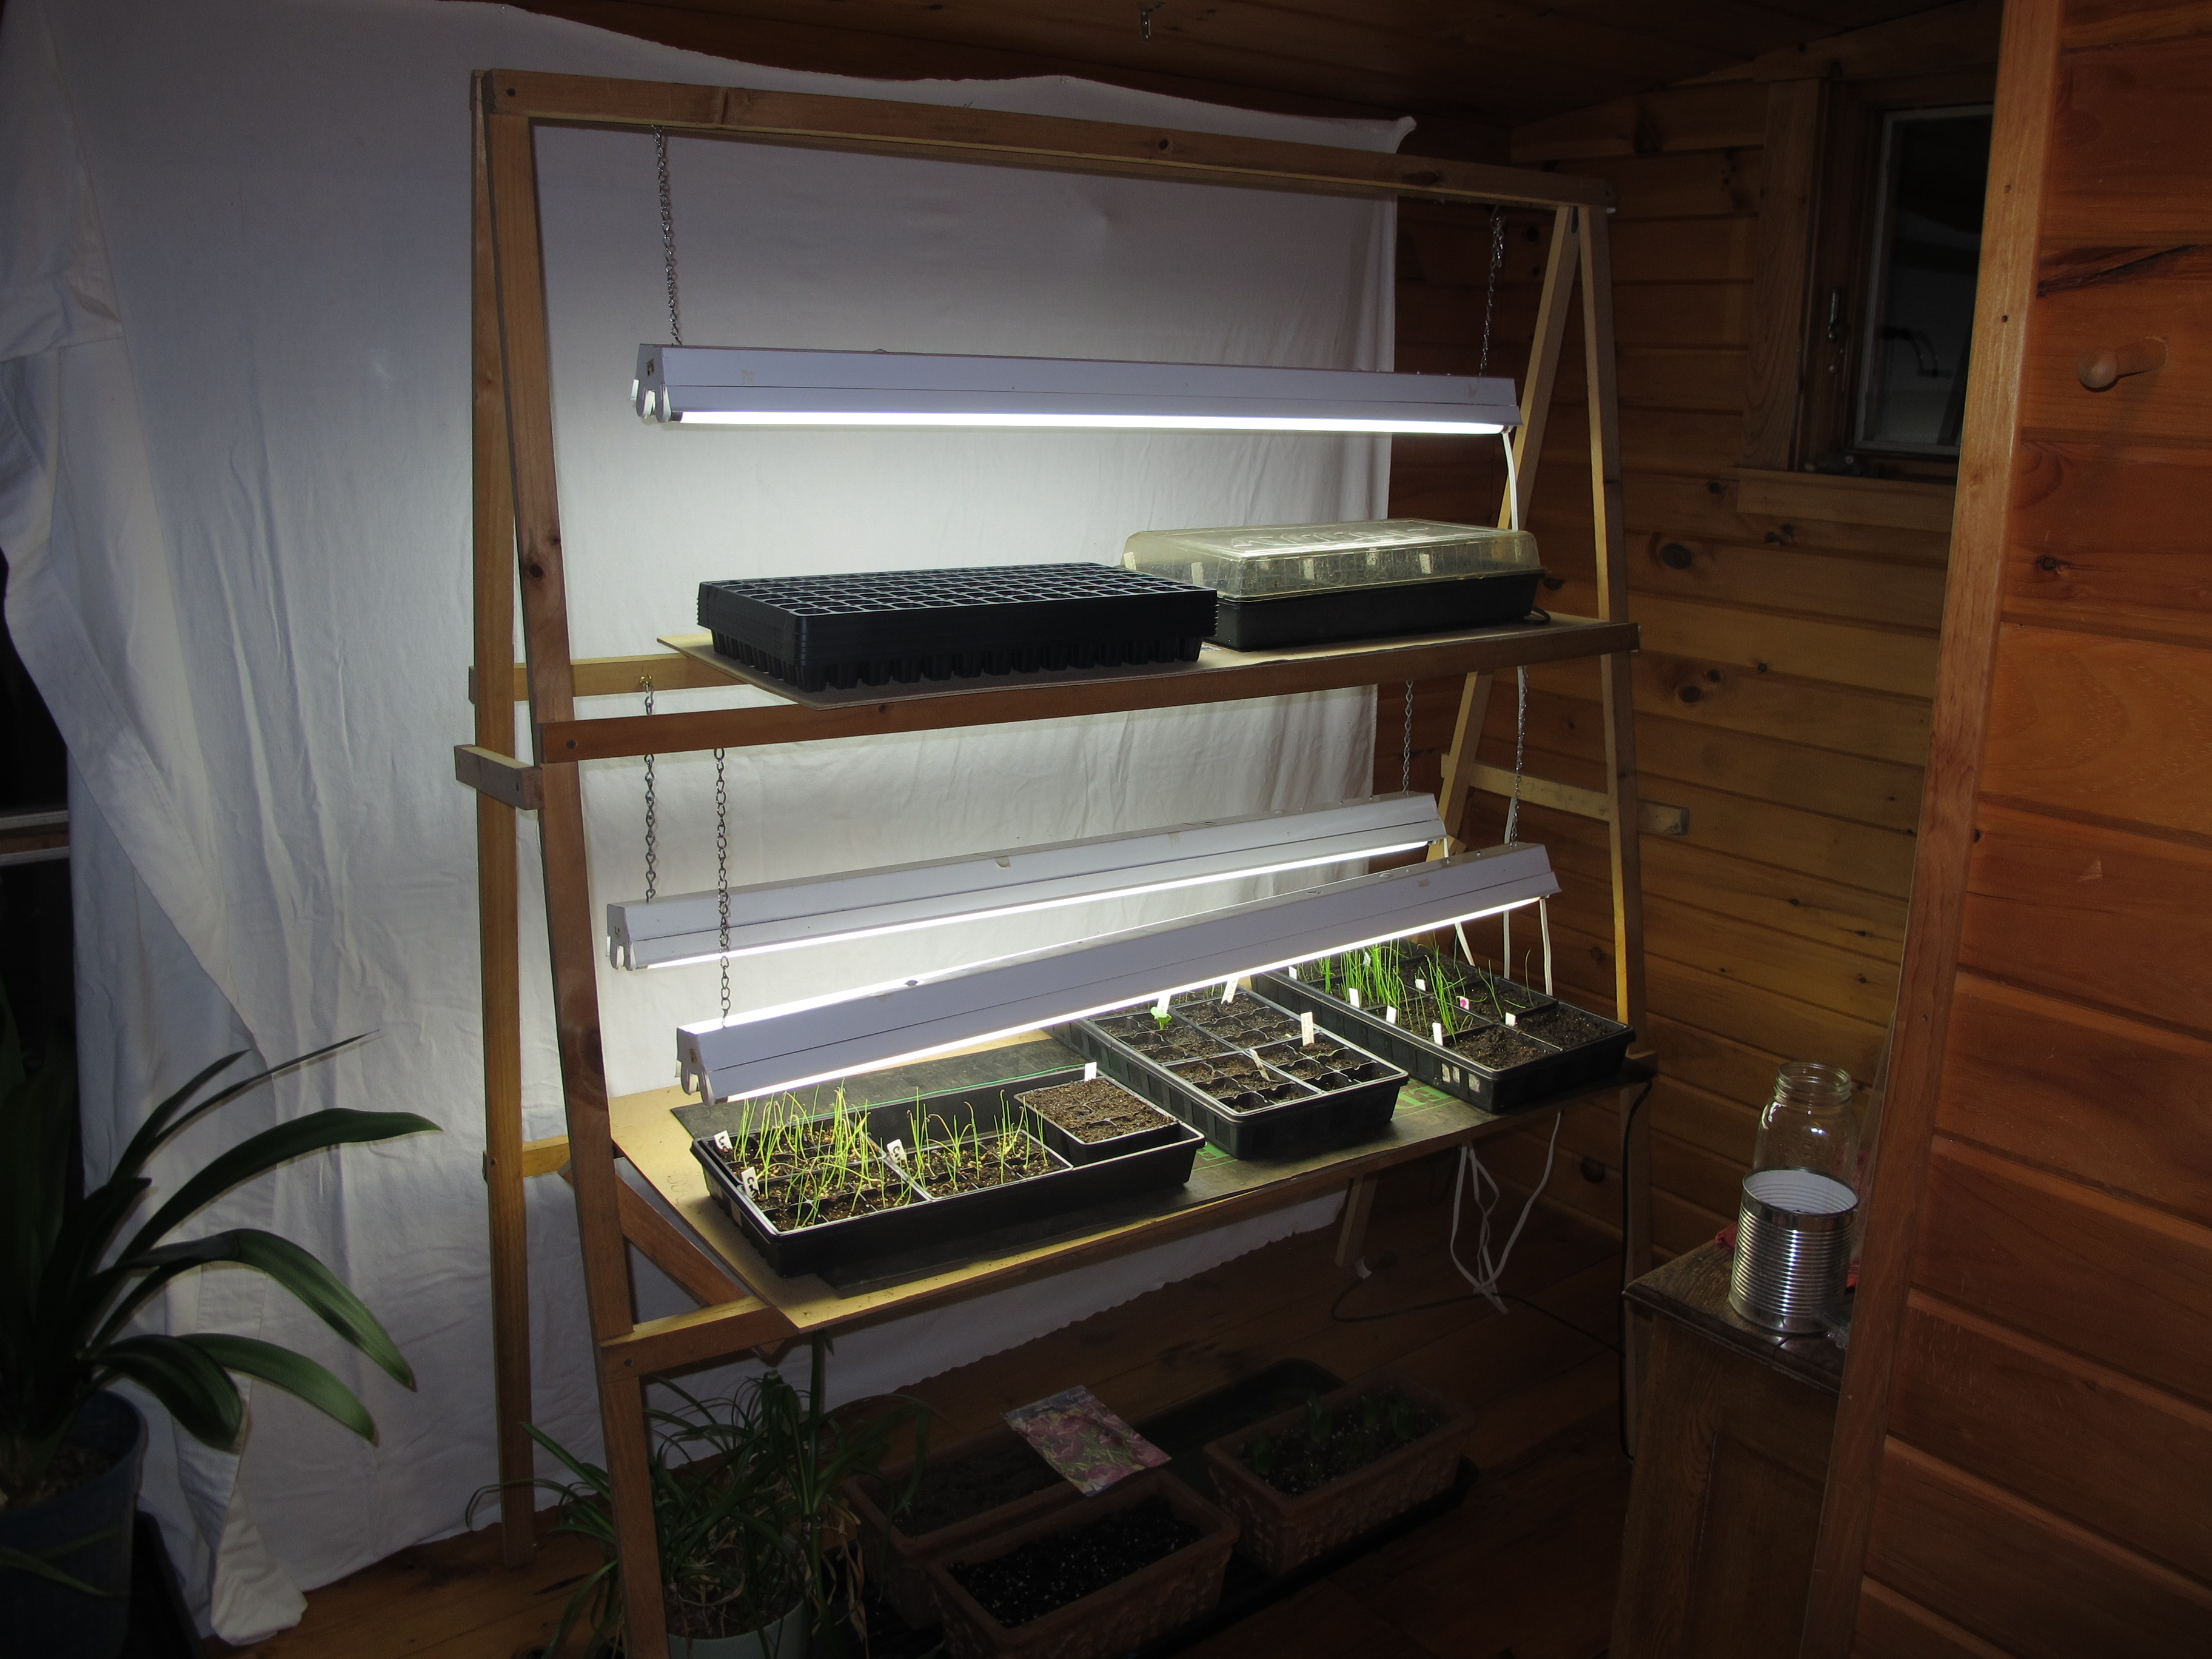
Homemade plant stand
A few years ago I built a simple wood A-frame plant stand that has worked out well for me. It uses 3 fixtures and will illuminate 6 flats of seedlings. I suggested at the time that your local lumber yard will be glad to take your parts list and cut lumber to the appropriate sizes. To get the directions, go to my website (www.Gardening-Guy.com) and type in “Plant Stand” in the search engine, and the article will come up. Or send me a self-addressed, stamped envelope and I will mail you the directions.
Another item that will help you is an electric heat mat to put under the flats while your seeds are getting ready to germinate. Most seeds have a protective mechanism to keep them from germinating too early. They need the soil to reach a certain temperature in order to know that winter has gone by. Garden centers sell 2 sizes: enough for one flat, or enough for four flats.
Last spring I started all my corn indoors in plug trays (containers with over 100 planting places per flat) and put them on a heat mat. They germinated in just 3 days – but would have taken 10 or more outdoors. Corn sometimes rots if the soil is cold and wet. Crows love to steal corn when it is first up, but I planted the seedlings when 3 inches tall and they rooted right in, so the crows didn’t steal a single one.
Moisture is another important factor when starting seeds indoors. Get your planting mix thoroughly moist before you plant. That can be done by placing a tray of planting soil in six-packs in a flat with water in it, and letting the water soak up from the bottom. Or pour water into the bag of soil mix the day before using it.
If the soil mix dries out when seeds are just starting to crack open and send out a rootlet, your seedlings will die. You can prevent that by covering the planted six packs with a plastic dome. These are clear plastic so you can see what is happening, and so that the seedlings that have germinated can get light while others are still waking up. By the time your seedlings are two inches tall, they will be crowding the dome and you should remove it.
Have you ever had bad germination rates? I have. It could be due to bad seed or old seed. In general it is best to buy new seeds every other year, even if you have plenty. Most seeds are good for 3 years or even longer – but at a lower germination rate.
But bad germination may also be due to the position of the moon and stars. I have been following a celestial calendar called “Stella Natura” (www.stellanatura.com) for a few years now, and although I can’t prove that its advice is right, I’ve had some interesting results.
I planted lettuce seeds on a “leaf” day, and then some more the following day, which was a “blackout” day (not recommended for planting anything). Even though I used the same seed package and planting mixture, I got a very low germination rate for seeds planted on a blackout day, but the others did well. The calendar has good days for planting fruits, flowers, roots and leaves. But this year I followed the calendar and still got very low germination for my artichokes, so who knows?
Remember when you calculate the cost of your tomatoes that building a plant stand for $50 and then buying lights for $100 is a multi-year investment. If you like messing around with plants in spring, starting seedlings indoors is a good idea. You can get rare and unusual seeds from catalogs that you would never find at your local farm stand. And, as one of my fridge magnets says, Gardening is Cheaper Than Therapy!
Henry Homeyer is a fruit tree pruner and gardening consultant. Contact him at henry.homeyer@comcast.net or P.O. Box 364, Cornish Flat, NH 03746.