Tips for Growing Great Garlic
Posted on Tuesday, October 10, 2023 · Leave a Comment
If you lean toward lazy (or have kids, dogs and a job), growing garlic may be just the ticket. It is the easiest of all vegetables to grow. Once planted and mulched, it requires little or no work until harvest. A good harvest is guaranteed if follow my instructions. Even with all the strange weather we’ve seen, I’ve never had a bad crop in the past 25 years or so of growing garlic.

Hard neck garlic cloves surround a stiff neck and are best for New England gardens
Now is the time to buy garlic for planting – unless you have some from your own garden saved for that purpose, as I do. You’ll want to get your garlic planted a month before the ground freezes, so depending on where you live, you may want to plant some soon. Garlic needs to establish roots now, and is not generally planted in the spring.
There are two categories of garlic: hard neck and soft neck. Both will grow in New England, but hard neck is the type grown by most farmers, and the most cold-hardy. It produces a stiff scape or stem each summer that is edible. Soft neck garden generally comes from California, and is good in the kitchen; it is also the type braided and hung from the ceiling in Italian restaurants as decoration. Hard neck garlic generally has more flavor; a wide variety of flavors is possible, depending on the type you grow.
Garlic does best in rich soil that drains well. If you have a heavy clay soil (one that is sticky when wet), you will need to add plenty of compost to your soil. Adding sand will not help, as sand added to heavy clay produces something like concrete that hardens up in dry times.
If you have poor soil, you may want to build a wood-sided raised bed, and add plenty of compost and topsoil that you purchase in bulk or in bags. I find Moo-Doo brand composted cow manure and topsoil are a good soil additives that are sold in bags in many garden centers. A 50-50 mix of your soil (or purchased topsoil) and compost should work well.
When making a wood-sided bed, I don’t recommend treated lumber. Even though most treated lumber is safe to handle and much less toxic than 20 years ago, I don’t want any chemicals leaching into my soil. I use rough-sawn lumber from a local sawmill, preferably hemlock. It generally lasts about 10 years. Eight-inch wide planks are wide enough to make a nice box.
Plain pine boards will work, too, and metal corners are readily available at garden centers or from catalogs like Gardeners Supply and Lee Valley Tools. The corners make constructing a garden box easy even for non-carpenters. All you need is a cordless drill to drive the screws. Carrots and other root crops do well in garden boxes, so you can alternate them with garlic in subsequent years if you build 2 or more boxes.
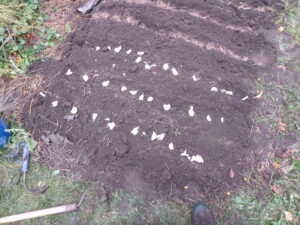
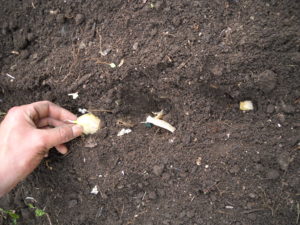
Place your garlic cloves on the soil to establish spacing before planting
I generally use my own garlic for planting, as it has adapted to my soil and climate over the years. But if I see big, fat bulbs of garlic at a farmers market, I sometimes buy some. I don’t recommend buying garlic for planting at the grocery store as most has been treated to prevent it from germinating, and so it will last longer.
Where can you get garlic for planting? If there is none at your local farmers market, you can get organic garlic from Johnny’s Selected Seeds in Maine (877-564-6697 or
www.johnnyseeds.com). But don’t wait too long – they sell out most years.
Once the soil is loose and weed-free, I plant. I take a CobraHead weeder, a nice single-tined weeder, and make furrows in the soil of my raised bed. I keep the furrows about 8 inches apart. I sprinkle some organic bagged fertilizer into each row, and stir it in.
I break the garlic bulbs apart, separating the cloves – there are usually 5 to 10 cloves per head. I push the cloves into the loose soil, pointy end up, about 3 inches deep, and 4 inches apart. I cover with soil, and then pat it gently.
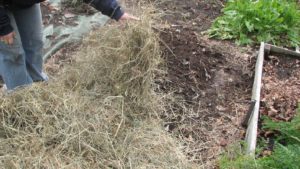
The last step is key if you want a weed-free garlic bed: put a foot of fluffy mulch hay or straw over the planted garlic. The straw will pack down over the winter and make a nice mulch that will keep most weeds from growing, but the garlic will push through it. It will be ready to harvest next July.
D

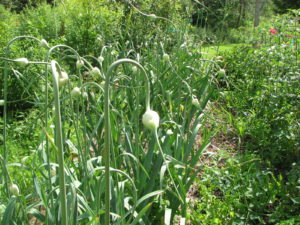
Garlic grows through th mulch, shown here in May
epending on when you plant, the soil temperature, and when real cold weather comes, your garlic may send up a few green shoots this fall. Don’t panic! It won’t hurt your garlic. When cold weather comes, it will go dormant and do just fine next spring.
I believe that garlic is a healthy and tasty addition to my diet. It may even be medicinal – it has been used that way for centuries. Some believe that if you crush your garlic and then wait 10 minutes before cooking, it will generate cancer-fighting compounds. Who knows? Certainly it can’t hurt.
And this winter if you chew on a clove of garlic before going to the store, you’ll never get a cold – because people will stand back from you in line!
Henry lives in Cornish Flat, NH. He is the author of 4
gardening books and is a UNH Master
Gardener. His e-mail is
henry.homeyer@comcast.net.
Now is the Time to Plant Garlic!
Posted on Thursday, October 24, 2019 · Leave a Comment
The easiest crop I grow every year is garlic. I plant it in October, mulch it well, and harvest it in early August. That’s it. If it’s well mulched, I don’t even have weed the bed more than once or twice. Not only that, I use this year’s harvest to plant next year’s crop, so it’s free. Each year my garlic crop gets better as I use the best of this year’s harvest to plant next year’s crop. My garlic is well adapted to my soil and climate.
If you want to grow garlic but don’t have any for planting, you can buy some “seed garlic” on-line, or you can check with a local farm stand for garlic you can plant. Don’t use grocery store garlic. Much commercial garlic has been treated with chemicals to prevent sprouting. And most grocery store garlic is the wrong kind for planting in New England – and some of it is from China. I avoid anything grown in China, due to concerns about toxic chemicals used there.
There are two basic categories of garlic: soft neck garlic and hard neck garlic. Grocery store garlic is usually soft neck, the kind you see braided and hung up in Italian restaurants. It is less hardy than hard neck garlic, a bit bland and less interesting to cook with.

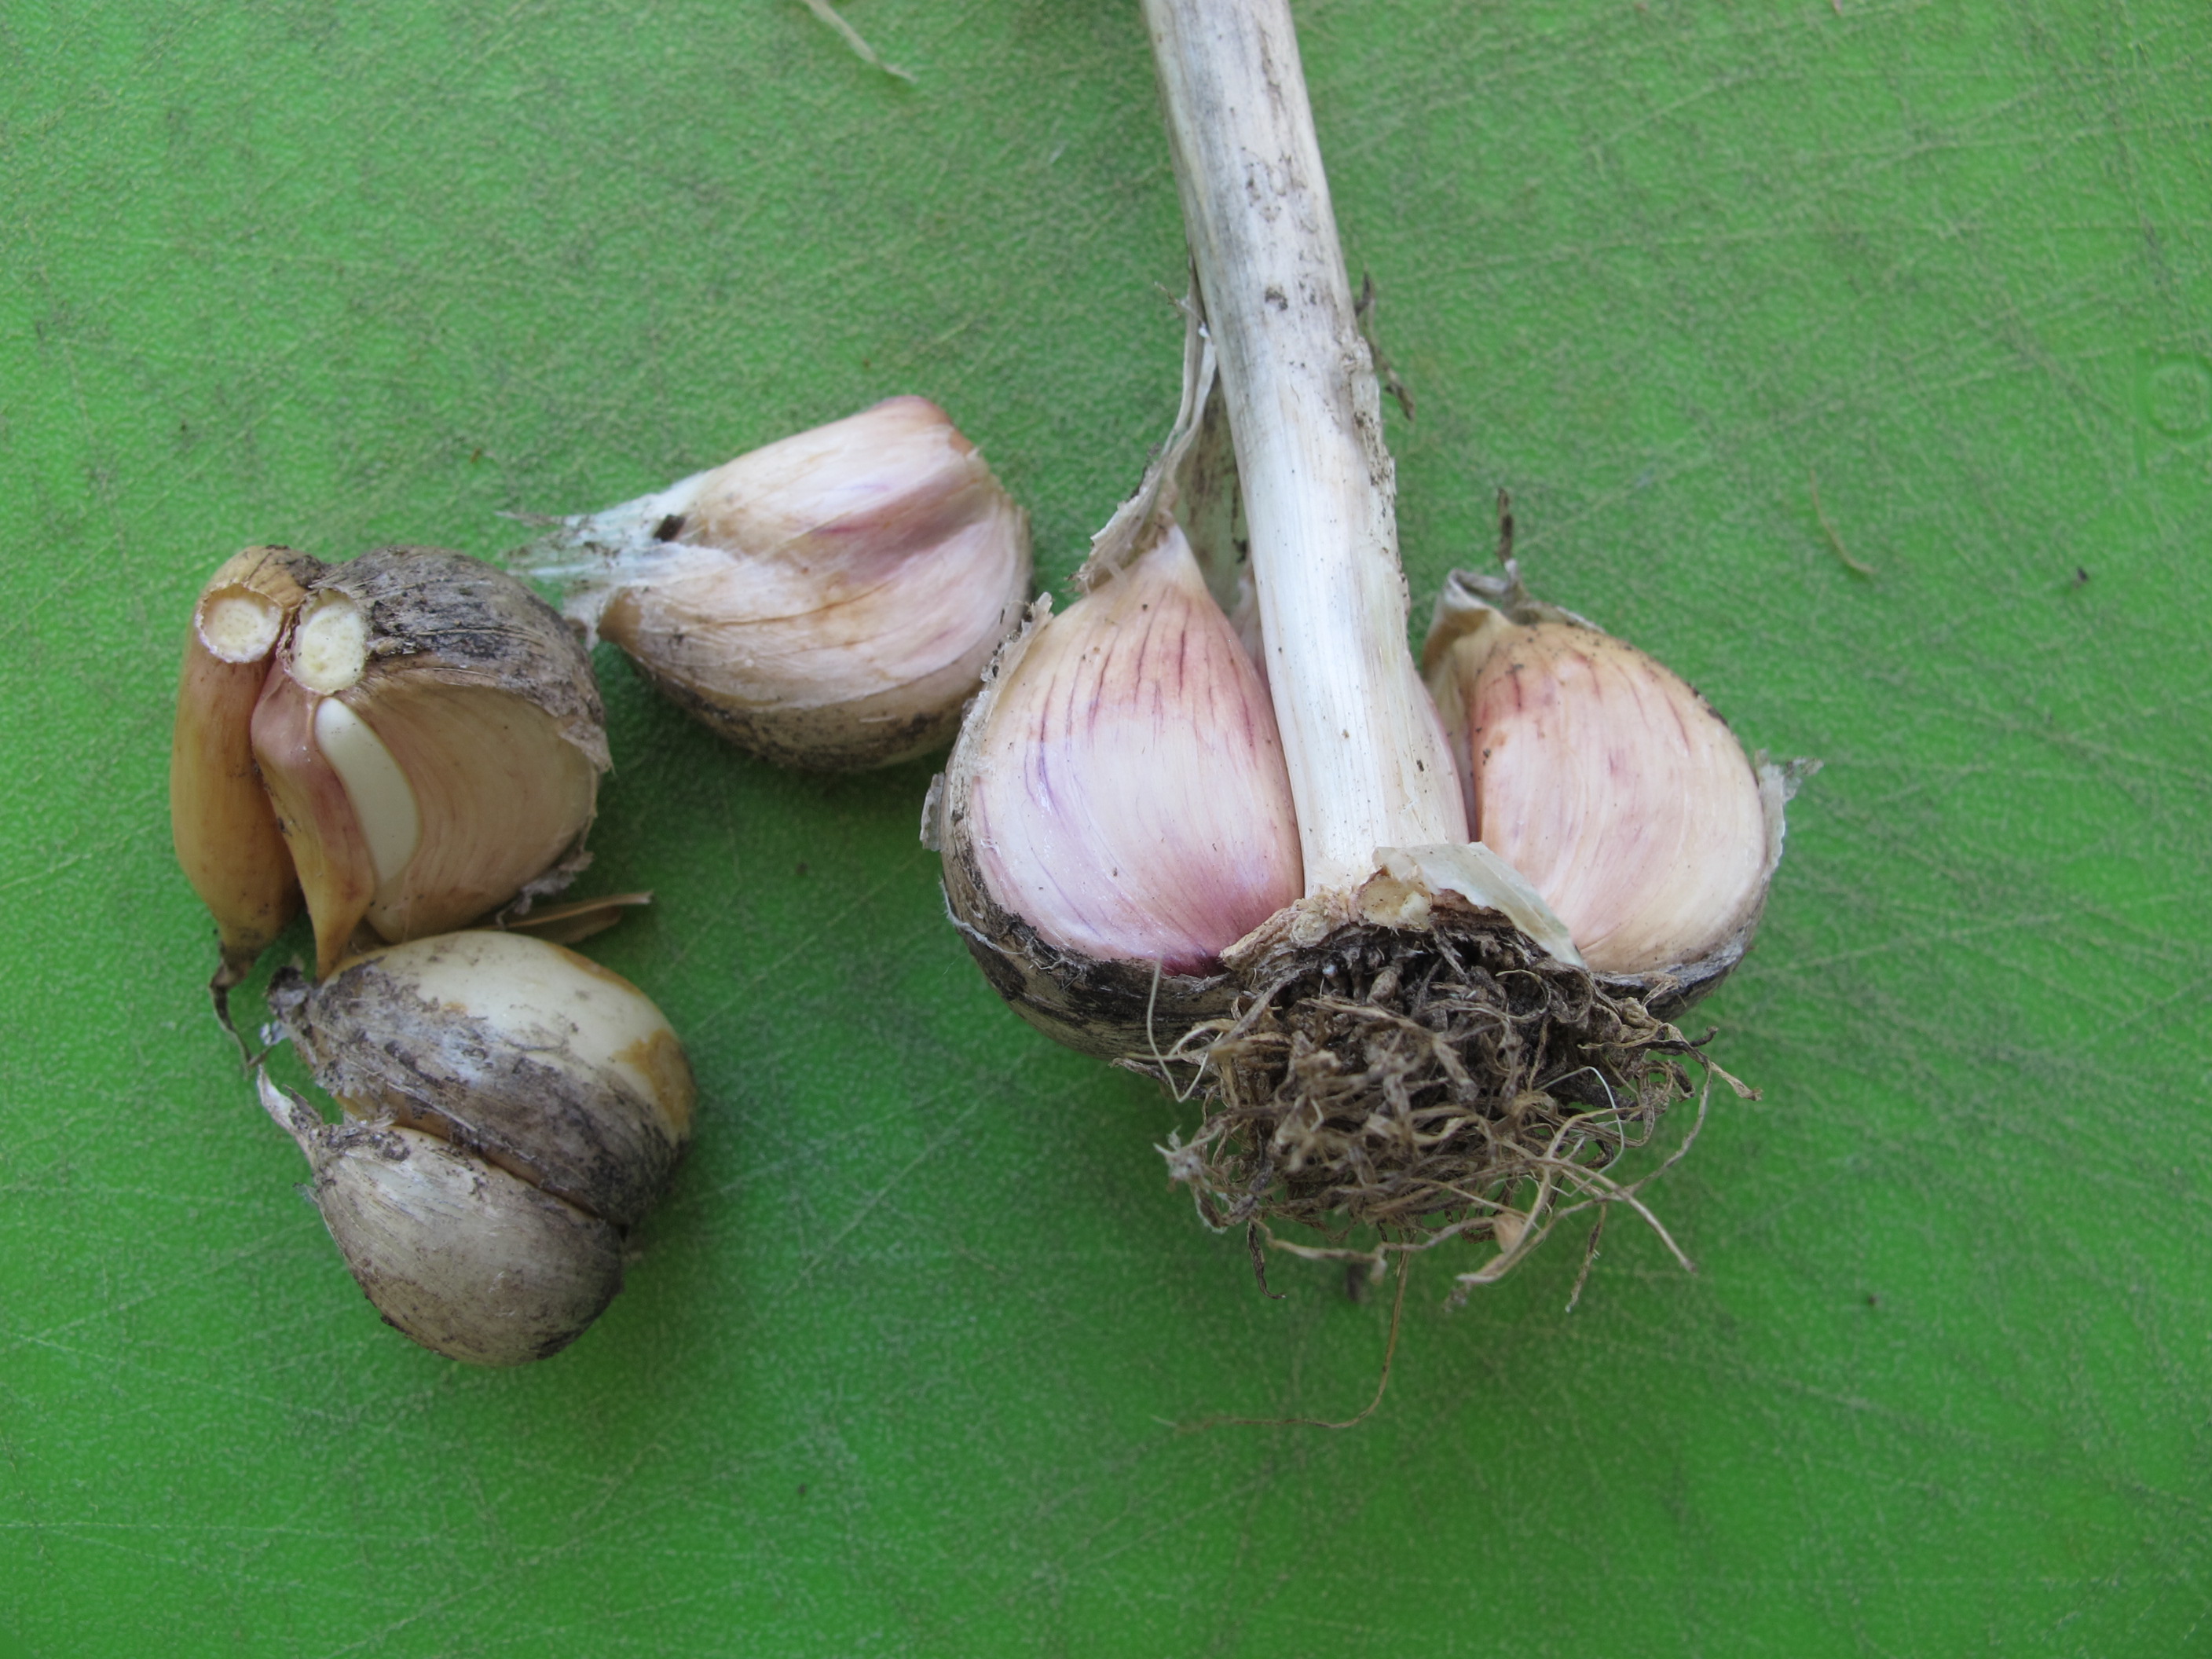
Hardneck Garlic ready for planting
Here in New England we should plant hard neck garlic, which has a stiff “scape” or stem that starts in the middle of the bulb, and grows up as the stalk and produces a flower in July. The fresh scapes can be cut and used in sauces or omelets.
To plant garlic, begin by selecting a bed in full sunshine. Weed it well and make sure the soil is loose and fluffy. In a bed 24- to 30-inches wide I plant 3 rows of garlic. I make furrows with a hand tool or hoe and add some organic fertilizer which I then stir into the soil.
Divide a bulb of garlic into individual cloves for planting. Mine vary from 4 or 5 cloves per bulb up to a dozen. Most have 6 or 8 cloves per bulb. I plant my cloves a hands-width apart, which is about 5 inches. I push each bulb into the soil so that the bottom of the clove is about 3 inches deep, or with the tips 2 inches from the soil surface.

Place your garlic cloves on the soil to establish space before planting
When I plant the second row I stagger the cloves so that they are not lined up with the first row. In the third row I match the cloves with those in the first row. Staggering the bulbs insures a little extra space between bulbs. When all are in the soil I push soil over the cloves and pat the soil down with my hands. If your soil is sandy or a heavy clay, adding some compost before planting is good.
The last step is mulching your bed. You can use straw or mulch hay. Straw should not have any seeds, but it is much more expensive to buy – usually more than $10/bale. Mulch hay is just hay for cows that got wet and is no longer tasty to them. It should be under $5/bale.
Take a section of a bale and shake it over the bed. It will fall apart and spread out. I put 8 to 12 inches of loose hay or straw over the bed. By spring it will have compacted to 3 inches of mulch, and the garlic will grow right through it – though weeds won’t. The mulch will keep the soil warm for a while this fall, which is good. The garlic needs to grow roots and get established before the soil freezes.
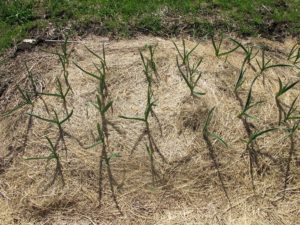
Garlic grows through th mulch, shown here in May
Sometimes garlic will send up a green shoot in the fall. When this happens, gardeners write me, asking if their garlic will suffer if it grows in the fall. Nope. The frost will kill the greenery, but not harm its potential, come spring.
Garlic has many uses. Not only will it scare away vampires, it is an important ingredient in many dishes. And it can be used medicinally. Vermont herbalist Rosemary Gladstar is famous for her fire cider recipe. This concoction is used to help prevent colds and other winter plagues. It contains garlic, raw apple cider, horseradish, hot peppers and other natural ingredients. It can have quite a kick, depending on how you make it.
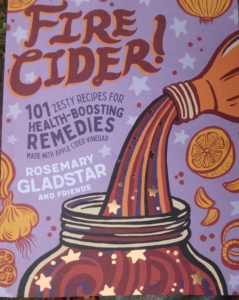
Fire Cider book cover
Rosemary Gladstar and a group of her colleagues and students have put together a lovely book called, “Fire Cider! 101 Zesty Recipes for Health-Boosting Remedies Made with Apple Cider Vinegar” published by Storey Publishing in 2019. Nearly every one of the recipes includes garlic. The book also tells the tale of how a company tried to trademark the name Fire Cider, though recently, I have learned, the upstarts lost in court.
What else is garlic food for? Here is my recipe for garlic bread, which is good with almost any dinner: Crush 2 to 3 cloves of garlic in a press, and mix with a stick of butter that is soft and slightly warm. Add 3 tablespoons of grated Romano or Parmesan cheese and ½ teaspoon of tarragon, and mix with a fork. Slather liberally on sliced Italian or French bread, wrap in aluminum foil, and heat in a 350 degree oven for 15 minutes. Consume! This has no calories if you use your own garlic.
If you don’t have a vegetable garden, plant some in a flower bed. The scapes in mid-summer are curly and stiff, and great in flower arrangements. So get some garlic, plant some, eat some and stay healthy!
E-mail Henry if you are interested in joining him on a Viking Cruise from Paris to Normandy and back next June. He’s at
henry.homeyer@comcast.net or PO Box 364, Cornish Flat, NH 03746.
Tips for Growing Great Garlic
Posted on Tuesday, October 9, 2018 · Leave a Comment
Now is the time to buy garlic for planting – unless you have some from your own garden that you saved for that purpose, as I do. You’ll want to get your garlic planted a month before the ground freezes, so depending on where you live, you may want to plant some soon. Garlic needs to establish roots now, and is not generally planted in the spring.
Of all the veggies I plant, garlic is the easiest to grow, and a good harvest is guaranteed if follow my instructions. But please don’t sue me if something goes wrong with yours. I’ve never had a bad year in the past 25 years or so of growing garlic.
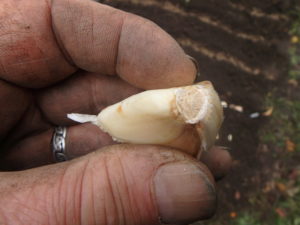
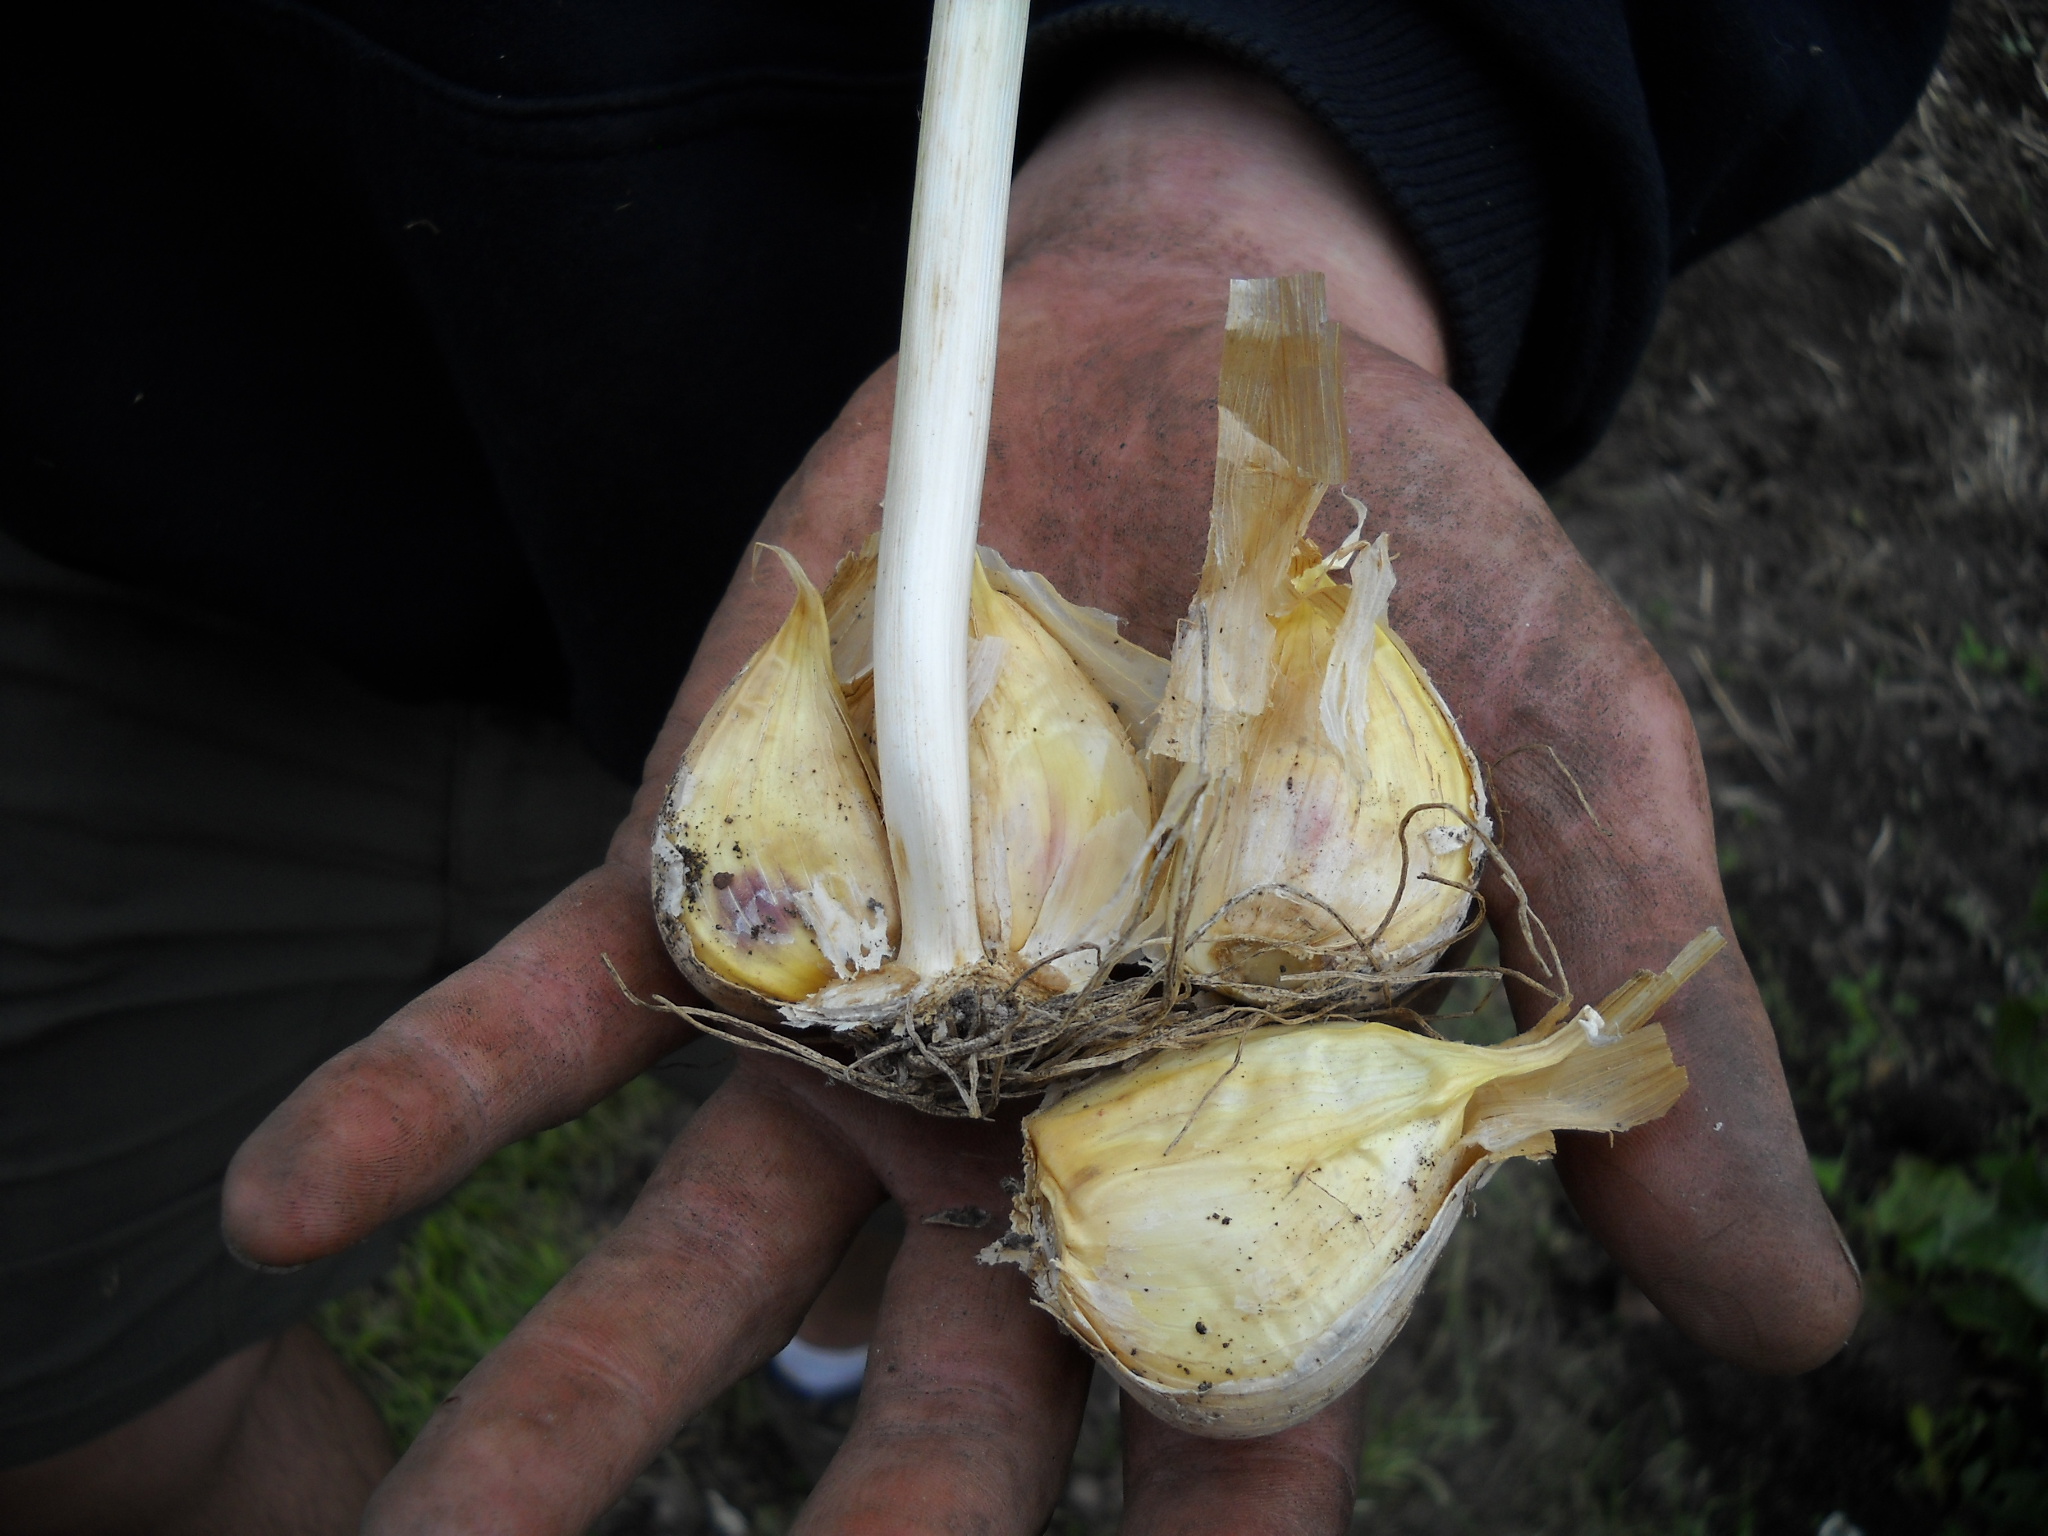
Garlic clove
There are two categories of garlic: hard neck and soft neck. Both will grow in New England, but hard neck is the type grown by most farmers, and the most cold-hardy. It produces a stiff scape or stem each summer that is edible. Soft neck garden generally comes from California, and is good in the kitchen; it is also the type braided and hung from the ceiling in Italian restaurants as decoration. Hard neck garlic generally has more flavor, and a wide variety of flavors are possible, depending on the type you grow.
Garlic does best in rich soil that drains well. If you have a heavy clay soil (one that is sticky when wet), you will want to add plenty of compost to your soil. Adding sand will not help, as sand added to heavy clay produces something like concrete that hardens up in dry times.
If you have poor soil, you may want to build a wood-sided raised bed, and add plenty of compost and topsoil that you purchase in bulk or in bags. I find Moo-Doo brand composted cow manure and topsoil are a good soil additives that are sold in bags in many garden centers.
When making a wood-sided bed, do not use treated lumber. Even though most treated lumber is safe to handle and much less toxic than 20 years ago, I don’t want any chemicals leaching into my soil. I use rough-sawn lumber from a local sawmill, preferably hemlock. It generally lasts about 10 years. Eight-inch wide planks are wide enough to make a nice box.
Plain pine boards will work, too, and metal corners are readily available at garden centers or from catalogs like Gardeners Supply and Lee Valley Tools. The corners make constructing a garden box easy even for non-carpenters. All you need is a cordless drill to drive the screws. Carrots and other root crops do well in garden boxes, so you can alternate them with garlic in subsequent years if you build 2 or more boxes.
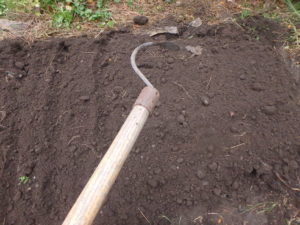
The long handled CobraHead weeder makes nice furrows without having to bend over
Once the soil is loose and weed-free, I plant. I take my long-handled CobraHead weeder, a nice single-tined weeder, and make furrows in the soil of my raised bed. I keep the furrows about 8 inches apart. I sprinkle some organic bagged fertilizer into each row, and stir it in.
I generally use my own garlic for planting, as it has adapted to my soil and climate over the years. But if I see big, fat bulbs of garlic at a farmers market, I sometimes buy some. I don’t recommend buying garlic for planting at the grocery store as most has been treated to prevent it from germinating, and so it will last longer.
Where can you get garlic for planting? If there is none at your local farmers market, you can get organic garlic from Johnny’s Selected Seeds in Maine (877-564-6697 or www.johnnyseeds.com). But don’t wait too long – they sell out most years.

Place your garlic cloves on the soil to establish spacing before planting
I break the garlic bulbs apart, separating the cloves – there are usually 5 to 10 cloves per head. I push the cloves into the loose soil, pointy end up, about 3 inches deep, and 4 inches apart. I cover with soil, and then pat it gently.
The last step is key if you want a weed-free garlic bed: put a foot of fluffy mulch hay or straw over the planted garlic. The straw will pack down over the winter and make a nice mulch that will keep most weeds from growing, but the garlic will push through it. It will be ready to harvest next July.
Depending on when you plant, the soil temperature, and when real cold weather comes, your garlic may send up a few green shoots this fall. Don’t panic! It won’t hurt your garlic. When cold weather comes, it will go dormant and do just fine next spring.
I believe that garlic is a healthy and tasty addition to my diet. It may even be medicinal – it has been used that way for centuries. Some believe that if you crush your garlic and then wait 10 minutes before cooking, it will generate cancer-fighting compounds. Who knows? Certainly it can’t hurt.
And this winter if you chew on a clove of garlic before going to the store, you’ll never get a cold – because people will stand back from you if they cough!
Henry lives in Cornish Flat, NH. He is the author of 4 gardening books and is a UNH Master Gardener. His e-mail is henry.homeyer@comcast.net.
Planting Garlic
Posted on Wednesday, October 11, 2017 · Leave a Comment
Growing garlic involves less work than anything else I grow. There really are only 3 steps: plant it, mulch it, and harvest it. It’s also the least expensive, once you have an established bed of garlic. I will plant this year’s crop from last year’s crop, and that one I planted from the crop of the year before. You really only have to buy garlic once – so long as you save some each year for planting.
There are basically just two kinds of garlic: soft neck garlic, which is what you probably get at your grocery store, and the stuff we grow here in the Northeast called hard neck garlic. Most soft neck garlic comes from California and keeps nearly forever. Hardneck garlic has a stiff stem in the middle of each bulb, and has a much more complex flavor (in my opinion). It will keep in a cool place until spring, but not much longer. Then it either sprouts or dries up.
Planting Garlic
October is the time to plant garlic. If you don’t have any seed garlic, you might be able to get some at your farmers market. Don’t plant grocery store garlic, even if you can find hard neck garlic, because it is often treated so that it will not sprout. By now most catalog-sellers of garlic have sold out.
Take a bulb (or head) of garlic and separate it into the cloves that surround the hard “neck” or flower scape. Depending on the variety of garlic, you might have just five cloves, or as many as a dozen. I like big cloves, as they are easier to peel and use. So each year I select for big cloves and plant them. Over the years my crop has produced bigger bulbs and bigger cloves.
Garlic needs full sun (defined as 6 hours of sun) and rich soil. I always add compost to my garlic bed and some organic bagged fertilizer. I rake soil from the walkways into a raised bed that is perhaps 30 inches wide and six inches higher than my walkways. Ideally, by adding compost, your soil will be rich and fluffy.
To plant, I draw furrows about 8 inches apart with my CobraHead weeder, a single-tined tool that is curved like a bent finger. I loosen the soil about 6 inches deep withit, than push cloves into the soil so that they are 3 inches apart and about 3 inches deep. Always plant them with the pointy end up. Afterwards I pat the soil down with my hands to firm the soil.
The last step is to mulch your garlic. I use mulch hay or straw and put almost a foot of fluffy material over the bed. Fall rains and winter snows will cause the hay to settle – I end up with about 4 to 6 inches of material in the spring.
Garlic Mulch
The mulch keeps the soil from freezing until January, allowing roots to get well established before the garlic cloves go dormant. It also prevents most weeds from germinating and growing next year, though I weed the bed before planting. Garlic is tough stuff and will push right through my layer of mulch, though most weeds do not.
Depending on the weather and when you plant, your garlic may send up green stalks this fall. Don’t fret if it does. Those sprouts will die back in winter, but the garlic will send up new ones in the spring.
Garlic Scapes
In early summer the scape, or flower stalk, will perform for you, “dancing” to create loops, swoops and circles of green. I use these in flower arrangements. Each scape produces a flower on top of the scape that will, if left, produce seeds. Those seeds are not useful for the average gardener, as they will not produce edible garlic for 2 years. But the stems and flowers are great for early summer stir fries. Garlic scapes are a taste treat.
Some believe that cutting off the scapes early on will produce bigger cloves of garlic, but I have never been able to tell if that is true or not, though it makes sense. Producing flowers and seeds uses energy that might otherwise go to producing bigger bulbs.
Next July the garlic you planted this year will be ready to harvest. Each bulb grows about 7 long pointy leaves that also surround the cloves and protects them. When 3 or 4 leaves have turned brown and started to dry up, it’s time to harvest. If you wait too long, all the leaves will have dried up and the garlic will not store as well – it will dry out too soon.
I’ve been told that after harvesting that garlic should be cured in a cool shady place for a week or two before you cut off the tops. Why? Because nutrients in the leaves – some of which are allegedly good for preventing cancer – will migrate to the bulbs and be absorbed.
You can store garlic best in a cool, dry place. Ideally 50 degrees with moderate humidity. I recently read an article produced at the University of California at Davis that you can freeze garlic instead of storing it at room temperature. Separate the cloves, but don’t peel them. You can freeze them in a zipper bag or jar for a year or more. I shall try that. Don’t store garlic at room temperature in oil, as it can produce deadly botulism.
Garlic may or may not repel vampires and viruses. I do know it makes food taste better, and is full of vitamins and minerals. So I grow it, and you should, too.
You can reach Henry at henry.homeyer@comcast.net. Read his blogs at https://dailyuv.com/gardeningguy.
Fall Chores
Posted on Monday, September 28, 2015 · Leave a Comment
I love writing this weekly column. I do it 52 weeks of the year, and have been writing it since the fall of 1998 when I wrote my first column about putting the garden to bed. And the nature of gardening is such that I can write a column a little ahead of time so that I can, for example, go hike the Chemin de St Jacque de Compostelle in southwest France, which I am. Lucky me.
Here are some of the tasks I’d be doing at home this week, if I were there. First, I’d be weeding. Yes, weeds like to set their seeds in the ground in the fall for a new start in the spring. They seem to know that we are tired of pulling weeds now. But don’t let them get away from you. Pulling weeds now will save you lots of work next year – both in the vegetable garden and in the flower garden. A single weed might only produce a few hundred weeds – or up to a million for a mature purple loosestrife.
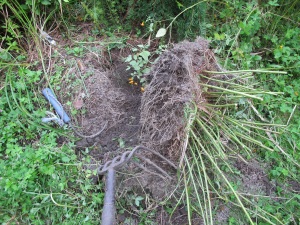
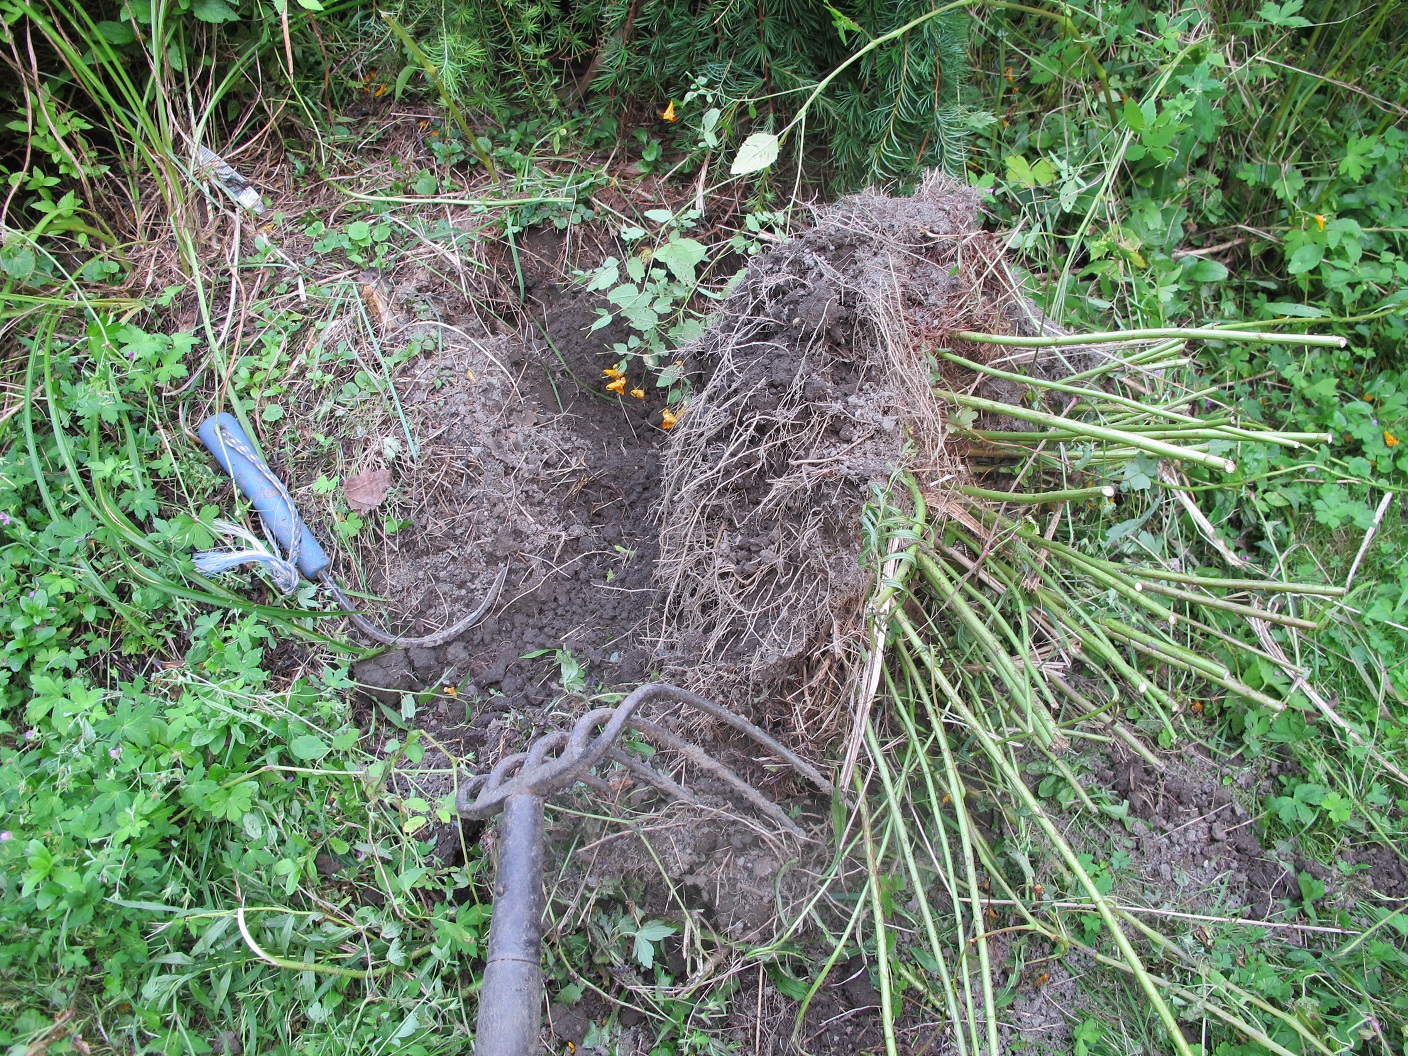
Removing goldenrod
Before I left I did extra weeding. I love goldenrods, and actually planted some short ones last year, and some shade-loving ones. But the big boys, those goldenrods that get to be 6 feet tall, are too big to co-exist with most garden plants, so they had to come out. I had been leaving them in the ground as bees and other pollinators love the pollen. But before I left they had finished blooming and I dug some out before the seeds got distributed.
A big clump of goldenrod is not something that you can easily just pull out – unless you have a backhoe. First I take my pruners and cut back the stems so I am not fighting them or getting poked in the eye. Then I go around the perimeter of the clump with a shovel or drain spade and try to get under the clump. I push the shovel in on angle, then push down on the handle to see it I can get it to lift a little. When I have gone all the way around, I push down hard, and (hopefully) the clump tips over and I can drag it aside. For purple loosestrife, which has a massive root system, it is better to cut off the tops and burn them (or put in the household trash) than to let the seeds be distributed.

Jewel weed takes over August
Before I left I also pulled out a lot of jewel weed (a.k.a. touch-me-not). Jewell weed has seed pods that explode when they are ripe, or if you touch them when they are almost ripe. Spring loaded. It is in the genus Impatiens, the same genus as our beloved shade annual. But this one will grow in the sun or shade. I let mine go to seed in recent years so my grandchildren could have the fun of touching them and seeing them explode. But now the population has exploded, so this year I worked hard to get them before seeds were set. They are an annual weed that is easy to pull.
Each fall I like to weed and prepare the beds in the vegetable garden for planting in the spring. I grow my veggies in wide, mounded beds. I like to loosen the soil in the walkways and then rake the soil into my beds. Then I add a layer of compost on top and stir it in. Finally, and I won’t do this until I return, I cover the beds with leaves and grass clippings collected by the lawnmower.

Hardneck Garlic ready for planting
Every October I plant garlic for the next year, and you should, too. Buy seed garlic from your local farmer or get some at the local garden center. Grocery store garlic probably has been chemically treated to keep it from sprouting, so is not good. It is probably not the type we can grow here, which is called hard-neck garlic. Buy it as soon as you can, as many farms run out. I don’t need to buy garlic as I save my biggest and best bulbs of garlic to use as seed garlic.
If you’ve never planted garlic, here is what you do: Prepare a bed and enrich it with plenty of compost. I use my CobraHead weeder, which has a single tine, to make a furrow and then sprinkle in some organic bagged fertilizer, and stir that in. I take a bulb of garlic and separate the cloves – usually 5 to 7 per bulb. The roots are at the fat end, and the pointy end goes up. I plant the cloves about 3 to 4 inches apart and a couple of inches deep. Rows should be about 6 inches apart.
The final, most important thing to do –in terms of saving labor – is to heavily mulch the garlic bed. You can use mulch hay or straw, a layer of the fluffy stuff a foot thick will pack down to 4 inches by the end of winter. Garlic will pop right though that layer, but most weeds will not. And don’t worry if some garlic sprouts before snow flies, it will still re-sprout in the spring.
Last winter I managed to avoid killing my rosemary plant that I had brought in last fall and potted up. So this spring I planted it in the garden, where it has thrived. Now I need to pot it up again. Pot it up in potting soil mixed with compost.
Here’s the trick about bringing in rosemary: Do it now, and let it stay outside in the pot just where it has been all summer. That way you are changing only one variable at a time. If you dig it up and bring it in right away, it not only must get used to life in a pot, but life indoors. In a week or so, bring it inside. . Rosemary should survive temperatures down to 24 or 25 degrees.
And speaking of life indoors, on the next warm day wash all your houseplants with the hose to get off aphids and their eggs. Then let them dry in the sun and bring them in. You’ll have fewer aphids that way.
Henry is on vacation this week and will not be answering questions. His website is www.Gardening-Guy.com
Garlic and Carrots and Leeks, Oh My!
Posted on Wednesday, October 2, 2013 · Leave a Comment
Some vegetables are as reliable as a sturdy shovel. Others – we all know – please us some years, disappoint us others. We grow tomatoes never knowing if the harvest will be bountiful or meager. But garlic and carrots and leeks, for me at least, are totally reliable. Year after year I know that I’ll harvest a good crop.
Now is the time to plant garlic. If you haven’t bought any garlic for planting, you’d better hustle to get some before your local farm stand closes for the season. It is, after all, officially fall. Avoid buying grocery store garlic as it is often treated with a chemical to keep it from sprouting – and is probably the wrong kind. But your local farm stand or farmers market should have garlic that will work just fine. Some garden centers will have seed garlic for sale, too.

Harneck garlic showing central neck or stalk
A few words about types of garlic: there are two basic categories and many different varieties, each with a distinct flavor and “bite”. What we grow in New England is hard-neck garlic, which has a stiff woody stalk around which the individual cloves (sections) grow. Soft-neck garlic is generally from California, and is the kind that is braided and hung on restaurant walls – or found in grocery stores. Soft neck garlic is less hardy and may not overwinter.
I plant my garlic in mid-October. This allows the plants to establish roots, and then go dormant. If you plant in spring, you may find the garlic bolts and does not grow big cloves.
If you are using your own garlic that you harvested in August, pick your finest heads (or bulbs) to use for planting. In my experience, small heads will produce small heads next year. And for cooking, big heads are easier to work with.
Prepare a bed by digging in compost to enrich the soil and to provide good drainage. I create raised beds that are 30 inches wide and 6 inches above the walkways. I rake the bed smooth and create furrows 6 to 8 inches apart across the row. I then sprinkle organic fertilizer in the furrows and scratch it in. Next I separate the cloves and plant them about 4 inches apart and 2 inches deep. I cover the cloves and pat down the soil.
Finally I cover everything with a thick layer of straw or mulch hay. I spread the hay 8 to 12 inches deep (and fluffy), but by spring it has packed down and is more like 4 or 5 inches of cover. This mulch keeps most weeds at bay, but the garlic grows right through it.
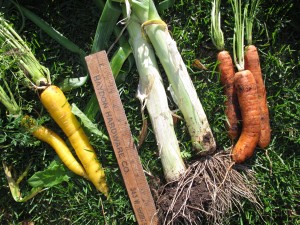
Yellow Sunshine carrots (L), Leeks, Yaya carrots (R)
Most of my carrots are still in the ground – they tolerate frost and cold, and get sweeter after a good chilling – some of the starches turn to sugars. I generally store carrots for winter in a spare fridge in the basement, but you can also store them in a bucket of damp sand in the garage, mudroom or bulkhead. Mice love carrots, so I recommend covering the bucket of carrots with quarter-inch wire mesh.
Another way to store carrots is to leave them in the ground. You can keep the ground from freezing by covering them with a thick layer of mulch hay that is then covered with a layer of leaves. I put a pole at each end of the row so that I can find it under a deep January snow. This method works fine, though I have suffered some rodent damage on occasion. If you find any chewed carrots now, harvest and store inside.
Leeks are another friend of mine that always produce well. I love leek and potato soup in the winter so I store most of mine, though I keep some for fresh use as a substitute for onion when my onions (fickle, some years) are less than bountiful. In my experience, leeks stored in the fridge or cold cellar lose their appeal quite quickly, so I freeze them. I clean and chop them up, then freeze in freezer-grade zipper bags. I do not blanch them.
Here is my version of leek and potato soup:
3 strips lean thick-cut bacon
2-3 cups chopped leeks
2 -3 cups diced potatoes
½ cup flour
2 chopped tomatoes
2 cups milk
1 handful chopped fresh parsley
1 bay leaf
¼ teaspoon nutmeg
½ teaspoon cinnamon
1 teaspoon Herbes de Provence
Lightly brown bacon in a heavy soup pot, then add leeks and potatoes, stirring constantly to brown. Add 4-6 cups water. In a dish stir water into the flour to get a thick but lump-free mixture. Add to soup pot and stir well. Add spices and tomatoes and simmer for half an hour. Just before serving add milk but do not boil the milk. You can make this vegetarian by avoiding the bacon and substituting butter or olive oil.
I have a vegetable garden, in part, because I love to cook. Eating my own vegetables give me great pleasure, particularly in winter – which is just around the corner.
Contact Henry by email at henry.homeyer@comcast.net or write him at PO box 364, Cornish Flat, NH 03746. Visit his Web site at www.Gardening-Guy.com.
Garlic
Posted on Wednesday, October 10, 2012 · Leave a Comment
If you’ve harvested everything but the kale and Brussels sprouts in the garden, pulled the weeds and shaped your raised beds in anticipation of spring, you may think that you’re all done. But unless you‘ve planted at least a little garlic, you are not. If you love Italian or French food as I do, you simply must plant some garlic. It’s the simplest, easiest crop I grow.
First, unless you have saved garlic from your harvest in July, you need to buy garlic. Do not just buy garlic at the grocery store. Much garlic sold is “soft neck” garlic grown either in California or (shudder) China. It is not as hardy as the “hard neck” garlic we grow here in New England. I’ve read that garlic at the supermarket has been chemically treated to prevent sprouting, too. I, personally, will not eat anything imported from China as their regulations about the use of chemicals are much less stringent than ours.

Hardneck Garlic
There are two basic types of garlic. The hard neck garlic I grow has a stiff stem in the middle, around which the cloves of garlic grow. It is plenty hardy in our climate, going through the winter unscathed. Soft neck is the type that is braided and hung in restaurants and kitchens. It last longer, but is not as hardy in the winter, and is less pungent than hard neck. I think hard neck garlic tastes better.
Go to your local farm stand to buy locally grown garlic, preferably organic garlic. Tell them that you are buying it to plant, and ask if they have more than one variety. Try 2 or 3 varieties, and label the garlic as you plant it. Each bulb has from 4-8 cloves, so buy enough to meet your needs in the kitchen – if stored properly it should last all year. One clove a day does not seem like much – but it would be 50 bulbs or more, depending on the number of cloves per bulb. I plant a hundred or more each year, as I also save garlic for planting the following year.
If you can’t get garlic at the farm stand, try your garden center. As a last resort, go to a seed company or search on-line. I like to buy locally, not only to support our farmers, but also because the garlic is best adapted to our local climate.
Mid October is the proper time for planting. It will grow roots and get established before the ground freezes. Some years it will also send up green shoots that will die back when winter comes, but that’s not a problem.

Planting Garlic
Here is what to do. First, inspect your garlic and reject any damaged or discolored cloves. Crack open a bulb and pay attention to the shape of the cloves. The rooting end is flatter, the growing tip is more pointy. You should plant the pointy end up, though planting it upside down wouldn’t kill it – just wastes energy.
Prepare the bed by working in 4 inches or more of compost if you have it. Garlic grows best in rich, dark, well-drained soil that also holds moisture. If you have sandy soil it will dry quickly in summer, so adding compost or chopped leaves will help to hold moisture. Garlic should not be grown in soggy, wet soil either. Clay soils hold water; if you have clay, amend it with compost and shape up the soil into raised beds for better drainage.
Next I take my favorite hand tool, the CobraHead weeder, and mark straight lines in the soil with its single finger-like steel tip, creating furrows. I sprinkle some Pro-Gro organic fertilizer into the furrows, and then run the CobraHead through it again, loosening soil to a depth of 4 to 6 inches and mixing in the fertilizer. In general, I plant 3 rows down a raised bed that is 30 inches wide.
Then the fun part: planting. Just push the cloves of garlic into the soft soil. The pointy tip should be a couple of inches deep. I plant cloves about a hands-width (5 inches) apart. I don’t cover the cloves until I have finished a row, so I can see my spacing as I go along. Then I gently cover the row and firm the soil in place by patting it gently.
The last part of the planting is to cover the soil with a thick layer of straw or mulch hay. I put on 6 inches or more, and the winter snows pack it down so that it becomes a 2-3 inch layer. Garlic sprouts will push right through the hay in spring, but most weeds will not germinate and compete. Garlic, like most plants, does best without weeds.
So that’s all you have to do. In June the garlic scapes, or flower stems, will be tall and curly. Great for use in stir fries. I also use them in flower arrangements as they are very interesting to look at, swooping around in curves and loops. Then in late July or early August I harvest the garlic. Store it in a cool dry place. I just wish growing tomatoes was as easy as growing garlic. Sigh. But that would be too easy!
Henry’s new book is in bookstores! Wobar and the Quest for the Magic Calumet is a fantasy-adventure for children 8-12 about a boy and a cougar. For more, go to www.Gardening-Guy.com.


 Click Here to buy from Cobrahead