Gardening Without Work
Posted on Sunday, February 23, 2020 · Leave a Comment
Ruth Stout, born in Topeka, Kansas in 1884, lived to the ripe old age of 96. She was an early proponent of organic gardening and was also (as seen from her writing) a sweet, funny, intelligent and common-sense person. I recently read her book, Gardening without Work: for the aging, the busy, and the indolent from cover to cover in an afternoon. I had heard much about her, but had never actually read this book before, or her most famous one, How to Have a Green Thumb without an Aching Back.
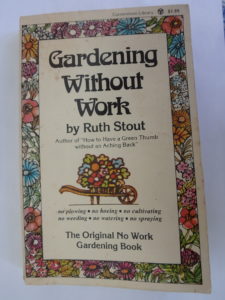
Ruth Stout’s Book
Ruth Stout made a name for herself largely by writing about mulching. Hay was her main form of mulch because it was cheap and plentiful. She got hay that had been spoiled (as animal food) by rain and applied it in thick layers. But she also used leaves, food scraps and any organic matter to enrich her soil as it broke down. She touted the ability of mulch to smother weeds and hold in moisture.
In the 1950’s and ‘60’s, “modern” gardeners and farmers were using DDT to kill insects and chemical fertilizers to push growth. She avoided all chemicals and got great results. She was not trained as a scientist, but depended on common sense and good observation skills to succeed in her garden. Below are some of the things she said in her book.
“My simple way is to simply keep a thick mulch of any vegetable matter that rots on both my vegetable and flower garden all year round. As it decays and enriches the soil, I add more.”
“I never plow, spade, sow a cover crop, harrow, hoe, cultivate, weed, water, irrigate or spray. I use just one fertilizer (cotton seed or soy bean meal), and I don’t go through the tortuous business of building a compost pile.”
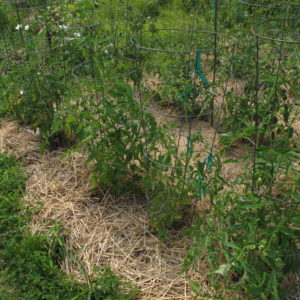
Mulching with hay
How often did she mulch? “Whenever you see a spot that needs it.” How deep is her mulch? Eight inches, on average. “Use all the leaves around. Utilize your garbage, tops of perennials, any tall vegetable matter that rots.”
Ruth Stout loved asparagus, and planted plenty. She said the mulch slows soil warming in the spring, so she raked the mulch off part of the patch to get early crop of asparagus, then left some mulch on for late asparagus. That’s good common sense.
She sowed corn and immediately applied a thin layer of mulch, allowing the corn to push up through it. The mulch deceived the crows, which love to eat newly germinated seeds. I once lost two 50-foot rows of corn to crows, who ate it up in one day as soon as it germinated! And peas? She raked off mulch a few weeks before planting to allow the early spring soil to warm up.
What else did Ruth Stout promote? Diagram your garden in winter. Take time to measure and plan before ordering your seeds. Order seeds early, before the best varieties run out. (I agree. I bought Sun Gold tomato seeds this week, as I have had trouble finding them in April, when I start tomatoes in the house). I like her observation that seed catalogs are to gardeners like “catnip to a cat.”
Witch grass, or Johnson grass, a grass that spreads quickly by root, was not a problem for her. She mulched, and added more mulch if it pushed through the mulch. She also used newspapers under the mulch hay for witch grass, which I have found very helpful.
All soils benefit from year-round mulch. She noted that during the dust bowl of the 1930’s, soil was blown away in huge quantities. That was due, in part, to the fact that soil was left bare after harvest, and blown away in dry times. She emphasized the need to always have your soil covered with mulch.
Ruth Stout developed lots of good tricks during her many years as a gardener. One I liked had to do with planting small seeds like lettuce or carrots. She said you can get fairly good spacing by taking a pinch of seed and then dropping it from waist high. As the seeds drop, they spread out. Not for a windy day, of course, but I will try it, come spring.

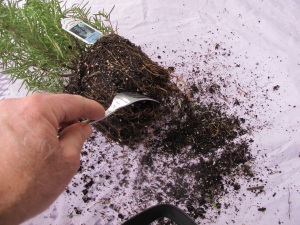
The first step of mulching as I do it is to put down newspaper
She wrote that one need not buy a chipper to break up leaves for use as mulch. Just rake them onto the driveway. Then after cars run over them a few times, rake them up and use them. Clever. Me? I use my lawnmower to chop up leaves, blowing them all in the direction, creating a windrow. Then I put them into my garden cart or onto a big blue plastic tarp to take them away.
Ruth Stout froze lots of garden vegetables for winter use, including whole ripe tomatoes. I freeze tomatoes since it is the easiest, fastest way to preserve them. But I have only used them in stews and soups. She went one step further: she let them thaw a bit, and ate them with a spoon. So I tried it after reading her book, and agree that although they don’t have the right consistency for sandwiches, they taste good!
I am a fervent proponent of mulching everywhere and believe it works. I suggest you read one of her books this winter, and give it a try.
Henry has been a UNH Master Gardener for more than 20 years. He is the author of 4 gardening books. Reach him at
henry.homeyer@comcast.net.
Nine Root Crop Stew
Posted on Wednesday, December 21, 2016 · Leave a Comment
Rutabagas? Kohlrabi? Celeriac? What does one do with these lesser known root crops? I make stew. You just need to get past the idea that they are food for “old folks” or “poor people”. There were good reasons that these vegetables – and other root crops – were the backbone of the diet in tough times. These vegetables are easy to grow, store well, and are very tasty.

Celeriac With Carrots Leeks and Brussels Sprouts
I recently made a pot of winter stew that used the three veggies mentioned above, along with potatoes, onions, parsnips, garlic, leeks and carrots. Oh my! It was delicious. But first, let’s look at what all these root crops need in order to produce well and fill your root cellar or spare fridge.
All root crops need soil that is essentially rock-free. They need to be able to grow to size without bumping into a boulder, or even a rock the size of a golf ball. So if you have rocky soil, you need to work on it, come spring.
I find a potato fork is good for finding stones. This is a tool similar to a garden fork or spading fork, but the handle is at a right angle to the metal tines. I have one that has been in my family for at least 50 years.
To get stones out of the soil, I sink the tool into the soil and pull it toward me. It acts like a big rake, loosening the soil and dragging stones to the surface. I have seen smaller ones in hardware stores, but the kind I like has tines at least 8-inches long.
I have bought the modern equivalent of my potato fork from a tool company, Howland Tools (www.farmandgardentools.com), that imports them from an Italian maker, Falci. They sell two varieties, the 4-tine hook fork and the 4-tine hook weeding fork. I have the first, but not the second, which has broader tines, like a standard fork. At about $50 each, these tools are well worth the price. Good steel, good beech handles.
What else do root crops need? Most need fluffy, well-drained soil that stays moderately moist all summer. Their requirements vary for the three main minerals, nitrogen (N), phosphorus (P), and potassium (K). Click this link for a summary of what each requires.

Kohlrabi Gigante
What does all that tell you? Root crops are fairly moderate in their needs. Potatoes require yearly addition of a balanced fertilizer. Only garlic does best with fairly dry soil, so planting it in raised beds and adding some extra compost to the soil will help. Add some blood meal to the soil for parsnips as it will provide plenty of nitrogen (13%) but little P or K.
Now the stew, (click here for the recipe) which can be vegetarian or not, depending on your preference. I’m an omnivore, and find that some beef adds flavor and depth to the stew, but you can omit it if you prefer. I use 1 to 2 cups of each of the vegetables, according to my supply and mood.
I start by selecting the vegetables and getting off all soil. Then I peel any that need peeling (potatoes, for example, don’t have to be peeled –the skins may add extra color and vitamins). In a large cast iron enameled pot I start by browning the onions and leeks in olive oil on low heat while I cut up a pound of stew beef into tiny cubes – half inch or so. I add them to the pot and add a little more oil, as the onions tend to suck up the oil fast.
When the meat is browned, I add some liquid to prevent the leeks and onions from burning. Two cups of apple cider is my preference, but either water or broth is fine, too. Then I chop up and add to the mix 3 large tomatoes from my freezer- I freeze them whole. I also add 4 ounces or so of tomato paste I made and froze last summer, and a handful or more of dehydrated Sun Gold cherry tomatoes (optional). If you don’t have frozen tomatoes, use a 28 ounce can of diced tomatoes or sauce.
Next? I cut into small cubes the carrots, celeriac, kohlrabi and rutabagas. These can simmer quite a while without getting mushy. Next the garlic goes in the pot, chopped fine, 2 to 3 cloves. Or more, depending on my whim. Potatoes I cut in bigger pieces and boil separately for 5 minutes, then add to the stew near the end. I want them firm, not mushy.
To achieve the perfect juiciness of the stew, add more liquid at this time. For spicing, I add Herbs de Provence, a tasty mixture of rosemary, thyme, basil and other spices I get at my Coop. A tablespoon is about right for me. And most importantly, I add lots of fresh ginger. I peel and grate a piece nearly the size of my thumb. And although I know people who grow ginger in the Northeast, I’ve tried and not had success, so I buy it.
I garden, in part, because I love to eat –and cook. I don’t mind spending an hour making a meal like this stew, because it will feed me for days. Oh, and by the way, you can make this stew and leave out any of the root crops you don’t have except the carrots, potatoes, onions and ginger, which are essential. Bon appetit!
Read Henry’s twice-weekly blogs about gardening, travel and more at https://dailyuv.com/gardeningguyYou can sign up for an e-mail alert every time he blogs.
Indoor Plants for the Holidays
Posted on Tuesday, December 13, 2016 · Leave a Comment
Florists, garden centers and grocery stores are loaded with color right now – plants that are bright, cheery, and hard to kill. They are just what we need in these dark, dreary days of early winter when the sun goes down before 5pm. Christmas cactus and poinsettias are great plants that are affordable and easy. I recommend them highly.

Poinsettias Come in Many Colors
You may think that poinsettias have big red flowers atop handsome green foliage. Wrong! The colorful parts (they now come in white, pink, plum, burgundy, cinnamon and lemon) are actually bracts, or modified leaves. The flowers are actually just pea-sized yellow blossoms in the middle of the bracts.
Poinsettias were introduced here in 1828 by President Andrew Jackson’s ambassador to Mexico, but only became popular holiday flowers in the 1960’s. A grower in California promoted them heavily on TV, giving plants to the likes of Johnny Carson who kept them on his desk during the Tonight Show.
If you buy a poinsettia, start it off right: be sure it is enclosed in a sleeve or a bag on the way home – they hate the cold. But don’t place it near a wood stove or radiator, either. The ideal temperature is 68 to 72 degrees, but my house is rarely that warm, and they do fine with daytime temps in the sixties and night-time temps a little cooler. Anything below 50 degrees is fatal – but we wouldn’t be happy then, either.

Poinsettia Flowers are Just the Center of These Colorful Cracts
Poinsettias do not require direct sunshine. In fact, bright indirect light is best; six hours is all that is required. And don’t over-water them. Root rot results from keeping roots constantly soggy. Water once a week but check the soil first by probing the top inch with your finger. If it feels moist, you can wait. Experts say it is best to water by placing the pot in a saucer or water and letting it soak up for 15 minutes, but I never do that. I water from the top and it works just fine. I often judge dryness by the weight of the pot, too. The heavier it is, the more water is in the pot. Fertilization is not recommended when they are in their bloom cycle.
Although I don’t usually do it, you can keep your poinsettia over the summer and hope to get it to produce colorful bracts next winter. These plants are photoperiodic, which means they are sensitive to daylight length. They need 14 hours of darkness each night in the fall if they are to “bloom”. Even electric lights on in their room can interfere with the coloring-up process, I’ve read.
Christmas cactus often bloom for Christmas, though if you keep them for years they may bloom at other times. Buy one now, and you’re pretty much guaranteed blossoms through the holidays. Properly cared for, a Christmas cactus can be handed down to your kids … and later, their kids.
Like poinsettias, a Christmas cactus needs bright, indirect light and moderate temperatures. Over-watering can be lethal, so if you are starting a new plant from a cutting, add some sand to the potting mix for increased drainage. One part sand to three parts potting mix is about right.
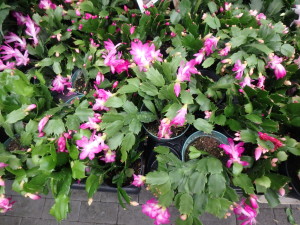
Christmas Cactus
Christmas cacti are not true cacti – they wouldn’t survive in a desert – so you shouldn’t let them get too dry, either. Feel the soil weekly – when the soil is dry an inch below the surface, it’s time to water. If you water too much or too little you will notice flower buds falling off.
A Christmas cactus does best with humidity in the 50 to 60% range. If you have a wood stove, chances are your house is drier than that in the winter. You can remedy the situation by filling a wide saucer with small stones, add water, and placing the potted plant on the stones. As the water evaporates, it adds humidity to the air around the plant.
Aside from these colorful plants, I like to add some greenery around the house in winter. I have a number of foliage plants, but also like to pick some pachysandra outdoors to keep in vases, or to fill out bouquets of flowers I buy.
Pachysandra is a shade-loving vine with year-round glossy leaves. Even with snow on the ground you can pick stems and place them in a vase of water, where they will thrive all winter. The leaves stay glossy and green and will develop good roots in a vase. In the spring I plant them outdoors in shady places as a ground cover. Right now I have a vase full of pachysandra stems with a few twigs of red winterberries, which is quite festive.
Despite my careful attention to my outdoor plants – both vegetables and flowers – I have never paid near as much attention to indoor plants. Perhaps I need a break in winter, when they are needing my care the most. So it is important to me that house plants be relatively undemanding. Poinsettias and Christmas cactus fill the bill.
Read Henry’s twice-weekly blog at https://dailyuv.com/gardeningguy. You can sign up for an e-mail link to the blog every time he posts. His e-mail is henry.homeyer@comcast.net.
Winter Pruning
Posted on Tuesday, December 6, 2016 · Leave a Comment
Traditionally farmers pruned their apple trees in late winter, but there is no reason not to do so now. Trees are dormant, and we’ve finished weeding and raking, so most of us should have time to work on our trees. Pick a sunny afternoon and get to work! Later, when the snow is deep, it won’t be so easy to prune.
Start by walking around the tree and looking at it from all angles. One of my goals in pruning is to create living sculpture, a tree with grace and elegance. A cluttered tree is never elegant to my eye. A bird should be able to fly through an apple tree – without danger of injury.
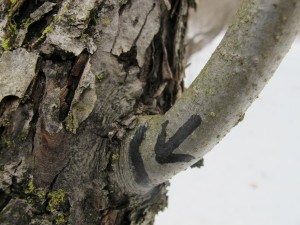
Branch Collar and Line to Show Where to Cut
Hesitant pruners often begin by nibbling away at a tree, taking dozens of small twigs and branches. I’m a bold pruner. I was taught that taking off big branches is better than tentatively snipping away at a tree. You want to open up the interior of the tree so that sunshine can get to every leaf. This creates a healthy tree. Do this by taking out the big branches if they are crowding others. More on that later.
But first, begin by looking for branches that are dead and removing them. They are doing no good for the tree and never will. If you scrape off a little bark, a live branch will show a green layer. Dead branches will only show brown. Cut the dead branch back to where it originates, but leave the branch collar.
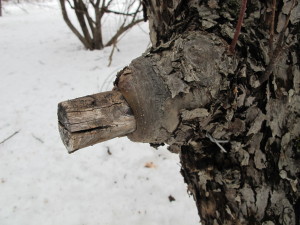
Stub Healing Back t o Branch Collar
The branch collar is a swollen area on the trunk of a tree or a larger branch where a new branch originates. The bark is often wrinkled at the collar. You don’t want to leave a stub when you remove a branch, nor do you want to cut flush to the trunk. Just leave that collar, as that is where the tree heals itself.
Low branches are the bane of many people who mow lawns. So take a look at any trees with lawn underneath, and see if you could remove a couple of low branches and make life easier. Some trees tend to shed lower branches, but most do not. Cut low branches back to the branch collar on the trunk, allowing space for you and your mower to cut the grass with ease.
Often trees, especially wild trees, grow too close to their neighbors. A single root system sometimes sends up 2 to 4 stems in close proximity. Cut out one or more to leave a single trunk. At this time of year I leave first year root suckers – those pencil thin shoots surrounding the base of apple and crabapple trees –and remove them in the spring.
So what else can you remove? Look for branches that are rubbing, crossing or growing parallel to others. Trees really are of very low intelligence. They grow branches that have no chance of growing to their full potential. They run into each other, or crowd others out. Your job is to train them to behave – with a saw! Ask yourself what a branch will be like in 5 years. If it will crowd another branch, remove it – or the other one.

Corona Pruning Saw
Using the appropriate saw is important. Don’t use that rusty old bow saw that you bought 25 years ago when Sammy was a Boy Scout. Go to your local garden center or family-owned hardware store and get a tri-cut pruning saw. These saws are sharp! You can’t sharpen them, but that doesn’t matter. The steel is so tough they will be sharp long after you have stopped pruning.
Get something with a blade a foot long or more so you can cut large branches. Small folding saw are okay for many cuts, but my favorite is a long curved saw made by Corona. It has a 21-inch blade and the big teeth with gaps to remove sawdust and prevent it from clogging up and binding the saw. It’s model RS 7160 and is available from OESCOINC in Conway, MA for about $47; I have the sheath for it, which costs another $35, but really is needed for a saw with teeth that could hurt you when carrying it. It’s my alternative to a chain saw for large branches.
If you are removing a heavy branch, you need to make 3 cuts, not one, so that the branch doesn’t break off while you’re cutting it, causing the bark to rip off, thus damaging the trunk. Make an undercut about a third of the way through the branch a foot or more from the trunk. Then go farther out the branch and lop off the bulk of the branch, reducing its weight. The undercut will stop any tearing of the bark. Finally cut off the stub at the branch collar.
The nice thing about pruning is that there are few serious mistakes to make. Yes, you can “oops!” a branch, but the tree will fill in spaces in a year or two. Branches are not like our arms or legs. Pruning is more like giving a tree a haircut. And if you think of pruning as sculpting, you will want to do it every year.
Henry posts his weekly articles and others at https://dailyuv.com/gardeningguy. You can sign up for an email alert each time he posts. Contact Henry at henry.homeyer@comcast.net or by mail at P.O. Box 364, Cornish Flat, NH 03746. I you want a mailed response, please include a self-addressed stamped envelope.
Winter Color on the Table
Posted on Monday, November 21, 2016 · Leave a Comment
I garden for many reasons. I want to grow my own chemical-free food, to have an excuse to be outside a few hours every day, and to have flowers on my table most of the year. Right now I have just 2 out of 3. A good batting average for a ball player – better than David Ortiz, for example – but not good enough for me. I want to hit one thousand. I need color and beauty in my house all year.
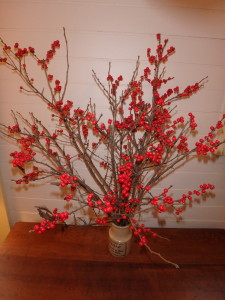
Winterberry
I almost always have a pair of pruners in my car, so when driving past an uninhabited swampy area recently I stopped to pick some winterberries. These red berries are the fruits of our native holly, Ilex verticillata. Unlike the evergreen varieties with shiny green leaves, winterberry drops its leaves in the fall, but clings to the red berries displayed on the female bushes.
Winterberry is dioecious, meaning that there are male and female bushes, and (remember that lecture you got ever so long ago about the birds and bees?) only the females produce fruit. And only if there are males present. If you buy winterberry plants, a good nursery will be sure to sell you a male to go along with your females. One male for 5 females is adequate.
Winterberry is a very satisfactory garden plant. It prefers moist soil and will grow in standing water – though I have seen it succeed in ordinary garden locations, though not in dry, sandy places. It does best in acidic soil, with a pH of 4.5 to 6.5, so add some sulfur to the planting hole. It produces the most berries in full sun. Soil rich in organic matter is a plus.
It is very cold hardy, surviving temperatures to minus 40 degrees (Zone 3). It is a moderate-sized shrub, rarely getting much more than 6 to 8 feet tall and 4 feet wide. I’m not sure why I haven’t planted much of it, as it brightens the winter landscape with its bright berries standing in contrast to the snow. Next year I will plant some more. Remind me!
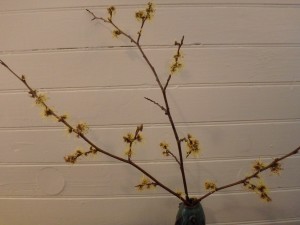
Witchhazel
Of my outdoor flowering plants, only witchhazel (Hamamelis virginiana) is still in bloom. Its yellow flowers have strap-like curly petals that remind me ever so slightly of yellow spiders dancing on the branches. The flowers are, theoretically, fragrant, but I have never noticed such.
Witchhazel will bloom in sun or shade and prefers moist soil. It has an open, branching habit. It is native to our area, and I first met it in the fall, hiking through a woods; I was intrigued to find something blooming after leaf drop, and looked it up. I have two that I planted, and after 10 years they are about 10 feet tall – but somewhat wispy. They are considered small trees or large shrubs and will grow up to 20 feet tall, but can be kept smaller with pruning.
My fallback position for color on the table is to visit my local florist on a regular basis for cut flowers. For 10 to 15 dollars I can get a nice arrangement of flowers that will last up to two weeks. Ask for flowers that will last a long time in an arrangement. Chrysanthemums are great, as are alstroemeria and carnations; lisianthus, spray roses, statice and monkey paws last well, too.
Each fall I also purchase an orchid. Orchids are thought by some as fussy or temperamental, but if you treat them right, they will bloom for months – and even come back and bloom the following year (though that is tougher). The most common orchids sold are Phalaenopsis orchids. Twenty years ago they were dreadfully expensive, but growers in Holland and Taiwan now produce them by cloning – producing hundreds of thousands of them for sale in big box stores.

Phaelanopsis
Phalaenopsis orchids like bright light, but no direct sunshine. They do not do well with cold temperatures, but home temperatures are generally fine – even though they come from greenhouses with temperatures in the 80’s. Don’t place them near radiators, woodstoves or doors to the outside. And never let the roots sit in water!
When buying an orchid try to find one that not only has pleasing colors, but also has plenty of buds. The stems will blossom from bottom to top, but usually you will only get blossoms from existing buds. I have cut back flower stems part way to the base after blooming, and gotten side shoots that blossomed, but that is rare.
Because you can buy a Phalaenopsis orchid for $10 to $15, some people just toss them out after blooming. Not me. I keep them, watering once a week until summer, when I bring them outdoors onto my shady deck. They come in pots with no drainage holes and would drown and die if I left them in those pots, but I lift out the inner pot which is just a stiff plastic mesh, which allows rain to moisten the roots but not rot them.
This year I have 2 Phalaenopsis orchids that I bought last year, and one has started a flower stem. It hasn’t yet started forming buds and I know I will never get it to bloom as magnificently as it did when I bought it. Still, it will add some color in a couple of months – and it cost me nothing this year.
Most Americans waste money on unnecessary items from time to time. Me? I’d rather waste a little money on house plants and cut flowers than most other things.
Read Henry’s blog at https://dailyuv.com/gardeningguy. He is the author of 4 gardening books.
Fourth of July
Posted on Wednesday, July 1, 2015 · Leave a Comment
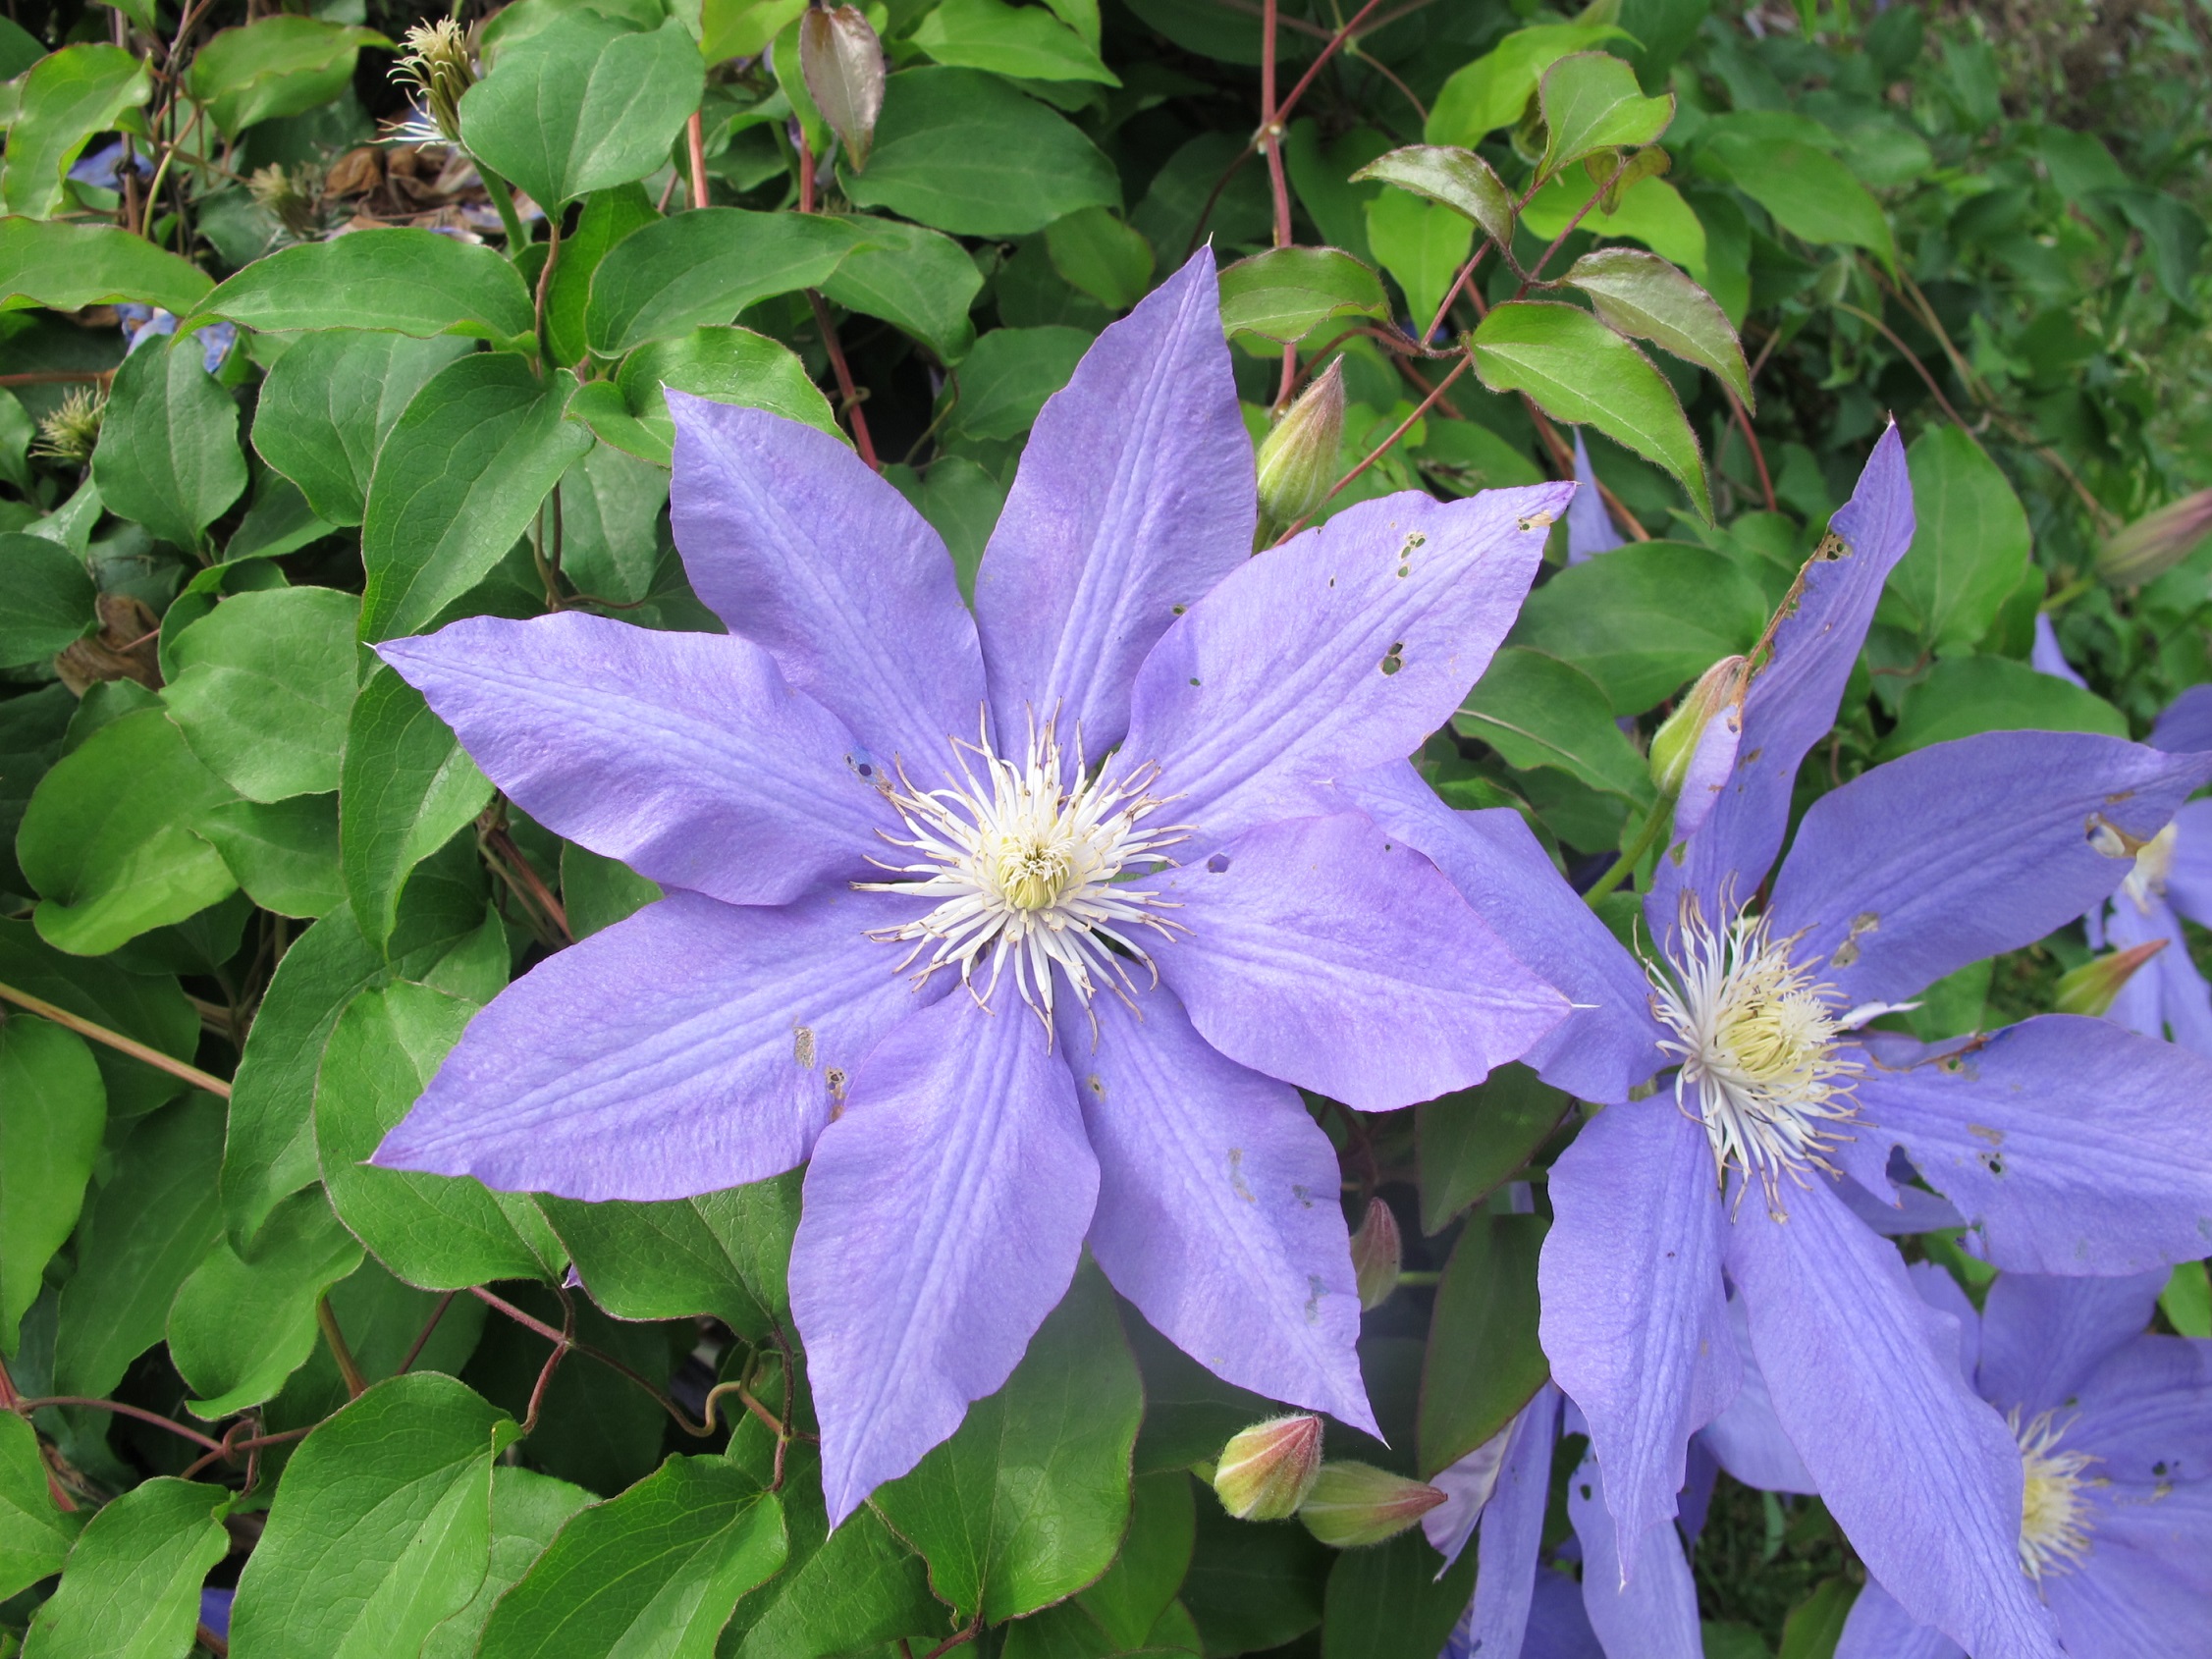
Among my earliest memories is one from a Fourth of July celebration back when I was just a tadpole – perhaps 1949. My sister and I sat on the hood of our parents’ 1938 Buick, a big black sedan, and watched fireworks way past my bedtime. Red, white and blue rockets zoomed skyward, filling us with awe. Now, all these years later, I am awed by red, white and blue flowers that climb up towards the sky. No booms, but plenty of blooms. Right now many clematis vines are ready to show off in patriotic colors in your garden.

Blue clematis (name not known)
Clematis is a showy vine that confounds many. Unlike most flowers, these come in several different colors – including red, white and blue. Surely you’ve seen showy 4- to 6-inch blossoms on vines growing up trellises. Those were probably clematis. But sometimes gardeners plant the vines and are disappointed. They can be a little fussy. In fact, I have two that I planted earlier this summer that seem to be sulking. I know, however, that within a year or two (or sooner, hopefully) they will start growing vigorously. I have provided them with good soil, some organic fertilizer and a structure they can twine around.
What clematis vines need are hot tops and cool bottoms. They require rich, slightly moist soil that stays cool, but plenty of hot sunshine on the ascending vines. To do that, mulch the roots well with chopped leaves or ground bark mulch. And plant a medium-sized perennial – or more than one – in front of the vine to shade the soil from the afternoon sun, helping to keep the roots cool. An astilbe is about the right size, or perhaps a Shasta daisy.
I called plantsman Gary Milek of Cider Hill Gardens and Galleries in Windsor, VT for suggestions for good patriotic red, white and blue clematis varieties. He said there are two great red ones: ‘Niobe’ and ‘Cardinal Wyszynski’. The latter one is a Polish variety that is free flowering, meaning that it will keep blossoming and growing taller all summer, a definite plus.
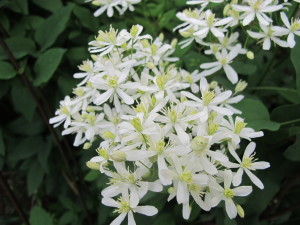
Cleamtis recta close-up
White clematis include a variety called ‘Henryi’, which since it shares a name with me, I should get. Gary Milek said it can easily grow 8 to 10 feet up from the ground in one year. Another white one he likes is ‘Gillian Blades’, which has white blossoms and yellow anthers.
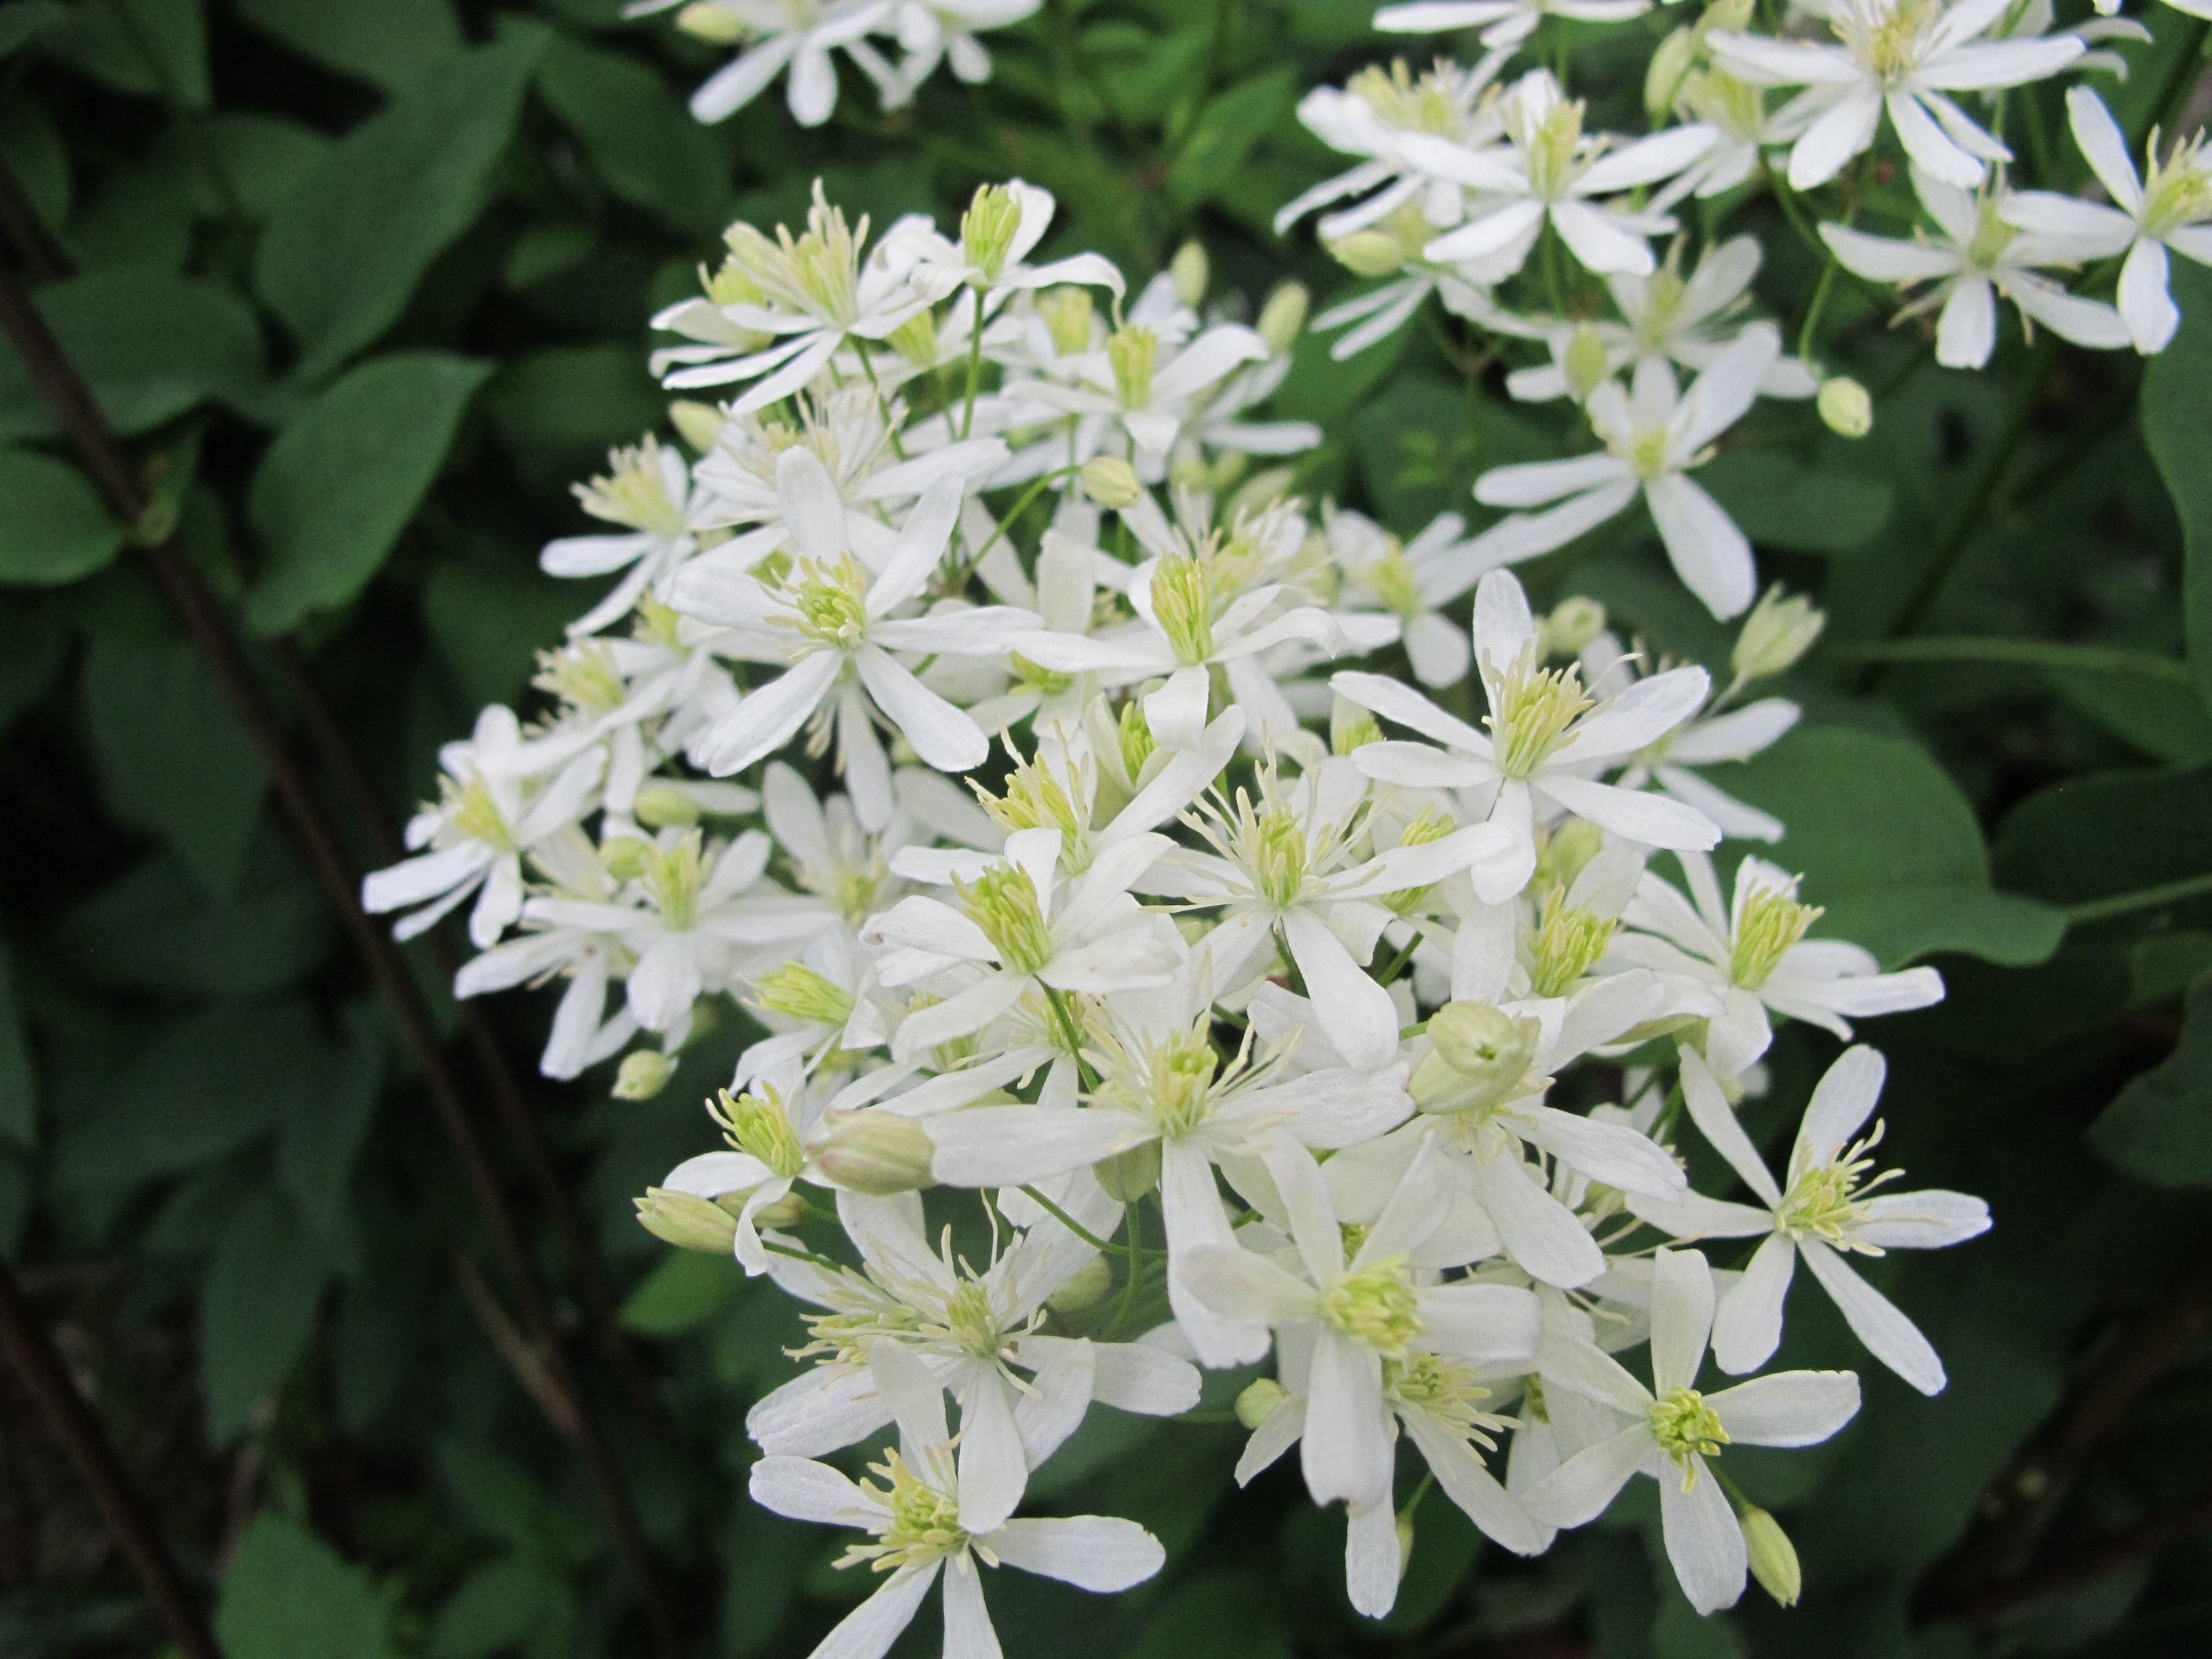
Right now I have a white bush-type clematis in bloom, known as ground clematis or by its scientific name, Clematis recta. This gets to be about five feet tall, and unless it is very well supported, it then flops over. Mine is growing in front of a stone retaining wall facing east, so it gets little afternoon sun. My bush is nearly six feet wide right now, but will die to the ground in winter.
The individual flowers are not impressive: each 5-petaled blossom is only an inch and a half across. But there are lots of them. Flower clusters are loaded with them, and the stems are nice and strong, hence great in a vase, and keep well when picked.
Come fall, I’ll have another round of white clematis blossoms when my ‘Sweet Autumn’ clematis (Clematis paniculata) comes into bloom. Like the bush-type, this clematis has small blossoms, and lots of them. And they are fragrant, or can be. I had one previously that was not fragrant, but generally they are.

pink Clematis
Of the blue or purple-blue clematis, a variety called ‘Jackmanii’ is well known and very popular. It is tough as nails, thriving even after hard winters. Like many, but not all, clematis, it dies to the ground each fall. You should prune it back to within a foot of the ground in the fall or first thing in the spring. Other clematis vines do survive the winter, and should just be trimmed to neaten them up after their early summer blooming.
According to Gary Milek, a truer blue (for the Fourth of July theme) is ‘The President’. It will grow 8 to 12 feet tall, and have two flushes of blooms: early summer (May-June) and then again in fall (September-October). Like many clematis, it has good winter interest: the seed heads are fluffy white, persistent structures.
Other great climbers in patriotic colors? Climbing hydrangea (Hydrangea anomala,subspecies petiolaris) is a fabulous white vine. It will attach itself to brick or rock walls, but needs help to climb a wooden wall. These great vines are slow to start growing after planting, but really get vigorous after 5 or 6 years. Your patience will be rewarded. As they climb, they extend short branches, loaded with big white flower panicles that seem to defy gravity. And they thrive in shade, or part shade. Great for the north side of a barn, where I have mine.
Then there are the red roses. The Canadian Explorer series, developed in Ottawa, are very nice. ‘William Baffin’ is my favorite climber. He grows 8 to 10 feet high, and is technically a deep pink. But that’s close enough for me.
So if you want something to grow up to the sky, there are plenty of choices. I just wish I had that 1938 Buick (which went to the junk yard in 1961). Sigh. Maybe I’ll go buy another climbing clematis to console myself.
Henry is the author of 4 gardening books, and a children’s chapter book about a boy and a cougar, Wobar and the Quest for the Magic Calumet. His web site is www.Gardening-Guy.com.
Starting Seeds Indoors
Posted on Wednesday, April 1, 2015 · Leave a Comment
After arguably the coldest, snowiest winter on record, I am ready for spring. Okay, maybe the winter of 1934 was colder. So what? I still have snow, and my woodpile is pathetic. I am picking up sticks and burning soggy remnants of previous woodpiles. To keep my spirits up on raw, gray days, I plant seeds indoors.
I started back in March, planting artichokes, onions, leeks and peppers. Now I am planting the brassicas: Brussels sprouts, broccoli and kale. Those hardy souls can go out around the time of the last frost, even if the ground is still cool. My tomatoes, the queens of the garden, I will start closer to mid-April and go in the garden in June – well after the last frost – when the soil warms up to 60 or more.
One key to success with plants indoors is having enough light. A bright, sunny windowsill might be enough for the first couple of weeks in a plant’s life, but to grow good healthy tomato plants for 8 weeks requires artificial lighting.
Shop lights are relatively inexpensive: a two-tube, four-foot fluorescent fixture should cost under $20, plus the bulbs to go in them – which vary widely in price. You don’t need fancy “Gro-Lights”. Those mimic the spectrum of daylight, but for starting lettuce and tomatoes for the garden, ordinary cheap tubes work just fine. And if you can mix cool white and warm white tubes, you can have something close to daylight wave lengths.

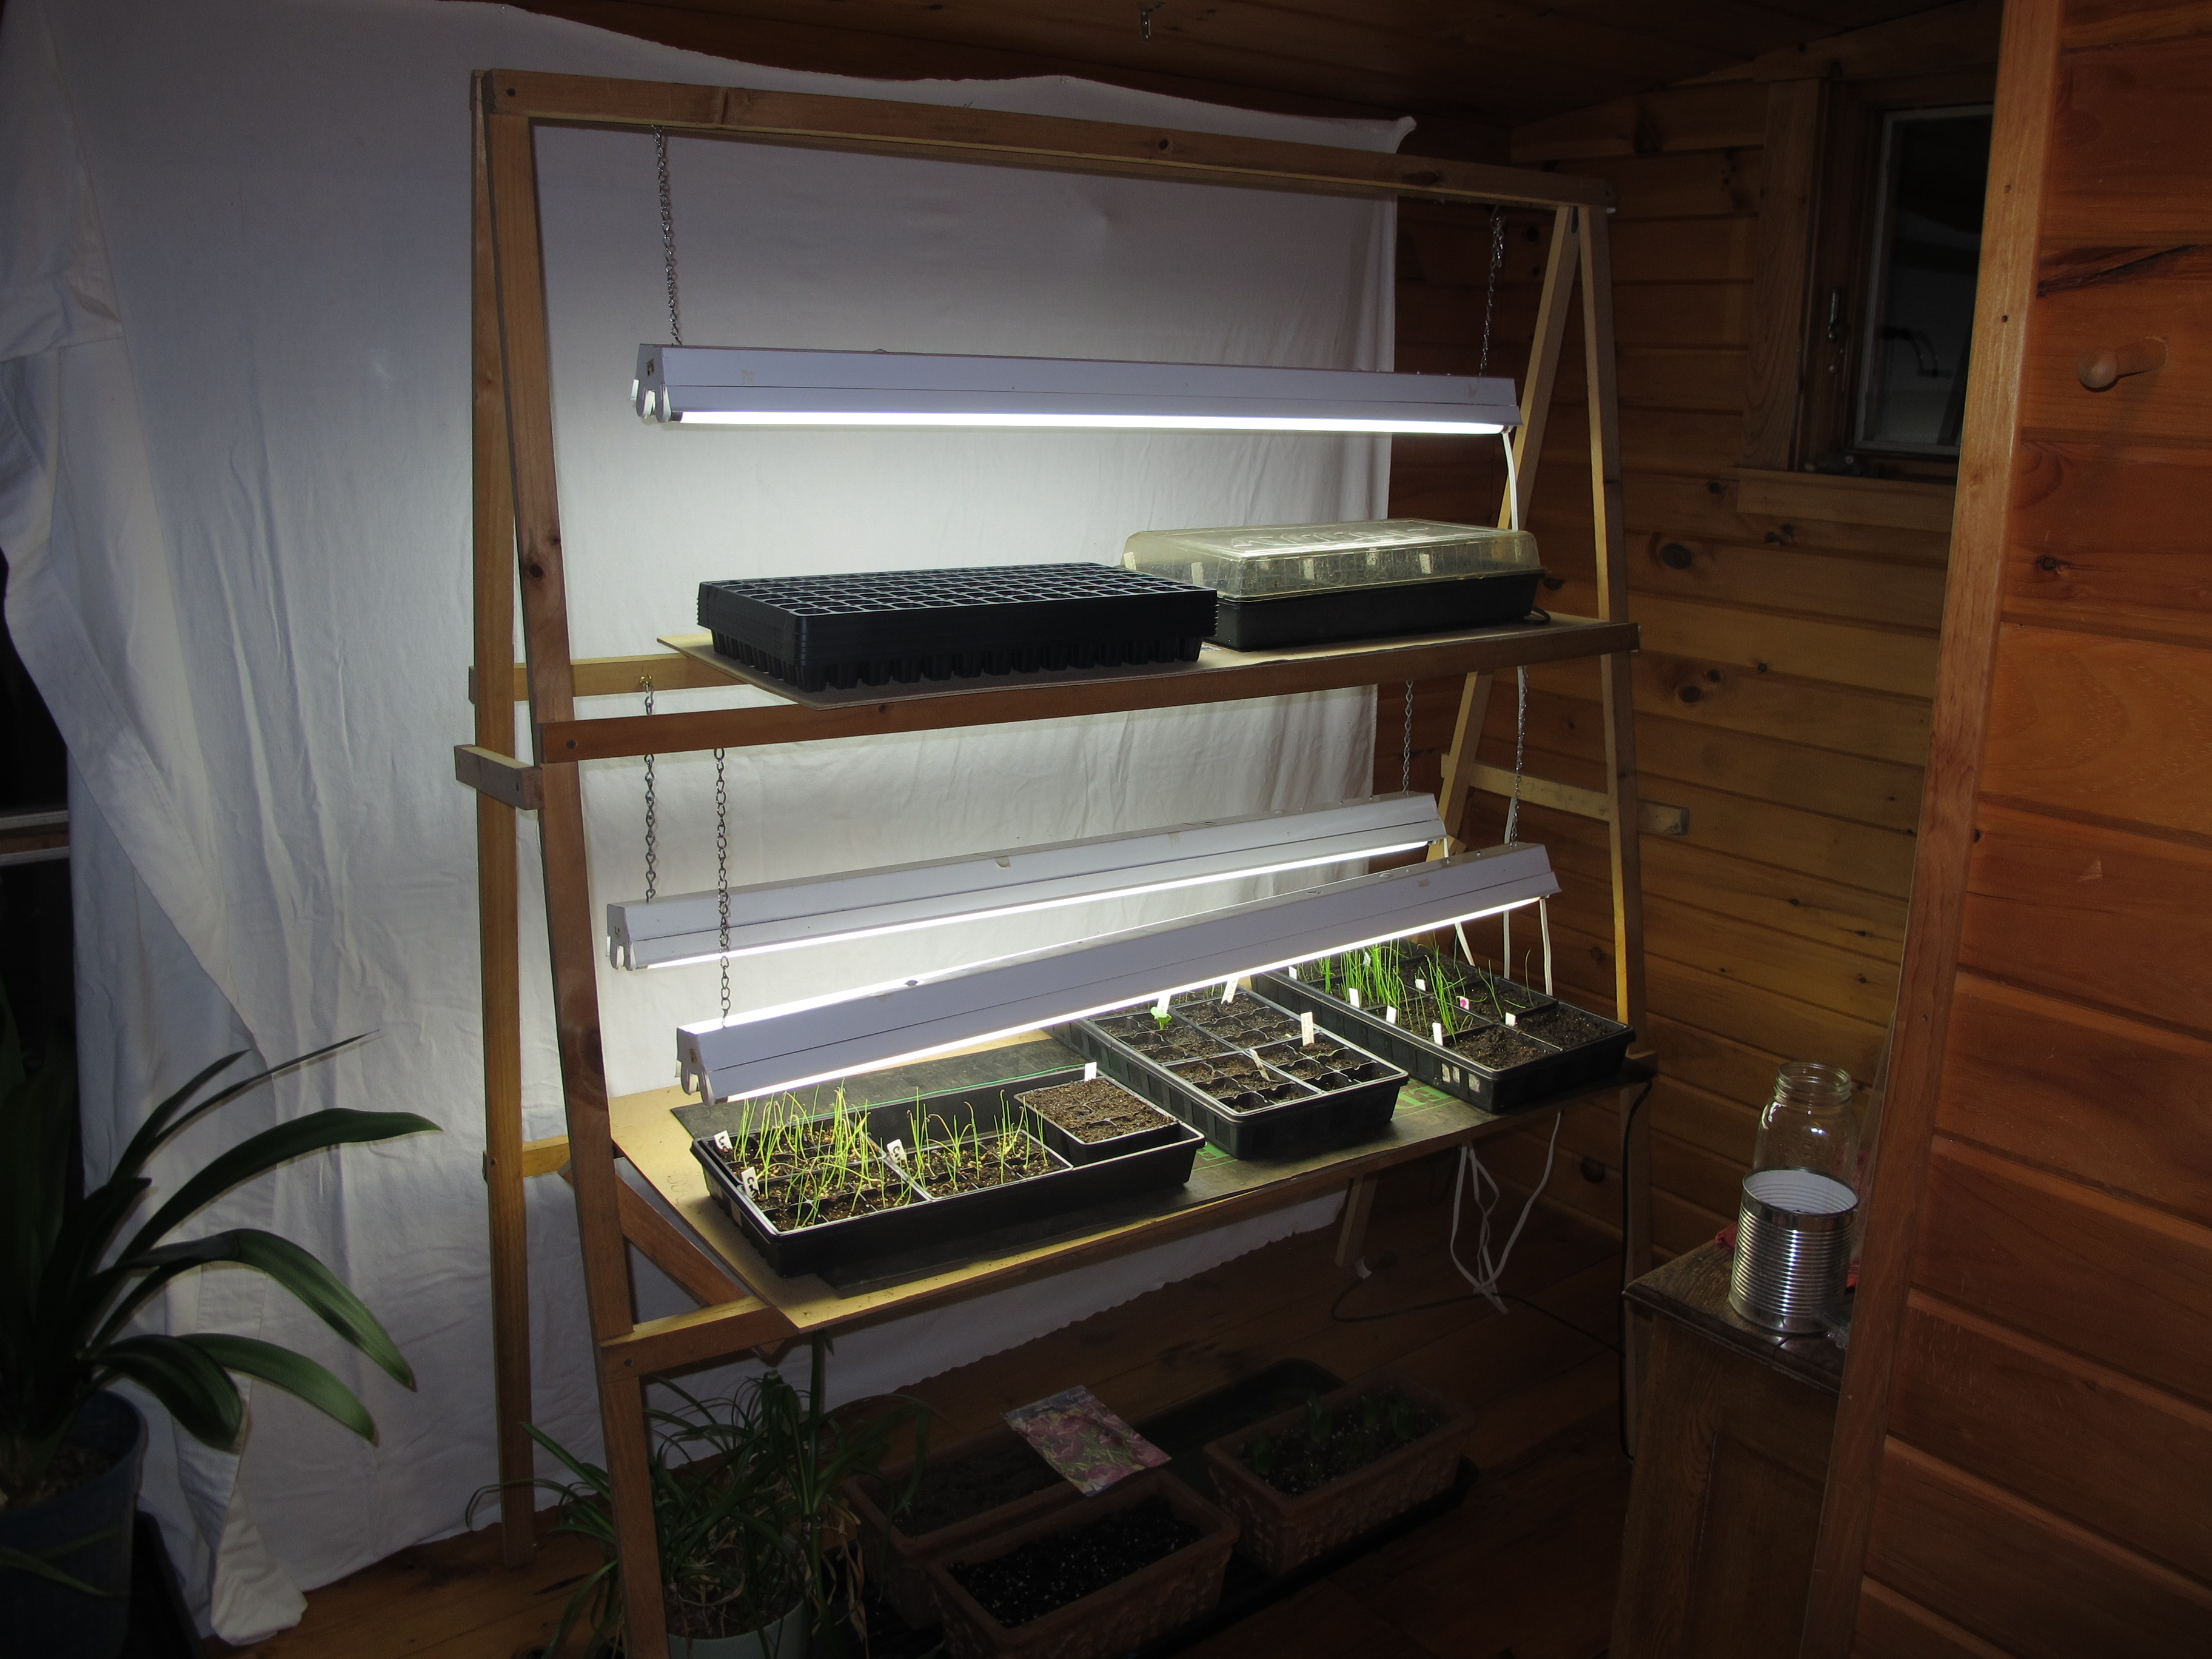
Homemade plant stand
A few years ago I built a simple wood A-frame plant stand that has worked out well for me. It uses 3 fixtures and will illuminate 6 flats of seedlings. I suggested at the time that your local lumber yard will be glad to take your parts list and cut lumber to the appropriate sizes. To get the directions, go to my website (www.Gardening-Guy.com) and type in “Plant Stand” in the search engine, and the article will come up. Or send me a self-addressed, stamped envelope and I will mail you the directions.
Another item that will help you is an electric heat mat to put under the flats while your seeds are getting ready to germinate. Most seeds have a protective mechanism to keep them from germinating too early. They need the soil to reach a certain temperature in order to know that winter has gone by. Garden centers sell 2 sizes: enough for one flat, or enough for four flats.
Last spring I started all my corn indoors in plug trays (containers with over 100 planting places per flat) and put them on a heat mat. They germinated in just 3 days – but would have taken 10 or more outdoors. Corn sometimes rots if the soil is cold and wet. Crows love to steal corn when it is first up, but I planted the seedlings when 3 inches tall and they rooted right in, so the crows didn’t steal a single one.
Moisture is another important factor when starting seeds indoors. Get your planting mix thoroughly moist before you plant. That can be done by placing a tray of planting soil in six-packs in a flat with water in it, and letting the water soak up from the bottom. Or pour water into the bag of soil mix the day before using it.
If the soil mix dries out when seeds are just starting to crack open and send out a rootlet, your seedlings will die. You can prevent that by covering the planted six packs with a plastic dome. These are clear plastic so you can see what is happening, and so that the seedlings that have germinated can get light while others are still waking up. By the time your seedlings are two inches tall, they will be crowding the dome and you should remove it.
Have you ever had bad germination rates? I have. It could be due to bad seed or old seed. In general it is best to buy new seeds every other year, even if you have plenty. Most seeds are good for 3 years or even longer – but at a lower germination rate.
But bad germination may also be due to the position of the moon and stars. I have been following a celestial calendar called “Stella Natura” (www.stellanatura.com) for a few years now, and although I can’t prove that its advice is right, I’ve had some interesting results.
I planted lettuce seeds on a “leaf” day, and then some more the following day, which was a “blackout” day (not recommended for planting anything). Even though I used the same seed package and planting mixture, I got a very low germination rate for seeds planted on a blackout day, but the others did well. The calendar has good days for planting fruits, flowers, roots and leaves. But this year I followed the calendar and still got very low germination for my artichokes, so who knows?
Remember when you calculate the cost of your tomatoes that building a plant stand for $50 and then buying lights for $100 is a multi-year investment. If you like messing around with plants in spring, starting seedlings indoors is a good idea. You can get rare and unusual seeds from catalogs that you would never find at your local farm stand. And, as one of my fridge magnets says, Gardening is Cheaper Than Therapy!
Henry Homeyer is a fruit tree pruner and gardening consultant. Contact him at henry.homeyer@comcast.net or P.O. Box 364, Cornish Flat, NH 03746.
Pruning Apple Trees
Posted on Wednesday, March 18, 2015 · Leave a Comment
Often the snow on the hilly south side of my house has melted by early March, allowing snowdrops to push their little noses out of the ground and permitting me to pick buds that open up indoors. Most years by mid-March the snow has melted enough to allow me to get out and move around my apple trees to prune them. Not this year. Snow is still knee-deep here and not disappearing very quickly. It will be April before I get to do much pruning.
The first step in pruning is to really take a good long look at the tree. Are there dead branches? They must go. Are there branches rubbing? You must remove one or the other. What about what I call “invaders”? Invaders are branches that “see” an empty spot and grow willy-nilly through the center of the tree to grab the sunshine. Off with it! Is the interior crowded? If so, it needs work.
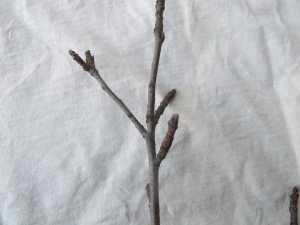
Apple fruit spurs
Where you make your pruning cuts is important for tree health. Don’t cut branches flush to the trunk or a bigger branch. Don’t cut into the swollen area at the base of a branch, an area called the branch collar. You can often see a distinct edge to the collar where the wrinkles in the bark in the branch collar stop and smooth bark of the branch begin. But don’t cut off branches too far from the trunk, either. That creates stubs that will die and slowly rot away – leaving an open wound where disease can enter.
In general, it is better to take a few bigger branches than lots of little ones. You can safely remove 20 to 25 percent of a tree’s leaves when pruning, though a well-tended tree won’t even need that much. The amount of wood is less important than the number of leaves, though that is a bit difficult to determine in winter. Pruning an old, neglected apple tree might be done with just a few cuts to remove big branches that are competing with the tree’s central leader or cluttering up the interior of the tree. Then in subsequent years you might work on smaller branches.
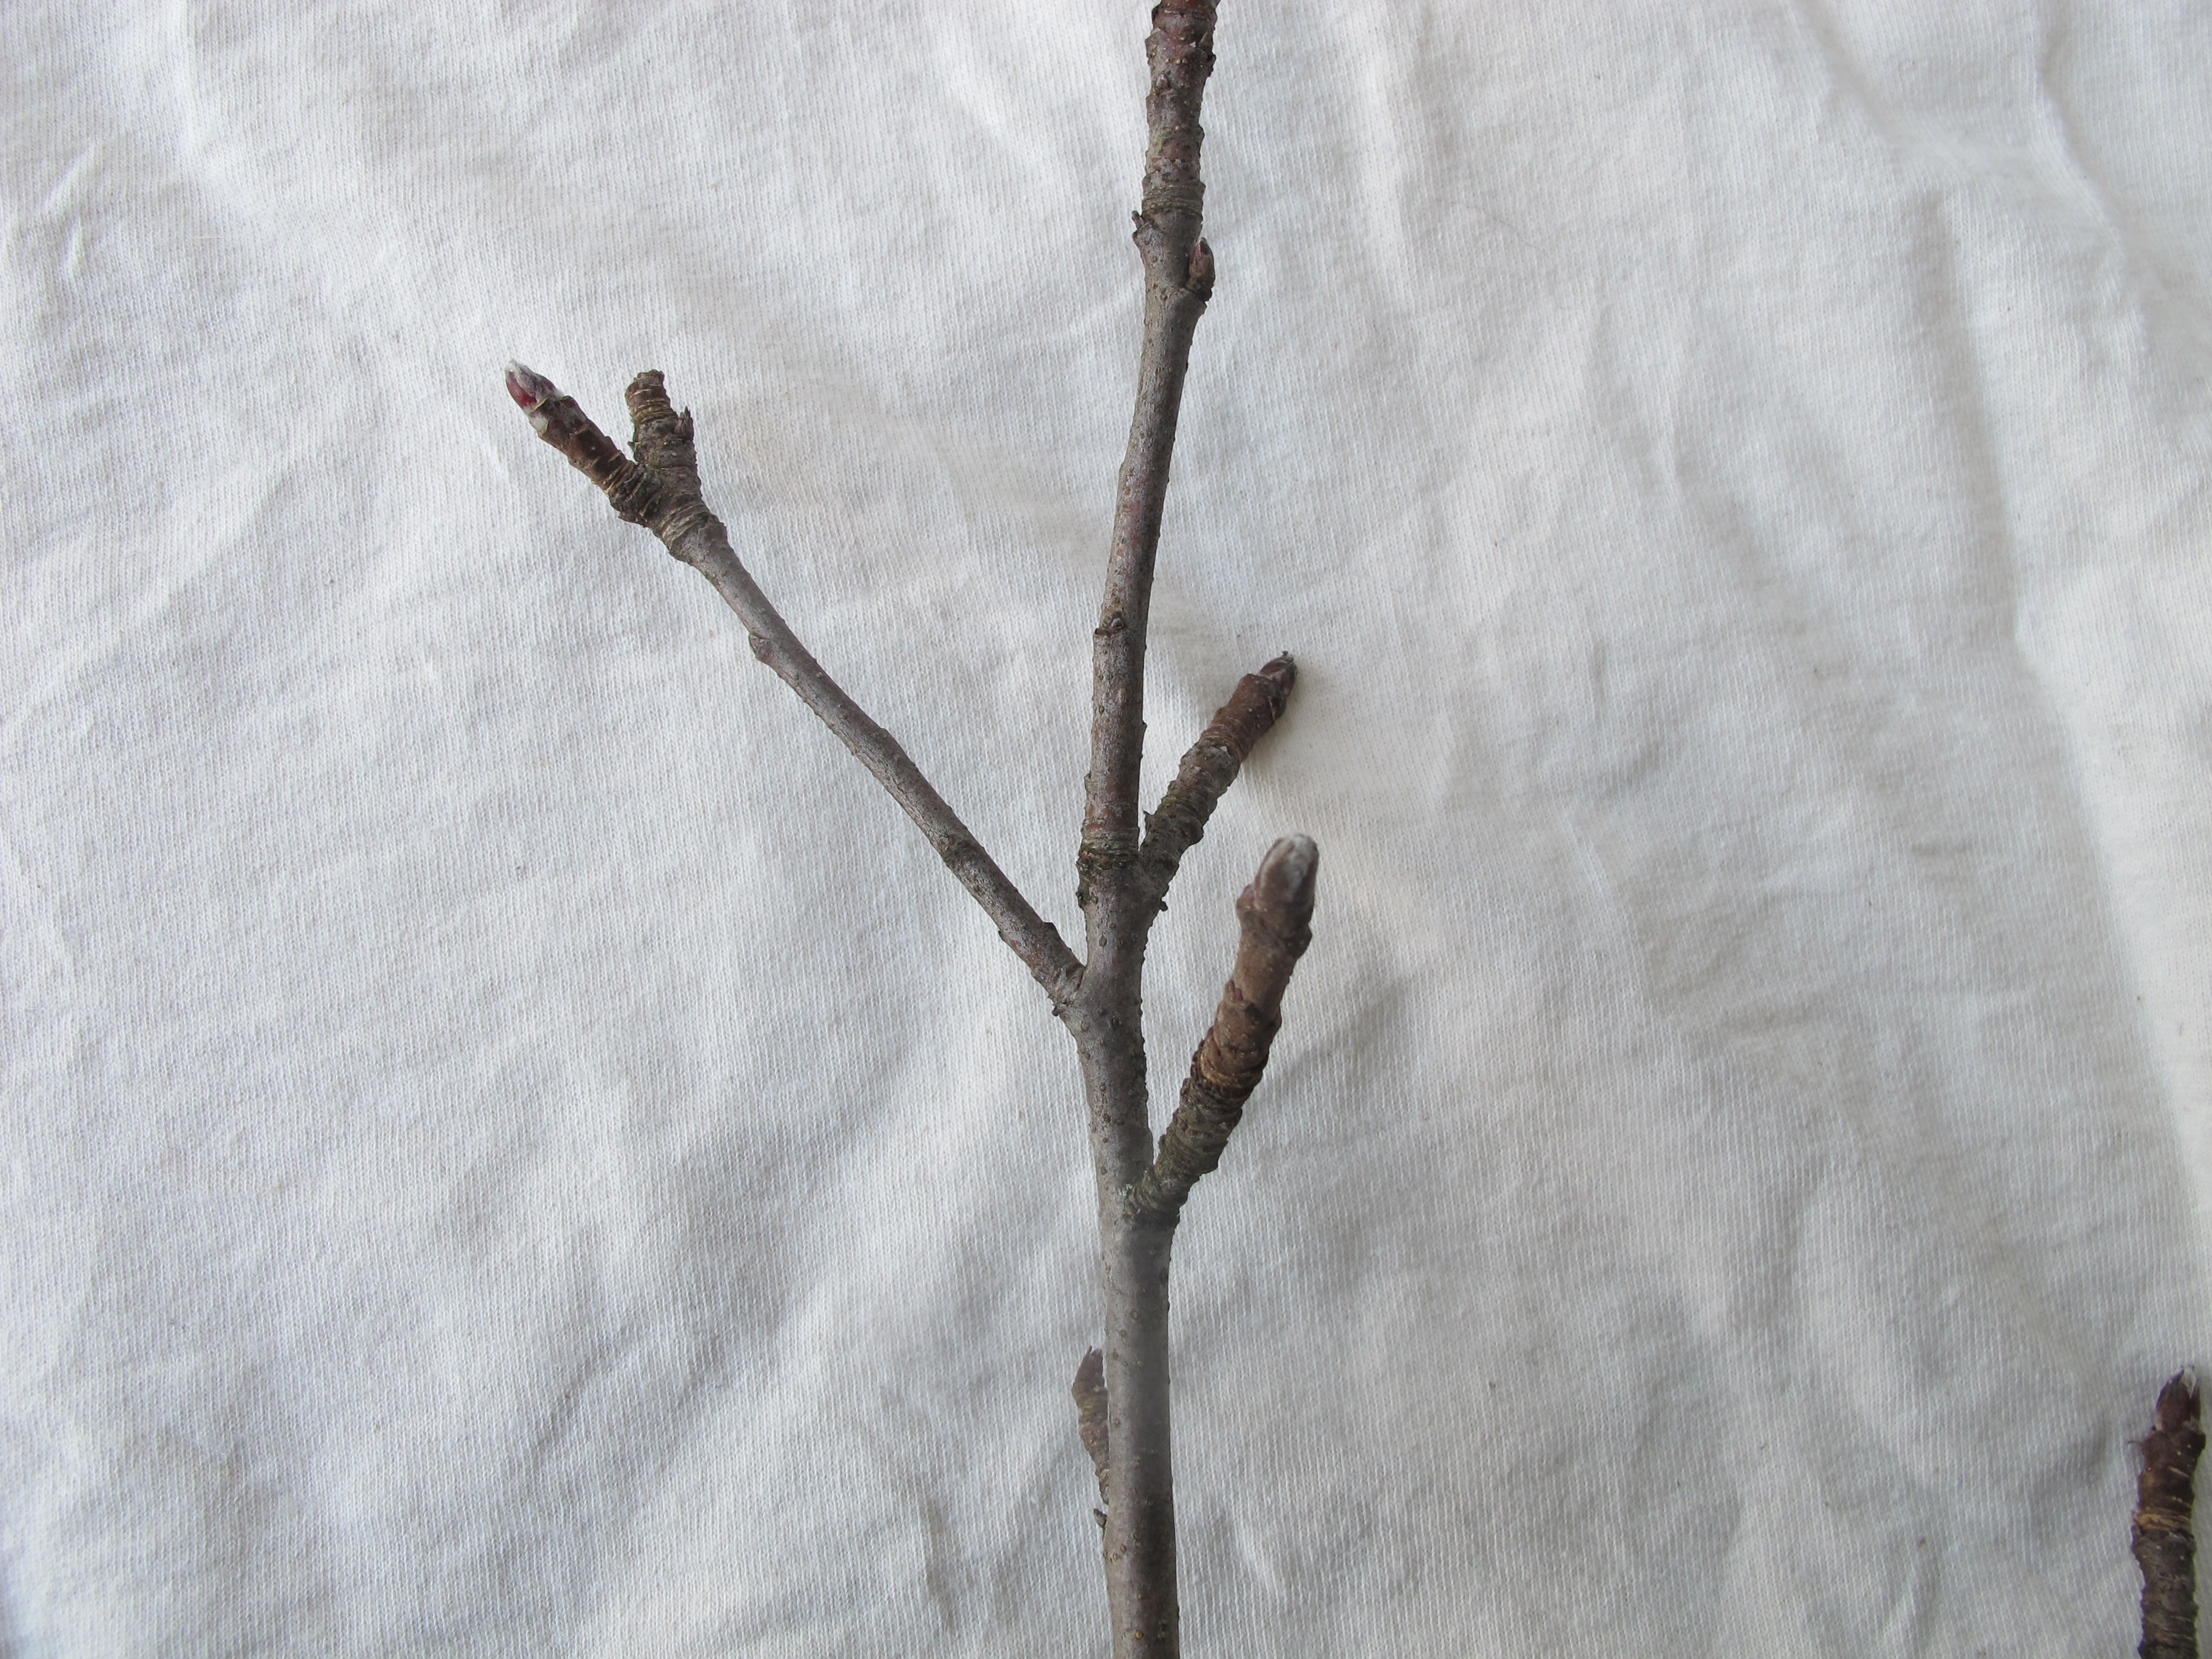
If you want blossoms and fruit, you can see if a branch will produce apples by looking for fruit spurs. Fruit spurs are gnarly little branches – usually just 3 or 4 inches long – that grow off bigger branches, branches that are at least two or three years old. At the tip of each spur is a cluster of buds that will produce leaves and flowers. If you are deciding whether to remove a branch, look for fruit spurs before cutting. Fruit spurs will not produce fruit in their first year.
Apples (and crabapples) tend to send up lots of waterspouts. These start as pencil-thick twigs shooting straight up from bigger branches. They are often a stress response: in summer they grow to produce leaves in the cool interior of a tree when the outer leaves have stopped producing food for the tree because it’s too hot. So even if you cut them out every year, more will come –often in the same place. Same varieties of trees send out a lot of water sprouts, others just a few. If you leave them in place, they will eventually become full sized nuisance branches cluttering up your tree.
A few words about bad crotches. Fruit bearing branches should be at an angle of 45 to 60 degree angle from the main trunk. A bad crotch angle (30 degrees or less) exist when there is a very tight angle between two stems. If the stems develop heavy fruit loads or are subject to heavy ice and snow loads, the weak crotch may break open, damaging the tree.
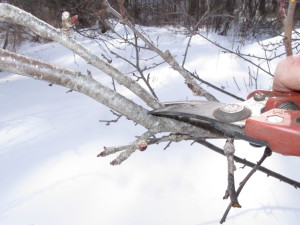
Fixing a bad crotch
Breaking of bad crotches occurs because as the branches grow, they grow together, enclosing bark – and creating a week spot. Prune one of the two branches to correct the problem. Do this when a tree is young if you can. Some trees are more prone to bad crotches than others. Maples, for example, often are full of bad crotch angles (but don’t prune them in spring as they will bleed excessively).
Apples produce the most fruit on branches that are more horizontal than vertical. Sometimes I weight down young branches to make them more horizontal. A milk jug with some water in it will do the job – and you can increase the weight to just the right amount by tying on the jug and adding water. Do that in mid-April and remove it on the Fourth of July.
For me, pruning is not just about getting the most flowers or fruit from a tree, it’s about creating a beautiful form. In winter, especially, I enjoy looking at a well-pruned tree as sculpture. If a tree has big branches hacked off to create a tree with a short profile – as some are in commercial orchards – it is not pleasing to the eye. A tree that tapers toward the top and has nicely spaced branches looks good – and produces a good fruit load, too. Experts say that an apple tree should generally have a central leader or stem that dominates the tree and grows up the middle of it.
Pruning apple trees is one of my seasonal joys. I love sculpting the trees, making them lovely to the eye, healthier and more productive, too. A well pruned apple tree should have enough space between branches that a robin can fly through it – without getting hurt. Un-pruned tree? It’s a messy as an unmade bed. And climbing up an old apple on a blue-sky day to prune it makes me feel like a boy again. I can’t wait.
Henry Homeyer is a professional pruner and the author of 4 gardening books. Reach him at P.O. Box 364, Cornish Flat, NH 03746 or henry.homeyer@comcast.net. His website is www.Gardening-Guy.com.
Spring Activities Indoors
Posted on Wednesday, March 11, 2015 · Leave a Comment
I am NOT going to kill my rosemary plant this March. Really. It is so easy to do, and most of us who grow rosemary have done it at least once. We get a perfectly nice rosemary plant through the winter, and then in March we kill it. Why? Because the sun is stronger, hotter, and because our plants are waking up after a winter’s semi-dormancy and starting to grow. All of that means our plants need more water.
I called Sarah Milek of Cider Hill Gardens in Windsor, Vermont, who is an expert grower of herbs (and all plants, really). She confirmed that rosemary needs more water now. And she said March is also a good time to re-pot rosemary. Your rosemary wants to put on new growth now, both roots and leaves. But if the roots are tangled and snarled, or if the pot is full of roots, the plant really cannot grow well.
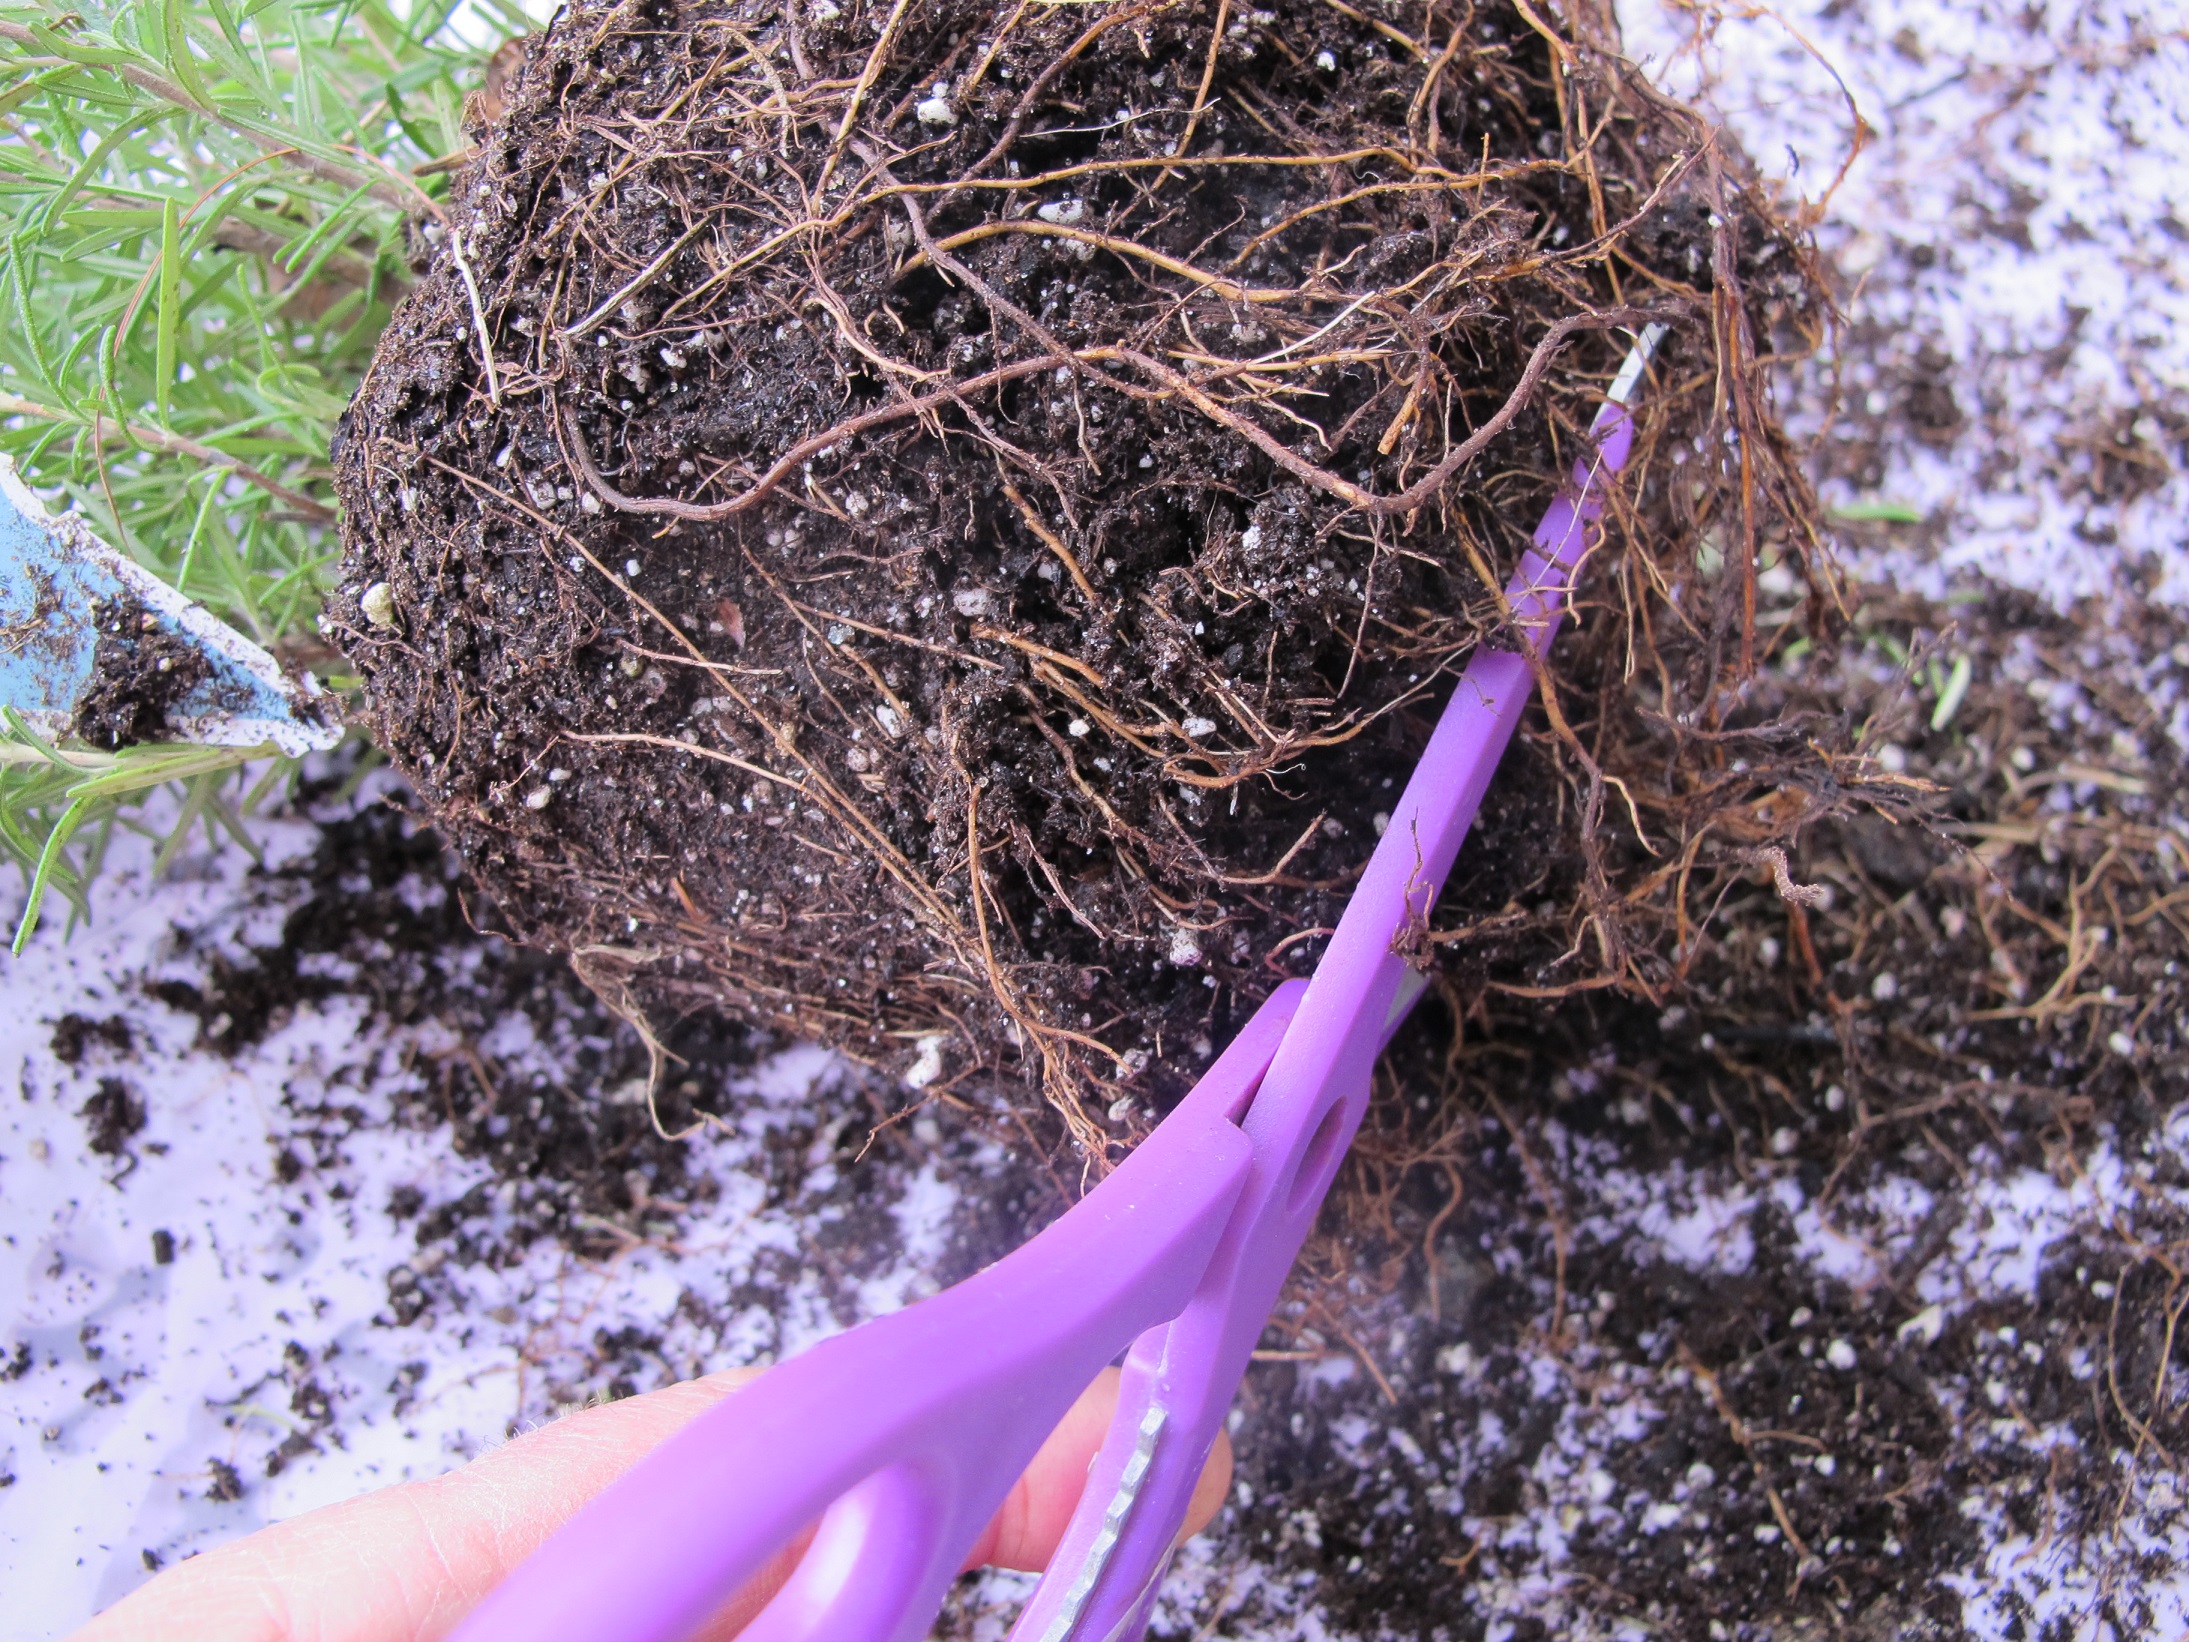
Teasing out rosemary roots with a fork
I took my rosemary plant, which is growing in a 5 inch diameter pot, and knocked it out of the pot: I turned it upside down over the kitchen sink, and gave it a sharp rap on the bottom of the pot with the heel of my hand. Then, with a gentle tug, I slid it out of the pot. I was looking for dead, brown roots – signs of overwatering and decay that need to be removed – but saw none. The roots were light-colored and in good health. They did not break when tugged on.
Rather than using a bigger pot, I decided to cut back the roots a bit to stimulate new growth, and to allow me to add fresh potting mix to the pot. Sarah Milek suggests using a kitchen fork to open up the roots and loosen the potting soil attached to the roots. Then it’s easy to cut back the roots with scissors. But, Sarah warned, don’t be overly drastic. A gentle haircut is all that is needed.
I added three quarters of an inch of fresh potting soil at the bottom of the pot and placed my rosemary in it. Then I poured in fresh potting soil around the edges and tamped it down.

Cutting back rosemary roots
Sarah reminded me that rosemary likes to grow with some humidity in the air – which is tough for a household like mine that uses a woodstove every day. She suggested I place some gravel in a dish or pan, and then water the stones before placing the potted rosemary on top of the stones. I’ve also heard that spraying the leaves with a fine mist of water makes rosemary very happy – though my tough love approach to houseplants generally precludes that.
Temperature is important for success with rosemary, and houseplants in general. Most plants do not want a very warm spot, so keep them away from radiators and wood stoves. In this season a south or west-facing window can get pretty hot in the afternoon, so an eastern exposure is better.
I asked Sarah Milek what other houseplants needed attention at this time of year. She mentioned geraniums (Pelergonium spp.). Most of us grow geraniums for their big red, pink or white blossoms that shine on seemingly forever. But in the course of a winter indoors, many have gotten leggy – with long stems, that is. The solution? Cut them back now. I generally cut back to a node, and then take the cutting and root it in water.
Sarah says rooting geraniums is better done in moist perlite. Perlite, the fluffy white stuff in potting mix, can be purchased in bags at the garden center. It is not Styrofoam, which it resembles, but a heat-expanded mineral made like popcorn in an industrial oven at very high temperatures. It holds moisture well but also releases it to plants when needed. It has a neutral pH. Sarah says you should tent your geranium cuttings – put them in a clear plastic bag so that they do not lose moisture.
Perlite is very light weight, so larger cuttings can easily tip over if using a lightweight plastic pot. A heavier ceramic pot would prevent that, or you could place stones or sand in the bottom of a plastic pot. Perlite provides no nutrition so once they are rooted, you need to give them a light dose of fertilizer weekly. Fish or seaweed fertilizer diluted to one quarter the regular dose is fine.
Other indoor activities for the cabin-fever-feeling gardener include starting some vegetables of flowers from seed. I have started onions, leeks and artichokes – all plants that need a long time from seeding to maturity. In mid-March I will plant hot pepper seeds, and then tomatoes, broccoli, kale and other veggies in early to mid-April.
If you have never grown artichokes, you might want to. There are several kinds of seeds available, including Green Globe, Purple of Romagna, Opera and ‘Imperial Star’. In past years when growing Green Globe artichokes, I followed the dictum that you must move them into a 50 degree growing space for 2 weeks at the 3 or 4 leaf stage to fool them into thinking they had lived through a winter. That meant setting up lights in my cold basement. But Imperial Star and Opera (a purple one I have not yet tried) are both grown for annual production, and do not need that cold period. Much easier. My artichoke plants produce 3-7 small chokes each year, but are also very pretty plants suitable for a flower garden.
Spring is just around the corner – and my rosemary plant knows it. It’ll be happier since this year I’m being attentive to its needs.
Henry is a UNH Master Gardener and the author of 4 gardening books. His book The New Hampshire Gardener’s Companion will be out in an expanded second edition later this month. His website is www.Gardening-Guy.com.
Learning and Helping as We Travel
Posted on Wednesday, January 14, 2015 · Leave a Comment
When I packed my bags to go to Maui recently I thought about packing my CobraHead weeder. But in the rush of getting ready I neglected to do so. I wish I had. That’s right, I like to garden even when I go on vacation. There are always opportunities to help out, and to learn. A winter vacation in a warm place can offer more than just a tan and some relaxation.
A friend told me about an organic farm on Maui that serves developmentally disabled adults and sells organic fruits and vegetables to the community. I called the farm and offered a day of help; my three traveling companions accompanied me. It was a wonderful day – and helped me to feel a little less guilty about the carbon emissions of that big silver bird that brought me to Maui.
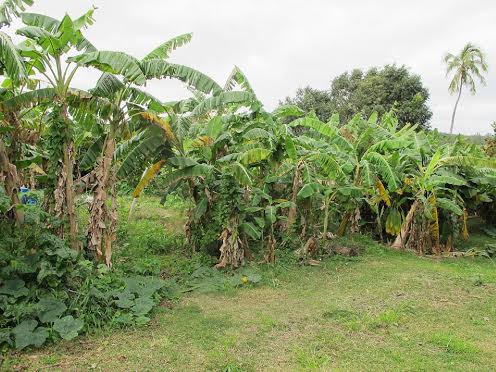
 Lokelani Ohana Farm Lokelani ‘Ohana Farm is unlike any I have visited before. It is just over an acre in size and produces 10 kinds of bananas including thumb-sized bananas and “apple” bananas, my favorites. Apple bananas are half the size of bananas we know from the store with a rich flavor that makes ordinary bananas seem as bland as Wonder Bread. There had been a severe tropical storm just before we had arrived on Maui, and some of the banana plants had blown down. We helped by cutting up downed stalks and lugging them off to compost piles. And I got to do some weeding – while it was 20 below back home.
Lokelani Farm is a “vibrant sustainable ‘Ohana where “people with disabilities live, learn and work together with reverence for spirit, creativity and nature, supporting each other’s potential and sharing a life of purpose.”, according to the vision statement in their brochure.
Christina Chang, the director of the farm and programs, told me that the programs have been in existence just since 2005 and are modeled on the Camp Hill initiative of Pennsylvania. Camp Hill has farms and programs that serve developmentally disabled adults in several locations in the northeast. Their farm programs are organic and biodynamic. At Lokelani adults participants learn not only how to garden, but also Saori weaving and other craft skills, and develop better social skills.
So if you wish to help out for a day or more on your next vacation, how should you find a good place to do so? Before heading off to Florida or Nassau or France, do a little research on the internet. Twice before this experience I have worked on farms, once in France and once in the Hebrides off Scotland. Both allowed me to learn as well as to help.
In my previous experiences I had joined the WWOOFer program: World Wide Opportunities on Organic Farms. It matches up volunteers with organic farms for short term work experiences. I worked about a week on each of the farms where I “woofed”; some farms have restrictions about how long a worker must stay and help – a week or a month minimum, for example. In general, woofers get room and board provided and work 4 to 6 hours a day, five days a week. Lokelani had 3 woofers working on the farm the day we were there, but we were not a part of the official WWOOFer program. In general other woofers that I have met have been in their twenties and thirties, but there are no age restrictions.
In order to see what is available, go to the website www.wwoof.net. The website will not give you farm locations or contact info – they want you to pay first to join – but you can see what sorts of jobs and farm placements are available before you join. In the United States the fee to become a WWOOFer is $40. In France it is 25 Euros.
You need to join the WWOOF organization for the country you are interested in – you cannot join once for all of Europe, for example. The web site allows you to sort the farms according to your requirements for length of stay, accommodations, type of food provided. Thus you can select omnivore, vegetarian or vegan diet, and only farms that can provide that will show up on your search.
I also found that there are other organic farms on Maui, some of which provide accommodations and the opportunity to learn and take classes. So you don’t have to sign up to be a woofer if you want to spend some time gardening in winter.
So what did I learn at Lokelani that day? I learned that bananas are incredibly resilient. Cut off the top of the plant, and the roots and base will generate a new stem. The leaves make a great mulch – they will block out sunshine and hold down weeds. I learned what a breadfruit tree (and the fruit) look like, and what macadamia nuts look like right from the tree. I met some very interesting people. I learned that Lokelani is a wonderful non-profit (www.lokelaniohana.org) that is trying to not only help adults with disabilities, but to help the broader community to accept and understand the special love and creativity of people with disabilities.
So think about spending some time on a farm next time you vacation. I’m glad I did.
Henry Homeyer is not answering gardening questions this week. His Web site is www.Gardening-Guy.com. He is the author of 4 gardening books.
|


 Click Here to buy from Cobrahead