-

Now available for $24.95 including shipping. -

Now available for $21.00 including postage. Vendors I Like
 Click Here to buy from Cobrahead
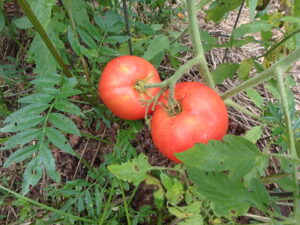
Queen of the Garden: the Tomato
My first slicers are Jet Star and early hybrid
To prepare red rocks I simply rinse them off, allow them to dry, and slip them into gallon freezer-grade plastic bags. I use a straw to suck the air out of the bag after I have the zipper closed 99% of the way. That minimizes frost on the tomatoes in the freezer.
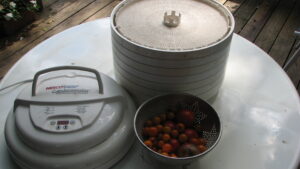
NESCO Dehydrator
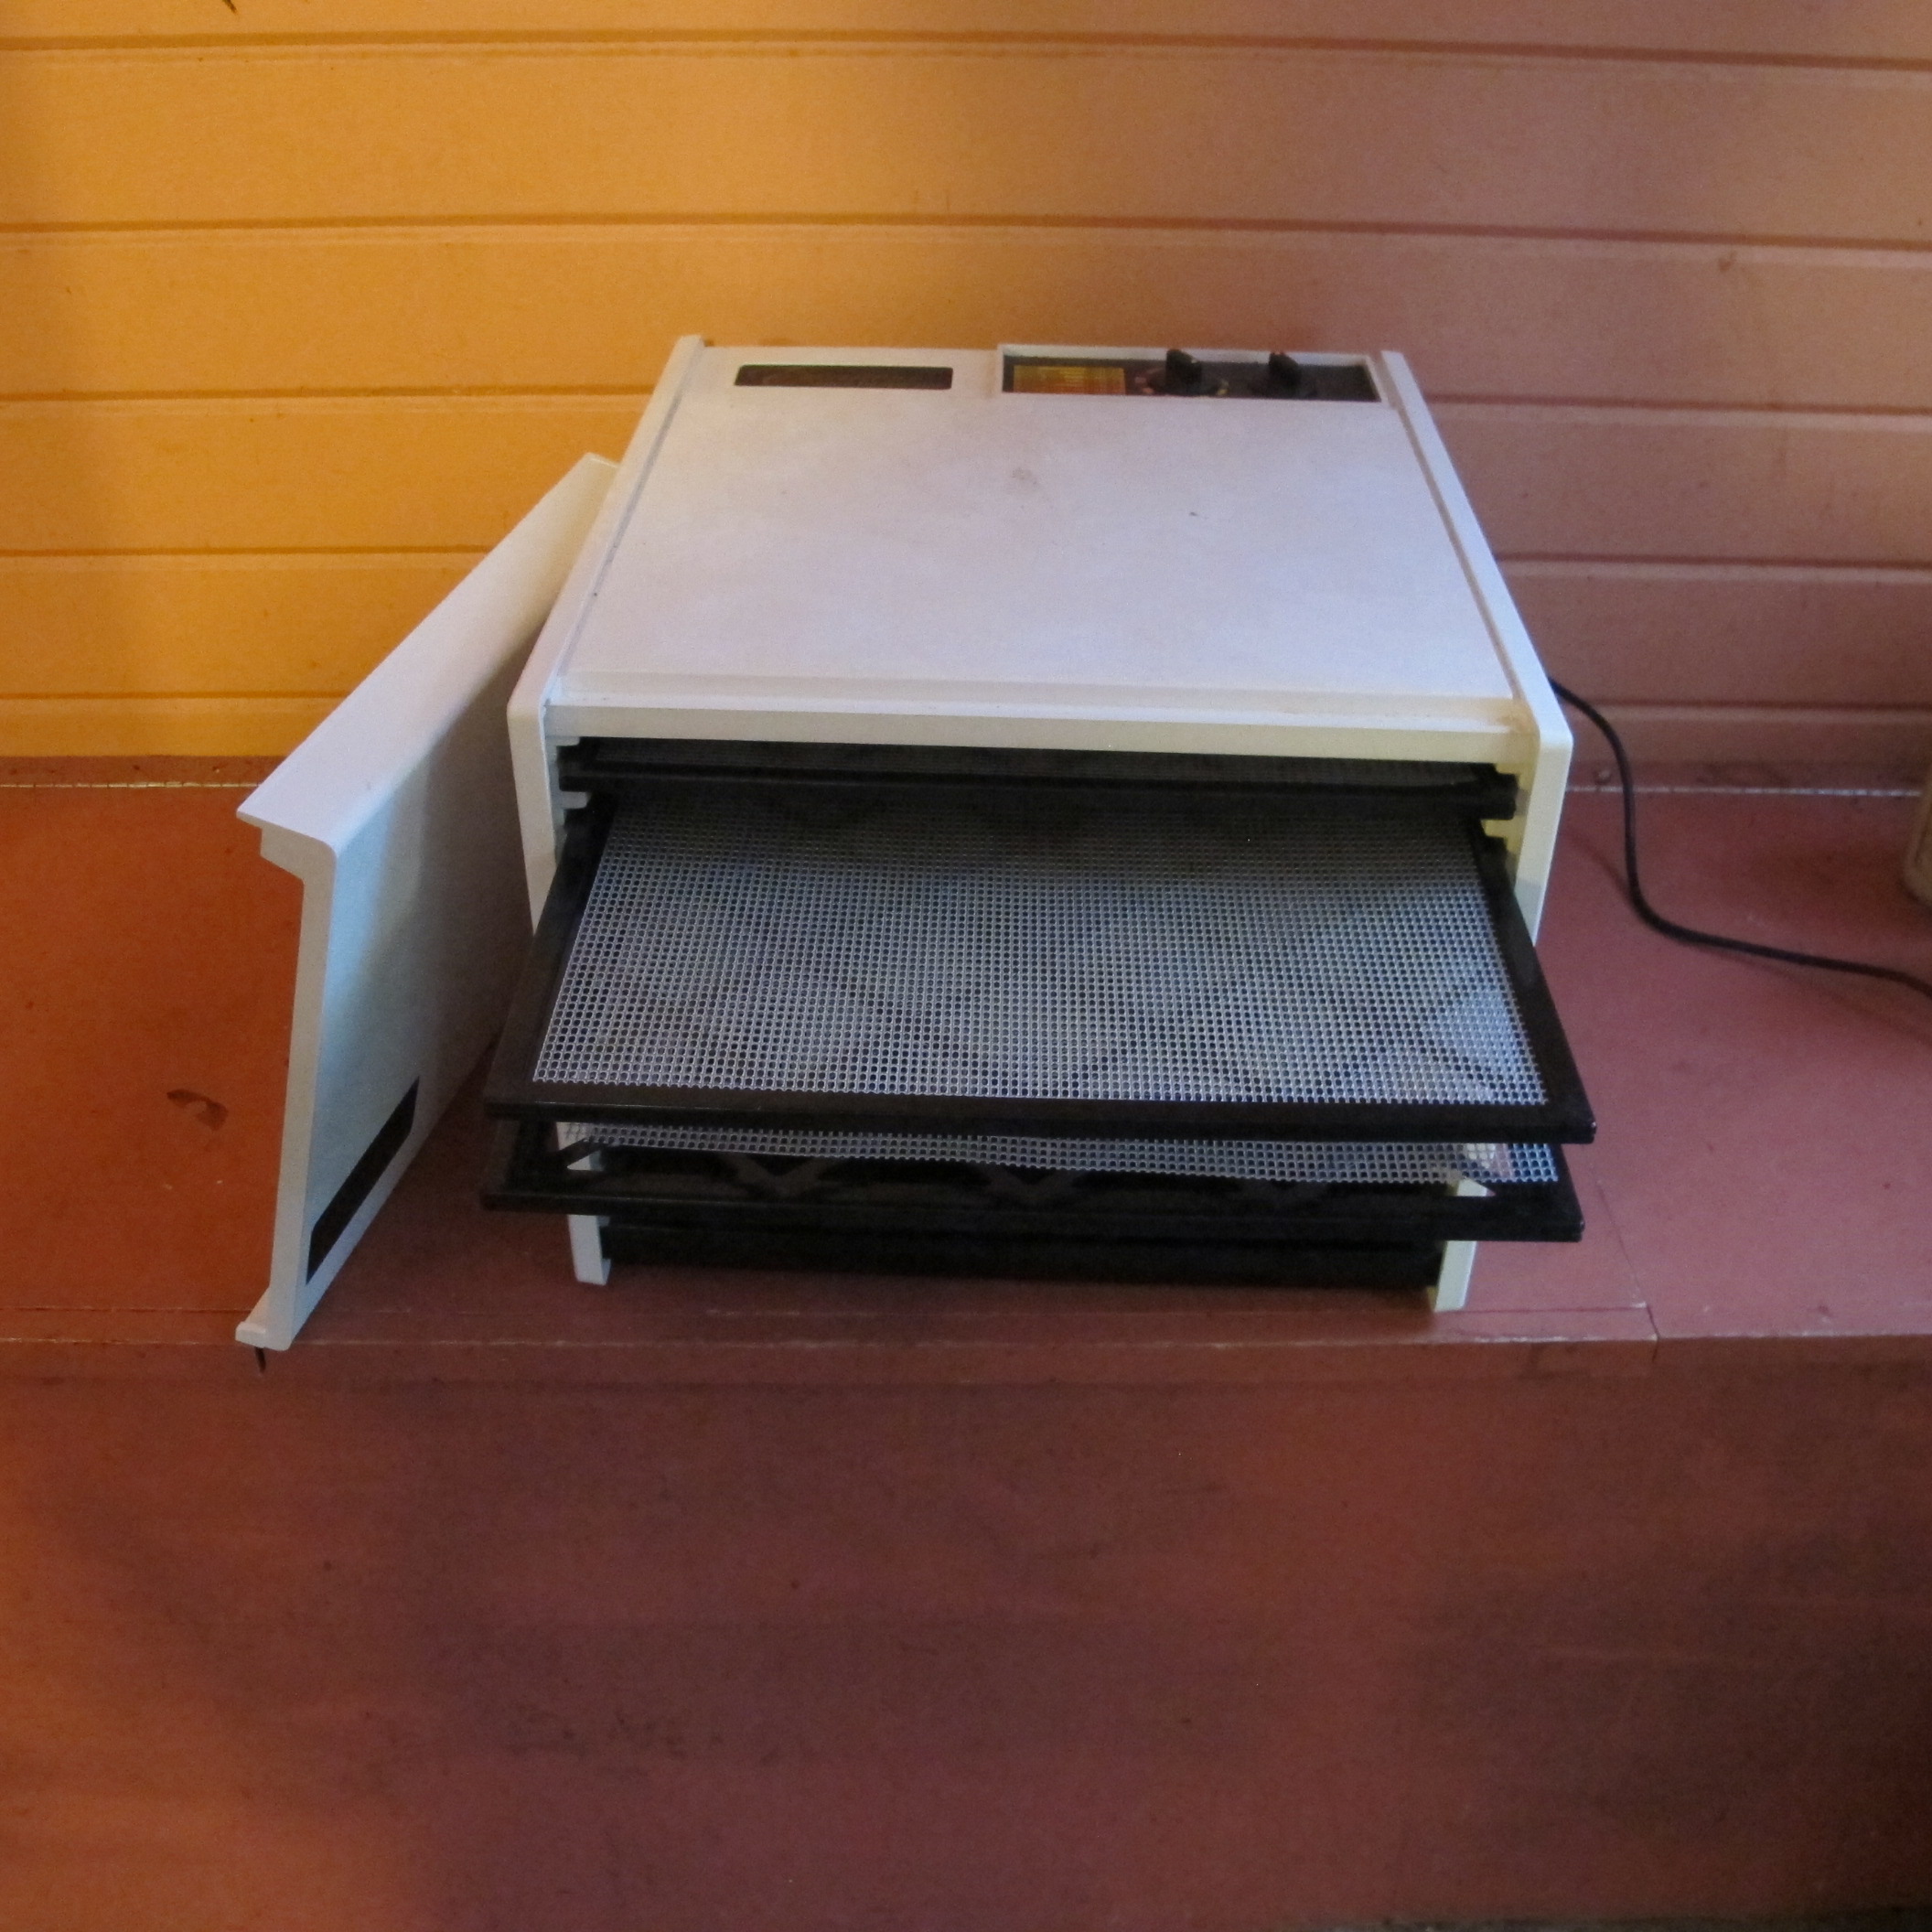
I have a couple of food dehydrators that I use to dry tomatoes, too. The Cadillac of dehydrators is the Excalibur. Mine is a $300 deluxe model that blows hot air sideways equally over all 9 trays. My other is the NESCO American Harvester, a serviceable machine that pushes air up or down through a stack of trays.

It’s time to plant more lettuce to go with the tomatoes
A sandwich is not really a sandwich, for me, without slices of tomato. One way to save slices of tomato for winter use is to roast them. I do so in the oven at low heat until they are caramelized and soft, not tough and dry. Then I place them in zipper bags and freeze them – but just one layer of tomatoes per bag. When I crave a tomato in my sandwich, I pull out a few slices and heat in my toaster oven until warm. Not a fresh tomato, but better than most sold in the grocery store in January.
Eating From the Garden Every Day of the Year
For breakfast I often drink a green smoothie that includes a banana, kale, some OJ, half a lime, fresh ginger, fresh mint if I have it, and water. It’s healthy, tasty, and uses kale I grew. I usually pick fresh ‘Winterbor’ kale from my garden until mid-December as even temperatures in the 20’s don’t seem to bother it. But all winter I have bags of frozen kale I can chop and add to my morning drinks – and winter stews.
Having a spare freezer – or more than one – is a wonderful way to keep eating from the garden all year. Here’s what I have in mine right now: tomatoes, peppers, green beans, broccoli, kale, strawberries, blueberries, leeks, apples for pies, peaches, applesauce and plum puree.
Tomatoes dominate the freezer. I freeze them whole, skins on, and make sauce or use them the way I would canned tomatoes. The skins come off easily – I just drop them into a pan of hot tap water for a couple of minutes, then rub the skins off. Of course you can leave the skins on, if you want.
I also have homemade tomato sauce in the freezer, complete with onions, garlic, basil, oregano and other herbs. And then there are the bags of tomato paste I cook down from tomatoes that I cut up, puree in a blender, and boil down till very thick. I freeze the paste in ice cube trays, then transfer the cubes to zipper bags when frozen.
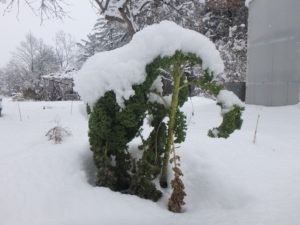
Kale is a good winter veggie
Freezing does take some work. I blanch kale, beets, broccoli, squash and green beans before I freeze them. That means I drop them in boiling water for a minute or so, put them in cold water, and then dry them well before freezing. The quick boiling kills the enzymes that cause aging, making for a better product. I don’t blanch tomatoes, peppers, fruit or leeks. But for best results it is good to eat those in year one, not year four or five.
The easiest way to keep food for eating all winter is to store it in a cool location. I have a cold basement and a cool area in the entry area of my house. Potatoes, carrots, kohlrabi and rutabagas store well in the basement with high humidity and temperatures in the 33 to 50 degree range.
When I have lots of root crops I store them in a cement block bin with a plywood lid. The bin is big enough for six 5-gallon pails. It keeps out the mice, holds in the humidity, and keeps the vegetables at a relatively constant temperature. I keep an indoor-outdoor thermometer sensor in it, so I can monitor the temperature from upstairs. If it gets too cold, I plug in an electric heat mat I also use for starting seedlings. I put a little moist sand in the bottom of each bucket to help with the humidity.
Other veggies need low humidity and cool temperatures. Those include onions, shallots, garlic and winter squash. I keep them on a wooden rack I got from Gardeners Supply, their “orchard rack”. I have that in the main part of the house where I have a woodstove – hence low humidity. But I keep them near the mudroom, which is unheated, so they stay cool. You can also keep squash under the bed upstairs in a spare bedroom with the heat off and the door closed.
Excalibur dryer does a good job on cherry tomatoes and more
Lastly, I dehydrate cherry tomatoes, hot peppers and apples. I find the drying process tends to concentrate flavors. I cut the cherry tomatoes in half, set the thermostat at 130 degrees, and bag them up when dry, but not brittle. Hot peppers I dry till brittle, and then grind them in my coffee grinder. That way I can add just a little zing to a dish, and avoid hot chunks. I grind the pepper seeds, too.
So here is a good winter stew made from my own veggies. You can add a pound of sausage or stew beef to this or leave it as a vegetarian dish. I do it both ways. If you use meat, brown it first in oil, then drain any excess oil and add the veggies.
Chop 2 yellow onions coarsely and brown in a cast iron pot. Then add the root vegetables according to what you have and what you like: 5 medium carrots cut in rounds (about 2 cups), 1 cup rutabaga cut in ½ inch cubes, 1 cup kohlrabi peeled and cut in ½ inch cubes, ½ to 1 cup celeriac, finely chopped. If you have no celeriac, substitute celery, they are relatives with the same flavor. Potatoes will go in the stew at the end, as they tend to fall apart if cooked too long.
Next add 5 frozen tomatoes, skinned and coarsely chopped. If you don’t have your own, add a 28 oz. can of crushed tomatoes, preferably organic. Add 3 to 4 cups water or broth, and perhaps a cup of apple cider. Add 1 to 2 cups chopped kale if you like kale. Simmer.
Garlic tends to burn easily if added with the onions, so add it after the liquid to avoid that. Use 1 to 3 cloves garlic, crushed or chopped fine.
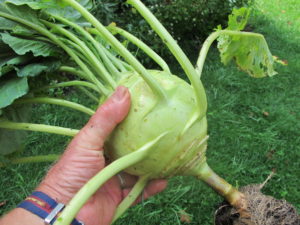
Kohlrabi is a good winter keeper
Next add herbs, according to your supply – and your taste. I have frozen parsley, and chop a couple of tablespoons of it. I add fresh rosemary from a plant on the window sill, a nice sprig chopped fine. A tablespoon of Herbs de Provence from the Coop is good, too. Then I add some ground hot pepper to add some zing. Simmer.
Lastly I add 2 cups potatoes cut in ½ inch cubes that have been boiled for 10 minutes in a separate pot. Drain, and add to the stew. Simmer another 10 minutes and serve. Enjoy!
Henry is the author of 4 gardening books and has been a UNH Master Gardener for over 20 years.
Tomatoes
This has been, knock on wood, a great year for tomatoes. I planted my seeds indoors earlier than I usually do, which meant that my plants went in to the ground earlier, and bigger. And there were no late frosts, so I’m eating tomatoes earlier than most years. Cherry tomatoes started producing in early July, and I picked my first full sized tomato on July 16. Lots of sun and adequate rain have pushed them along. Barring an attack of late blight, I will have more than I need to feed myself all winter – if I process them now.
My mother and grandmother canned tomatoes. They worked in a hot kitchen in August and September turning homegrown tomatoes into canned tomatoes and sauce. In order to avoid the deadly disease, botulism, they boiled jars seemingly forever. But now, in the day of chest freezers, we can make sauce and not have to go through the canning process. You can make sauce and freeze it for use in the winter. And there are lots of other ways to save the harvest.
First, my favorite technique: freezing tomatoes whole. I call it the “no-work” method. Just place clean dry tomatoes in gallon freezer bags, suck out any excess air with an ordinary straw, and place the bags in the freezer on a cookie sheet. I generally get 9 large tomatoes into a gallon bag. After the tomatoes are frozen, you can take them off the cookie sheets and stack the bags.
When you are ready to use the tomatoes for a soup or stew, you can remove the skins easily, if you wish, by running them under hot water and giving them a quick rub. Halve the tomatoes and cut out their attachment points, chop and cook. If you let the tomatoes thaw they will be mushy and no good for sandwiches. But cooked? They’re great.
Last summer I tried roasting tomatoes in the oven, and was very pleased with the results. I cut tomatoes in half, and placed them in a shallow roasting pan and placed them in the oven at 350 degrees. I cooked them until the tomatoes caramelized and lost most of their moisture. Then I placed them in zipper bags, one layer thick and put them in the freezer. To avoid the need for scrubbing the roasting pan, I cooked them on a sheet of aluminum foil. These tomatoes worked fine in sandwiches in winter. I just put the frozen tomatoes in the toaster oven to thaw and heat, and put them on bread. Yum!
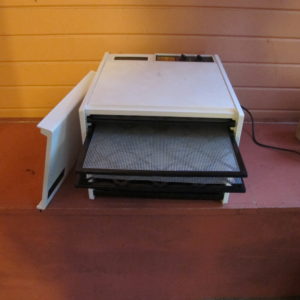
Excalibur dryer
I grow a lot of cherry tomatoes each year – 10 plants or more. I eat them every meal in season, and snack on them between meals. My favorite variety is ‘Sun Gold’, a hybrid. What do I do with the vast numbers of these sweet cuties? For years I have been cutting them in half and dehydrating them. I’ve tried all sorts of dehydrators, and think I have found the best.
The machine I use is the Excalibur. This machine has 9 square trays, a heating element, a thermostat, a timer and a fan that sits behind the trays. The fan and heater location is key. This machine blows hot air across the trays as opposed to all the others I have used, which send hot air up from the bottom or down from the top. Either way, the tomatoes closest to the fan and heating element dry first, and those farther away dry more slowly. So one must rotate the trays, or take out the dry ones and continue to dry those that are still not fully dried.
The Excalibur also uses less electricity – 660 watts an hour, while the NESCO unit I used for years uses 1000 watts – but both take about the same time to dry a batch of tomatoes. The Excalibur also can hold more fruit per tray as the trays are square and the others are round.
I store the dried cherry tomatoes in zipper bags. They are fine on a shelf in the pantry, in the fridge, or, for long term storage, in the freezer. When I want to use them, I just toss them into a stir fry or stew, and these little nuggets bring a “Wow!” to the lips of my guests. If you don’t dry them to the crispy stage, but leave them a little chewy, you can even use them in salads and sandwiches.
Lastly, I make a lot of tomato paste. It’s easy and allows me to use chunks of tomatoes that had bad spots that needed to be cut out. I core tomatoes over the sink and squeeze out juice and seeds. Then I pop them into the food processor and puree them, skins and all. I pour the liquid into a heavy enameled cast iron pot, and slowly boil the slurry until it is thick enough to stand up a spoon in it. I let it cool all night, uncovered, and spoon the paste into ice cube trays. Once it’s frozen I bag it in zipper bags. Then I can get just the right amount of tomato paste and never waste any – I just use 1, 2 or 3 cubes, depending on my recipe.
It is still work to put up the harvest, but the methods above are a lot less work than canning tomatoes in jars in a hot –water bath. And come winter? There is nothing better than eating your own tomatoes.
Henry is the author of 4 gardening books and a children’s fantasy-adventure called Wobar and the Quest for the Magic Calumet. His web site is www.Gardening-Guy.com.
Drying Fruits and Vegetables
This was a fabulous year for most fruits, particularly apples and pears. The abundance of it all made it impossible to eat all the fruit when ripe, so I have been processing fruit for the last few weeks. And
The Excalibur, by contrast, gets even heat and air on every tray because the fan/heater is in the back of the unit, so each tray gets equal air flow. The model I have has 9 trays, each measuring 15inches square. Not only that, the heater is programmed to fluctuate in temperature within a drying cycle to keep the fruit from getting too hot.
The NESCO unit uses 1,000 watts of energy per hour – that’s equivalent to a lot of curly light bulbs burning – but the Excalibur uses just 666 watts. Still a lot, but a lot less.
I compared the drying time for a batch of fruit, each dryer holding 15 sliced pears and 11 sliced apples. The NESCO dryer needed 9 trays for that amount of fruit, while the Excalibur needed only 7 trays. I left 2 trays empty in the Excalibur so that the 2 dryers would have equal quantities and I could compare drying times.
It’s difficult to estimate moisture content (to determine when a batch of dry fruit is adequately processed. I like the fruit chewy, not brittle. The bottom-heated NESCO dryer and the Excalibur dried the fruit in roughly the same amount of time – perhaps the Excalibur was a little quicker. The Excalibur is much quieter.
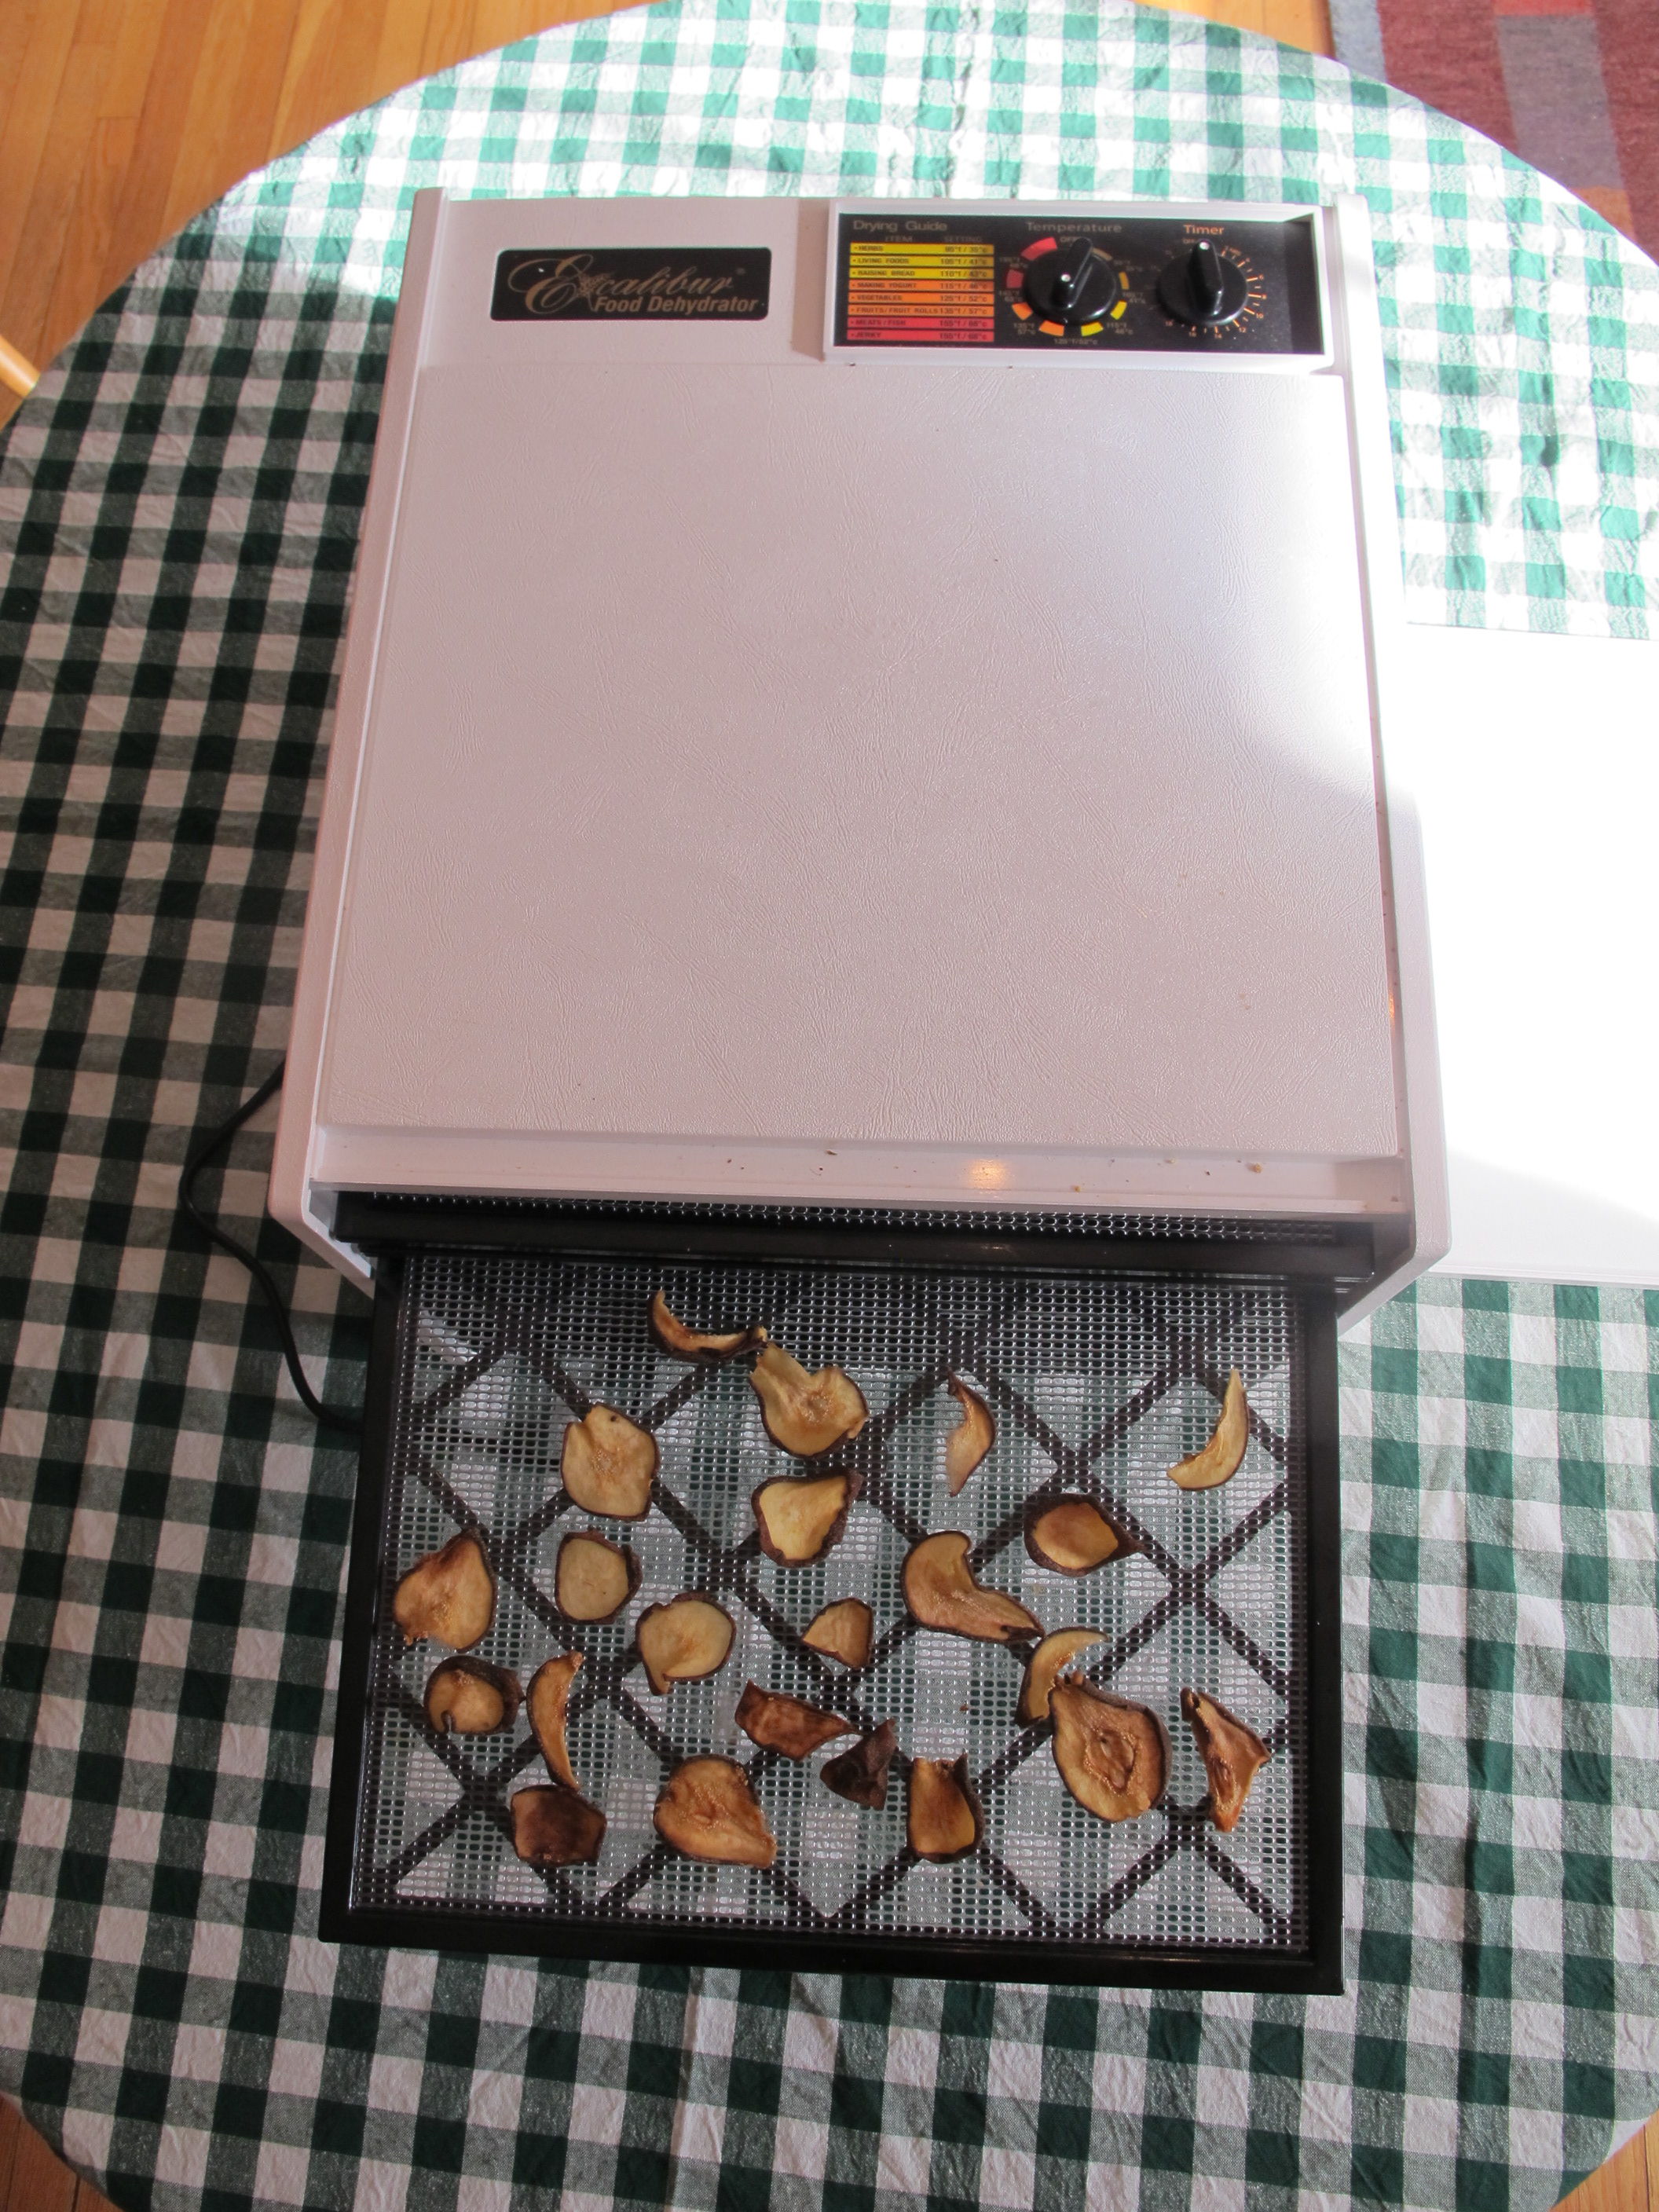
Excalibur with pears
In reading the instructions I learned that dried fruit is considered “raw food” if properly prepared. Too much heat can kill the enzymes of fruit, and that occurs, according to some research, at an internal fruit temperature of 140 degrees. But it is all right to start fruit at a higher temperature for the first two hours. There is a lot of water in the fruit at the onset – and the evaporation cools the fruit so the core temperature never hits 140 degrees – even if the machine is set at 155 degrees. This also shortens the drying time considerably, saving energy.
I have always dehydrated my hot peppers especially the very hottest ones. I dry them until they are brittle, and then put them –seeds and partitions included – in my coffee grinder. This allows me to sprinkle just a little bit of “heat” into a dish – or a lot, if it pleases me.
Blueberries have a waxy outer skin, and at lower temperatures they take forever to dry. But by cranking up the temperature for a while I can dry them in a reasonable time. I bet you could freeze them first – they often burst on freezing – then dry them.
Last weekend I finally pulled the last of my carrots. A few were damaged by rodents, or had cracked. I stored all the perfect ones and dried the others. I scrubbed them well, then cut them in thin slices. I started off doing the slicing with a knife, but soon switched to my food processor, which has a special “julienne” blade that did the job nicely. I will use the dried carrots in soups this winter.
I know that some gardeners like to make dried foods to take on the trail. You could dry carrots, green peppers, squash, tomatoes and onions – the start for a good stew. You can dry meat, too, or make jerky, but I’ve never tried that. Maybe this winter.
Dehydrating fruits and vegetables intensifies the flavors and brings out the sweetness. I love to nibble on my dried pears (which I make with skins-on) while driving the car. They provide me with great satisfaction – they’re as good as eating chocolate chips, but healthier.
Henry can be reached at P.O. Box 364, Cornish Flat, NH 03746 or henry.homeyer@comcast.net. His Web site is www.Gardening-Guy.com.