Six Less Common Veggies You Might Like
Posted on Sunday, May 17, 2020 · Leave a Comment
I don’t mean to sound like I’m bragging, but if it will grow in Cornish Flat, New Hampshire, I’ve probably tried it. Scorzonera? Sure, once, but I was not enthralled by this long, thin root. Peanuts? Once, didn’t get many. Gilfeather turnips? You bet. Many of the things I try I don’t continue to grow – they have to taste good, and be productive to qualify. Let’s look at a few that I do like, and that you might not grow – as yet.

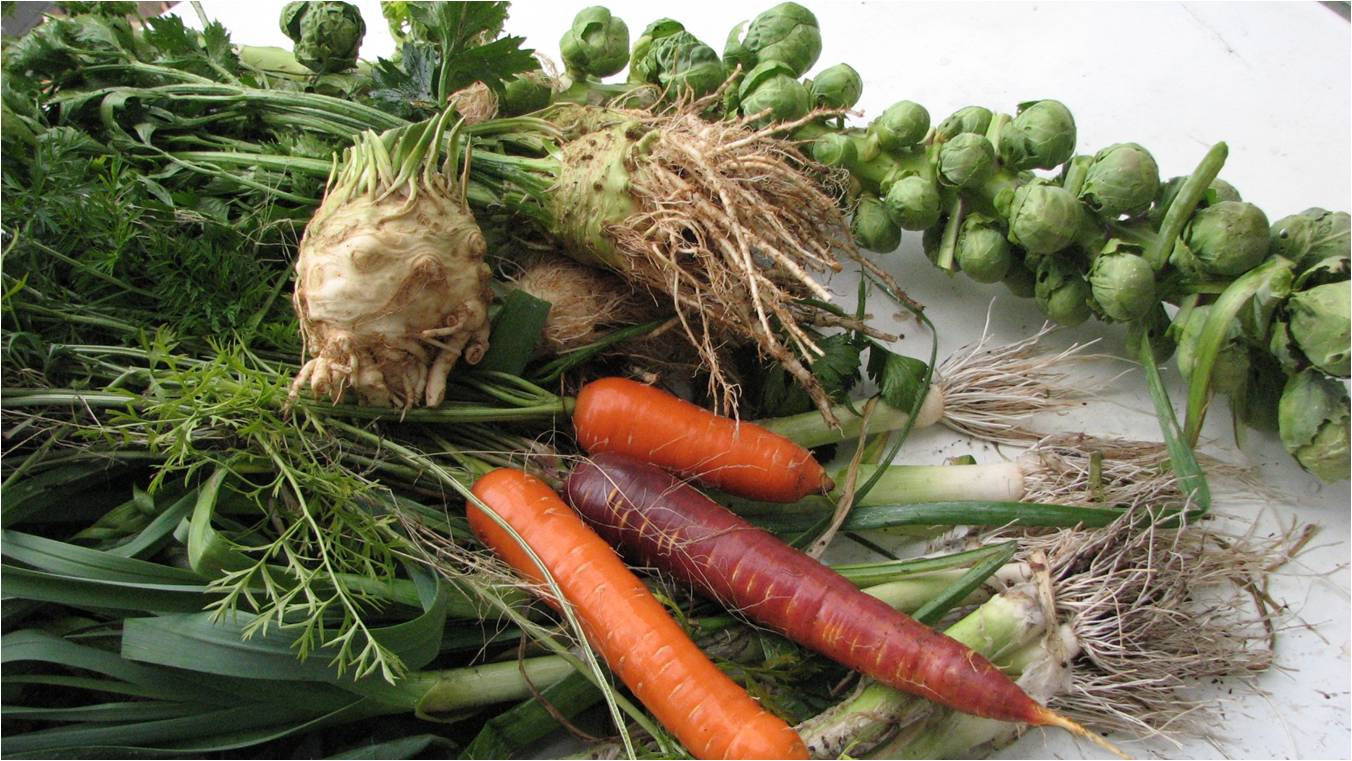
Celeriac with carrots, leeks and Brussels sprouts3
One of my favorites is celeriac, or celery root. This is a close cousin to celery, but less attractive to slugs and snails, and easier to grow. It is a funny looking root crop with many fat roots. It tastes very much like celery in a soup or stew, though it is not usually eaten raw. I peel the roots, and chop the round bulb into chunks for cooking. If stored in the vegetable drawer or a cold cellar with high humidity and cool temperatures, it will store all winter.
Celeriac grows best in rich moist soil. I start it indoors in March and plant it outside in late May, spaced 6 to 8 inches apart. If crowded it will not produce well. It also needs lots of moisture, so don’t plant it in dry, sandy soil. It takes a long time to grow to transplant size, so look for it at good garden centers – some will have starts for sale.
Kohlrabi is another funny-looking root vegetable. This has much of the bulbous root above ground, with leaves popping out on stems from the bulb. I’ve heard it likened to a space alien. But it’s delicious! Crisp, with a nice snap, it’s in the same family with broccoli and kale. It’s good in salads as well as stir fries. There are purple varieties, and white or green ones, which tend to be slower growing and good for long-term storage.
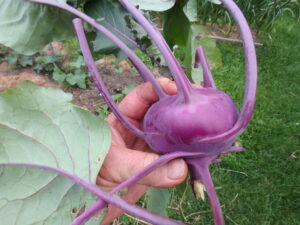
Try growing kohlrabi this summer
Kohlrabi germinates in less than a week and grows fast. Although you can start them indoors, you don’t need to. In most places you can start them now. Plant seeds outdoors 3 to 4 inches apart and thin every other one if all grow. They like consistently moist soil, so add compost at planting time.
Artichokes need a long growing season, so you should have planted them indoors back in early March. But more and more good garden centers are growing them, so might be able to find plants for sale.
They are big plants, up to 2 feet across with nice grey-green leaves. I sometimes plant them in the flower garden. In fact, the vegetable you eat is a flower bud. If you don’t pick them, they will open up and be quite pretty. I once saw them as flowers in an ancient abbey on the island of Iona, Scotland and they were quite striking. They’re related to thistles. Your artichokes will be smaller than store-bought.
In California artichoke plants are perennials, but even with mulch I have never had one survive a winter here. One called Imperial Star is an annual, and is best for growing here. They need rich, dark soil with plenty of compost and some organic fertilizer. Plenty of moisture is needed, too.
Although I once had a bumper sticker that said “Eat More Kale”, kale has become mainstream and needs no advertising. But I’d get one that said something like, “Rejoice in Rutabagas!” to put on my truck, if I could. They are easy to grow, mild and tasty, and don’t suffer from things that make potatoes problematic (potato beetles and fungal blight). I use them as a substitute for potatoes in stews.
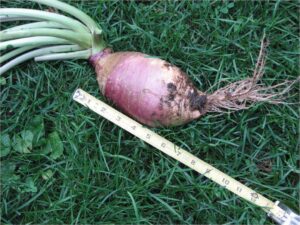
Rutabagas are a good substitute for potatoes
Rutabagas are also relatives of kale and broccoli, members of the Brassica family. I plant them by seed in June, and thin to 8 inches as these are big root crops that will not produce well if crowded. Although flea beetles can bother them, I’ve never had anything eat mine. Cover with row covers if you have a problem.
The skin of a rutabaga is reddish purple, and the flesh is yellow or orange. They store well – all winter in a cold cellar or spare fridge. ‘Helenor’ and ‘Laurentian’ are the varieties I‘ve grown, but I imagine all are fine.
Leeks are some of the easiest veggies I grow. Buy them as small plants at a good garden center, or start them from seed indoors in March. Space them 4 to 6 inches apart in a trench 3 inches deep. Fill in the trench a month later. If you want more of the white part of the leek, you can mound up the soil around them.
In the fall I harvest leeks, wash them and cut off the roots. I chop them and put them right into the freezer. They are then available as an onion substitute, or to make one of my favorite soups, leek and potato.
Tomatillos are not commonly grown – even by me, but they are commonly required for Mexican dishes. They are big plants, like a tomato, but I have read that they do best sprawling on the ground, not in a cage.
The first time I grew them I just planted one, and got no fruit: you need 2 plants or more for cross pollination. So buy 2 or more plants, and plant them 2 weeks or so after you plant your tomatoes. Remember, they would much rather be growing in Mexico!
Think about digging up some of your lawn this spring to increase the size of your garden. Hungry times might be ahead, who knows? The good thing about that is, a new garden is much less likely to have tomato blight problems. So grow some tomatoes in your front yard. And since your garden will be visible from the street, you’ll do a better job weeding, I bet!
Henry Homeyer started growing vegetables with his Grampy in 1948 or so, and generally eats something he has grown every day of the year. He is the author of 4 gardening books. E-mail him at
henry.homeyer@comcast.net.
How to Make a Halloween Stew Using Veggies Fresh from the Garden
Posted on Monday, October 24, 2016 · Leave a Comment
Here it is, late October and I’m still harvesting food from my garden. All of it could have been picked earlier, but I love letting vegetables stay in the garden as long as possible, and eating them the day they were picked. And I enjoy making a dish that uses as many of my own ingredients as possible.
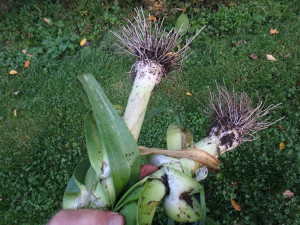
Fresh leeks
For my Halloween stew I used potatoes, leeks, carrots, kale, parsley and thyme directly from my garden, and have others including Brussels sprouts, arugula, celeriac and non-heading broccoli. You could get any of these you need from your local food Coop, which will have them from local farmers. In my opinion, local food is better by far than food trucked across the country.
This stew is really just a variation on my old favorite, leek and potato soup. To make a Halloween stew I think you need something bright orange – reminiscent of Jack-o-lanterns. I made it first with winter squash that I steamed in big pieces and then scooped out in balls with a melon baller, but I didn’t find that the flavor worked with the other ingredients. So I next tried it with carrots, which tasted much better. If you have little kids, the carrots can be made into round balls by steaming them and using a melon baller; otherwise chunks are fine.
Cut 4 strips of thick lean bacon lengthwise, and then into pieces half to three quarters of an inch long. Cook them on low heat in a heavy iron pot. Prepare 2 cups of chopped leeks by cutting them lengthwise into quarters, and then chopping into half-inch pieces. Brown in the frying bacon. Have at ready 4 cups of potatoes chopped into half-inch cubes, and add to the leeks. Brown for a few minutes, then add a quart of water. Bring to a boil, then reduce the heat to a simmer.
Next add 1 or 2 cups of carrots – either as chunks or balls, as mentioned above. Kale is optional in this stew. It adds a nice green color, and I like the flavor, but not everyone does. If you add kale, you will need to add extra water. Toss in a sprig of fresh thyme and a quarter cup of chopped fresh parsley. I like the flat-leafed kind best, though I grow curly parsley, too.
Simmer the stew for 20 minutes or until the potatoes are soft and ready to eat. Add a cup of milk and a dash of nutmeg at the end, but don’t let the stew boil after the milk has been added.
To make this recipe I picked all the vegetable the day I made it – October 19. Carrots are frost hardy and mine had already been through a hard frost. In fact, you can leave your carrots in the ground through the winter, digging them as needed. I’ve done this and know they get even sweeter after getting very cold –some of the carbohydrates in root crops like carrots and potatoes turn to sugars below 50 degrees F.
To leave carrots in the ground for winter eating, put a stake at each end of the bed: otherwise you might not find them easily if you get a lot of snow. I cover the bed with a few inches of whole fall leaves, and then a layer of mulch hay or straw. That will keep the soil from freezing solid.
There are two problems with storing your carrots this way, however: some carrots need to be picked before they get too big or they will split. But if yours are still in the ground, you should know already whether that is a problem. I grew some great purple carrots this year, but the bigger ones split, so I dug them all. A split carrot will rot if left in the ground too long.
The other problem? Rodents. Mice, voles, chipmunks, field rats and some squirrels might gnaw on your carrots if left in the ground. That’s why I like having a spare fridge in the cellar to store vegetables for the winter.
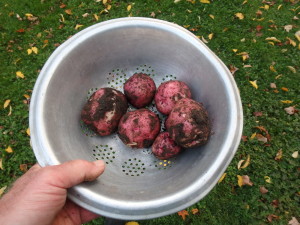
New red potatoes
I try to grow between 25 and 50 pounds of potatoes each year. My plants produce between 1 and 3 pounds of potatoes each, so I generally plant 25 to 35 plants. This feeds me, allows me to give some away most years, and provides me with organic seed potatoes to start next year’s crop. I once went 20 years without buying a potato, though I only had them to eat for 9 or 10 months each year. I don’t mind eating seasonally, in fact I think it makes me appreciate my food even more.
I’ve tried several different techniques for storing my potatoes. I’ve stored them in a cement-block bin (with a plywood lid) in a cold basement. Last year I put them in an antique 25 gallon crock with a plywood lid. Often I’ve stored them in a spare refrigerator. The trick is to maintain high humidity and a temperature between 33 and 50 degrees F. Putting an inch of wet sand in the bottom of a storage bucket works great for that, though you will have to re-moisten the sand after a while.
This year I did 2 plantings of potatoes: the main planting was in early June, the second in early August. For that second planting I had found some sprouted potatoes in the storage crock I had used, and decided to see what would happen if I planted them in August. Not all of the potatoes sprouted – they had been lurking in a dark basement for months – but those that grew did fine. They had about 10 weeks of growing time and were full sized and healthy. No bugs, either.
Growing my own food isn’t just about saving money, though I like that. Really it’s about the satisfaction of eating food that’s fresh, that tastes great and that has never been sprayed with chemicals.
Read Henry’s twice-a-week blog posts at https://dailyuv.com/gardeningguy. Henry is the author of 4 gardening books, most available at www.Gardening-Guy.com.
More on Growing Great Veggies
Posted on Monday, May 16, 2016 · Leave a Comment
This year Mother Nature, if she were a middle school student, would be at best a tease, and at worst a bully. Or maybe the Wicked Witch of the West. She gives us warm and sunny – then threats of snow or hail. Come on, Spring, let’s get with the program. We have veggies we want to plant!
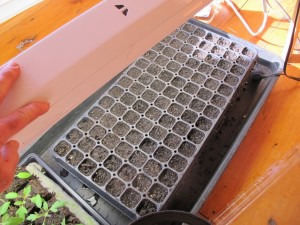
Corn seeds planted in plug tray indoors
Recently I wrote a column that promised tips on growing vegetables “A to Z: Artichoke to Zucchini” – but didn’t finish the B’s and skipped to zucchini. Huh. Today I’ll be less ambitious: The last of the B’s and most of the C’s. There really are a lot of great veggies we can grow.
Beets are best started outdoors once the soil temperature has warmed to 60 degrees or even warmer. Yes, they grow well in cool temperatures, but are slow to germinate in cold soil. Plant 2 to 3 inches apart, and be prepared to thin them in a month to 3 to 4 inches apart. Each “seed” is actually a seed capsule containing 2 to 6 seeds. They like soil that is near neutral in pH, so if you have acidic soil, add a little limestone. And they are deep rooted, so plant in fluffy soil for best results.
Hoping to jump the gun this year, I planted some beets in flats indoors on April 10. I started them on an electric seed warming mat but only got 20 percent germination, and the plants have long stems and are flopping over – even with bright fluorescent lights over them. I won’t do it again. I’ll plant mine outdoors this week.
Carrots also want fluffy light soil – and few if any stones. Comb through the soil carefully to get out rocks – I use a CobraHead weeder for that. Add lots of compost and some bagged organic fertilizer at planting time and again in early July.
Carrot seeds are tiny, but it’s worth your time to plant them individually, or nearly so. It will save a lot of time thinning them later on. Put seeds in the palm of one hand, and push one away from the rest with a pencil or pocket knife. Pick it up, plant it, and repeat. Tedious, yes. I like to plant them about an inch and a half apart, and thin to 3 inches when the thinnings are big enough to be worth eating.
Cauliflower is fussy. If it gets too hot or too cold it will “button” and not form a proper head. And unlike broccoli, cauliflower makes no side shoots (with rare exceptions). There is a purple one that I have grown, gorgeous in the garden but it turns gray when cooked.
Likewise, I don’t grow celery. It attracts slugs, gets woody and tough if the soil dries out, and is generally unsatisfactory. But I’m a serious cook and often need that celery flavor. Instead, I grow celeriac, also known as celery root. This is a great root crop that is pest free and stores for a long time. It’s funny looking with lots of roots that I cut off the bulb. Then I chop or grate it.
Celeriac
Celeriac, unfortunately, is not often sold in 6-packs at the garden centers. But it’s worth asking for it as the seeds germinate slowly and take a long time to get big. I planted mine on April 10 and they are just an inch tall 5 weeks later. Still, it will grow well into the fall so you could try planting seeds. Celeriac needs soil with plenty of moisture all summer.
I avoided growing corn for decades, instead I bought just a couple of ears at a time. I’m a bit like a raccoon: I tend to glut on it when there’s plenty in the garden ‘cause it’s so darn tasty! But for the past 2 years I have grown it. Here’s what I have discovered: you do need to plant it in blocks of 4 rows to get good pollination. And it needs plenty of supplemental nitrogen to do well. Last year I ran out of fertilizer and thought that since the soil was good, it would do fine. But corn in that section was short and spindly.
Fencing is probably the best to keep out coons, but I also used some solar powered blinking red lights that are said to scare them off (www.niteguard.com). Those are touted as deer repellents, too. I had some raccoon damage, but I probably needed more of them as the corn patch was very long. You need a minimum of 4 units to point in every direction.
Cucumbers are a summer favorite of mine, and I’ve already started some seeds indoors. They’ll go outside in mid-June after frost and when the soil is nice and warm, say 65 degrees. I used to plant seeds outdoors, but the plants were often killed by striped cucumber beetles that would strip off all leaves in a single night. Now I plant them when they have vines 6 to 12 inches long with some nice big leaves.
If you have had trouble with beetles but want to direct-seed your vine crops, you can cover the hills with row cover, also called Reemay. It is a thin agricultural fabric that breathes and lets sunshine and rain through. But sometimes the beetles, which emerge from the soil, are already waiting for you before you put it down. Be sure to rotate your planting sites for vine crops like cukes.
Mother Nature, if you’re listening: I’ve had it with this weather. Don’t make me release the flying monkeys.
Henry is now blogging twice a week. See the blog at https://dailyuv.com/henryhomeyer. You can sign up to get an e-mail alert every time Henry posts something.
Groundhog (Day) Soup
Posted on Wednesday, February 10, 2016 · Leave a Comment
The old timers say that on Ground Hog Day we should still have half our wood supply – or more. This year I had more than half as it’s been a warm winter. Or perhaps not a real winter at all. At the half way point I always want to still have plenty of vegetables left from the summer, and I do. To celebrate Ground Hog Day this year I made a soup of my own vegetables, largely with root crops stored in the basement in an old fridge. Here is what I used:
Ground Hog Soup
1 rutabaga, cut in ½ inch cubes
1 kohlrabi, cut in ½ inch cubes
5 carrots, cut in rounds
3 medium-small yellow onions, finely chopped
½ a small celeriac, finely chopped
1 huge garlic clove, finely chopped
5 frozen whole large tomatoes (or substitute a 28 oz can crushed tomatoes)
2 cups winter squash, steamed
2-3 tablespoons finely chopped fresh ginger
1 tsp dried parsley
¼ to ½ tsp dried hot pepper (optional)
fresh rosemary (3-4 sprigs)
1 qt vegetable stock
1 cup cider
olive oil, salt and pepper as needed

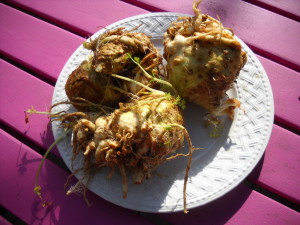
View of interior of celeriac
To make the soup I began by sautéing the onions in olive oil until translucent. I use a heavy enameled iron pot for this. While the onions were cooking I chopped the rutabaga and kohlrabi into half-inch cubes, and the carrots into rounds. I added a quart of vegetable stock (I could have made my own, but cheated and used store-bought). Then I put in the root crops I’d cut up and turned down the heat to simmer. I added a cup of cider made from my own apples that I’d frozen, then thawed for this.
I’m sorry to admit that my supply of whole frozen tomatoes is getting low and will have to revert to store-bought canned tomatoes before the new crop comes in this summer. I freeze whole tomatoes in zipper bags in September because it is such an easy way to put them up, much easier than canning. Now I just run them under hot tap water and rub off the skins. I let them sit for a few minutes, then chop them up and toss into the pot.
I added some Espelette hot pepper powder – my own that I dried and ground in the coffee grinder – but you can add jalapeno and use more or leave it out altogether. I added dried parsley and fresh garlic, rosemary and ginger at this time, too.
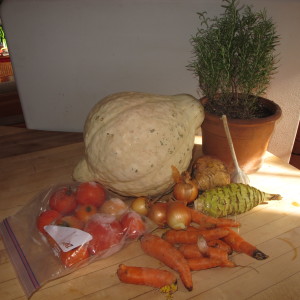
Hubbard squash and other winter veggies for soup
I always have plenty of winter squash. This year I grew 2 large Hubbard squash in addition to many smaller Waltham butternut squash. For this soup I cracked open a Hubbard even though I couldn’t use all the meat from this 10-pound squash all at once. I cut it into many pieces, removed the seeds, and steamed it in a stock pot until it was soft.
I separated the flesh of the squash from the leathery skin with a large spoon and used 2 cups of the meat for this soup. The rest I cooled, then bagged and froze for later. I blended the squash in my food processor with liquid and tomatoes chunks from the soup pot, though you could use chunks of squash in the soup instead. I find pureeing it makes for a nice thick soup.
Last summer I dug my rosemary in mid-September and potted it in a 50-50 mix of potting soil and good compost. I’ve had it in a south-facing window and it has some soft growth as it leans toward the window, but is healthy, overall. I will start increasing the water to it as spring gets nearer. By March it will need twice as much water as I give it now. Three sprigs of this added good flavor to my soup.
A few words about rutabagas and kohlrabi. They are both great “keepers” for winter storage. Rutabaga grows well in full sun and rich, lightly moist soil. They need to be thinned to 8 inches apart early on or else you’ll get big tops and small roots. The flesh is sweet, not bitter the way some turnips can be. It works like potatoes in a soup, but never crumbles apart the way potatoes do.
Kohlrabi comes in purple or white varieties, and both are crispy and fresh either in a salad, soup or stir fry. ‘Kossak’ is a white variety that can be left in the ground all summer, getting huge – 8 inches or more – but not tough. It is designed for winter storage, and I usually grow some. Thin to 6 to 8 inches apart for good production, more if you are growing Kossak.
If you don’t have rutabagas or kohlrabi, you can substitute potatoes and perhaps add something else from your garden. I generally boil potatoes separately when adding to a soup or stew, and add them towards the end so that they are not mushy or crumbly. I bet green beans would be good in this soup, too. Whatever you use, it’s bound to be good. Bon appetit!
Henry gardens and cooks in Cornish Flat, NH. His e-mail is henry.homeyer@comcast.net. Or write him at P.O. Box 364, Cornish Flat, NH 03746. Please include a stamped envelope if you want him to answer a question.
What I Learned Last Summer
Posted on Wednesday, October 28, 2015 · Leave a Comment
As I calculate it, I’ve been gardening for 66 years – or at least hanging out in gardens. I have memories of being in the garden with my grandfather, John Lenat, when I was three. Technically I was “helping” Grampy, though my role was probably limited to things like tossing weeds into his wheelbarrow if the weeds missed the wheelbarrow when he threw them. Still, I’ve spent a lot of time in the garden since then. And each year I still learn plenty in the garden. Let’s look at what I learned this year.
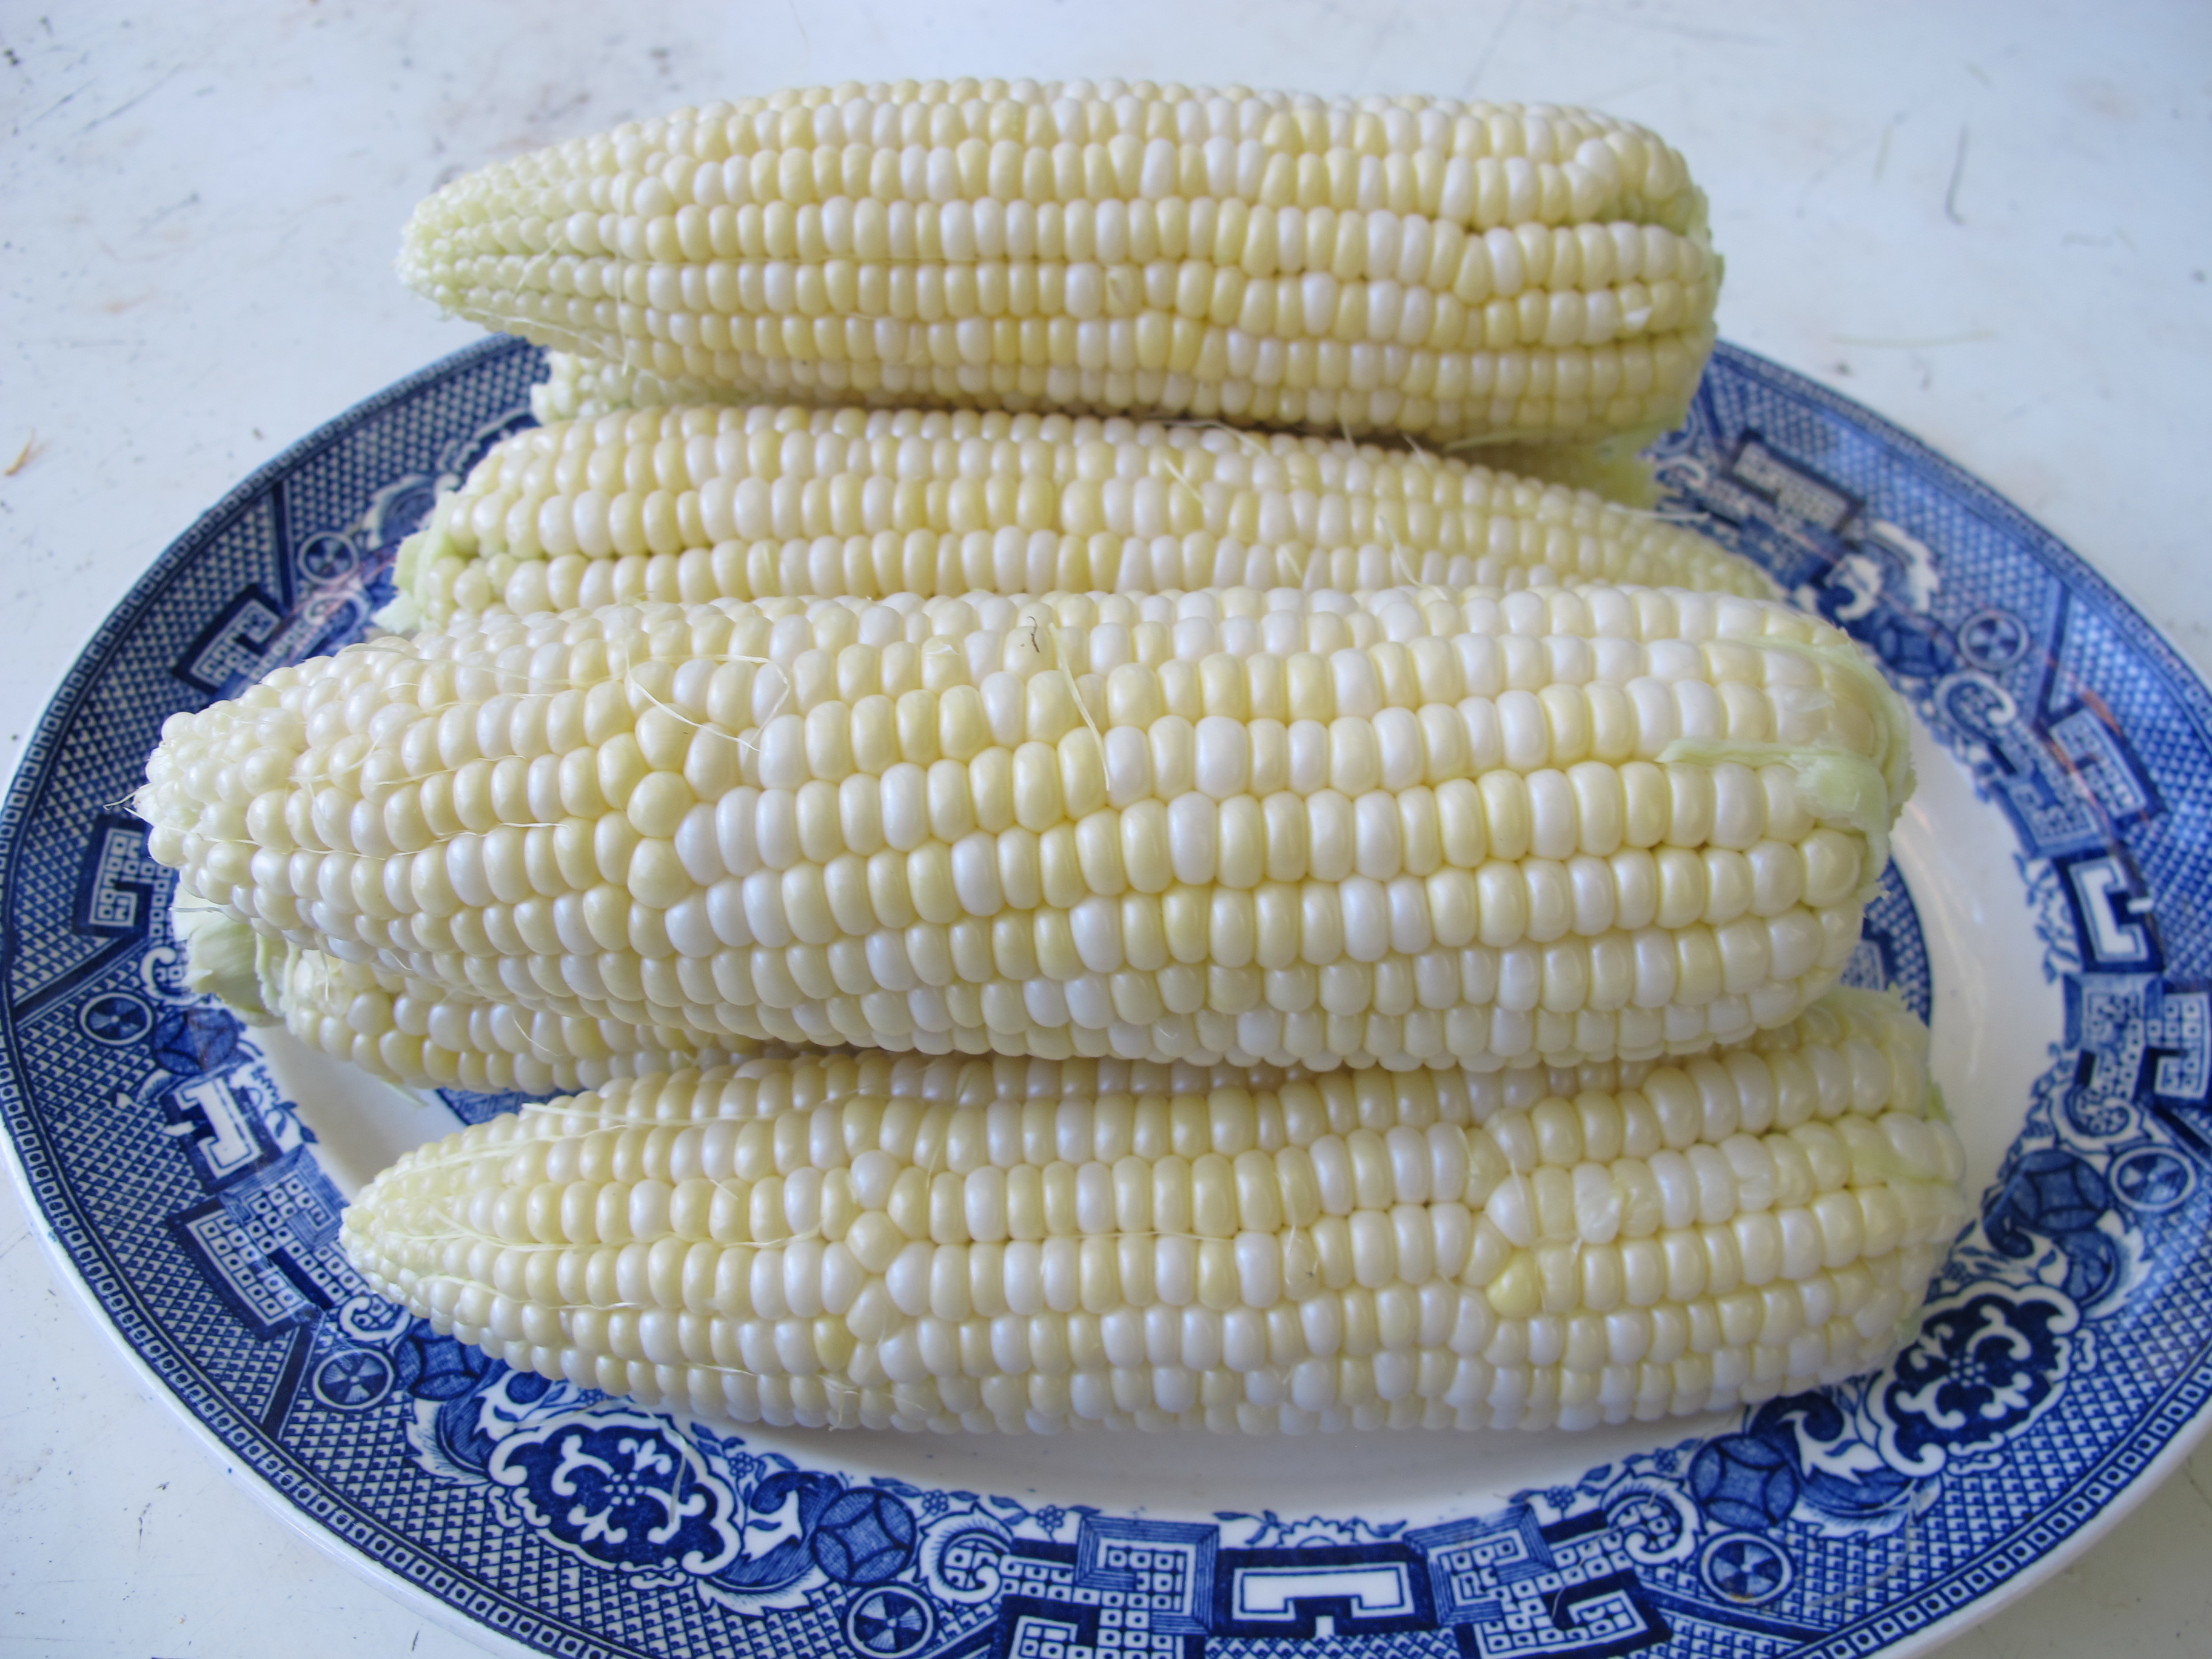
I haven’t grown sweet corn often, but these last two years I’ve had the use of a farmer’s field to grow corn, potatoes, watermelons, pumpkins and more. It’s been great fun to have pretty much unlimited space for growing anything I want – and enough space to grow food to give away. So I grew sweet corn.

Organic Corn from my Garden
Farmers say corn is a “heavy feeder” and they give it plenty of nitrogen, one of the three nutrients found in chemical fertilizers. Nitrogen drives green growth and makes plants get big, fast. Inadvertently I did an experiment with my corn: half got supplemental nitrogen, half did not. It wasn’t a planned experiment: I had some bagged organic fertilizer, one called Pro-Gro, and gave it half my corn. Then I ran out of fertilizer and said to myself, “This is good rich soil, I’m not going to go back home (6 miles from the field) to get more fertilizer. It’ll be fine.”
The difference was dramatic: the corn that got fertilizer was big and produced nice corn. The other? Scrawny with small ears barely worth picking. Even those dang raccoons ignored it, mostly.

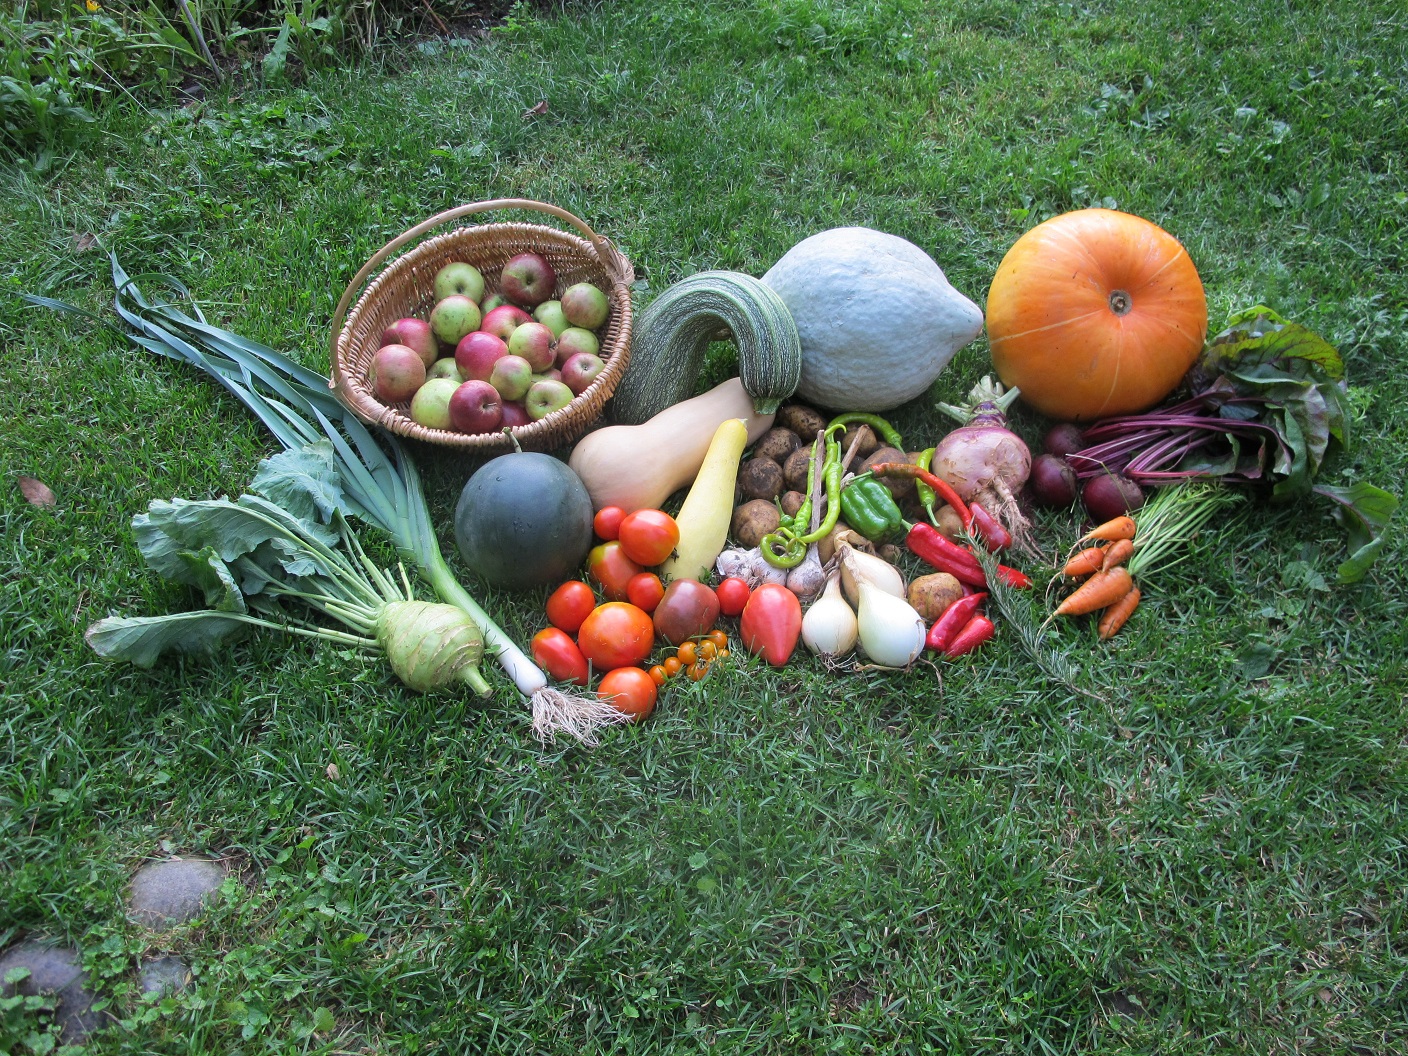
This year’s harvest, including watermelon
I had not grown watermelon in 30 years, as I had decided that I live too north to make it worthwhile. But our local farmstand grows nice small watermelons, and since I had the space, I decided to give some a try. I bought a 4-pack of plants in May, planted them in early June, and got a couple of watermelons from each plant.
Here’s what I learned: watermelons don’t take up so much space, or at least not the mini-melons. My melon sent out two vines each, and I directed them in opposite directions, running down the row. They grew up to 20 feet, but the leaves were relatively small, and they just went by other plants in the row without troubling them. That meant that I found melons in with the summer squash, but I didn’t mind.
Deciding when to pick the watermelons was, at first, challenging. The variety I grew (probably one called ‘Sugar Baby’) produced nice 6- to and 8-inch watermelons. I was told by a local farmer that ripe watermelons should sound hollow when tapped. The first one I picked was pink inside, not red, and clearly needed more time on the vine. We ate it anyway. But I learned to be patient. Watermelons don’t go mushy if you don’t pick them, or get tough and bitter. They just get sweeter, and wait patiently for you. The rest were all wonderful, and I shall grow them again.
A friend visited Monticello last year, and bought me some seeds, including sesame seeds. I planted some indoors last spring, and planted them in the ground in early June. I remember from my Peace Corps days in West Africa that sesame was a big plant, so I left plenty of space for these. I didn’t need to. Mine got no taller than 2 feet tall, and each plant produced perhaps 50 small seed pods. If you want a supply of sesame seeds, you need lots of plants. I won’t bother to do it again.
This past winter I read that tomatoes produce better if you grow them without added fertilizer. In the past I’ve always added both compost and bagged organic fertilizer in each planting hole. This year I did not add fertilizer and, as predicted, did not get those 6-foot tall plants I am used to. I got smaller plants, but they produced smaller loads of tomatoes, too. Next year I will use fertilizer again – but maybe less than the handful I usually toss in the planting hole.

Celeriac with carrots and Brussels sprouts
I don’t normally grow celery. It tends to be tough, stringy, and attract slugs. Instead I grow celery root which is also called celeriac. Celeriac is a related plant that produces a big bulb-like root that tastes like celery when grated into soups and stews. I start it by seed in March, and grow it in full sun in soil that does not dry out.
This year I forgot to plant any seeds, so bought two 6-packs of started plants. But one of the 6-packs was celery, not celeriac. I didn’t notice the difference until mid-summer, as the leaves are similar. The celery was better than I had remembered: not the big stalks one finds at the grocery store, but reasonably sized and not too stringy. And the slugs? They ate some, but were not awful. What did I learn from this? Always start your own seeds if you want to be sure to get what you want.
Every year is different, and every year I learn from my mistakes and experiments. Maybe if I reach 100 years old I’ll know it all. I hope not!
Henry is a UNH Master Gardener living in Cornish Flat, NH. Reach him at henry.homeyer@comcast.net. His website is www.Gardening-Guy.com.
Eating from the Garden
Posted on Wednesday, December 24, 2014 · Leave a Comment
Here it is, officially winter, and I’m still eating from my garden. I recently made what I call a winter salad: grated carrot and celery root (also known as celeriac) with a vinaigrette sauce. Sometimes my winter salad also gets grated or chopped apple, or some dried cherry tomatoes. Only the ingredients for dressing are bought – vinegar and oil – though I have been known to even make my own vinegar some years. Of course dried currants or raisins are also nice in that salad, but I don’t grow those. I could put in dried blueberries, as I do dry a few each year, but haven’t tried them in the salad yet.

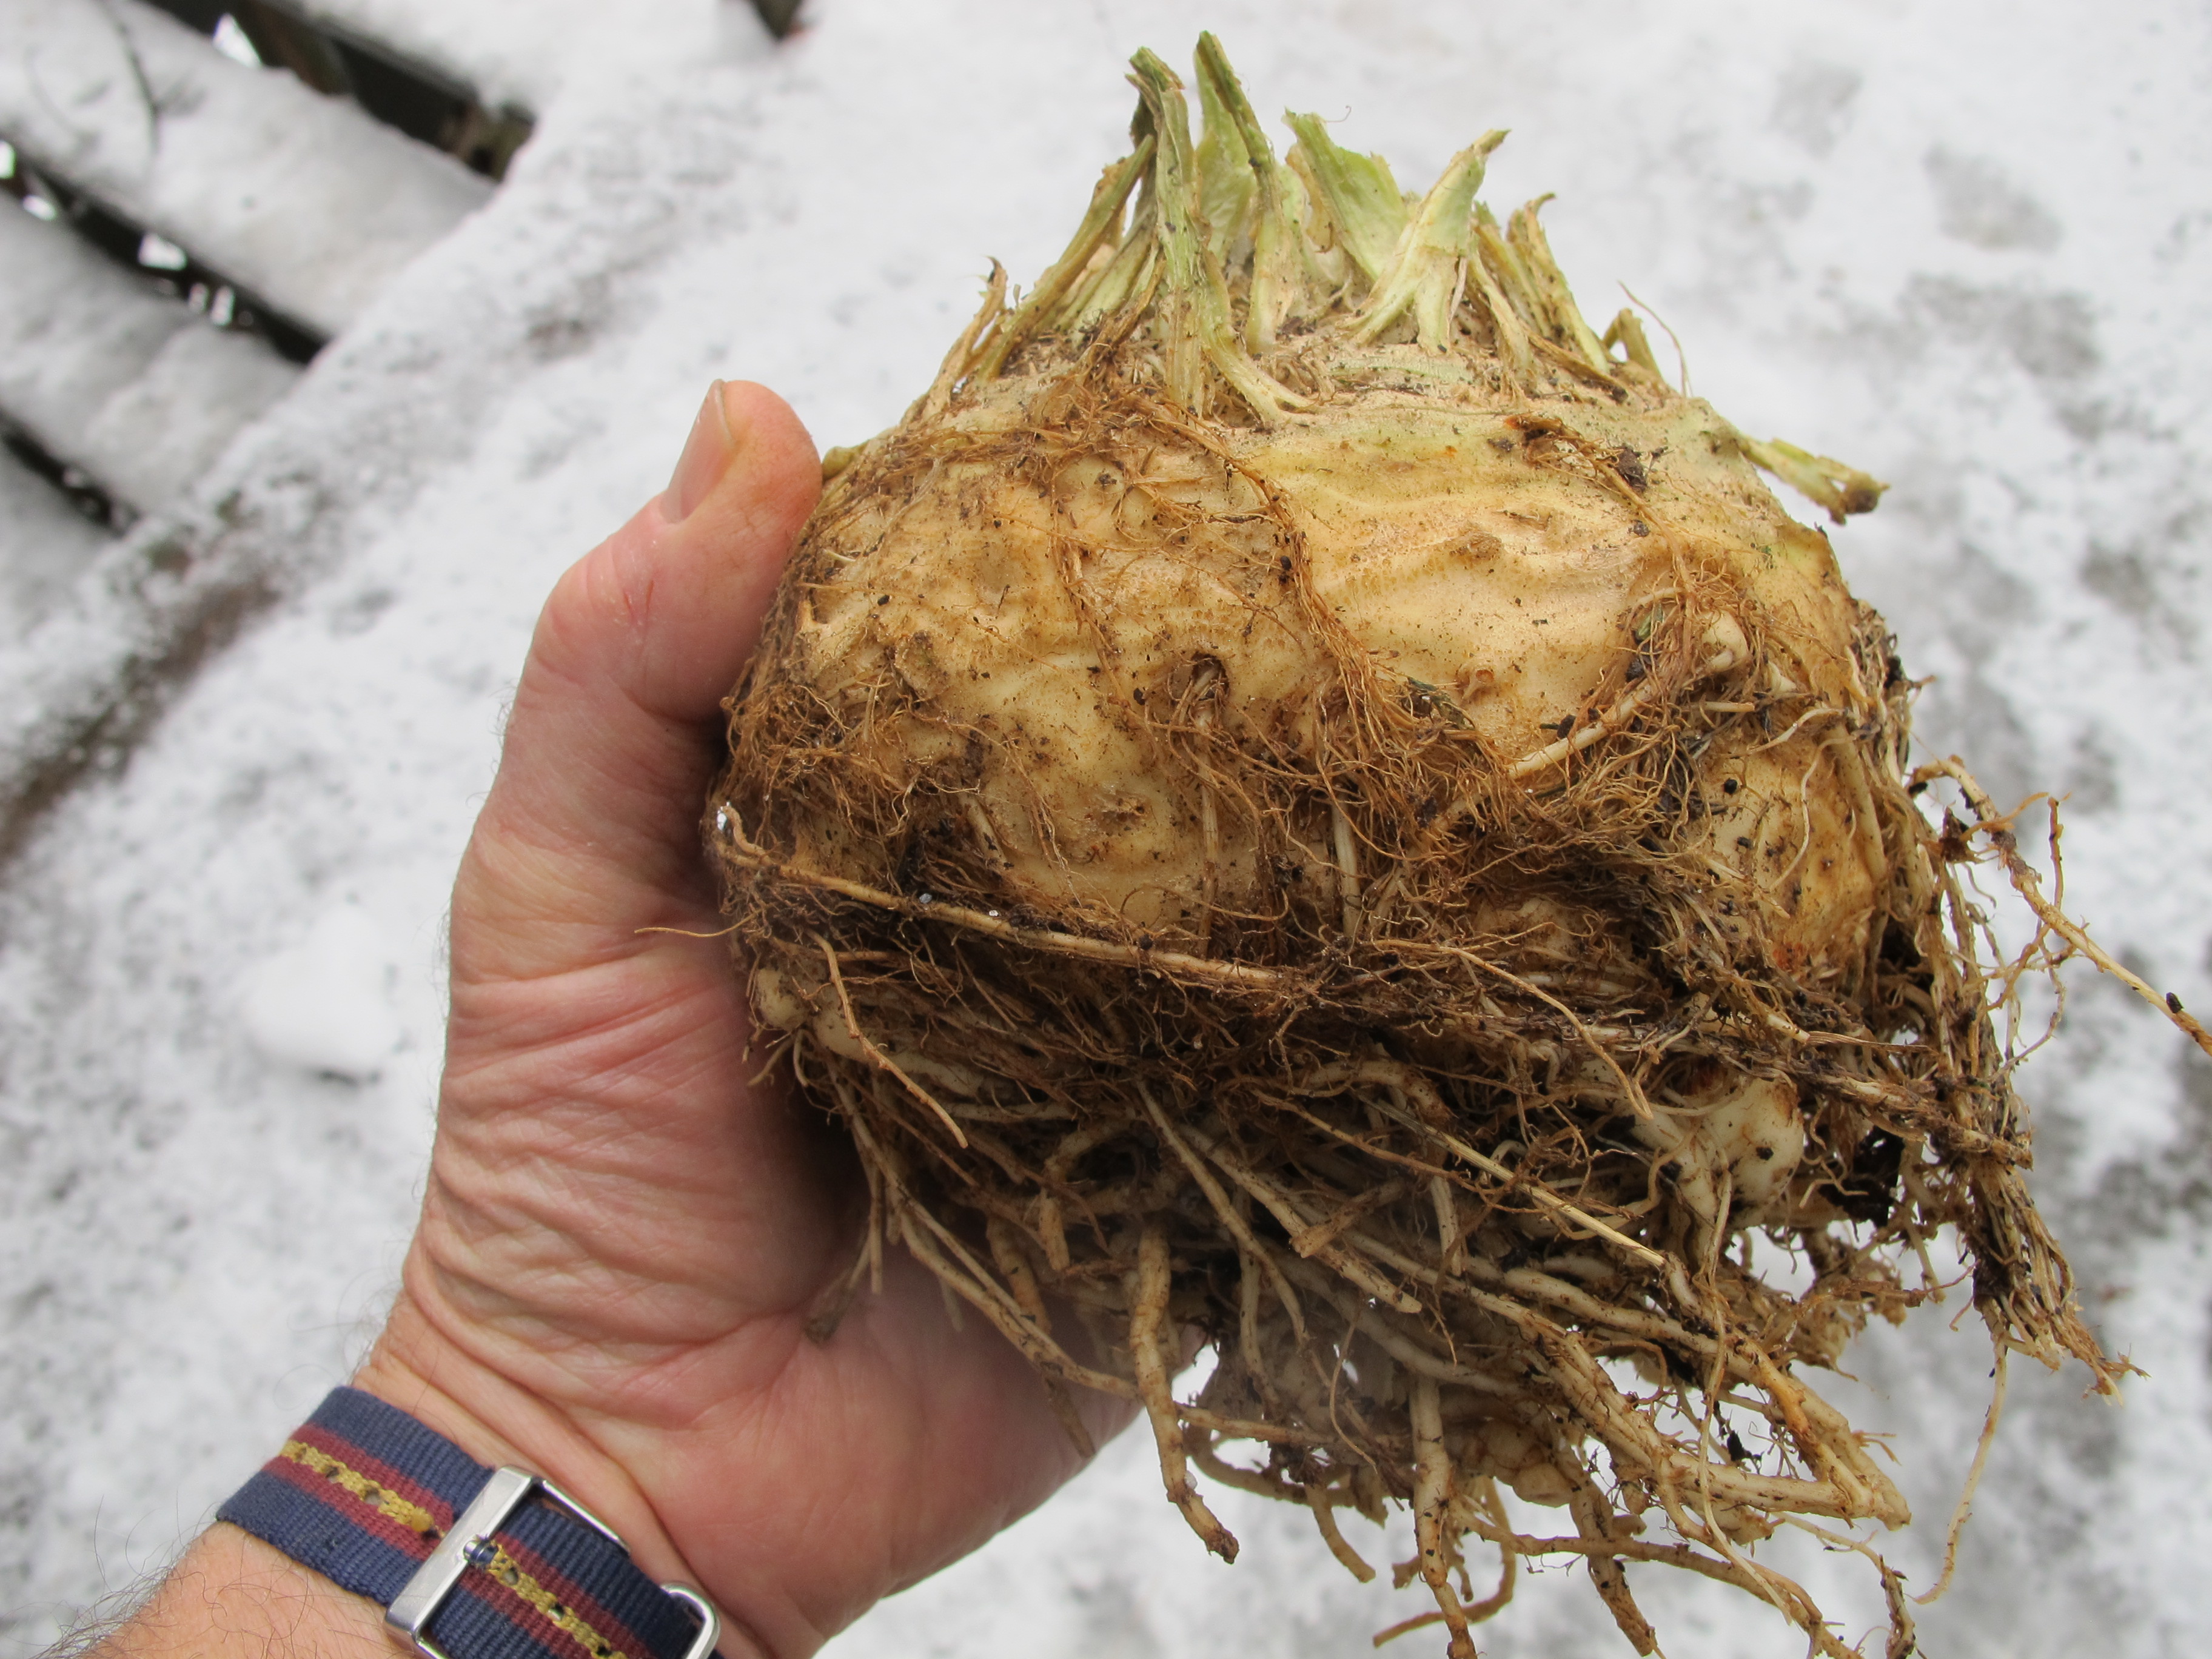
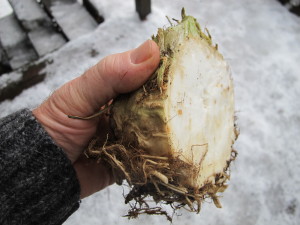
Celeriac
Celeriac is an unsung hero. Most gardeners don’t grow it. Most gardeners should. It’s a root crop related to celery, has a similar flavor, and the leaves are nearly identical. Unlike most root crops, the bulk of this root sits up above the ground level. The meat of this vegetable has the consistency of a carrot, but it is white and round. Mine grow to be 3 to 6 inches in diameter.
Celeriac stores well and stays tasty for months. In the fall I cut off the tops, cut back most of the roots, and wash out the dirt from the thick mass of roots. Then it will store for 3 to 4 months in a cool place with high humidity. You could do this by putting the celeriac in a plastic bin or bucket and storing it a cool place that stays in the 33 to 50 degree range. To keep the humidity high you can put an inch of moist sand in the bottom of the bucket.
Another way to store celeriac, carrots, potatoes, kohlrabi and rutabagas is to get an old fridge. Often older model fridges are available free from on-line list serves – or even in your daily newspaper. That’s how I got a 1946 GE model that still works fine, and it does not have the undesirable “frost free” feature. Modern refrigerators remove the humidity from all but the vegetable drawers. But many older ones do not, and thus are great for filling up with storage vegetables. Or, one can store veggies in modern fridges in plastic bags that have been punched with many holes using a paper punch.
View of interior of celeriac
Unfortunately, many garden centers do not sell celeriac seedlings in the spring. So if you want to grow celeriac, you may want to order seeds this winter when you put together you seed order. I start them indoors, starting in early- to mid- March. They are a bit slow to germinate, and need consistent moisture from planting to harvest. They don’t like cold weather or soil in the spring, so I transplant them into the ground in June.
Celeriac needs soil that doesn’t dry out. Sandy soils do not hold moisture well, while heavier, clay-based soils do. If you have a light, sandy soil, do not grow celeriac in raised beds, as raised beds tend to drain off and dry out more quickly. And add lots of compost to the soil before planting, as compost tends to act a bit like a sponge, holding water.
In addition to using celeriac in my winter salad, I use celeriac in stir fries, soups and stews. It adds a celery flavor – and a richness – that I like. And I haven’t had much luck growing celery. When I’ve tried in the past, I had trouble with slugs, the stems have been spindly, and celery in general does not store as well as celeriac.
My friend Ed Smith of Cabot, Vermont, is the author of a number of excellent gardening books, including The Vegetable Gardener’s Container Bible. I called him recently to see how he grows celery, as I recalled that he does well with it. He told me that new no longer grows celery in the ground. He only grows it in self-watering containers.
Ed told me that he gets containers from Gardeners Supply (www.gardeners.com) that are roughly 3-feet square and 12 inches deep. At the bottom of each container is a reservoir that holds a couple of inches of water separated from the soil mix by a plastic barrier; it has a wicking system that keeps the soil consistently moist, but not soggy. In his big container he plants 18 to 20 plants, and puts it in full sun.
For a soil mix Ed uses a 50-50 mix of compost and peat moss, and he adds a cup of organic fertilizer and usually some Azomite. Azomite is a rock powder sold in 50-lb bags that has trace minerals not found in fertilizers.
The key to success with celery, according to Ed, is to keep it consistently moist and pick it small. Don’t wait until your celery looks like the stuff from the grocery store, pick it when the stalks are small, say half an inch in diameter. He doesn’t usually start his own plants as they take a long time to grow, but buys plants from a greenhouse. Ed told me that he chops up his celery and freezes it in pint zipper bags. Then he uses is all year in soups and stews. He does not blanch it before freezing.
It is winter now, but not too early to start planning your garden for 2015. Read the seed catalogs, dream, and before you know it, it will be time to start next year’s seedlings.
Henry Homeyer is the author of 4 gardening books. His web site is www.Gardening-Guy.com.
Growing Some Lesser Known Vegetables
Posted on Wednesday, May 29, 2013 · Leave a Comment
This year as you plan your garden, why not choose some lesser known veggies to see how they do for you? You might just be surprised how easy it is to grow kohlrabi or rutabagas – and how tasty they are. I grow those, and several other kinds of vegetables that you might not have tried. Most are not terribly hard to grow. You could be the first on your block to grow artichokes!
Let’s start with sweet potatoes. Most New England gardeners don’t generally grow this vegetable, thinking that it’s a southern crop. It is, but you can grow it. The trick is to grow it under black plastic, which increases the heat. It needs good rich soil, liberally amended with compost or aged cow manure. Start plants from little plants called slips, available from catalogs such as Johnny’s Selected Seeds (www.johnnyseeds.com).
Adequate moisture is key for growing sweet potatoes. Even if you leave an opening in the plastic for the plant, rain water probably won’t soak the soil enough. Run a section of soaker hose under the plastic and give it some water any time the soil seems dry. Soaker hoses are available at garden centers and are basically special hoses that ooze water very slowly, soaking the soil.
Rutabagas, like Rodney Dangerfield, don’t get the respect they deserve. They are easy to grow, rarely bothered by pests or diseases, and can substitute for potatoes in the kitchen. They look a bit like turnips (which do have a strong flavor) but rutabagas are mild. I find they are great in stews- they don’t get mushy the way potatoes do when you re-heat the stew several times.
Plant rutabagas by seed in mid-June about 2 inches apart and thin to 6 inches apart for maximum production. Rutabagas can get big –a pound each or more, but do not get tough or less tasty even when they get big. They grow best in soil that is near neutral on the pH scale and is rich in compost.

Celeriac with carrots & Brussels sprouts
As far as I am concerned, growing celery is best left to the professionals. When I’ve tried growing it, the slugs loved it and the stalks were dry and stringy. But you can have that same celery flavor in your soups, stuffing and stews by growing celeriac, also known as celery root. I start celeriac by seed in the house in late March or early April, but some better garden centers will offer plants already started. Celeriac loves moisture, so add compost to the soil to hold water, and water during dry times. Plant about 6 inches apart.
Salsify and scorzonera are long, thin root crops with a somewhat nutty flavor. They need deep, loose soil as they can grow 8-12 inches long. But each is only an inch or less in diameter, so they don’t produce much food per plant (compared to carrots or rutabagas, for example). Plant directly in the garden, and wait. They are slow growing, so plant early and harvest late in the fall. Great in turkey stuffing.
Artichokes are beautiful plants that look good in a flower garden, too. In California they are perennials, producing year after year in deep black soil rich with moisture. I have started them from seed, but one must start them early in March for best results. But some garden centers sell them in small pots, so most years I buy them.
Allow a 2-foot by 2-foot space or more for each artichoke plant. You will get one artichoke (which is really a flower bud) at the top of the plant, then side shoots with smaller artichokes after that, up to 5 more. None will be as big as the grocery store version. Be sure to pick them before they turn dry and open up.
My favorite of the odd ducks of the vegetable world is kohlrabi, which looks a little like a space alien: a round fat “root crop” that sits in the soil surface and has stems popping out of it like arms –and then leaves, of course. The vegetable is almost perfectly round and is actually a thickened stem. It comes in purple and green varieties. Eaten fresh in salads it tastes something like a cucumber crossed with a radish. But they are good in stir fries or stews, too.
Plant kohlrabi seeds directly in the garden about 3 inches apart and thin to 6 inches. It is in the cabbage family (Brassica) and grows fast, ready for harvest in as little as 8 weeks. Last year I grew a variety called “Kossak’ that is an 80-day variety, but it gets to be huge (8” or more) and stores well – Johnny’s Selected Seeds, the developer of the seed – says it will store for 4 months! It needs plenty of moisture, and like most veggies, plenty of compost in the soil.
Of the salad/cooking greens, think of trying orach. Seeds are hard to find – Baker Creek Heirloom Seeds is the only place I’ve found that has them (www.rareseeds.com). This is a gorgeous purple-leafed plant that gets to be three feet tall, and is in the goosefoot family which includes many varieties of weeds – but also spinach, beets and quinoa. If you let a few plants flower and go to seed, you will always have some volunteer plants in the garden, year after year. It has no special growing needs; it’s almost a weed, after all.
Gardening is supposed to be fun. For me that means trying more than the usual veggies. So this year, get adventurous. Try kohlrabi, rutabagas or even an artichoke! You’ll be glad you did.
Henry Homeyer’s Web site is www.Gardening-Guy.com. You may reach him at henry.homeyer@comcast.net.


 Click Here to buy from Cobrahead