-

Now available for $24.95 including shipping. -

Now available for $21.00 including postage. Vendors I Like
 Click Here to buy from Cobrahead
How to Build a “Cold Cellar” or Vegetable Storage Bin
I had a banner year for root crops this year, and storage is a problem. For the past few years I had been storing root crops in a spare fridge, or in an old 25-gallon crock with a plywood lid in my cold basement. This year I went back to using a cement block bin that accommodates more produce. I call it my “cold cellar”.
There are two impediments to storing root crops for winter: maintaining the proper temperature, and keeping mice from getting at the food. My house was built in 1888 as a Creamery, or butter factory, and has a stone foundation – which will always make it possible for determined mice and squirrels to get in.
The building was built into a hillside and 3 sides are above grade level – which makes for a cold basement in winter months, as I only heat it when the temperature outside is below zero.
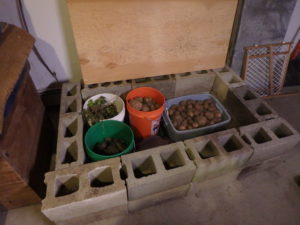
Cold Cellar Storage Bin
This year I built a cold cellar for potatoes that uses 22 cement blocks. Cement blocks are readily available and relatively inexpensive. Blocks that are 16 inches long, 8 inches wide and 8 inches tall generally cost about $2 each. In addition to the blocks all you need is a piece of plywood to cover it.
So here is what you need to do if you want to build a bin for storing vegetables. First, select a place where the temperature can be kept above freezing. Your garage might work, or a cold basement like mine. But you need to make sure it isn’t too cold, as you don’t want produce to freeze.
If temperatures drop below freezing during the coldest part of winter, you have a couple of options: you can carry your buckets of produce to a mudroom or unheated pantry for a few weeks, or you can add heat.
In an earlier version I used a drop light with a 75-watt incandescent bulb to provide heat in my storage bin. I kept an indoor-outdoor remote sensor in it that I could read upstairs, and plugged in the drop light when temperatures inside the bin dropped to 35 degrees.
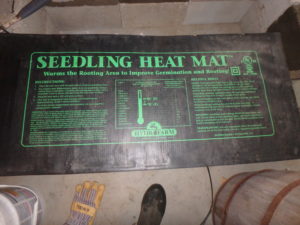
A seedling heat mat can provide heat if needed
Another alternative, and probably a better one, is to install a heat mat. I have one that is designed for helping seeds to germinate by providing a gentle bottom heat. Most heat mats are small, just big enough for one flat, but I have one is 48 inches by 21 inches and uses 107 watts of energy. It should provide plenty of heat for the coldest of times. These are available at garden centers or from Gardeners Supply Company (www.gardeners.com) on-line.
Don’t set up a cold storage bin on a dirt floor. The mice will dig under the fortifying cement block wall, and get to your potatoes and carrots. Build it on a smooth cement floor. You can build any size you want, but I made mine 3 blocks long (4 in the front) and 2 blocks wide. And mine is 2 courses of blocks high, so I used a total of 22 blocks. It is big enough to accommodate six 5-gallon pails, but of course you can make a smaller one.
Root crops store best with high humidity. Winter air in New England is very dry, so I put an inch or two of moist sand in the bottom of each bucket. I do not use plastic lids on the buckets because the vegetables are living organisms that breathe slightly. They need air circulation, too, to keep mildew at bay.
For a lid to the storage bin, you can use plywood. Three quarter-inch plywood would be best, as it is least likely to warp. But five-eighths or even half inch will work. I recommend placing a few heavy objects or extra blocks on the outsides of the plywood to weight it down and minimize warping. Mice can get in through the smallest imaginable spaces.
Bernice Johnson of Cornish Flat, may she rest in peace, once told me a funny story about an elderly and mentally impaired neighbor who grew a lot of potatoes. He had a basement that was full of mice and rats. He stored his potatoes in a pile on the dirt floor and placated the rodents by going to town once a week and buying as many packages of week-old donuts as he could. He’d stand at the top of the stairs and then throw down donuts to feed them, making them promise to leave his potatoes alone. And it worked, he claimed!
Even in a dark, cool storage bin, potatoes somehow know when spring arrives. So I try to finish up eating – or sharing – most of my potatoes by the end of March. But I will save some until June so that I can plant them and start next year’s crop with them. I once went 20 years without buying potatoes, though that meant I had none during the early summer months. When my first new potatoes were ready to eat, I felt like a king at a royal banquet.
You may reach Henry at PO Box 364, Cornish Flat, NH 03746. Please include a SASE if you wish a reply by mail. Better yet, e-mail him at henry.homeyer@comcast.net. You may read his blog at https://dailyuv.com/gardeningg