Spicy, Zesty and Hot!
Posted on Wednesday, June 19, 2013 · Leave a Comment
When I was a young man I lived in Africa and learned to love hot, spicy foods. In Cameroon, where I was a Peace Corps volunteer, the food was generally bland. Local folks ate ground corn, rice or cassava that was boiled up and only made interesting when served with a sauce made of leaves, spices and hot peppers – and very occasionally a little meat or fish. I was sometimes served pepper sauce so hot that it made me sweat and once I got uncontrollable hiccups along with the sweats. Habaneras? I bet some of the old boys could eat them like pickles. Now I grow hot peppers and horseradish to satisfy my need for hot and spicy.
Let’s start with peppers. Hot peppers would really rather be living in Mexico or Cameroon or even southern France. They do well in hot, dry climates and lousy soil. Or should I say, soil that is low in organic matter, and especially nitrogen. If you want to get peppers (and not just big plants and leaves), you should never give peppers fertilizer after they go in the ground. (I do give seedlings some liquid fish or seaweed fertilizer when they are growing indoors).
I grow a number of kinds of hot peppers most years. My favorite is one called the Espelette pepper, a name that the French government lists as controlled (sort of like the word “champagne” which can only be used to refer to bubbly wine from certain villages). True Espelettes come from just 11 villages in southwest France – and from Cornish Flat, NH, of course. The French dry Espelette peppers and coarsely grind them into a powder. They are about the same level of spiciness as jalapenos, about 4,000 Scoville units. Here in the States, Espelette powder sold on the internet costs about $8/oz. I’ve never seen it for sale in a store.
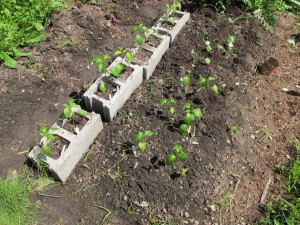
Espelette Peppers
Chatting about gardening in my favorite restaurant, my server told me that she grows her peppers in cement blocks. She said that she fills the holes in the blocks with soil and plants into the blocks. Since the cement absorbs the sun’s heat, they do better than those grown in the soil, she said.
I knew that peppers like to be grown in close proximity to other peppers – though I have never understood why – and each cement block provides space for two peppers that are quickly touching leaves. So this year I’m conducting a comparison – some in the soil, others next to them in blocks. I made a mix of potting soil and compost to fill the blocks because I think straight garden soil would compact and stifle the roots. I’ll report back in the fall.
Then there is horseradish. Horseradish is in the cabbage family, but unlike its cousins, it is the root, not the leaves, that you eat. And unlike other crucifers, horseradish is not started by seed, but by planting a cutting. The Johnny’s Selected Seeds catalog, one of very few that offers cuttings, explains that the seeds are not viable. They ship cuttings in April, “after danger of freezing in transit has passed.” I called them, and they are currently out of stock until next spring. But you can also get cuttings from a friend and plant some now.
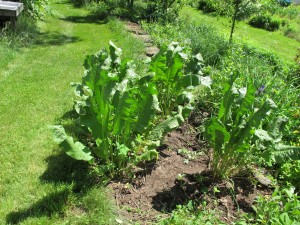 To prepare a cutting, dig up a root, cut off the leaves, and use the top 2 inches of the root to re-plant. Bury the starts about 2 inches deep and 12 inches apart. Prepare a horseradish bed by working in some well rotten manure or compost. That will improve soil texture and keep the soil looser – for ease in future harvesting. You can begin harvesting a year or two after planting.
Horseradish does best in well drained soil, but really will grow anywhere. It will be most vigorous in full sun, but 4 hours is plenty. Horseradish, which is essentially a weed, doesn’t need high levels of nitrogen, phosphorus or potassium.
Once established, horseradish roots go down two feet or more into the soil. Because the roots branch and they are brittle, one can never get all the roots out. Even a scrap of the root will re-sprout, so the plants are there for life. Horseradish is as persistent as it is piquant. It doesn’t spread fast, but it spreads. I keep my patch under control with the lawnmower – it can’t spread into the lawn without being cut down.
To harvest, loosen the soil around a plant, either with a garden fork or a drain spade. Drain spades have blades that are about 16 inches long and 5 inches wide, and are great for digging out deep-rooted things like horseradish and some persistent perennial weeds. A mature root will challenge even the strongest backs, so you may need to sever the root with your spade to remove it.
To make a horseradish sauce, peel the root, chop into pieces, and place in a blender with vinegar. The fumes are strong, so do it outside. Pulverize it, adding vinegar until it is the right consistency, and store in the fridge. Your own will be better than the store bought stuff.
Other than planting, horseradish needs no labor from a gardener until it’s time to harvest. Now if tomatoes and beans were so easy, I bet we’d all have bigger gardens!
Contact Henry at henry.homeyer @comcast.net. And visit his Web sites, www.Gardening-guy.com and www.henryhomeyer.com.
Garlic
Posted on Wednesday, August 15, 2012 · Leave a Comment
Everything has its season; for me, this is garlic season. In early to mid-August each year I harvest 60-100 garlic plants, each bulb or head with 6 to 8 cloves. I tie them in bundles of 10 and hang them in a cool dry location, whole plants including the tops. A month later I trim off the tops, but I’ve been told that curing them with their tops on allows certain nutrients to flow back into the cloves from the foliage. If you haven’t picked your garlic, you should. If you wait too late the outer skin of the garlic will break down and the garlic will not store as well.

Garlic ready to cure
And what, you might fairly ask, does one do with 100 heads of garlic? For starters, I will save the best 15 heads or more for re-planting. I don’t buy seed garlic, I use my own, year after year. Planting time is not until October, but I select the best garlic and set it aside for planting. That means, over time, that I am developing strains that are best for my soil and climate. Now, after 25 generations of doing so, I grow garlic that is well adapted to my specific conditions.
Then there is pesto. I planted a bed of basil about 4 feet square this spring from plants I started indoors. Recently I cut most of that basil about 8 inches from the soil line and processed it all at once for pesto – the plants will grow new leaves for other uses later. I’ve tried a lot of recipes, and have decided this one, below, is the best. I used pine nuts for it, instead of walnuts or almonds, even though those nuts cost me $22/pound. But 6 batches of pesto only used 3 cups of pine nuts, which translates to about $8 for the nuts. This is a treat, and will last for months if spaced out between meals and not consumed on toast with tomatoes for breakfast, which is what I did the day after making pesto.
Henry’s Pesto Supremo
2 cups basil, well packed down in the measuring cup
1/3 cup pine nuts, roasted
3-6 large cloves of garlic according to your taste
1/3 to ½ cup olive oil
½ cup grated Romano cheese (or Parmesan if you prefer)
salt and pepper to taste
I began by browning the raw pine nuts in a cast iron fry pan at medium heat. The pan had been oiled and then wiped with a paper towel to remove the excess. I find roasting improves the flavor considerably.
Remove basil from stems, wash, spin dry and then pat the leaves dry with a cloth towel. You need enough basil to fill a 2 cup measuring cup with leaves packed down firmly, which is a lot of leaves.

Pesto Frozen in Ice Cube Trays
Place leaves in a food processor and add 1/3 cup of pine nuts and pulse a few times. Mince the garlic in a garlic press, add to blender and then pulse. Add oil slowly with the processor running. Finally add the cheese and pulse a few times. Taste immediately on toast!
Looking for other ideas I called Bill Howard, Executive chef at Three Tomatoes Trattoria (my favorite Italian restaurant) which is located in downtown Lebanon. He started by reminding me that different strains of garlic have different flavors, some with lots of “bite”, others quite mild.
Bill likes a mild strain called “Music.” He roasts it in a 350 degree oven for an hour or so, caramelizing the sugars in it and making it suitable for spreading on toast. I’ve done this in the past by putting whole heads of garlic (skins on) in a small, oven-safe baking dish with a little olive oil. When the garlic is roasted I let it cool, take scissors to snip off the tops, and then squeeze out the soft inner mush onto toasted bread. Sometimes I first lather the toast with a soft goat cheese and then spread the roasted garlic and top with a slice of fresh tomato. Oh boy!
Bill Howard also told me that sometimes when using garlic that has a lot of bite he slices it, and then poaches it in milk, which mellows it out. That seems truly bizarre to me, but I’ve never eaten one of his dishes I didn’t like. Not only does he use the garlic, he makes a garlic-infused béchamel (white sauce) sauce using the milk, butter and flour.
Garlic keeps best in a cool location with low humidity. I keep garlic on an “orchard rack” in the mudroom, a place that stays cool. I got the rack a few years ago from Gardeners Supply (www.gardeners.com) and use it for winter squash and onions, too. It is made from hardwood slats, so there is good air circulation. If you just have a few heads of garlic I suppose you could keep it in a basket in the kitchen, or perhaps in the fridge.
Garlic is believed to cure or prevent all manner of ailments. I learned from herbalist Nancy Phillips (author of The Village Herbalist) that one should mince or chop garlic and then let it sit for 10 minutes before cooking with it. She says this allows certain anti-cancer compounds to develop full potency before use. I have been doing it for years – it can’t hurt.
I do know that garlic adds great flavor to almost any dish. And who knows, I might poach some in milk and use the milk on my cereal. That would be an interesting way to start the day!
Henry Homeyer’s new children’s book will be available in September. Look for Wobar and the Quest for the Magic Calumet from Bunker Hill Publishing.
Filed under Article, Uncategorized · Tagged with best pesto recipe, Chef Bill Howard, freezing pesto, garlic, growing garlic, growing great garlic, Henry Homeyer, nancy philips, the village herbalist, Three Tomatoes Restaurant
Artichokes, Carrots and Beets, Oh My!
Posted on Wednesday, May 23, 2012 · Leave a Comment
I think I have grown, at one time or another, every kind of vegetable one can grow in New England, from artichokes to zucchini. Some, like carrots and beets, are worthy of a spot every year. Others, like fall radishes and spinach, get missed some years. One of the most interesting, but least productive, is the artichoke.
I’ve been to Castroville, California, which claims to be the artichoke capital of the world. Hundreds of acres of artichokes line the highway. They are perennials there, huge plants spaced 5 feet apart and producing many fat artichokes on each plant. Not so here. Artichokes don’t survive the winter for me, even well mulched. And they take a long time to start from seed – I start them in February on years when I grow them. Fortunately, some good garden centers sell started plants, so one does not have to run grow-lights for 4 months to get a garden-grown artichoke. Edgewater Farm in Plainfield, NH sells them.
 An artichoke plant will produce, for me, one medium sized artichoke and perhaps 3 smaller ones as side shoots. It takes a space two feet square and needs rich, moist soil. Some years I’ll get my first artichoke in August, but one year it only started producing after the first frost scared it a bit. I harvested it after Halloween, having built a little greenhouse over it.
Consider the lowly carrot. For a dollar or so, you can buy a pound of them. Crisp, orange, tasty. When I was growing up in the 1950’s, my Irish cousin Richard was occasionally called “carrot top” because he had bright orange hair. Carrots only came in orange, back in the early 1950’s. Not so now. It’s worth planting some, and the time is now. But you may want to try some new varieties – they now come in purple, yellow and white.
There are 3 key steps involved in getting good big carrots: 1) prepare the soil so that it is loose and deep – a foot deep or more. No stones, and plenty of compost. 2) Thin them out. Carrot seeds are tiny, and often end up planted too close together. Get them an inch apart as soon as you can. 3) Give them a little organic fertilizer in early July. Just sprinkle lightly alongside the row, and scratch it in a bit. July Fourth is a good day to fertilize them – you probably won’t have work that day.
Beets are good not only as a root crop, but also for the tops, which are tasty when steamed up and served with butter. No matter how carefully you space your beets, they will still need to be thinned out. Why is that? Because those big fat “seeds” you planted are not seeds at all, but seed capsules. Like an apple, each contains more than one seed. Actually, ‘Moneta’ is a variety with only one seed per capsule, sold by Johnny’s Seeds.You can leave clusters of beets for a few weeks after germination so that when you thin them the plants are of a size worth cooking.
Your peas, if you planted them in April, should be up by now. Peas, even the short-vined varieties, do best with some support to keep them from flopping on the ground. Chicken wire is the standard, but if you have a pile of trimmings left from pruning your apple trees, you can use small branches to support your peas. Just push them into the soil.
Those apple branches can be used in other ways, too. If you have cats, you know that they love to dig in soft soil and leave you presents. Place apple branches over newly worked beds to keep cats out. You might even be able to keep deer away from your tulips now, by poking bigger branches in the tulip bed to physically keep them back. I haven’t done so because Daphne, my corgi, seems to keep the deer away with her scent.
We will have another frost this spring, I assume, but that won’t affect my lettuce, onions, spinach or root crops. I try to plant lettuce every 3 weeks or so all summer to keep a steady supply. My first lettuces are up and looking good, so now I will plant another batch. I like to plant lettuces 6 to 9 inches apart in order to get nice full heads of lettuce. Sometimes I start a cluster of seeds all in one place, not bothering to space them out. Then, when the leaves are 1 to 2-inches tall, I gently tease the plants apart and re-plant with wide spacing. I like to plant red and green varieties and alternate them in the row for the looks of it.

Peanut seedlings started indoors
I said above that I’ve tried every kind of vegetable from A to Z, but I haven’t. This year, for the first time, I am going to grow peanuts! I got seeds from Burpee’s Seeds, and have some growing indoors under lights. I will also plant some directly in the soil when the soil temperature is above 60 degrees. I’ll report back to you later. And please keep me informed if you grow something special and wonderful. We’re in this gardening game together.
Henry’s Web site is www.Gardening-Guy.com. You may e-mail him at henry.homeyer@comcast.net.
Getting Rid of Invasives
Posted on Wednesday, November 23, 2011 · Leave a Comment
There are still a few nice days left before cold rain, snow and cold take over our weather systems, and I try to take advantage of these last warm, sunny days. Unfortunately, I’m not the only one. No, I hope you do, too. It’s those pesky, unwanted invasive shrubs in the understory of our woods and forests that I am referring to. I took a walk recently and noticed that there are plenty of bush honeysuckles enjoying the sunshine. Many still have green leaves (some are turning yellow now), allowing them to make energy by photosynthesis and store it for winter.
Go for a walk along a country road or into your woods. If you see bushy shrubs that still have green leaves,

Honeysuckle
you are probably seeing Amur honeysuckle (Lonicera maackii). This bush honeysuckle is able to grow in sun or shade, wet or dry. It is one of the first plants to get leaves in the spring, one of the last to lose them in fall. It shades out our native wildflowers and other native shrubs. It is taking over the landscape – but you can help control it now, when you don’t have so many other gardening tasks to occupy your time.
Amur honeysuckle can get to be12-15 feet tall and wide. It is a floppy plant with yellowish-white blossoms in June and quarter-inch diameter red berries. Birds eat the seeds and then distribute them in their droppings. It takes 3-5 years from germination to the time a honeysuckle produces flowers and berries.
The roots of this bush honeysuckle tend to be quite close to the surface of the soil, so pulling or digging them out is not very difficult. I recently spent part of a morning working to eliminate honeysuckle on my property. Here is what I found.
Pulling small to medium sized honeysuckles does not require superhuman strength. I easily pulled shrubs that were 3 to 5 feet tall and wide. Larger specimens I just cut to the ground. Yes, they may re-sprout, come spring, but they won’t bloom and produce seeds next year. If I can go back each year and cut off new shoots, I will prevent the plant from spreading.
I recently spoke to Kari Asmus of Hanover, NH who has been digging up invasive plants on her property since she and her husband bought it 11 years ago. She recommends using a “weed wrench” for pulling medium to large sized honeysuckles, along with two small tree species, the glossy buckthorn (Rhamnus frangula) and common buckthorn (Rhamnus cathartica) which are also invasive species on their property. A weed wrench (www.weedwrench.com) is a hand tool that gives you a nice mechanical advantage: it grabs onto a stem down low, and has a long handle to help you to pry out the root system with minimal effort.
Kari’s property is about 10 acres, and by keeping after the invasive plants each year, she has reduced their incidence to a point where they are not a problem. Native plants like bloodroot and wild ginger – absent when they bought the property – have returned and spread through their woods. Kari said fall and spring are the times to work on digging out problem plants. They have leaves when native plants do not. She said she has gotten to recognize the distinctive color of the leaves, even from a distance, so she can go right to a honeysuckle or buckthorn to pull it out. Seeds deposited years ago continue to germinate, but the young plants are easy to pull by hand.
The buckthorns get bigger than honeysuckles and are more difficult to eliminate. Although a honeysuckle,

Common Buckthorn
if cut down, may send up new shoots at the stump, it does not send up root suckers the way a buckthorn will. Root suckers are new shoots coming up from the roots that develop into full-size trees; they can pop up 10 feet or more from the parent tree. They are a stress response by certain trees: if cut down (or sometimes if they are infected with a lethal fungus), shoots develop.
Nelia Sargent of Claremont, NH taught me some years ago how to kill buckthorns without stimulating root suckers. She double girdles a buckthorn by cutting all the way around the trunk with a hand saw. She just cuts through the green cambium layer of bark, but does not cut into the heartwood. Then she goes up 12 inches and does it again. She said it takes 3 years to kill the tree but no suckers are sent up. I tried it on a neighbor’s tree, and, by golly, it worked. However, the common buckthorn often has a trunk that can make it difficult to double girdle the tree: there are often up to a dozen trunks growing very closely together.
In my neighborhood the buckthorns have already lost their leaves, but the trees are loaded with dark berries, just waiting for hungry birds to come this winter for food. Each berry has 3-4 hard seeds, just waiting by be dropped somewhere so it can start a new tree.
So if you are looking for a good project on the next sunny day, go look for invasives and see if you can get rid of a few.
Henry Homeyer can be reached by e-mail at henry.homeyer@comcast.net or by mail at P.O. Box 364, Cornish Flat, NH 03746. His Web site is www.Gardening-Guy.com
Getting Ready for Visitors
Posted on Wednesday, June 22, 2011 · Leave a Comment
I recently got my gardens ready for visitors right around Father’s Day, which made me wonder what my dad might have said about them (he passed away long ago). Dad was a gardener who grew vegetables so he could eat them. Period. He was not interested in growing flowers. Or shrubs. Or decorative trees. But he appreciated nice gardens, and I think he would have liked how mine look right now – especially after my 72-hour blitz to get ready. Let me share with you my ideas about getting gardens ready for visitors.
First, since my gardens have been (ahem) a little under-maintained, I had to accept that they would not be perfect when company came. I knew I could make them look good, but that there would be flaws: weeds, empty spots, flowers that need staking, shrubs that need pruning. You get it. Fortunately other gardeners are forgiving since often their gardens are in a similar state of imperfection.
I think that hiring a college student, preferably an athlete, is good – especially if you’re not a kid anymore. Even a student who has never gardened before can push a wheelbarrow full of compost or mulch, or empty your wheelbarrow for you. That saves a lot of energy so that you, the gardener, can do the stuff that requires experience. Teach your helper to identify one or two designated weeds, and let her just go after them. Carlin, my helper, filled several wheelbarrows with nothing but jewel weed, which was everywhere.
Buy some annual flowers. As you pull out the golden rod and other big weeds that somehow escaped notice last summer, there will be empty spots that need filling. You can buy 4- or 6-packs of flowers to fill in the spaces without a big expenditure. Annuals are often in bloom when you buy them, and will bloom all summer if you cut off the spent flowers – and some don’t even require that. I bought marigolds, snapdragons, zinnias, asters, gazanias, gomphrena, and stock. Read the tags as to height and spacing, and have at it. Most do well in average soil, so you probably don’t even have to do much soil improvement.
")
Elephant ear (Colocasia spp.)
Think about buying one really dramatic annual. I spent $40 on a plant commonly known as “elephant ears”. It came in a 14-inch pot, stood32-inches tall and had a 48-inch spread. Elephant ear (Colocasia spp.) is a tropical plant that grows large green or purplish leaves and thrives in moist soils. They are grown in Cameroon (where I was a Peace Corps volunteer in the 1970s) as a food item – the roots are like yams. High in carbohydrate, low in flavor. And it’s so dramatic that visitors will ignore a few other flaws in my garden as they gush over this big, juicy plant. I didn≠t remove this big plant from the pot, just buried it up to the lip of the pot in the ground. Then this fall I can easily bring it inside without re-potting it.
Don≠t be afraid to move things around. My granddaughter, Casey Yunger, planted a 6-pack of dianthus last summer in her little garden bed here at my house. I thought it was an annual, but low and behold, it came back and produced 6 large blooming plants (each a foot across). I popped them out of the ground, and used them to fill in spaces. With the exception of big, deep rooted perennials like peonies and perennial poppies, most flowers don’t mind moving. I even moved a rose I’d had for over 15 years so that it would get more sun – and fill in an empty spot. Just move things a week before company comes, so plants will have adequate time to settle in.
Tie up floppers. Nothing looks worse than a nice perennial with gorgeous flowers that are lying in the dirt. I have tried every type of material for tying up plants, and prefer green plastic tape (not sticky) that comes on a roll; it’s about a quarter of inch wide. Unlike string, I can break it off the roll with my fingers. I generally use 3 bamboo stakes to tie up a good sized plant, running the plastic tape between the bamboos about two-thirds the way up the plant from its base.
Big urns of flowers can really dress up a garden, too. You can buy a hanging basket of flowers, and then transfer the contents into an appropriately-sized pot for a quick and dramatic spot of brightness.
I hate to admit it, but I found that a weed whacker (string trimmer) can be a terrific tool for garden clean-up. I’ve had one for a couple of years but never used it at all last summer – I hate loud machines. But a weed whacker really can make places near stone walls and buildings look much better – and quickly. I’m still a novice with a string trimmer, so I generally stay away from trees and flowers – they can damage plants in the blink of an eye (I have to admit to ruining places in my lawn while getting used to it).
And lastly, cut the lawn. A neat lawn – especially if you have edged the lawn around flower beds – gives an overall impression of order. So invite a group to visit your garden: it will force you to get it looking really great, and then you will enjoy it more all summer.
Lawns, and the Machines Available to Work on Them
Posted on Wednesday, May 11, 2011 · Leave a Comment
Most guys love machines, the bigger and louder the better. And before you take me to task for that comment, answer this: who in your family usually uses the chain saw, the lawn mower, the rototiller and the snow blower? In my experience it’s the guys. Not always, but most often. So spring is here, and the guys (and a few intrepid women) are itching to get out the chain saw to cut up the pine branches that broke off last winter and then get to work on the lawn.
Me? I’m not much of a machine guy, so to learn about the various motorized options, I visited Upper Valley Equipment Rental on Bridge Street in West Lebanon, N.H. and talked to Brian Henry, the manager. We looked over his arsenal of machines: a power broom, a lawn de-thatcher, a core-aerator and a 40 inch sweeper with a bristle brush, and I went home with a power broom to try out.

power broom
The power broom is actually an attachment that goes on a string trimmer (also known as a weed whacker). It consists of a rotating cylinder with rubber paddles that lift and push debris forward. The one I rented weighed 25 pounds, but because the motor and blades are at opposite ends of a 6-foot handle, the machine requires a certain level of strength and endurance (your 80-year old mother should not attempt to use it).
The power broom works: you can push a lot of debris with it. My lawn is quite soft and I found that if I didn’t keep moving the machine forward, it was possible to damage the grass and dig a depression. I see it as best used to clean up a paved driveway or the shoulder of the driveway with sand and gravel left from the winter. I still prefer a rake to a power rake, even though an old fashioned rake takes more time.

core-aerator
The core-aerator is a machine designed to make your lawn less compacted – and thus to grow better. It extracts plugs of turf from compacted lawns, allowing you to get compost and fertilizer into the soil. As I explain in my new book Organic Gardening (not Just) in the Northeast, you can test your lawn for compaction by trying to plunge an ordinary 6-inch screwdriver into the lawn up to the hilt. If you cannot easily do this, your lawn is compacted and you may wish to rent an aerator. It pokes holes 2-3 inches deep and half an inch across. The plugs extracted fall out on the lawn (and would eventually break down) but most people would want to rake them up. Spreading compost after aerating is a way to get organic matter into the lawn, increase biological activity to soften and loosen the soil.

Sweepster
I also looked at a walk-behind “Sweepster”. The one I saw had a 40-inch stiff-bristled brush on a rotating drum. It reminded me of a street sweeper, but it pushes the debris forward and does not pick it up. Since I have no pick-up truck I wasn’t able to bring one home, and (as a confirmed Luddite) I am not sure I need one anyway. Again, it would be great on driveways, and might also serve to clean thatch, or accumulated dead grass, out of the lawn.

dethatching
Speaking of which, I got a demonstration of a dethatching machine at the rental center. It≠s a walk-behind machine with lots of short metal blades designed to loosen and lift dead grass. If you have biologically active soil, the organisms in the soil (including earthworms) should breakdown your grass clippings, precluding the need for a dethatcher. But if you apply lots of chemicals to the lawn, you may wish to rent one, as chemicals tend to minimize biological activity. The machine would be good for scuffing up the soil in order to apply seed to an existing lawn, too.
Small engine repair shops are busy tuning up lawn mowers and sharpening the blades. If you are mechanically inclined, you can sharpen the blade yourself by removing it and using a bench grinder or coarse file to mimic the angle of the blade set by the manufacturer. If it has been warped or bent by hitting rocks, stumps or dog bones, you should replace the blade.
If you set your blade at 3 inches or more, you can minimize crab grass growth – effectively shading it out. If you want to minimize weeds in the lawn you can spread corn gluten. It is a corn product that should be spread now, during the period between the blooming of forsythia and lilacs. But it is not a miracle (some weeds will get established anyway), and for best results should be used 3 years in a row. Microbes in the soil break down the gluten, releasing peptides that inhibit root growth – of weeds, but also of any grass seed you might use, so don’t use it if overseeding the lawn now. Corn gluten contains nitrogen and acts as a fertilizer, slowly releasing nitrogen as your microbes break it down.
The best spring activities for improving your lawn, besides cleaning it up, are spreading some compost over it and adding some good grass seed. Half an inch of compost spread with a shovel and rake will energize your lawn, and adding grass seed will fill in the thin spots. So pick your weapon of choice – either motorized or manual – and get to work. Summer will be along soon.
Minimizing Work in the Vegetable Garden
Posted on Wednesday, May 4, 2011 · Leave a Comment
Getting older? Too busy with kids, dogs and a job? Don’t give up the idea of having a vegetable garden. Just simplify, minimize and be smart about how much you take on. Here are some ideas about what you can do to minimize work in the garden and still have the joy of ripe, red tomatoes or carrots just pulled moments before eating.

Grow what you really love, and forget about the rest.
First, be not so ambitious. A garden 10 feet by 12 feet will do. Grow what you really love, and forget about the rest. If you had a weedy 20-by-20 garden last summer, cut it in half this year. Cover half with black plastic and then a layer of straw (so it looks better and doesn’t have pools of water for mosquitoes to breed in).
Buy seedlings instead of starting plants in the house. And just because you buy a 6-pack of tomatoes doesn’t mean you have to plant them all. Give some away √ or put the extras in the compost.
Don’t rototill. Rototilling is hard work, and it brings up a lot of buried weed seeds that will make work for you every year. Hoe up the soil to make mounded, wide raised beds, 30 inches wide and 6 inches taller than your walkways. Keep them in place from year to year.
Add compost each year to improve the soil, and stir it in a little. It does its magic best near the surface of the soil where the roots are. I like a CobraHead weeder (www.CobraHead.com) for stirring in compost. Buy compost – by the bag or by the truck load. It’s worth every penny.
Mulch saves labor. Mulch with 6 sheets of this newspaper, and then cover it with hay, straw or grass clippings. Get the walkways done right away, as soon as you have the beds made. Then July 4th weekend, when the soil is warm and your plants are established, mulch around the plants. Mulch also holds in moisture.
Only water when the soil is dry. A little drought stress is not bad – it lets plants know they have to produce seeds – and food for you – as an easy life is not guaranteed. Buy a watering wand so you can water the roots, not the tops of the plants. That will minimize fungal diseases. Dramm is a brand that works real well for me. Water deeply, and less often.
Use tomato cages, and install them at planting time, not after the plants get big. Plants that flop over and lay on the ground don’t produce well. Tying to a stake is fine, but more labor intensive.
Look for a new tomato variety called “Defiant.” It is claimed to be highly resistant to the late blight that came early in 2009, melting vines and fruit. No point in growing tomatoes if the blight gets them. Grow at least one Sun Gold cherry tomato. It is tremendously productive, and the tastiest snack food in town.

Lettuce
Plant lettuce once a month, all summer. Start with a 6-pack from the garden center, or sprinkle a few seeds directly in the ground. If starting from seed, transplant them when 3-4 weeks old so they are 6 inches apart. Or just thin them out. Planted too close together they’ll never get to be big, juicy heads of lettuce.
Pole beans are great. You don’t have to bend over to pick them. And they produce most of the summer, once they have begun. Bush beans are good, but produce just one big crop of beans, then quit.
Don’t plant 6 zucchini. One is enough. “Romanesco” is a great variety – it is still tasty and not mealy when it gets big – and they seem to turn into small bombs overnight.
Potatoes are easy and wonderful. Kids love to dig them. Picking potatoes is like going fishing – and knowing you≠ll catch trout. Just pick the potato bugs every day in June, and they won’t be a problem. Look on the underside of leaves for orange egg masses and scrape them off, too. Drown in soapy water.
Rhubarb is easy, so grow some. It comes back every year with no work. And no self respecting bug will eat the leaves, which are full of oxalic acid and bitter. I’ve been told that our taste buds get more feeble as we age, but that rhubarb is the last flavor to go!

Small Garden
Put a garden bench or a couple of Adirondack chairs in the shade near the garden. Don’t be afraid to take time off to admire yourhandiwork. Gardening is not just about production. Get the kids or grandkids to hang out with you while you work. Give them some garden space to push trucks around in. Get worms from the compost pile, and go fishing! Gardening doesn’t have to run your life.
A Cold Wet Spring
Posted on Wednesday, April 27, 2011 · Leave a Comment
I’m tired of cold gray days, drizzle and downpours. My vegetable garden is so wet I should be fishing there, not gardening – though I am doing neither. Last spring we had hot weather early and our plants started off much too fast. Then a hard frost came that killed early fruit blossoms. Each year is different. Meanwhile, what can we do?
First, don’t worry about the fact that flowers are 2-3 weeks late in blooming. They will eventually bloom, and most early blooming plants are not damaged by a little frost, should we get some more, and we may. Last year I took pictures of my February Daphne (Daphne mezereum) in full bloom on April 4, and as of April 24 it still had not bloomed.
Don’t jump into your usual spring lawn and garden work yet √ or not unless your property is a lot drier than mine. If your shoes making dents in the lawn, or if you hear a “squish”, stay off the lawn. For flower beds, try using a 5-foot long plank to walk on if you must get in them to work. That will distribute your weight nicely. If you have two planks (each 6 inches wide), you can move from one to the next.
Rototilling now is definitely a no-no unless you have sandy soil on a hilltop. Grab a hand of garden soil, squeeze it with your fingers, and open your hand. Touch it lightly with a finger. If the soil does not crumble, it is too wet to rototill. Heavy clay soils hold water, and may never fall apart with a gentle touch √ unless you work in lots of compost. Rototilling too early can ruin soil structure.
You can, however, start seeds indoors now. I have about 300 seedlings started indoors, growing under lights. Lights are important. I know some gardeners grow a few tomatoes on the window sill, but growing plants without supplemental light generally results in spindly plants that are pale and reaching for the sun. A 4-foot, 2-tube fluorescent light will illuminate 2 flats (72 seedlings or more, depending on the size of the cells in the 6-packs). Lights are a good investment.
Keeping the light near the seedlings is important. I hang lights above the plants, keeping them 6-10 inches above the leaves and raising the lights as the plants get taller. It’s also important to let your babies sleep at night. Fourteen hours of light is plenty. It’s good to let temperatures in the room with the seedlings hover around 60-65 degrees, too and even cooler at night.

pruning
This is a good time of year to do some pruning. You can prune fruit trees and blueberry bushes now. Learn to recognize the flower buds of each, so you will know what you are pruning off. Apples and other fruit trees bloom on short (3-4 inch) fruit spurs that are more than one year old.

Fruit spurs
Fruit spurs are most commonly present on “scaffold” branches, those branches that extend outwards from the trunk at about a 45 degree angle. If you want to turn a small vertical branch into a scaffold branch that will eventually produce fruit, you can bend the branch by hanging a weight on it for a couple of months. Hang a plastic bottle on the branch, and add water to get the weight you want.
I recently attended a pruning workshop led by Bill Lord, a now retired UNH Extension fruit specialist. He said that older branches on blueberries that have no fruit buds this year probably won≠t have any in the future, and that you should prune off those limbs to stimulate new growth. The fat buds that will produce fruit are usually toward the tips of vigorous young branches – those 6-10 inches in length. Those branches generally produce the strongest buds. The smaller buds elsewhere are leaf buds. Bill said that each fruit bud can produce 5-10 berries!
This is also the time of year to get your soil tested. Call your Extension office, or ask Mr. Google where you can get it done. It only takes a few minutes to collect a sample, and a test can tell you much. Blueberries, for example, need very acidic soil (pH 4.0 to 5.5) to be productive. A soil test will tell you how much garden sulfur (approved for organic gardeners) to add around your plants. Blueberry roots grow in mats near the soil surface, so just sprinkle the sulfur on the soil to avoid damaging roots.
When getting soil tested, also have your soil tested for heavy metals like lead. It≠s an extra fee, but ingesting lead can harm you or your children. And get a test done to measure the amount of organic matter in the soil: you want 4-8% in for good vegetable production.
Spring will get here, eventually. Meanwhile, be patient. Take some time now to read a gardening book on a cold, raw day – perhaps even my new one. You might even recognize some of your favorite articles from this column.
Growing Grapes
Posted on Wednesday, April 20, 2011 · Leave a Comment
Each fall I enjoy a special treat: munching the sweet-sour flavor of grapes I have grown. I generally eat them outdoors as they are full of seeds, and I enjoy spitting out the seeds, much as I did as a boy. I like to see how far I can spit them, and whether I can hit objects accurately. That≠s puerile, for sure. But it≠s good to be a kid again, especially as an adult old enough to qualify for Social Security.
According to my best reference text on growing grapes organically, The Grape Grower: A Guide to Organic Viticulture by Lon Rombough (Chelsea Green Publishing, 2002), there are some 10,000 varieties of grapes, and less than 1% of those are seedless. Grapes are supposed to have seeds, that≠s how they reproduce. We have been spoiled by 3 common grocery store varieties that are seedless, most notably Thompson≠s Seedless, which dominates the market.
Here are in the Northeast we can grow grapes for eating or for wine, despite the reputation of California as the place for wine grapes. According to the catalog of Elmore Roots, an organic nursery specializing in cold-region fruit plants, there are several good wine grapes to choose from. I called David Fried, owner of Elmore Roots, to talk about grapes recently. He told me that King of the North and Sabrevois, both red grapes, were the best for making wine. Six plants can produce enough grapes for making wine.
And for eating? Fried says Bluebell is the best. The fruit is pinkish-purple, and is great for eating fresh, or for making juice or jelly. It is disease resistant and survives frosts quite well.
So what do grape vines need to thrive? Full sun and good air circulation. Air circulation is important because low spots that have poor circulation tend to encourage fungal diseases. Growing on a hillside is best, preferably a slope facing south or east. Growing them on a stone wall works well, too, as the wall provides extra heat.
According to Rombough≠s book, ≥The ideal soil for best vine growth and production, especially of table grapes, is a deep, light silty or slightly sandy loam.≈ Rombough suggests digging some test holes 2-3 feet deep to see what the soil is like √ if you are on a rocky ledge, see where the deepest soil is for your grapes. He says you rent a power post hole digger to make test holes. David Fried noted that sandy soil in full sun is best.
Test the pH, or acidity of your soil, before planting and make adjustments as necessary. Soils with a pH of 6.5 to 7.2 are best. Remove grass, weeds and other competitors for nutrition from the area where you will plant your grapes. Rombough suggests planting grapes so that rows go along with the prevailing winds, which for me is east-west. That will help to dry out the vines in wet times, minimizing fungal problems. He says to plant roots 8 feet apart, and rows 8-12 feet apart if you are starting an orchard. And if you have bought grapes grafted onto a root stock, do not plant them deeply. The graft union (place where the roots and the tops were joined) should be above ground.

prune grapes
This is the time of year to prune grapes. They produce grapes on shoots that were new last year. Pruning now stimulates new growth that will produce grapes next year. And if you do not prune each year, your grape vines will develop into an unmanageable mess. An un-pruned vine may produce lots of blossoms, but the quality and size of the fruit will not be good.

Grapes grow well on trellises or wires.
Grapes grow well on trellises or wires. I have 2 rows of wire attached to my barn for grapes to grow on, but they are so vigorous that if I didn≠t prune off new growth each year, they would engulf my small barn and cover the windows. I wouldn≠t be able to reach the grapes for picking. The Grape Grower: A Guide to Organic Viticulture has excellent drawings of ways to set up wires for your grapes, and how to prune.
I hesitate to give advice on how to prune grapes, as I am still learning. Rombough≠s book shows a thick stalk coming up from the ground, with sturdy lateral arms attached to the wires, which I have. Each year I am supposed to cut off most of last year≠s vigorous new growth, leaving some short spurs on those lateral arms to produce this year≠s fruit.
I have just 3 grape plants, 2 growing on a trellis in front of my barn, and one growing on a cedar arbor I built years ago. I have a very high water table √ there is a nearby brook √ and I am surprised that my grapes have survived. But in my experience all vines, including grapes, are tough and adaptable. I don≠t get a huge crop and I share it most years with the birds, as they do love grapes √ and some years they are more attentive to my grapes than I. A flock of cedar waxwings can √ and will √ eat all my grapes in one sitting, those greedy gluttons. Maybe I should rent an owl – or buy a plastic one to live near my barn in grape-picking season.
Making A Spring Wreath
Posted on Wednesday, April 13, 2011 · Leave a Comment
A friend recently pointed out to me that the evergreen spray I≠d put on the front door back in December looked pitiful. It did. Funny how I can not notice the obvious. I decided that the time had come to put something else on the front door, something that shouted, “Spring and summer are on the way.”
I like making wreaths. A spring wreath using pussywillows, red-twigged dogwood and alder branches seemed like a good idea, so I headed off to find twigs alongside the road. All three plants are native to New England, and plentiful in wet areas.
Pussywillows (Salix alba, S. caprea or S. discolor) are weedy little trees or big shrubs whose major virtue is that their male catkins are furry fellows that perk up an otherwise drab time of year. And pussywillows are tough. They will grow in water-logged soil that would be fatal to the root systems of most other trees or shrubs. On the other hand, they are weak wooded and often scraggly. But at this time of year they are in their glory.
Elsewhere along a roadside I’d noticed the brilliant red stems of redosier dogwood (Cornus sericea). The redosier dogwood is a native shrub that, like pussywillows, does well in wet locations. Tatarian dogwood (C. alba) is a landscape plant that is sold for its red twigs, too. New growth on either is brilliant red, particularly in winter. Second year growth turns gray, with just a hint of red.
Anyone who grows red twigged dogwoods needs to prune them severely each year to keep them from looking drab. The town road crew had done a good pruning job- early last summer their brush hogs had cut plenty of red-twigged dogwood right to the ground. The stems were bright red- and free for the cutting. A healthy dogwood can grow 2-3 feet in a single season.
I have generally considered black alder (Alnus glutinosa) a nuisance plant that fills in and takes over around my stream. In researching this article I learned that they do have a virtue: they are nitrogen-fixing plants, so they improve the soil. Alders have male and female flowers. The male flowers are typical catkins but the female flowers resemble cones. Last year’s seed producers are still visible and handsome.
Rather than using a wire form, I made a simple grapevine wreath that allowed me to squeeze twigs between the vines. This reduced the need to use wires to attach the twigs, though I did use some florists wire to help attach twigs in places. This very thin wire is green, and easily cut with scissors.
I went to the woods and cut a fifteen foot length of grapevine that was about as thick around as a pencil. It is important to use fresh, not dead, vines; the one I cut was a greenish white inside and flexible, so I knew it would work well. Grapevines are readily available and produce good food for our feathered friends, although they can choke out some trees if left to get huge.
To make the wreath I formed a vine circle about 16 inches in diameter by overlapping (or twisting) one half of the vine over the other half – the same way I start tying my shoelaces. Then grasping one of the loose ends I wove it around the vine circle in tight loops. When I ran out of vine I tucked the end into the circle and repeated the maneuver with the other end of the vine. When done the grapevine wreathe was about an inch and an a half thick and 18 inches in diameter.
Next I cut some pussywillow twigs 12 to 18 inches long and tucked them into the wreath one at a time, forcing them into the crevices between the vines. Sometimes it was tough to force a twig into the wreath as the bent vines make an almost impenetrable barrier in places. I used a screwdriver to pry the vines apart to make room for twigs if needed. The pussywillow twigs followed the contour of the wreath, but extended out beyond it.

Spring Wreath
Then I took redosier dogwood and alder twigs and tucked them into the wreath, again spreading the grapevines apart and letting the natural tension hold them in place. I cut them a bit longer so that they stuck out further from the grapevine portion of the wreath. I selected alder twigs that had the cones and catkins.
When completed the wreath was about 36 inches in diameter, and had a distinctly porcupine-like appearance. I ended up putting it on the wall near the front door, as it shows up better there than on the natural wood colored door.
Spring has been slow to arrive this year, and I’m more than ready for its arrival. Making a spring wreath has helped a little.


 Click Here to buy from Cobrahead
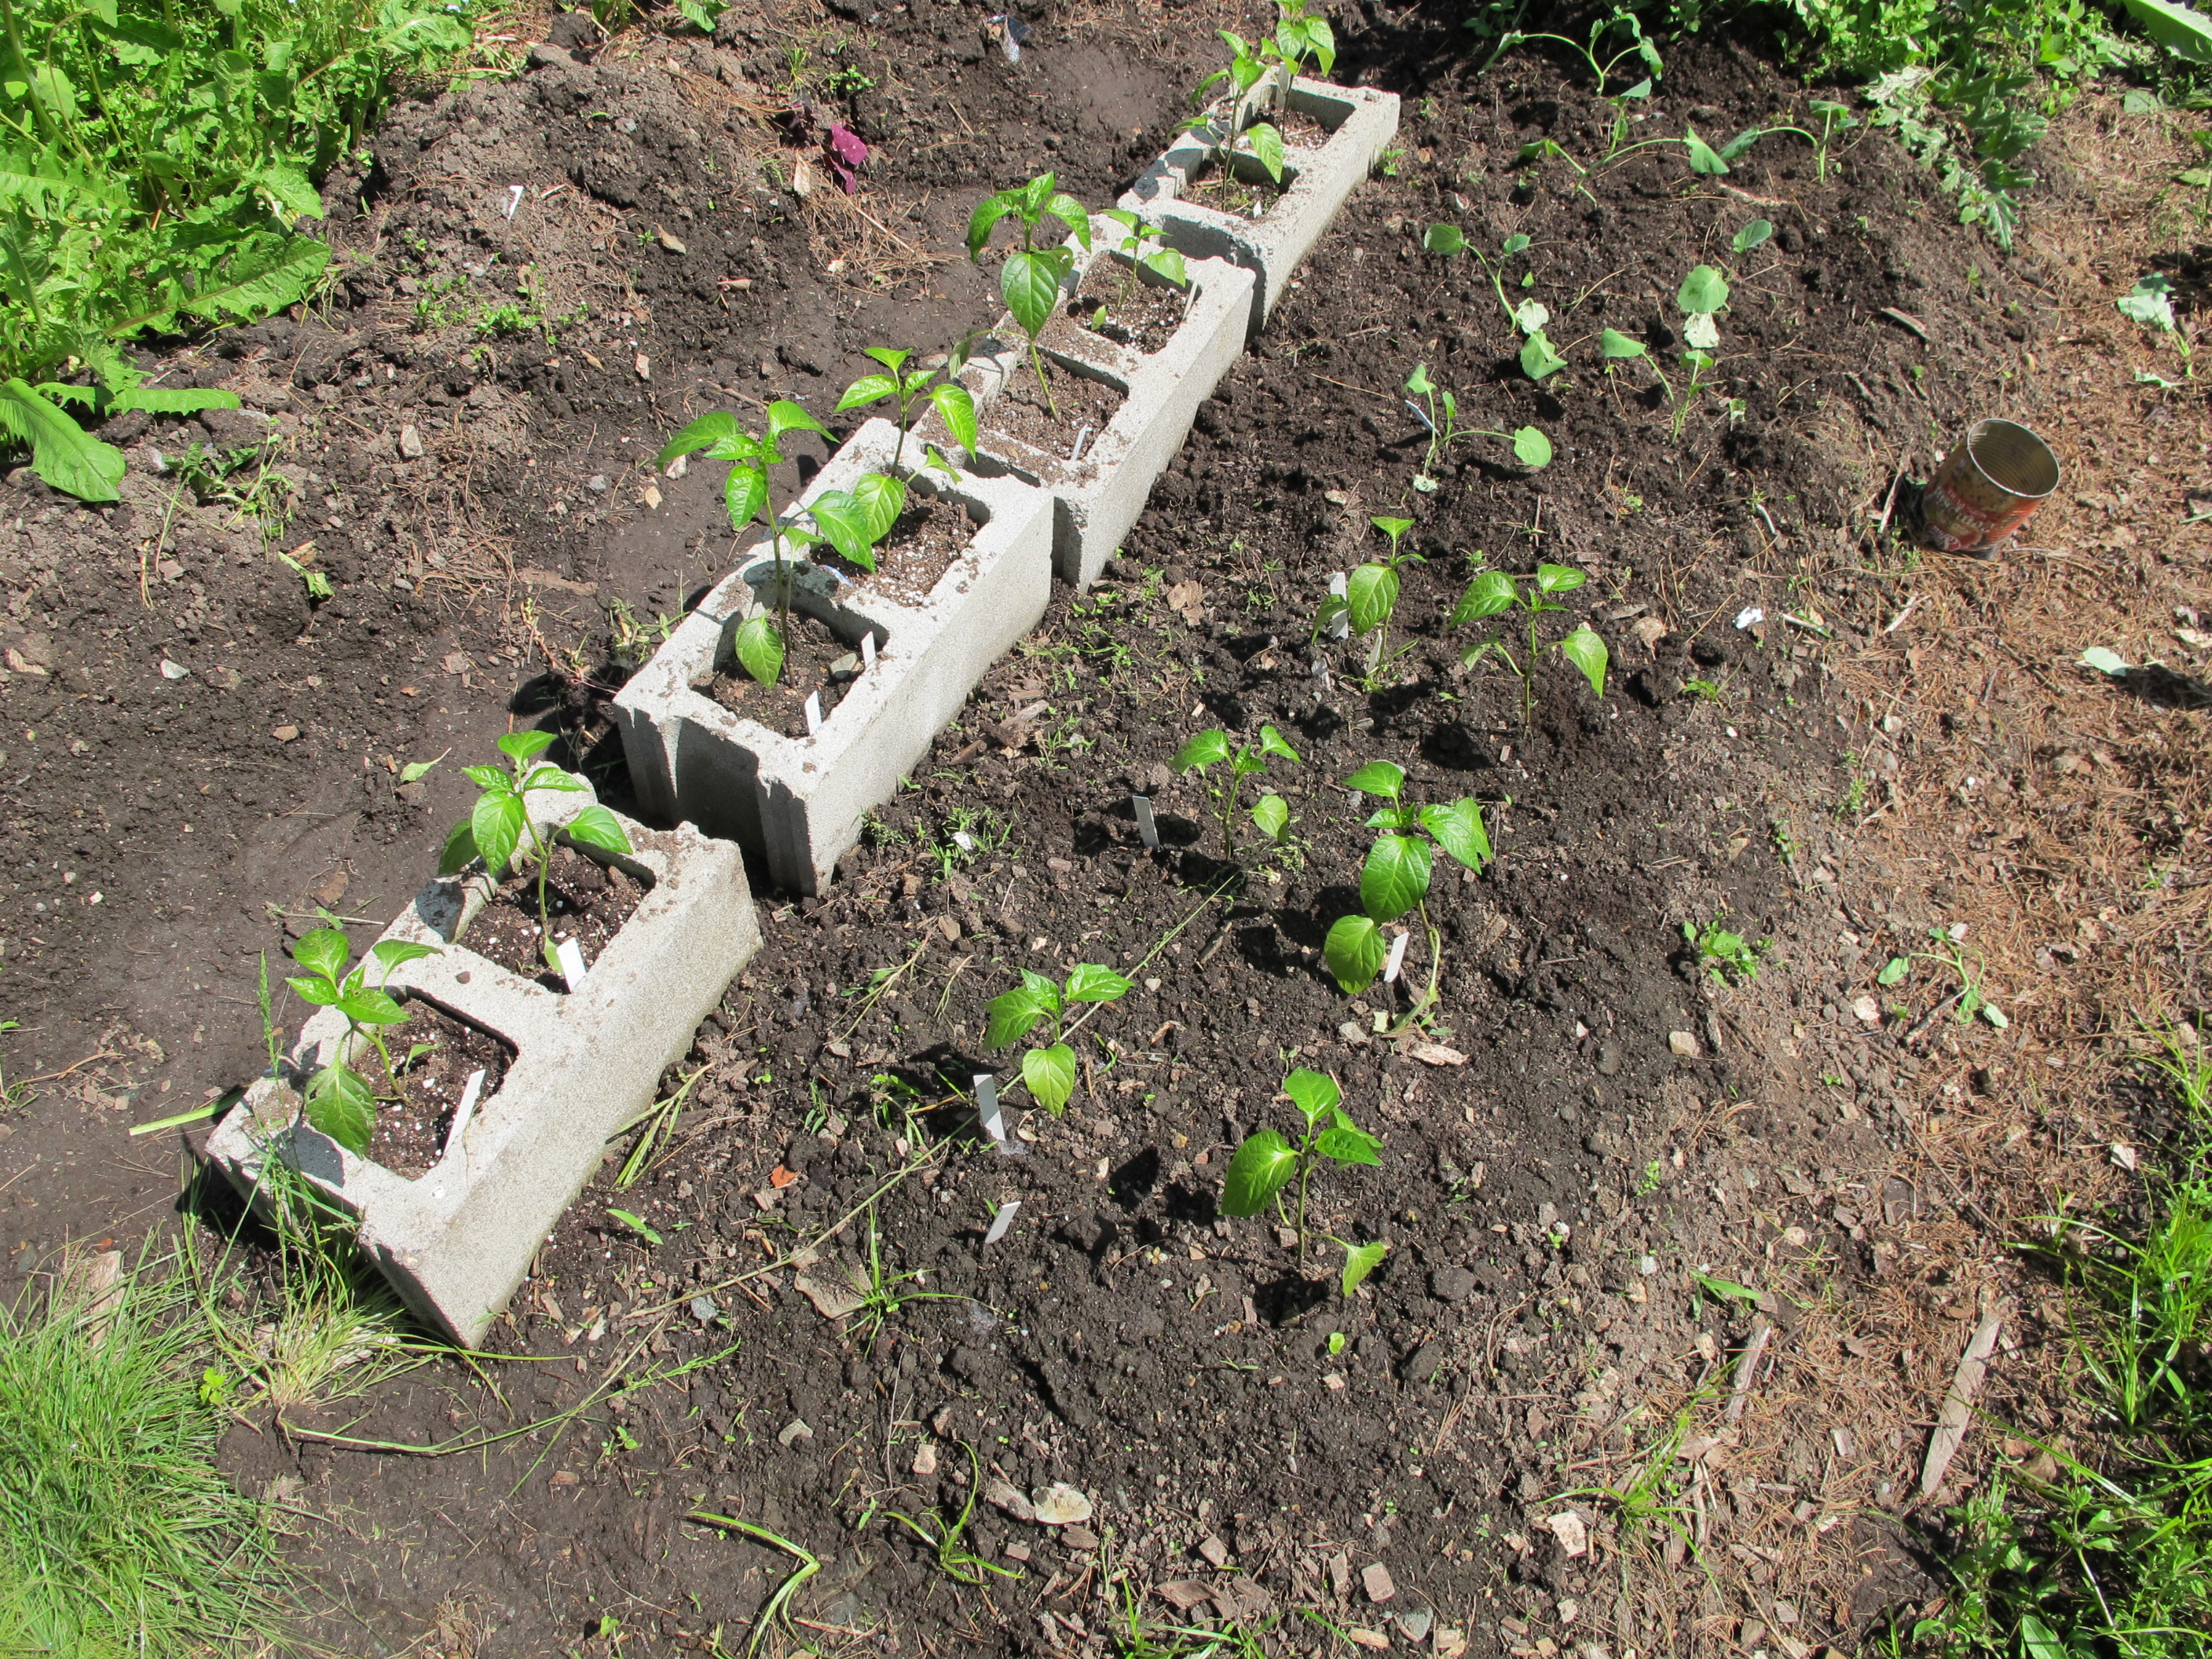
 To prepare a cutting, dig up a root, cut off the leaves, and use the top 2 inches of the root to re-plant. Bury the starts about 2 inches deep and 12 inches apart. Prepare a horseradish bed by working in some well rotten manure or compost. That will improve soil texture and keep the soil looser – for ease in future harvesting. You can begin harvesting a year or two after planting.

 An artichoke plant will produce, for me, one medium sized artichoke and perhaps 3 smaller ones as side shoots. It takes a space two feet square and needs rich, moist soil. Some years I’ll get my first artichoke in August, but one year it only started producing after the first frost scared it a bit. I harvested it after Halloween, having built a little greenhouse over it.

