-

Now available for $24.95 including shipping. -

Now available for $21.00 including postage. Vendors I Like
 Click Here to buy from Cobrahead
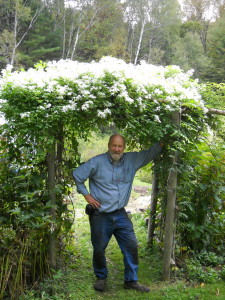
Two Trees Your Birds Need
Recently a blue jay turned to me and said, “Thanks, Henry, for planting those hemlocks and pine trees back in 1972!” Well, perhaps I’m presenting alternative facts here, but I know that the birds really do appreciate those trees. Particularly now, in the cold of winter.
Most of us feed the birds– not only to help them, but also to enjoy watching them all winter. The food we provide is helpful, but most would survive just fine without out it. But helping birds by providing shelter out of the wind and safety (away from cats and other predators), and nesting places is equally important. Forty-five years ago I planted a row of evergreens as screening for my back yard and it has been a real haven for birds.
According to a wonderful book called, Trees, Shrubs and Vines for Attracting Birds by Richard M. DeGraaf (University Press of New England, $24.95 in paper), 46 species of birds use the eastern white pine for either food, cover or nesting – and is one of the most beneficial trees for birds.
I dug up half a dozen small evergreens including a 5-foot tall white pine seedling in the summer of 1972. All were “volunteers” growing in a meadow near my house. They have done well, growing to mature size and blocking the view of my back yard from the road.
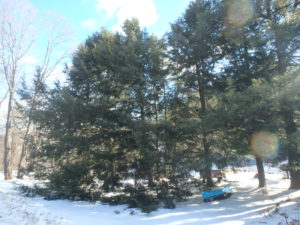
Hemlock and Pine Screening
According to the list of birds using white pine, the seeds are the favorite food of the northern bobwhite, red-bellied woodpecker, and spruce grouse – none of which I have seen in it. But it is also a favorite for some of my good bird buddies – black-capped chickadee, nuthatches, northern cardinal and juncoes. They go from the bird feeder on my deck to the pine and back, and enjoy resting out of the wind and away from Winnie and Sammy, my two resident cats.
Here are a few tips for growing white pines. First, don’t plant them near a paved road, as road salt is very injurious for them. I’d guess that if you are 20 feet or more back from the road with your planting, you should be all right, though even farther away would be better, especially if downhill from the road.
Next, remember that white pine trees get to be big, particularly if they are planted away from competing trees. They will grow 10 feet in 10 years, though under ideal conditions they will grow twice that or more. A mature white pine can reach 100 feet in size, though mine are about half that; their width can reach 20 to 40 feet. They have long needles, 5 to a cluster.
In recent years I’ve had many questions about white pine trees with needles that brown and drop off. It is normal for the trees to replace some needles every year, and every 4 to 6 years to lose quite a few in the autumn. But if you are seeing widespread needle browning at other times of the year, you may have a problem.
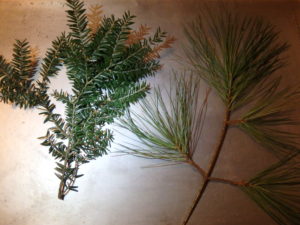
Hemlock (left) Whitepine (right)
Pines grow best in rich soil that drains well and is not generally soggy. Soils that are compacted by cars parked near them will suffer root damage. White pines prefer acidic soils with a pH of around 5.2. So you may be able to help your pine trees by applying some agricultural sulfur around them, just as you do your blueberries.
Leaving the dropped needles under the trees will help, too. The needles will serve as a mulch, preventing the soil from drying out too much in dry times and will help to acidify the soil as they decompose.
Eastern hemlock is another great plant for birds. De Graf lists 26 birds that use hemlock on a regular basis. It is an easy tree to grow as it will do so in full sun or full shade, and everything in between. It is fast growing, in most conditions other than heavy clay. It can grow a foot or more per year. It is easy to identify as it has soft, short needles –just half an inch long.
One worry I’d have about buying a Canadian hemlock is an insect pest that can devastate them: the wooly adelgid. This mite is an aphid-like insect that can kill a mature hemlock in 4 to 10 years. A native of Asia, it has no native controls. It covers itself with waxy filaments, the wool, which tends to keep off predatory insects. They are being monitored closely throughout New England, and few outbreaks have been recorded in Vermont, New Hampshire and Maine – though it is working its way north.
If planting hemlocks, choose well-drained acid soils. It is susceptible to drought, particularly in the first few years after planting. But generally it is an easy tree to grow.
Obviously now is not the time to plant trees, but it’s a good time to imagine what they might add to your landscape after 10 or 20 years. Don’t make the mistake of planting either of these trees too close to the house – 25 feet from the house would be a minimum for either. And if you want a hedge, hemlocks can be pruned into a hedge quite nicely – though if you miss a few years of pruning they will get too tall. And that almost always happens!
You can read Henry’s blog at https://dailyuv.com/
Is it Time to Starting Seedlings?
A reader, Vicki, wrote recently asking if it’s time to start Brussels sprouts indoors, and if so, how? No, it’s not time for them yet. But I will start a few things soon. Here are some tips.
First, know that most vegetables and flowers only need to be planted 8 to 12 weeks before you put them out. For me, frost sensitive vegetable starts go outdoors in early to mid-June. Counting back 8 weeks means planting in April, not January.
But look at your seed catalogs – or go online – to see how long a particular plant takes to germinate and get ready to plant outdoors. I find that the Johnny’s Selected Seeds catalog is one of the best source of growing tips. Go to www.johnnyseeds.com and click on grower’s library, then on vegetable library. This will give you the chance to click on a vegetable and get 2 pages of good information – most of which is also in their print catalog. For another good source of information go to the Gardeners Supply Company’s vegetable encyclopedia: http://www.gardeners.com/
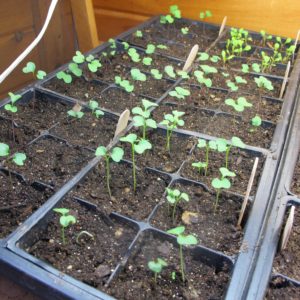
A Flat of Seedlings
Professional growers don’t want to spend a lot of time babying seedlings – time is money – and recognize that smaller seedlings generally transplant better than large ones. Roots of small plants are not bound up, even in a small cell, so they transplant better. Some gardeners like to start tomatoes 16 weeks ahead of planting, and then transplant seedlings from starter 6-packs to individual 4-inch pots, allowing them to plant large tomatoes in the ground. But that’s a lot of time tending and watering. Those same gardeners often try to get seedlings into the ground in May – even if the ground is chilly. I like to put mine out when the soil is 60 degrees or warmer. Then the plants take right off and are not stressed. Warm weather plants like tomatoes and peppers tend to sulk when put in cold, wet soil.
The reader, Vicki, asked if I thought she needed a heat mat for her Brussels sprouts. Not necessarily. Heat mats are good for impatient gardeners who want to get things growing fast. Soil temperature is a safety feature for plants: cold soil means more cold weather is still coming. If the soil is truly warm, it’s safe for tender plants to germinate. So it may take 2 weeks or more for Brussel sprouts to germinate at 50 degrees, but only 5 to 8 days at 75 to 85 degrees. Soil mats should be turned off once the plants have germinated.
Vicki was planning on growing her Brussels sprouts on a south-facing windowsill. Don’t do it, Vicki. Invest in some lights. Seedlings need intense light in order to develop strong bodies and thick stems. If there is not enough light, plants get tall fast and lean toward the source of light. They are flimsy and more prone to disease.
I tell wanna-be gardeners that they need to have 6 hours of direct sunshine outdoors to grow good tomatoes and other fruits, but that lettuces and kale – leafy greens- can get by with 4 hours of direct sun. It’s hard to get 6 hours of sun indoors at this time of year, especially since the sunshine is so often filtered through clouds. And in modern windows, much of the sun’s strength is filtered out so that it won’t bleach out your rugs and curtains. What kind of lights are best? I recommend fluorescent lights using T-8 bulbs. Those are tubes that are narrower in diameter than the old T-12 bulbs, but more energy efficient. Shop lights are relatively inexpensive, though special “Gro-Light” fluorescent tubes can be pricey. I use ordinary shop lights with no-frill tubes.
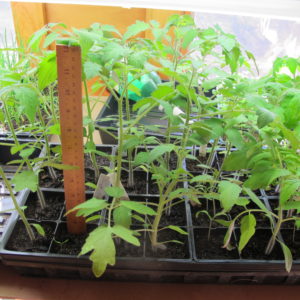
Tomato Seedlings Ready for Bigger Pots
I built an A-frame plant stand that is perfect for shop lights and flats of seedlings. You can see the directions to build it at https://dailyuv.com/
Vicki asked me about fertilizing her Brussels sprouts seedlings. It depends on the soil mix you use. If you buy a commercial seed-starting mix, it is light and fluffy and good for developing roots, but it has little in the way of nutrients, and those present will wash away in a couple of weeks. Me? I make a 50-50 mix of seed starting mix and good compost. The minerals in the compost will not be so quickly depleted. In either case, a regular light dose of an organic liquid fertilizer such as Neptune’s Harvest fish and seaweed will keep your plants from suffering from lack of minerals. But don’t overdo it. More is not better.
So, Vicki, don’t start your Brussels sprouts until April, or even May. Onions and peppers and artichokes are things I start in late January, or even as late as mid-February. That keeps me busy and thinking of Spring, but doesn’t overwhelm me.
You may reach Henry at henry.homeyer@comcast.net or at P.O. Box 364, Cornish Flat, NH 03746. Please include a SASE if you want a mailed response. Henry’s web site is www.Gardening-Guy.com.
Twelve Rules for Gardeners
I do a lot of public speaking, and was recently asked to give a talk that put forth a list of “Commandments” for gardeners. Not wanting to sound pretentious, I decided that 12 rules sounded better than 10 commandments. Here they are:
- Do not use chemicals in the garden. Not insecticides, not weed killers, not chemical fertilizers. Why? Because it’s not only better for the environment, it’s better for your plants. And you, especially if you plan to eat your veggies.
Just say no to pesticides! My dog Daphne
Mother Nature has been growing green plants for a long time – and she never fertilized with tree spikes or used Roundup to kill weeds, or Sevin to kill bugs. And she did just fine. Sure, the Japanese beetles can be pesky. But do you really want your kids and dogs playing on a lawn with pesticide residue on it? I don’t. Plants do fine with organic techniques. Pick off those dang beetles and drown them in soapy water.
- Don’t let your weeds make seeds. Seeds can last years, waiting patiently for you decide to go to the beach for a week in August. Then they will germinate and grow like crazy. Making you go crazy when you come back and see the gardens full of weeds.
What to do? Learn to love weeding. It’s an excuse to be outdoors in the garden and to ignore other deadlines. Say to your loved ones, “Gotta go weed! Weeds are blooming! Sorry, can’t help with that!” And mean it. Weed every day for at least a few minutes. Make it a ritual like brushing your teeth or making the bed.
- Treat your soil as you would a puppy: give it good nutrients but not too much of anything. Don’t give it big doses of fertilizer. Some compost and a little slow-release organic fertilizer will help, but too much fertilizer will encourage fast, weak growth that is attractive to insect pests and fungal diseases.
- Create biodiversity in the landscape. Put some flowers in with your veggies and veggies in with the flowers. Artichokes or purple kale will look great in your flower bed. Marigolds in the vegetable garden are thought by some to repel certain pests. An acre of cabbage will attract loopers that might not find one or two plants.
Not only that, flowers in the vegetable garden feed pollinators needed by your cukes. And insects like ladybugs, which eat aphids, also depend on pollen when insect prey is not available.
- Create hardscape so that you have beauty even in winter. When I bought my house in 1970 I started by vegetable gardening. Later I planted perennials. It wasn’t until much later that I discovered the joys of shrubs and trees.
Clematis in the fall
Woody plants take a lot more time to grow and become mature than perennials. So start with them. In 15 or 20 years most trees start to look great, even maples and oaks. Add stone walls or a bentwood or cedar archway, or even a barn if you can. All look great in winter – and can support blooming vines.
- Learn to store, dehydrate and freeze garden produce so you can eat something from the garden throughout the year, not just in summer. This is one of my great joys in life. Even a clove of garlic added to a salad or a winter squash put in a soup in January brings me pleasure. I spend a lot of time in late summer into the fall preparing food for storage, but it is worth every minute I spend, and more.
- Prune your trees so they are beautiful. Most people look forward to pruning as much as they enjoy getting a root canal. Think of pruning as creating living sculpture. But the nice thing is, if you inadvertently lop off a branch that you regret removing, others will fill in the space.
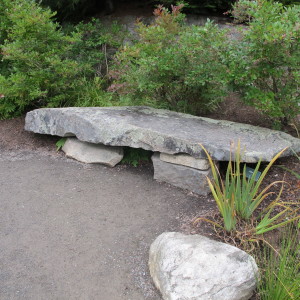
Stone bench
Yes, there are rules about pruning. But if you know enough not to leave ugly stubs, and cut just outside the “branch collar”, that swollen area where branches meet the trunk, you will be fine. Clear out clutter.
- Keep a compost pile, but don’t be afraid to buy compost, too. Don’t worry if your kitchen scraps don’t turn into “black gold” overnight. Buy compost as needed – we never have too much.
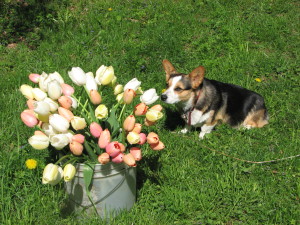
- Cut fresh flowers whenever some are in bloom and keep them on the table. Plant early bulbs and late fall flowers to extend the season. And then support your florist. Fresh flowers are a basic human right.
- Keep a few easy houseplants to keep your green thumb active, even in winter. Don’t be afraid to throw them out if they disappoint you – or you, them!
11. Learn from other gardeners. Visit other gardens. Take classes.
12. Take a few moments every day to walk through the garden, pausing to look at the beauty, not just the weeds or the projects on your list.
Read Henry’s blog posts at https://dailyuv.com/
Michelle Obama and the White House Garden
I recently was re-organizing my gardening books and came across a great book by Michelle Obama: American Grown: The Story of the White House Kitchen Garden and Gardens Across America (Crown Publishers, 2012, $30 in hardback). I must have gotten it when it came out, but never read it until now. It’s a wonderful book, and every library should own it. Not only is it a good gardening book, it is a look into the life and character of Michelle Obama.
Michelle Obama grew up in Chicago and never had the chance to garden as a child or young adult. But as a mom, she knew she wanted her children to eat fresh organic food whenever possible. When she and the family moved into the White House she had the opportunity to have a garden.
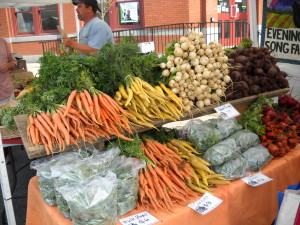
Rutland, VT Farmers Market
With the help from fifth graders at nearby Bancroft Elementary School, Michelle Obama created a vegetable and herb garden. They also got help from National Park Service staff, a professional farmer, and the staff of the White House, especially the cooks. Their garden thrived and the food was not only eaten by the Obamas, but shared with the children who helped plant it, and with a local homeless shelter called Miriam’s Kitchen.
This book is more than a feel-good story. Yes, a third of the food went to the homeless shelter. And yes, low-income children got to work in the garden and eat the results of their labor. But it also tells the story of how to create a garden, starting with removing the sod. It’s full of useful gardening information.
It is full of spectacular photos showing the gardens every step of the way, from planting to harvest. It has diagrams and layouts of the gardens. It explains the importance of getting a soil test before planting. And it has recipes for using (and knowing when to pick and how to store) things like bok choi or cauliflower, which most of the Bancroft Elementary students had never encountered.
Like most beginning gardeners, Michelle Obama had doubts: “What if the seeds or seedlings were not set in correctly and we ended up with empty beds? What if we couldn’t control the weeds? I worried about the weather … What if the plants didn’t grow? And what if, after all this effort, the food that did grow didn’t taste good?” But her fears were unfounded, and the garden was a huge success.
The book includes profiles of others who worked in the garden with her and really gave full credit to everyone who helped, taking none for herself. And the book includes vignettes and photos of many community gardens around the country.
I particularly liked a section on a container garden in Houston, Texas. The Houston Parks Department donated 34 huge planting containers that were installed on a stone patio in front of a high-rise office building. Each floor got one or more of these waist-high containers and a choice of vegetables to plant. Office workers took turns watering and weeding – and taking home the lettuce, okra, tomatoes and more.
Canillas Garden
As most of you know, Michelle Obama has been a supporter of healthy eating and active lifestyles for children as a way to be healthy and reduce obesity. This garden, which she calls a community garden, is part of that effort. The book also profiles others – some well-known athletes, some ordinary citizens – who are doing things that support her goals. I loved a picture of 400 kids in purple tee-shirts doing jumping jacks on the South Lawn with her in an effort to break a Guinness Book of Records record. And they did, over 300,000 people participated at the same time around the country.
Not everyone can have a garden, or even pots on a patio. Mrs. Obama spent time in the book lauding farmers markets, too. Fresh, local food is good food. She pointed out that Thomas Jefferson had started the first farmers market in Washington, D.C. (and that he also had a kitchen garden at the White House). So she lobbied city officials and got approval for a farmers market near the White House.
I haven’t tried any of the recipes in this book, but they look very good. Her corn soup made with fresh corn and thyme looks great, I shall try it next summer. And the spinach pie seems like a winner.
So as I bundle up to go outside on a cold January day, I like to think back to summer and my own vegetable garden. I like going to my freezer to extract bags of kale and squash for making my own soup. And I enjoy sitting by the fires and reading about other fine gardens. I think you would like Mrs. Obama’s book. I did.
Read Henry’s blog, and get an email alert every times he posts, by going to https://dailyuv.com/