-

Now available for $24.95 including shipping. -

Now available for $21.00 including postage. Vendors I Like
 Click Here to buy from Cobrahead
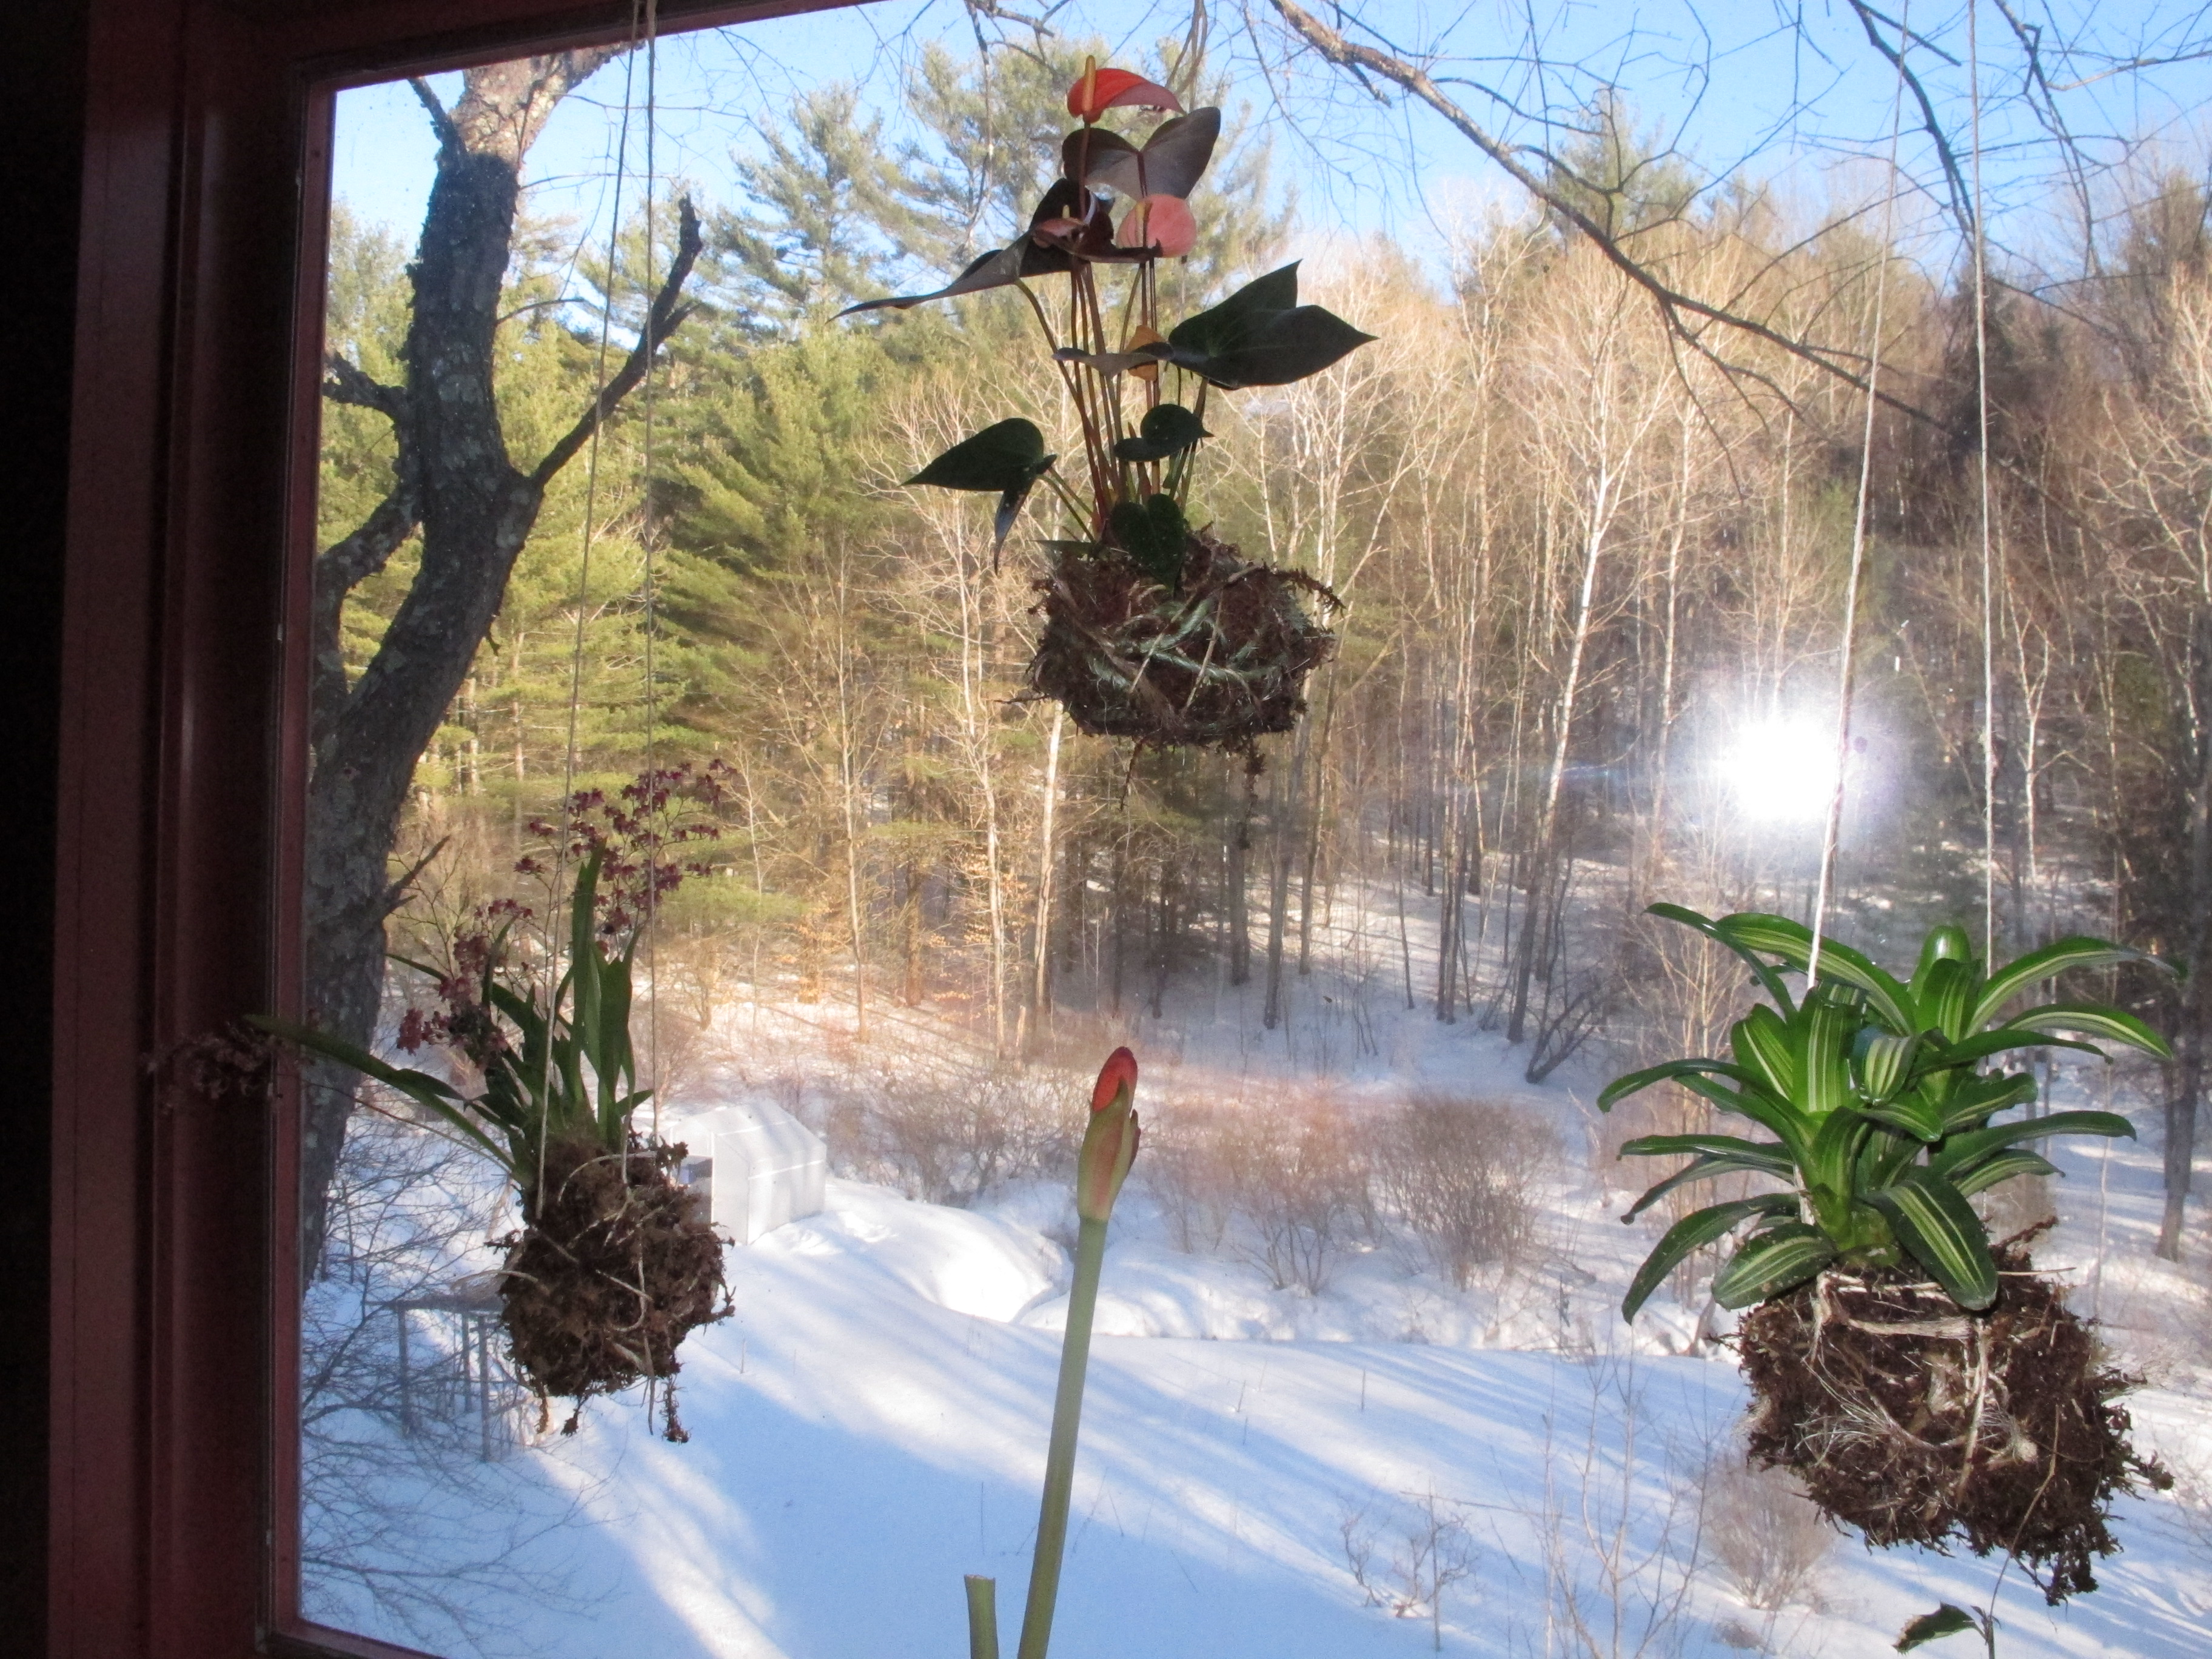
A New Way to Grow and Display Indoor Plants: Kokebana
This is the time of year when I am chomping at the bit, all ready to garden, but without much I can do outside. So I was delighted to visit a friend in Maine who was experimenting with a new art form/planting technique: kokebana. This is a Japanese technique for hanging plants indoors – without using pots of any sort of pot, instead wrapping them with moss and strings.
Doing some online research I found that kokebana is also called kokedama, which means ”moss ball” in Japanese. I made three plants into kokebana plants, and it was a great, messy project that made me feel like I was a kid making mud pies. Not bad for a mudseason afternoon.
Kokebana is most successful if you choose small epiphytic plants – though apparently some people even hang small trees as kokebana. Epiphytes are plants that, in their natural state, grow in trees. They do not send roots into the trees or obtain any nutrition from the trees, they just use a tree for a safe haven. Epiphytes might benefit from the remnants of a few rotting leaves or some windblown soil provide a few minerals. They get water when it rains, but generally don’t require much.
Explaining epiphytes to my grandson George, age 11, I said that they did well because they are adapted to grow where nothing else can grow. They’re like those weeds that grow in your driveway: there is no competition. They make good houseplants, too, because they generally do well with little or no direct sunshine and many can go weeks – even months – without getting watered. My kind of houseplants.
To get the materials for this project I went to Longacres Nursery Center in Lebanon, NH. They have a greenhouse packed with all kinds of tropicals, including many epiphytes. I brought a list of good plants for kokebana I’d put together after some online research. Included were Antherium, bromeliads of all sorts, and many orchids. I bought three plants and took them home to make into kokebana.
I went online to see what I could learn about kokebana, and found surprisingly little information. I watched one YouTube video (How to make a String Garden) that showed in high speed how to make a plant into a kokebana, but when I tried their technique, it didn’t work.
They placed strings in a bowl, then lined it with sphagnum moss, added a few stones as ballast, then potting soil and a plant. In fast forward, they tied all the strings around the plant and hung it up. No mess. When I took my attempt at a kokebana out of the pot, everything fell apart.
Having invested in 3 houseplants for this project, I tried another way. I cut 36-inch long pieces of garden twine and spread out 6 or 8 pieces on a table, all intersecting in the middle. Then I spread a layer of sphagnum moss over the strings, creating a disk about a foot across and three quarters of an inch deep. I had moistened the moss, but it was not drippy. I tried to keep the long fibers from separating when I pulled out a chunk from the package so that it would stay together.
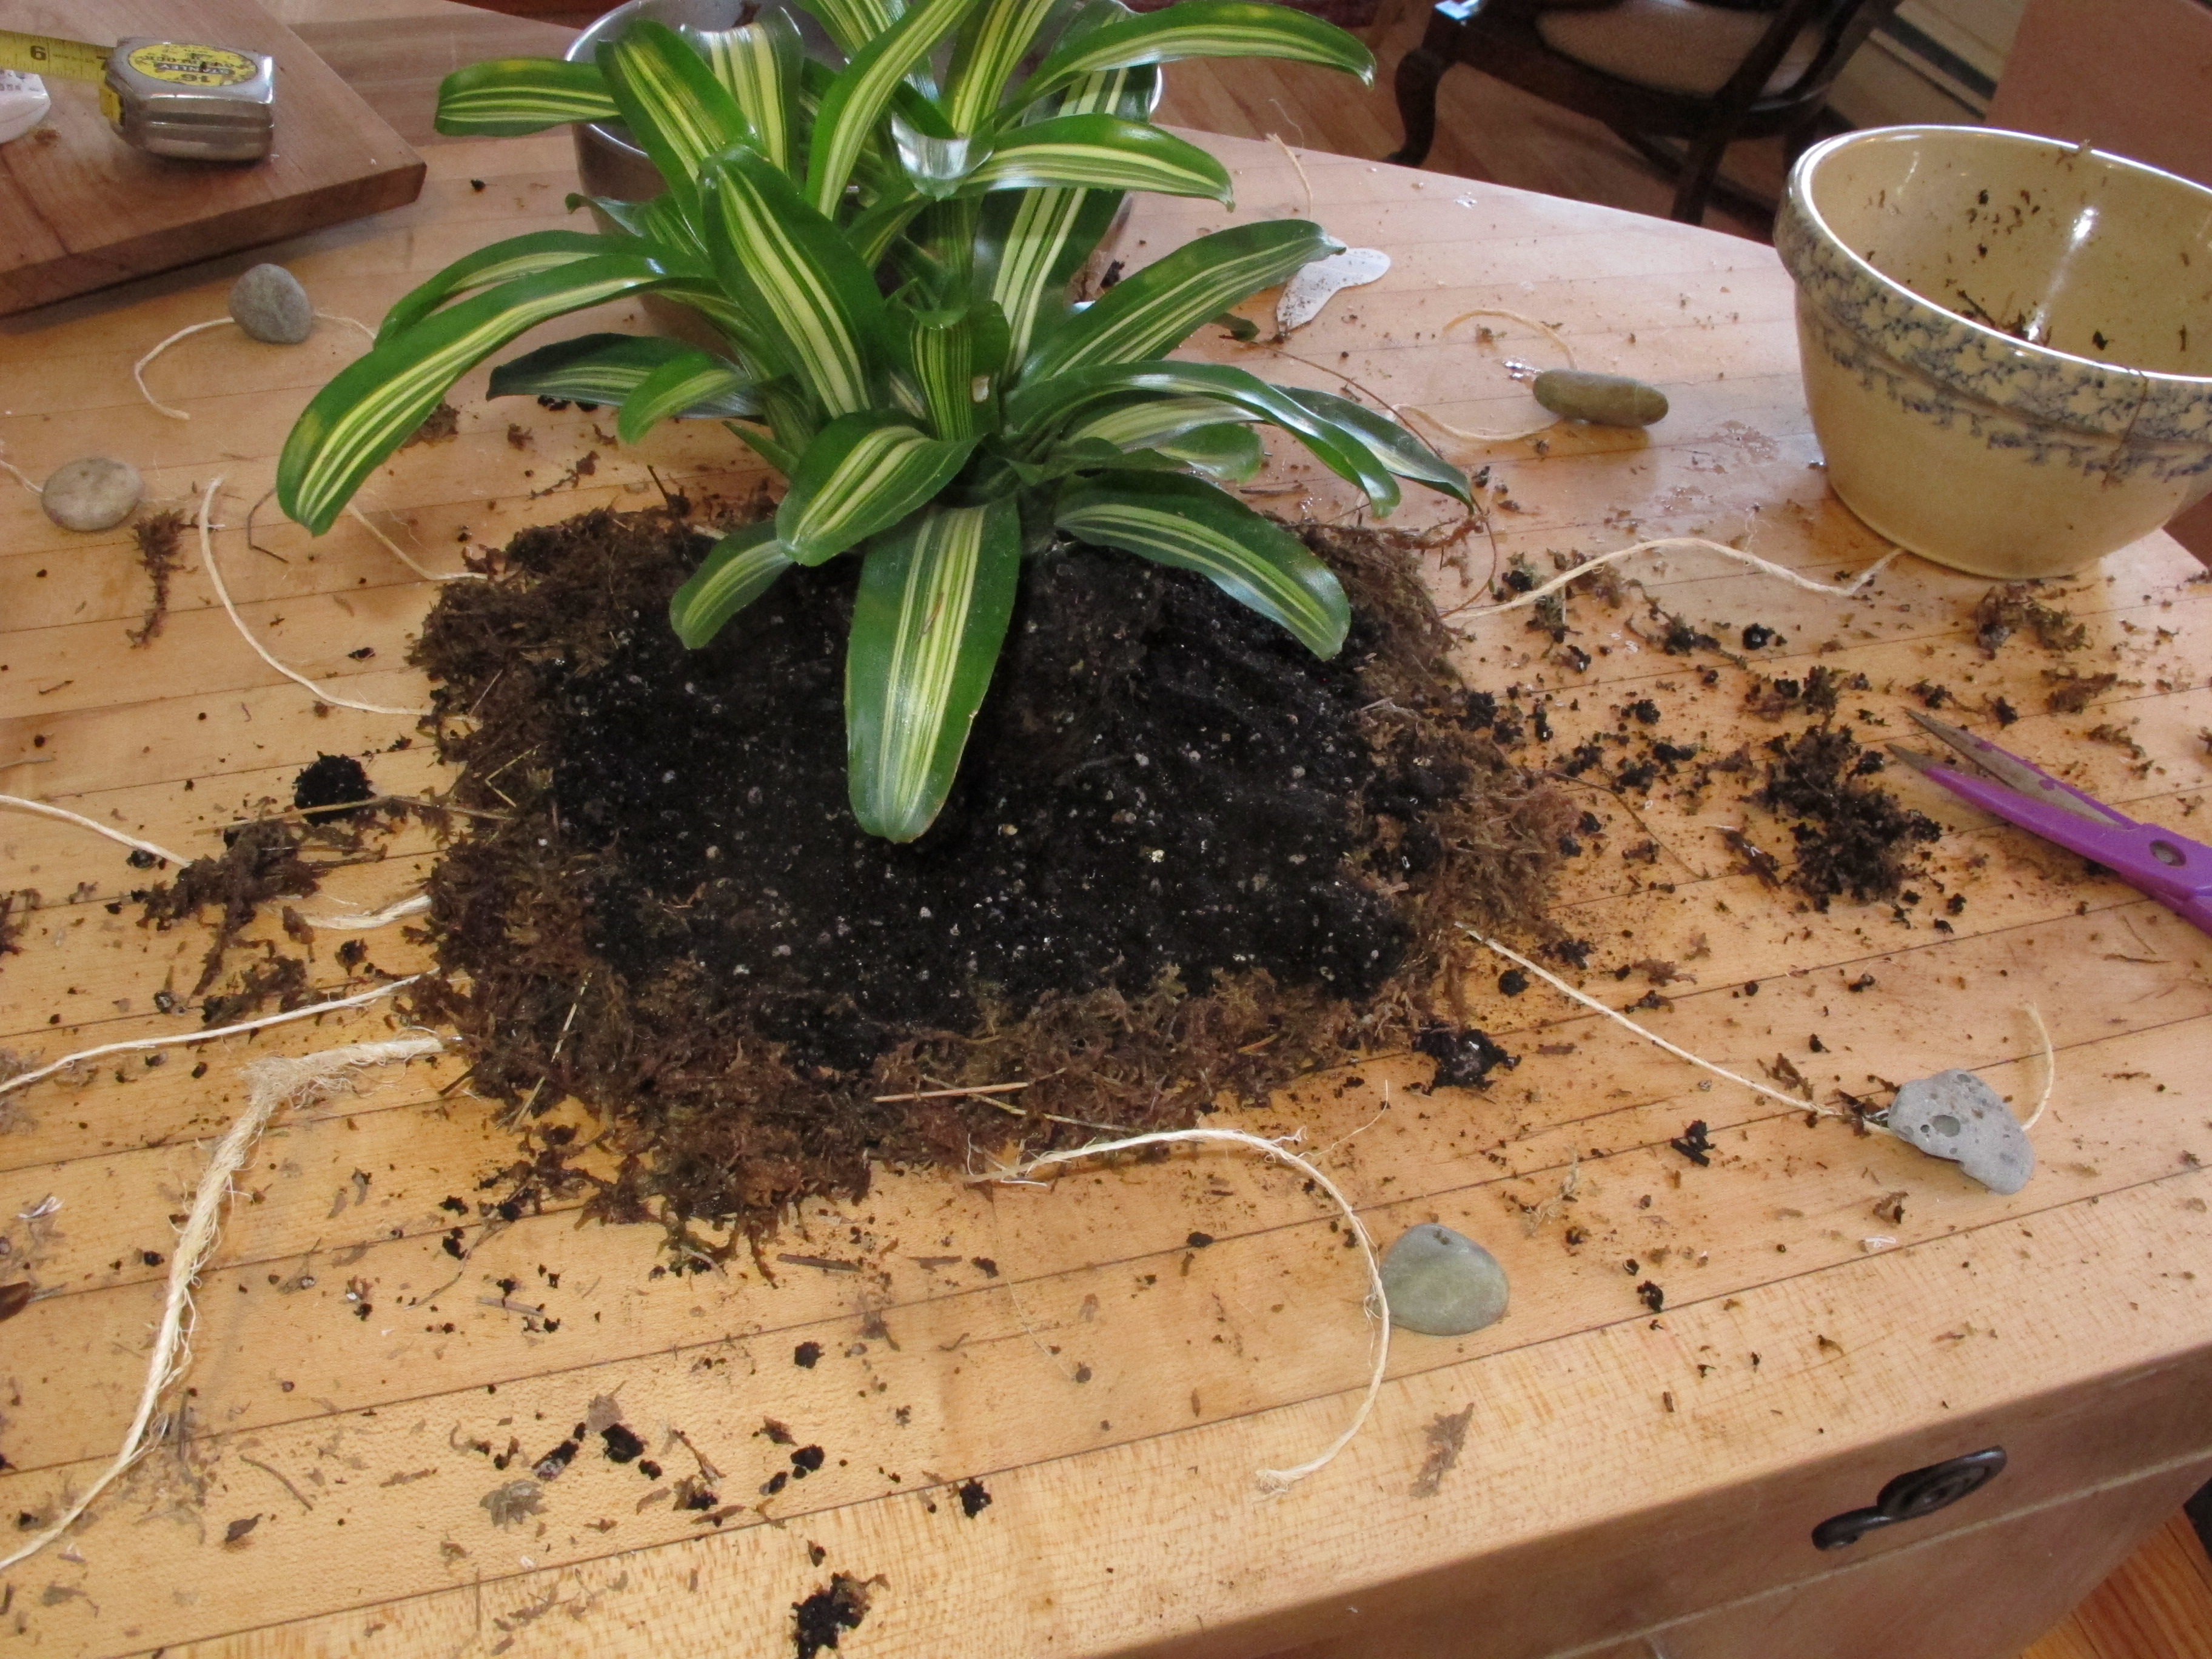
Next a spread a layer of moist potting soil over the sphagnum. I loosened the roots of my plant and placed the plant on top of the potting soil. Then the tricky part: forming a ball around the root ball, and surrounding it with the strings. I tried to pull up all the strings at once and hold them with one hand while using the other to form the ball and encircle it with string. Surprisingly, I could do that. My potting soil was a bit sticky, which helped. If I did it again and had some clay, I would mix some into the potting soil.
My strings around the ball were pretty random – this was not a root ball that had evenly placed strings confining it. But the sphagnum moss acted like a screen, holding in the soil. I cut two 48-inch strings, ran them around the ball, and used them for hanging the kokebana ball in my window.
I started with the kokebana in an east-facing window, thinking that some morning light would be good. But they dried out completely in 3 days, and I was worried that I might kill them if I ignored them for a week. So I moved them to a north-facing window where they got bright indirect light, but no direct sunshine. This seems to have worked better.
Soaking the balls seems like the best way to replenish moisture. But it also means that the balls will drip after soaking. I put them in the dish drainer for an hour after soaking, but they still dripped when hung. So I have also tried using a spray bottle to give them water. It requires more frequent applications of water, but it is less messy – I found that moving the kokebana plants for soaking left little bits of sphagnum moss on the windowsill and the table near it. Spraying was more labor intensive, but a bit tidier.
Spring is technically here, as of March 20. Couldn’t prove it by me – there is still snow when I look out the window. But at least I have 3 handsome plants hanging in a window and two of them are in bloom!
Henry Homeyer lives and gardens in Cornish Flat, NH. He is the author of 4 gardening books and one children’s chapter book. His website is www.Gardening-Guy.com.
Pruning Apple Trees
Often the snow on the hilly south side of my house has melted by early March, allowing snowdrops to push their little noses out of the ground and permitting me to pick buds that open up indoors. Most years by mid-March the snow has melted enough to allow me to get out and move around my apple trees to prune them. Not this year. Snow is still knee-deep here and not disappearing very quickly. It will be April before I get to do much pruning.
The first step in pruning is to really take a good long look at the tree. Are there dead branches? They must go. Are there branches rubbing? You must remove one or the other. What about what I call “invaders”? Invaders are branches that “see” an empty spot and grow willy-nilly through the center of the tree to grab the sunshine. Off with it! Is the interior crowded? If so, it needs work.
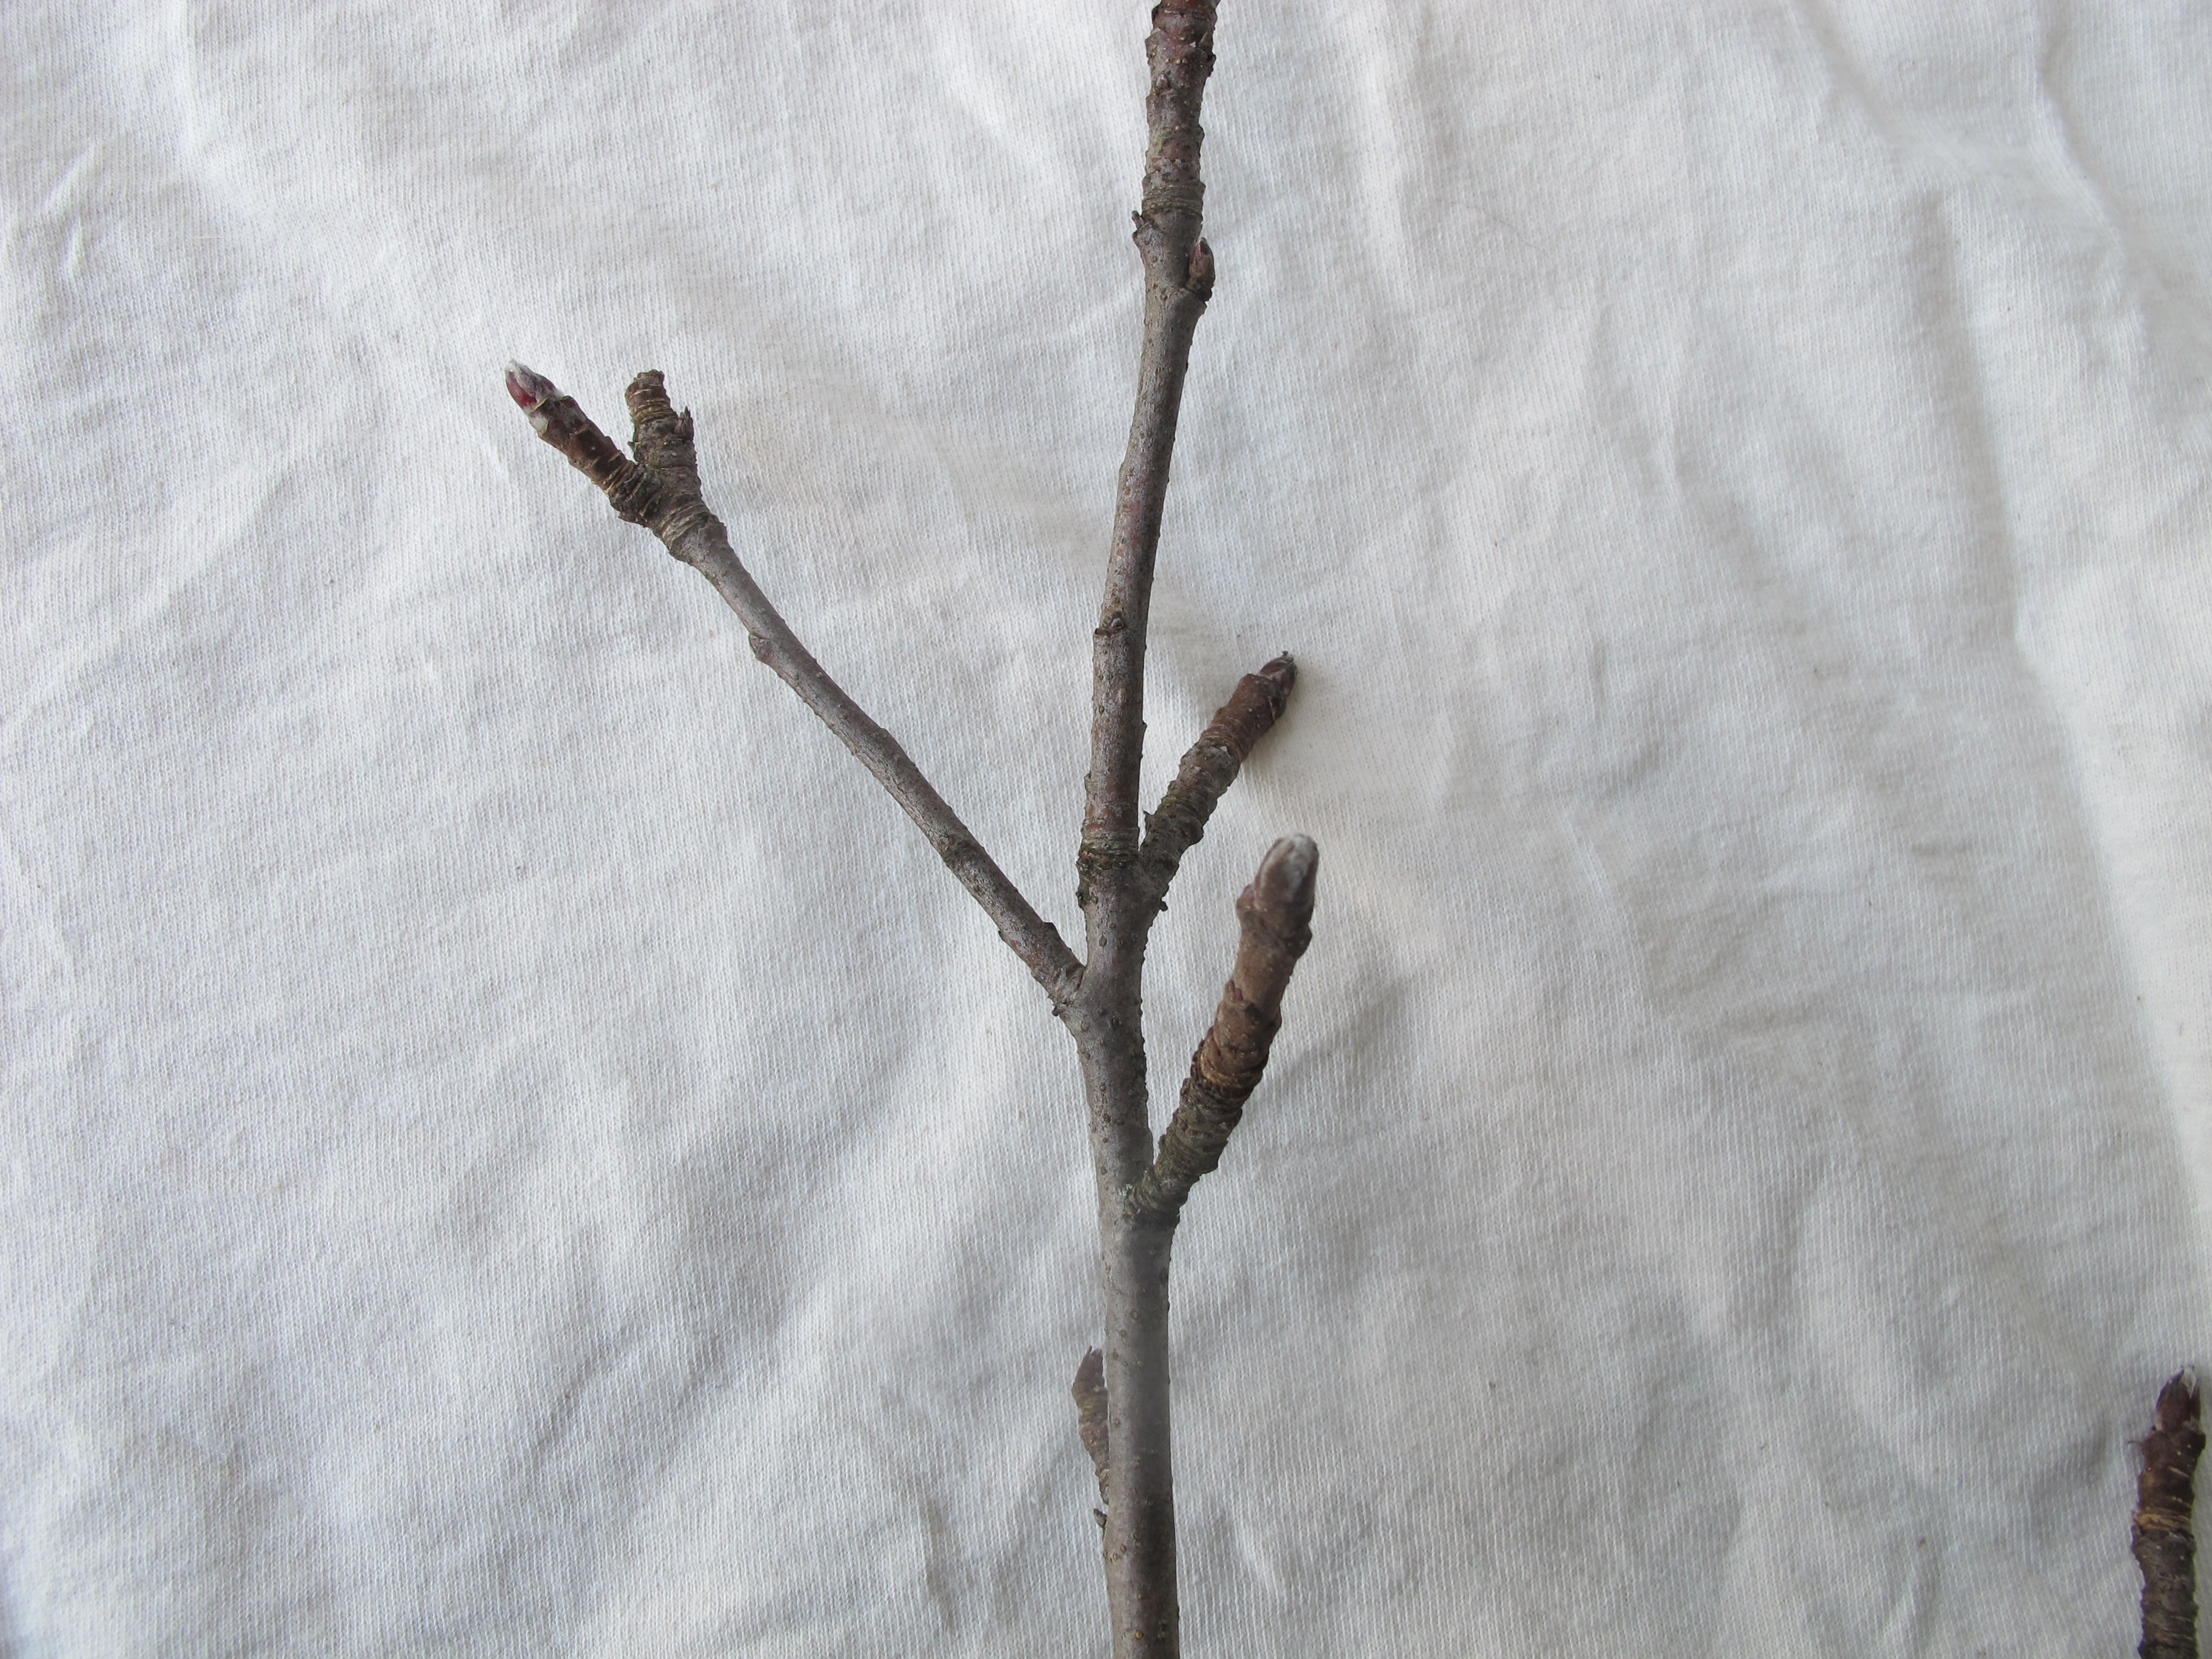
Apple fruit spurs
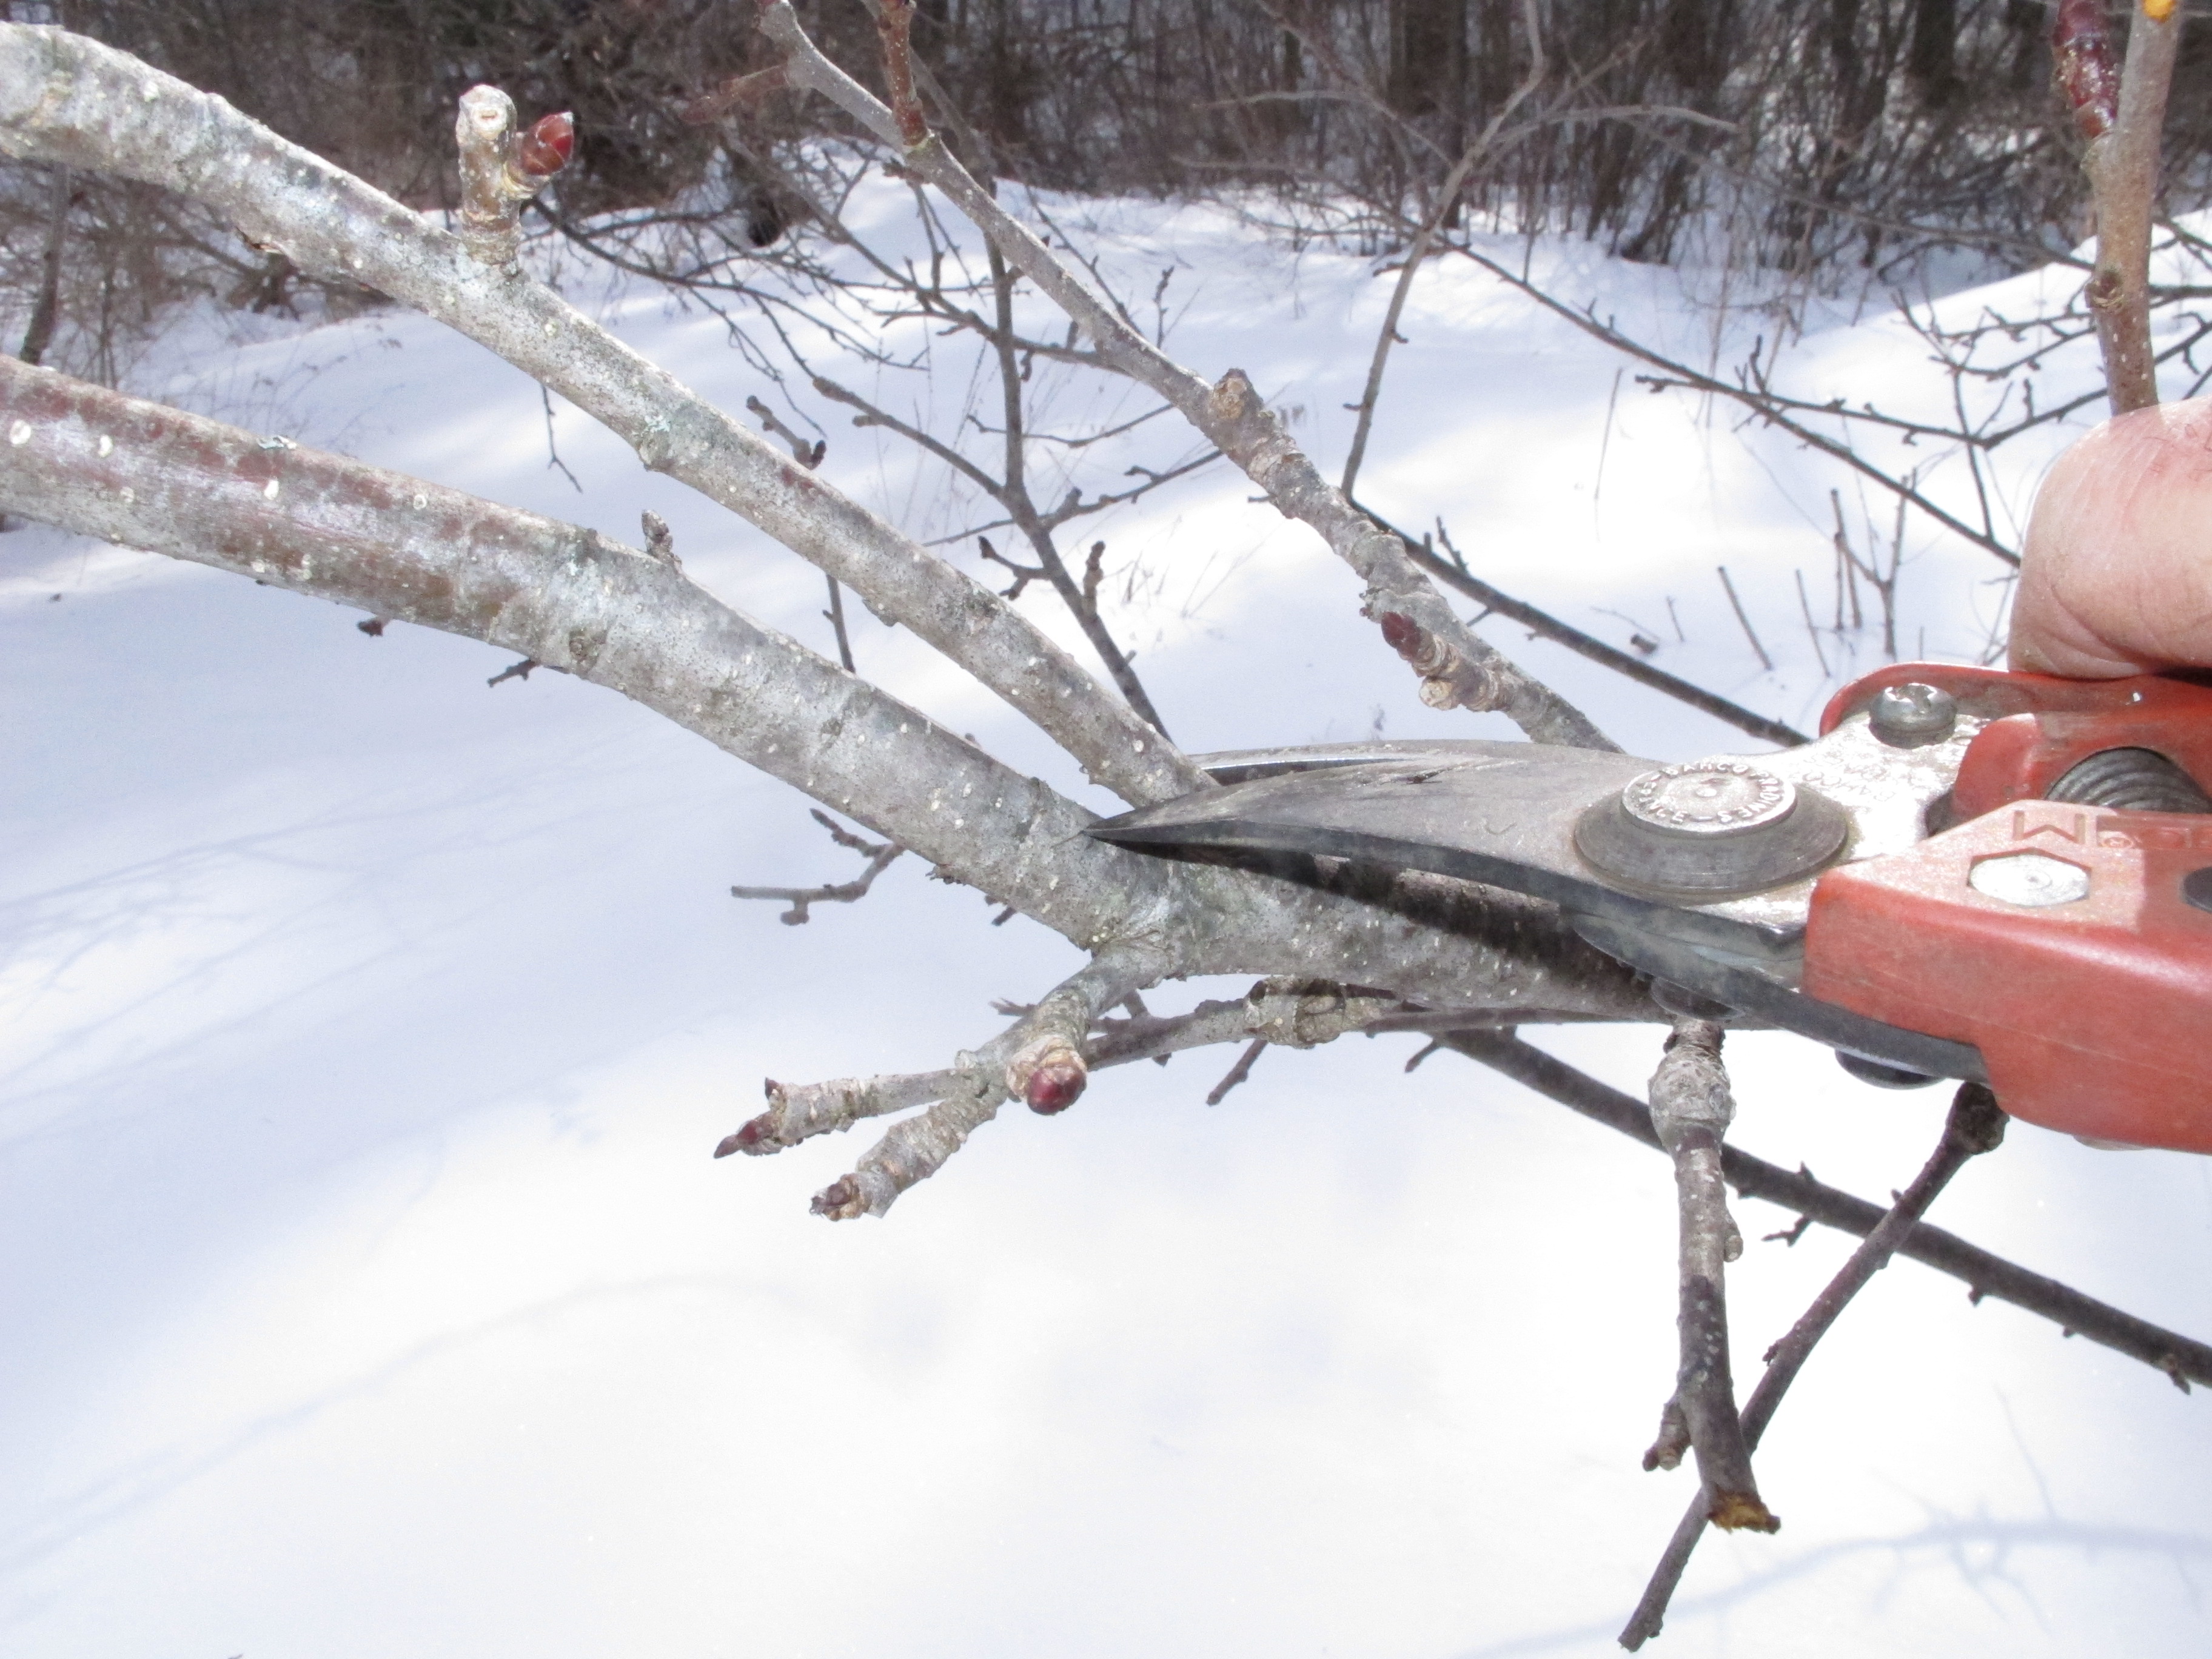
Where you make your pruning cuts is important for tree health. Don’t cut branches flush to the trunk or a bigger branch. Don’t cut into the swollen area at the base of a branch, an area called the branch collar. You can often see a distinct edge to the collar where the wrinkles in the bark in the branch collar stop and smooth bark of the branch begin. But don’t cut off branches too far from the trunk, either. That creates stubs that will die and slowly rot away – leaving an open wound where disease can enter.
In general, it is better to take a few bigger branches than lots of little ones. You can safely remove 20 to 25 percent of a tree’s leaves when pruning, though a well-tended tree won’t even need that much. The amount of wood is less important than the number of leaves, though that is a bit difficult to determine in winter. Pruning an old, neglected apple tree might be done with just a few cuts to remove big branches that are competing with the tree’s central leader or cluttering up the interior of the tree. Then in subsequent years you might work on smaller branches.
If you want blossoms and fruit, you can see if a branch will produce apples by looking for fruit spurs. Fruit spurs are gnarly little branches – usually just 3 or 4 inches long – that grow off bigger branches, branches that are at least two or three years old. At the tip of each spur is a cluster of buds that will produce leaves and flowers. If you are deciding whether to remove a branch, look for fruit spurs before cutting. Fruit spurs will not produce fruit in their first year.
Apples (and crabapples) tend to send up lots of waterspouts. These start as pencil-thick twigs shooting straight up from bigger branches. They are often a stress response: in summer they grow to produce leaves in the cool interior of a tree when the outer leaves have stopped producing food for the tree because it’s too hot. So even if you cut them out every year, more will come –often in the same place. Same varieties of trees send out a lot of water sprouts, others just a few. If you leave them in place, they will eventually become full sized nuisance branches cluttering up your tree.
A few words about bad crotches. Fruit bearing branches should be at an angle of 45 to 60 degree angle from the main trunk. A bad crotch angle (30 degrees or less) exist when there is a very tight angle between two stems. If the stems develop heavy fruit loads or are subject to heavy ice and snow loads, the weak crotch may break open, damaging the tree.
Fixing a bad crotch
Breaking of bad crotches occurs because as the branches grow, they grow together, enclosing bark – and creating a week spot. Prune one of the two branches to correct the problem. Do this when a tree is young if you can. Some trees are more prone to bad crotches than others. Maples, for example, often are full of bad crotch angles (but don’t prune them in spring as they will bleed excessively).
Apples produce the most fruit on branches that are more horizontal than vertical. Sometimes I weight down young branches to make them more horizontal. A milk jug with some water in it will do the job – and you can increase the weight to just the right amount by tying on the jug and adding water. Do that in mid-April and remove it on the Fourth of July.
For me, pruning is not just about getting the most flowers or fruit from a tree, it’s about creating a beautiful form. In winter, especially, I enjoy looking at a well-pruned tree as sculpture. If a tree has big branches hacked off to create a tree with a short profile – as some are in commercial orchards – it is not pleasing to the eye. A tree that tapers toward the top and has nicely spaced branches looks good – and produces a good fruit load, too. Experts say that an apple tree should generally have a central leader or stem that dominates the tree and grows up the middle of it.
Pruning apple trees is one of my seasonal joys. I love sculpting the trees, making them lovely to the eye, healthier and more productive, too. A well pruned apple tree should have enough space between branches that a robin can fly through it – without getting hurt. Un-pruned tree? It’s a messy as an unmade bed. And climbing up an old apple on a blue-sky day to prune it makes me feel like a boy again. I can’t wait.
Henry Homeyer is a professional pruner and the author of 4 gardening books. Reach him at P.O. Box 364, Cornish Flat, NH 03746 or henry.homeyer@comcast.net. His website is www.Gardening-Guy.com.
Spring Activities Indoors
I am NOT going to kill my rosemary plant this March. Really. It is so easy to do, and most of us who grow rosemary have done it at least once. We get a perfectly nice rosemary plant through the winter, and then in March we kill it. Why? Because the sun is stronger, hotter, and because our plants are waking up after a winter’s semi-dormancy and starting to grow. All of that means our plants need more water.
I called Sarah Milek of Cider Hill Gardens in Windsor, Vermont, who is an expert grower of herbs (and all plants, really). She confirmed that rosemary needs more water now. And she said March is also a good time to re-pot rosemary. Your rosemary wants to put on new growth now, both roots and leaves. But if the roots are tangled and snarled, or if the pot is full of roots, the plant really cannot grow well.
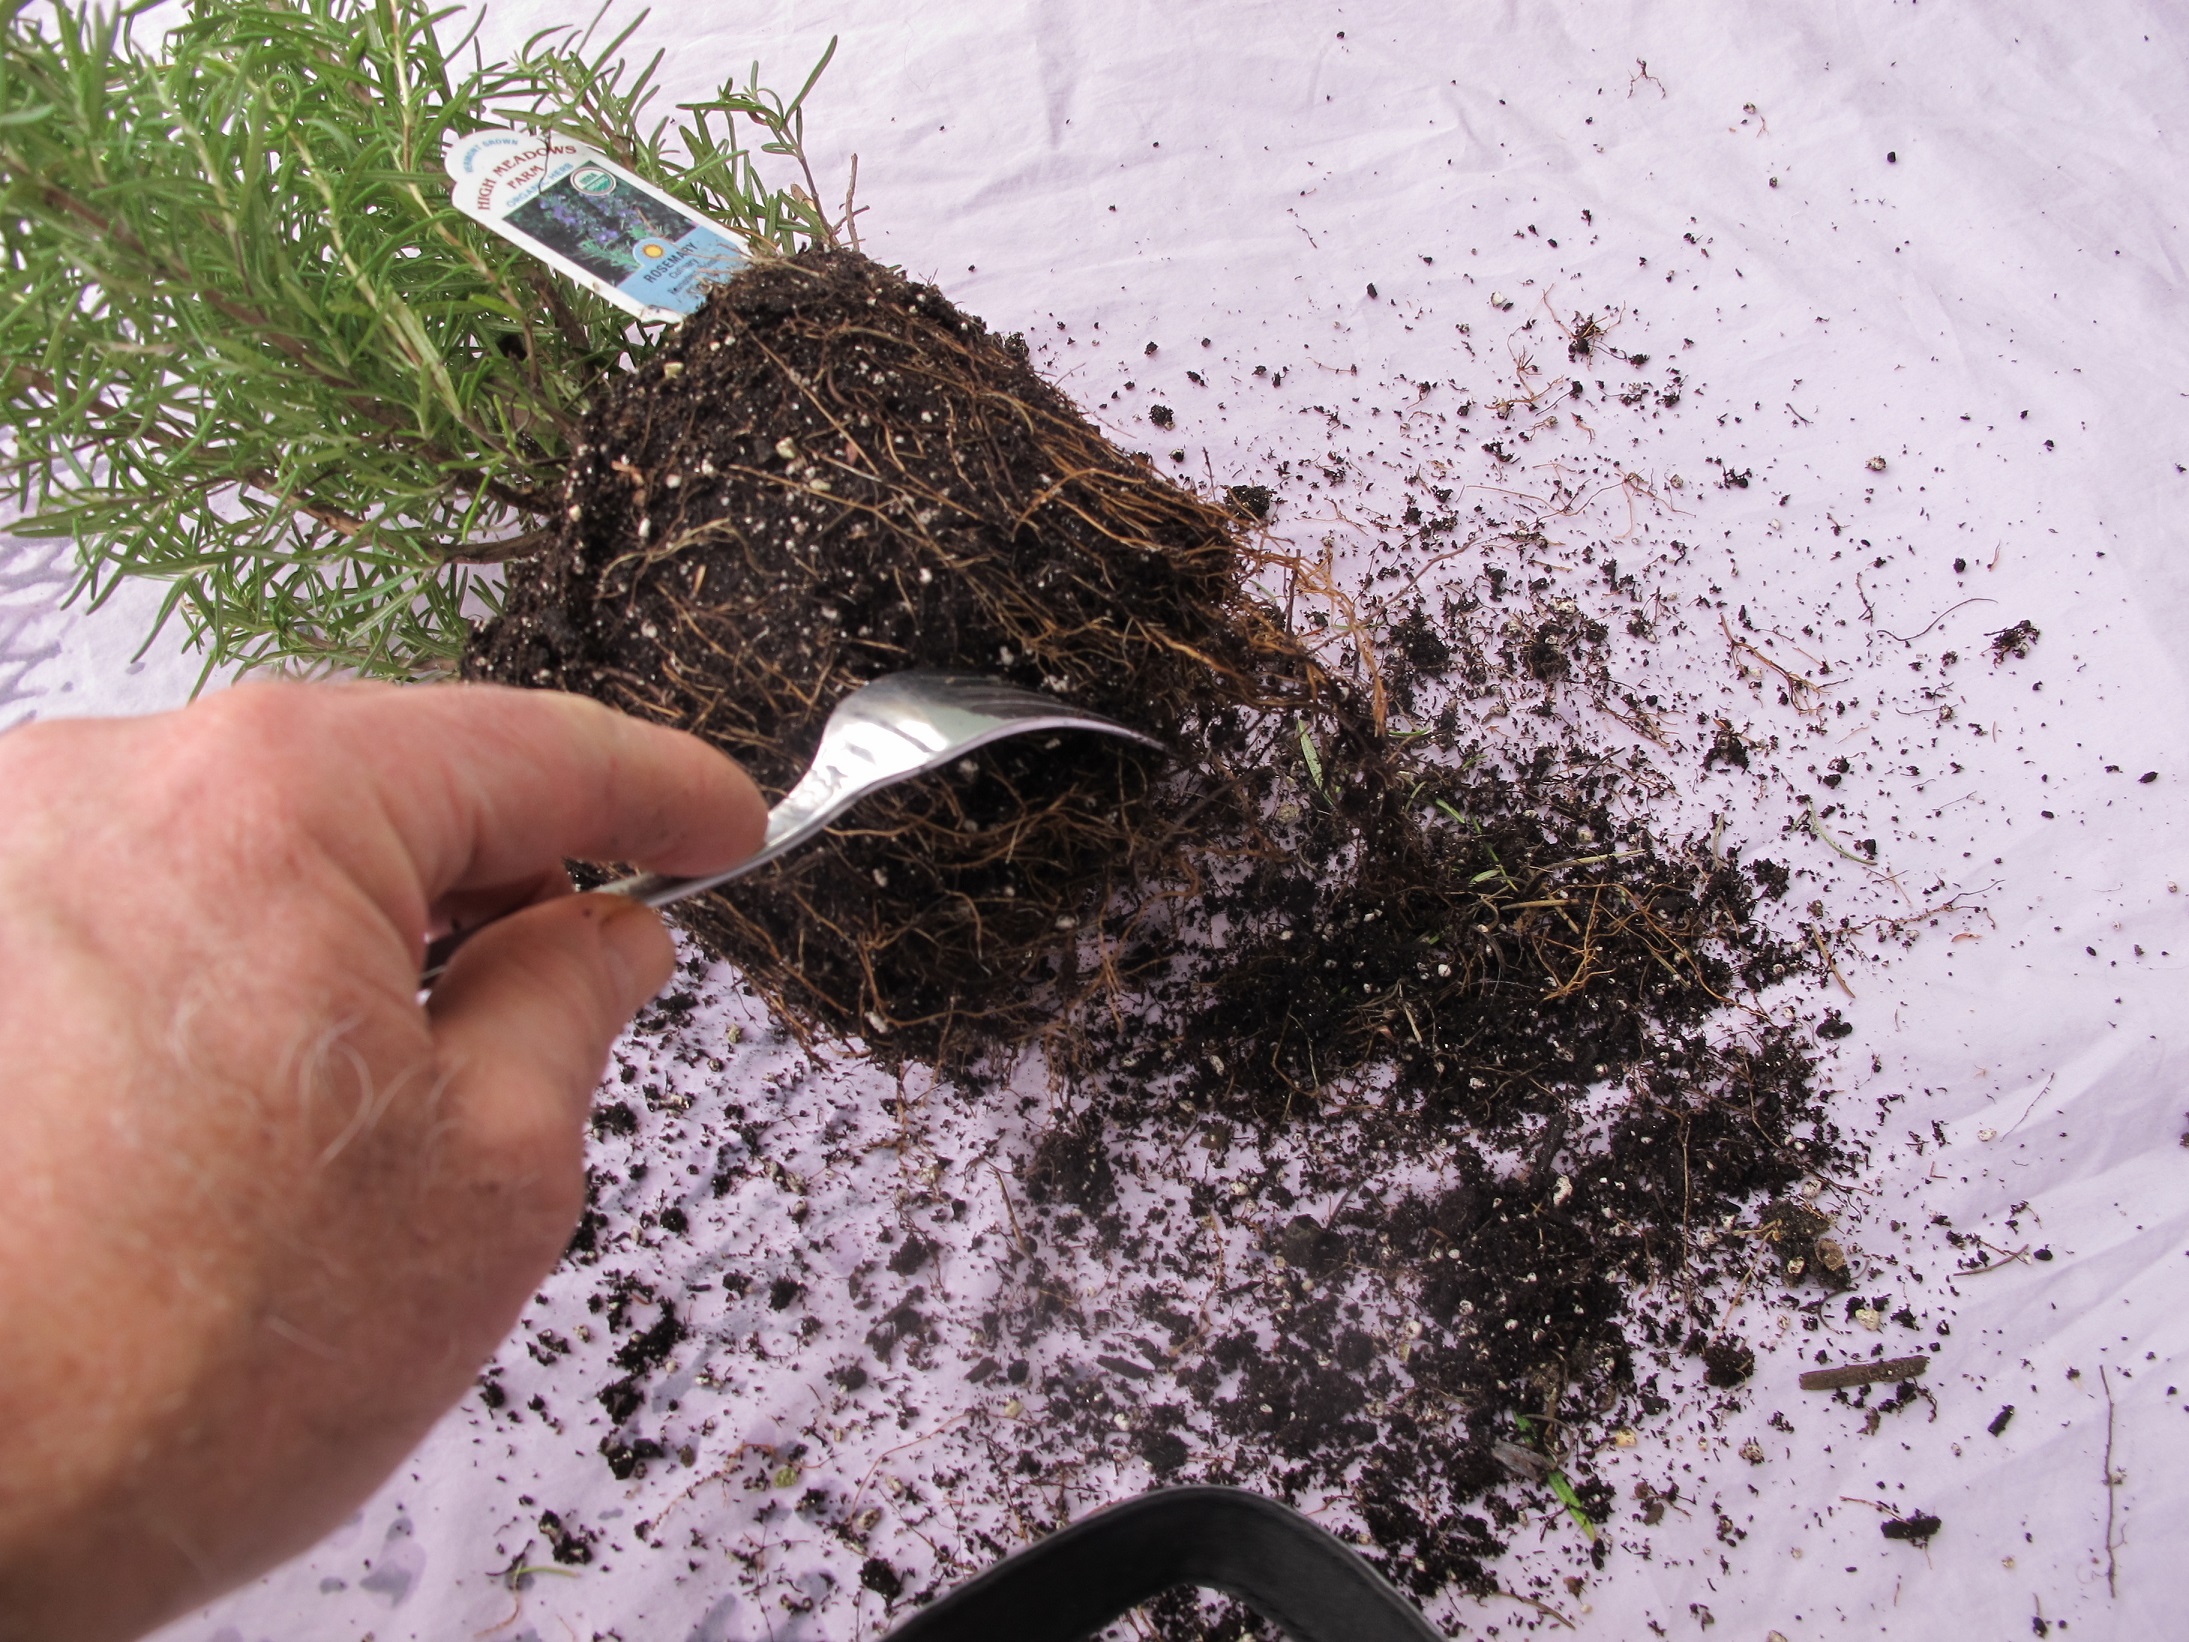
Teasing out rosemary roots with a fork
I took my rosemary plant, which is growing in a 5 inch diameter pot, and knocked it out of the pot: I turned it upside down over the kitchen sink, and gave it a sharp rap on the bottom of the pot with the heel of my hand. Then, with a gentle tug, I slid it out of the pot. I was looking for dead, brown roots – signs of overwatering and decay that need to be removed – but saw none. The roots were light-colored and in good health. They did not break when tugged on.
Rather than using a bigger pot, I decided to cut back the roots a bit to stimulate new growth, and to allow me to add fresh potting mix to the pot. Sarah Milek suggests using a kitchen fork to open up the roots and loosen the potting soil attached to the roots. Then it’s easy to cut back the roots with scissors. But, Sarah warned, don’t be overly drastic. A gentle haircut is all that is needed.
I added three quarters of an inch of fresh potting soil at the bottom of the pot and placed my rosemary in it. Then I poured in fresh potting soil around the edges and tamped it down.
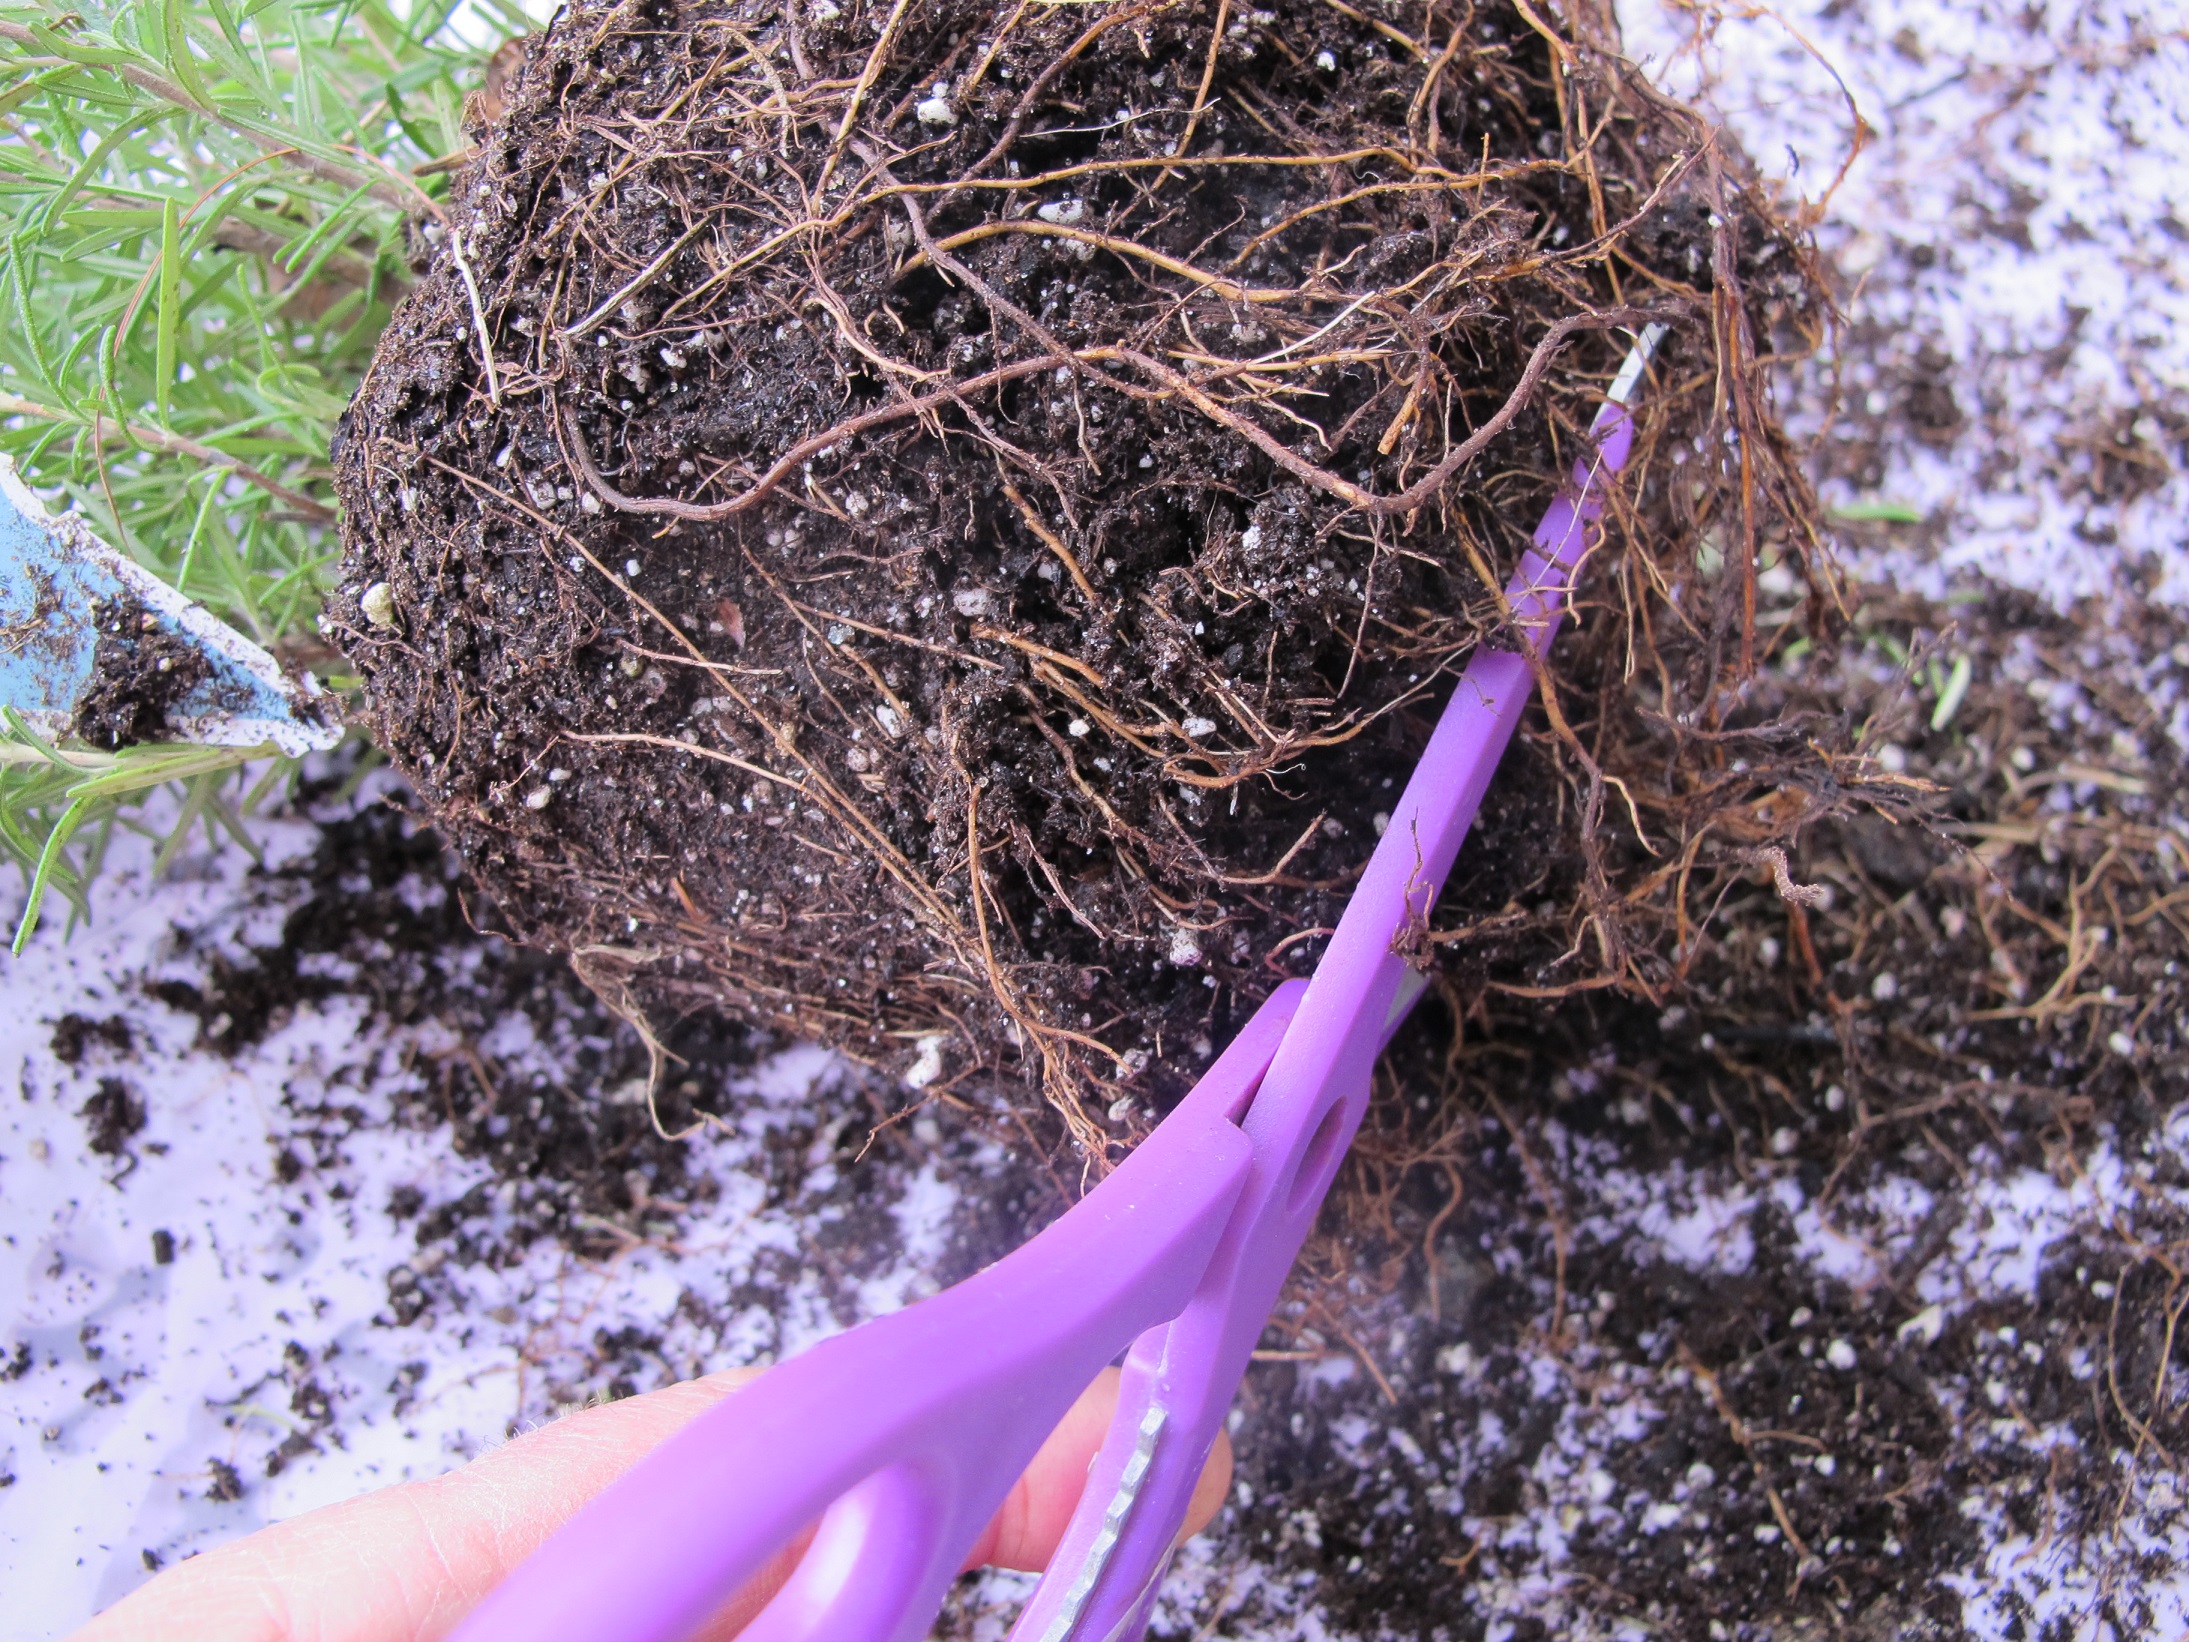
Cutting back rosemary roots
Sarah reminded me that rosemary likes to grow with some humidity in the air – which is tough for a household like mine that uses a woodstove every day. She suggested I place some gravel in a dish or pan, and then water the stones before placing the potted rosemary on top of the stones. I’ve also heard that spraying the leaves with a fine mist of water makes rosemary very happy – though my tough love approach to houseplants generally precludes that.
Temperature is important for success with rosemary, and houseplants in general. Most plants do not want a very warm spot, so keep them away from radiators and wood stoves. In this season a south or west-facing window can get pretty hot in the afternoon, so an eastern exposure is better.
I asked Sarah Milek what other houseplants needed attention at this time of year. She mentioned geraniums (Pelergonium spp.). Most of us grow geraniums for their big red, pink or white blossoms that shine on seemingly forever. But in the course of a winter indoors, many have gotten leggy – with long stems, that is. The solution? Cut them back now. I generally cut back to a node, and then take the cutting and root it in water.
Sarah says rooting geraniums is better done in moist perlite. Perlite, the fluffy white stuff in potting mix, can be purchased in bags at the garden center. It is not Styrofoam, which it resembles, but a heat-expanded mineral made like popcorn in an industrial oven at very high temperatures. It holds moisture well but also releases it to plants when needed. It has a neutral pH. Sarah says you should tent your geranium cuttings – put them in a clear plastic bag so that they do not lose moisture.
Perlite is very light weight, so larger cuttings can easily tip over if using a lightweight plastic pot. A heavier ceramic pot would prevent that, or you could place stones or sand in the bottom of a plastic pot. Perlite provides no nutrition so once they are rooted, you need to give them a light dose of fertilizer weekly. Fish or seaweed fertilizer diluted to one quarter the regular dose is fine.
Other indoor activities for the cabin-fever-feeling gardener include starting some vegetables of flowers from seed. I have started onions, leeks and artichokes – all plants that need a long time from seeding to maturity. In mid-March I will plant hot pepper seeds, and then tomatoes, broccoli, kale and other veggies in early to mid-April.
If you have never grown artichokes, you might want to. There are several kinds of seeds available, including Green Globe, Purple of Romagna, Opera and ‘Imperial Star’. In past years when growing Green Globe artichokes, I followed the dictum that you must move them into a 50 degree growing space for 2 weeks at the 3 or 4 leaf stage to fool them into thinking they had lived through a winter. That meant setting up lights in my cold basement. But Imperial Star and Opera (a purple one I have not yet tried) are both grown for annual production, and do not need that cold period. Much easier. My artichoke plants produce 3-7 small chokes each year, but are also very pretty plants suitable for a flower garden.
Spring is just around the corner – and my rosemary plant knows it. It’ll be happier since this year I’m being attentive to its needs.
Henry is a UNH Master Gardener and the author of 4 gardening books. His book The New Hampshire Gardener’s Companion will be out in an expanded second edition later this month. His website is www.Gardening-Guy.com.
The Tao of Vegetable Gardening
Winter trudges along, bringing us snow and sub-zero temperatures, seemingly ignoring the calendar that tells us Spring is officially less than a month away. In between shoveling and carrying firewood I’ve spent considerable time reading this winter. My favorite gardening book this winter is The Tao of Vegetable Gardening: Cultivating Tomatoes, Greens, Peas, Beans, Squash, Joy and Serenity by Carol Deppe (Chelsea Green, $24.95 in paper).
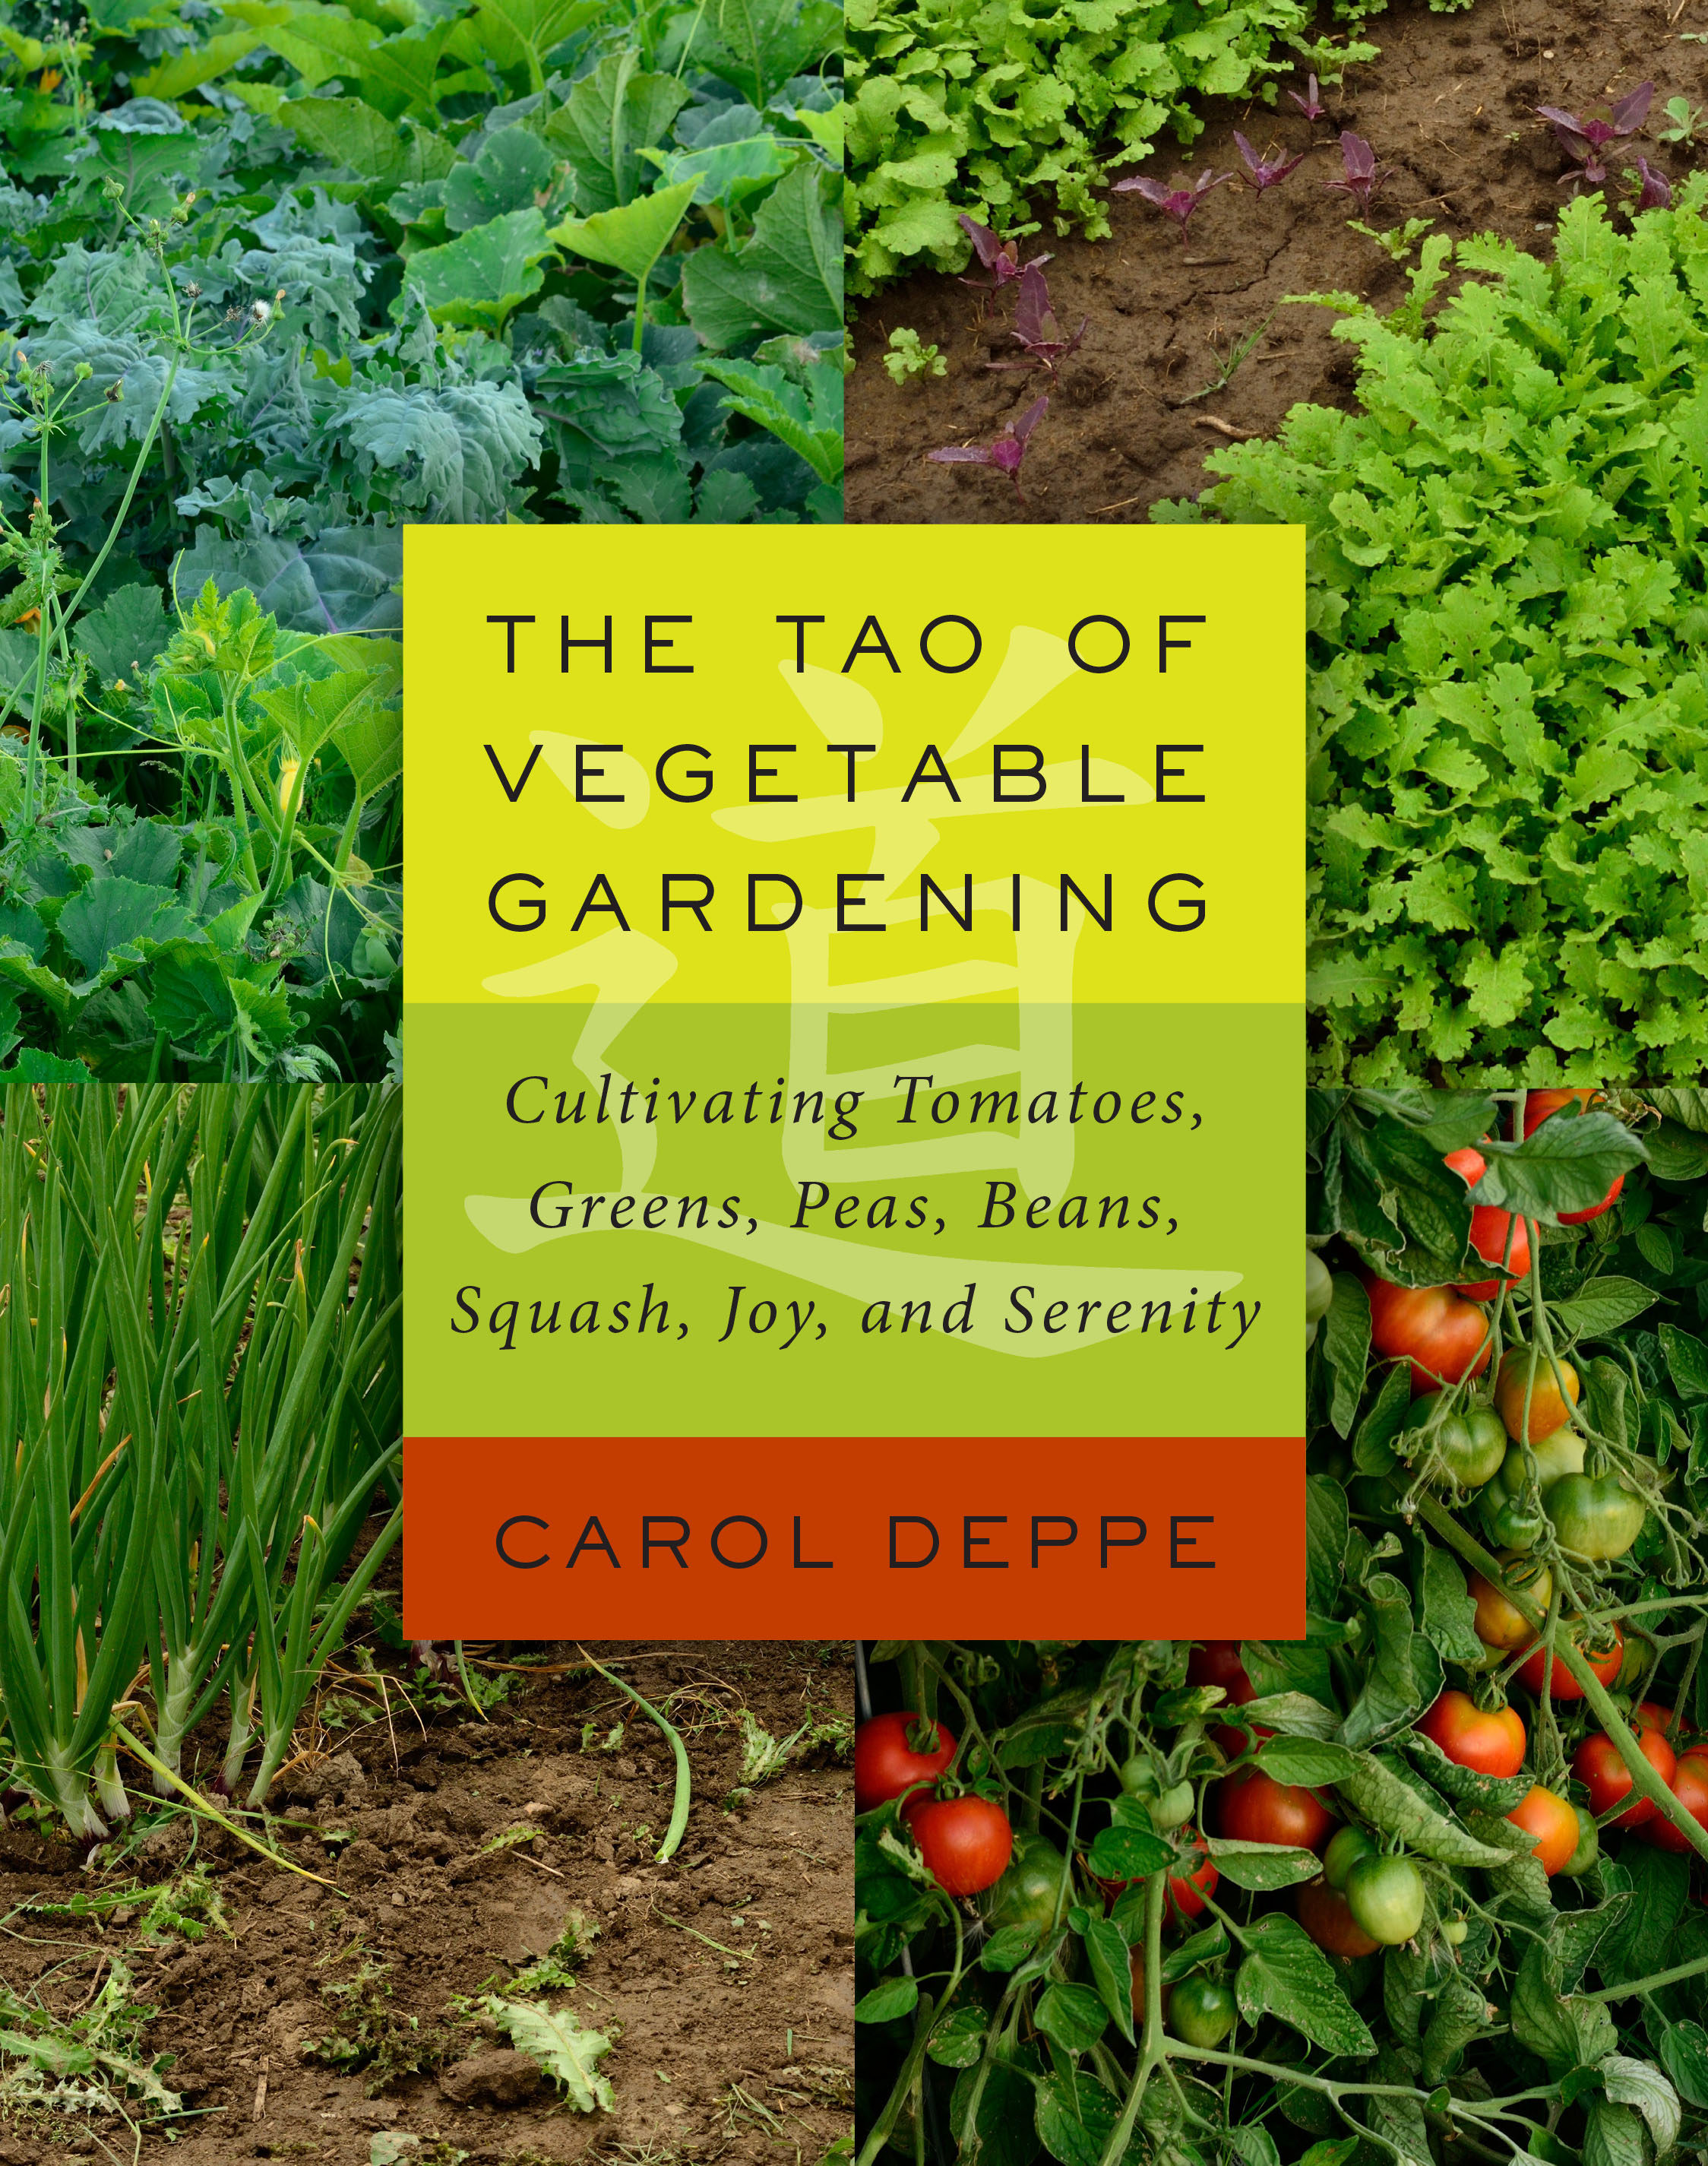
Tao Vegetable Cover
It is rare that a good technical book also deals with joy and serenity, which is part of what distinguishes this book from others. I called Carol Deppe at her home in Oregon and she is as enthusiastic in life as she is in her book. She wrote a chapter in her book called, simply, “Joy.” We are, she asserts, originally hunters and gatherers. Many of us are wired to enjoy gardening – as a way to gather. Recognizing what we love to do, and doing it, makes for a happy person.
The book is full of useful information. When considering a new book I first skim a chapter that is about something I know well. So, for example, if I can learn about tomatoes, I want the book. I did. Carol Deppe has a PhD in biology and has been breeding plants and doing garden research for decades.
So what did I learn about tomatoes? First, that I may be fertilizing them too much, producing big plants but perhaps fewer tomatoes overall than I might. I give each plant a little Pro-Gro (a slow release organic fertilizer) at planting time even though my soil is rich and dark. This year I will plant half with, and half without the fertilizer. And I will keep records.
Carol maintains that irregular watering not only can cause cracking of fruit (which I knew), but that it can also affect flavor, which I did not know. She recommends mulching as a way to keep roots consistently moist, then watering before the soil is dead dry. I mulch, but rarely water – though my soil only dries out in times of drought.
Another factor affecting flavor is temperature. Tomatoes, her book says, taste best if picked in the late afternoon on a sunny day. Cold nights and cool mornings do not help tomato flavor. She often picks 2 to 4 days before full ripeness, and finishes them off indoors where it is consistently warm. Many of the best tasting heirlooms have unripe shoulders even when the rest of the tomato is dead ripe, she wrote, and should be eaten before the shoulders ripen.
She is more attentive to crop rotation than I am. In a small garden there is little space to rotate crops on a 3 year cycle (which she does) – especially since much of what I grow is in the same family: tomatoes, potatoes, peppers (and eggplant, though I don’t grow it). Those plants should not overlap, she says, or be planted in ground that had one of them in the past 2 years.
From the book I learned of some seed companies I haven’t used before and tomato varieties that sound great. From Nichols Garden Nursery (www.nicholsgardennursery.com) I have ordered tomatoes that Carol likes including ‘Legend’, an early tomato (68 days) that produces one-pound tomatoes and is parthenocarpic. That means it can produce fruits without pollination, doing so in cold weather that is not conducive to releasing pollen. She says it is highly tolerant of two late blight strains, too. I never knew there are different strains of the blight.
Nichols Nursery also sells ‘Pruden’s Purple’, ‘Black Krim’ and ‘Geranium Kiss’, others that Carol recommends. ‘Prudens Purple’ is an heirloom that Carol says has flavor as good as ‘Brandywine’, but 2 to 3 weeks earlier. I will try it. ‘Black Krim’, the book explains, reaches full flavor when still half green and firm. If picked when it looks fully ripe, it is overripe, even rotten. I made that mistake once, and never grew it again. ‘Geranium Kiss’, bred by Alan Kapuler (www.peaceseeds.com), is an open pollinated determinate tomato that is very resistant to late blight and produces big clusters of 1 to 2 ounce fruits.
What else did I learn from this book? I learned about ‘Green Wave’ mustard. Carol Deppe broadcasts seed on a weed-free garden bed and then bounces a lawn rake over the soil to disturb the soil and cover the seed. She lets this cooking green grow until it is about 10 inches tall – in about 8 weeks. Then she cuts the top 7 inches off and cooks it up for dinner, or blanches and freezes it. Green Wave is blazingly hot if eaten raw (spicy enough to deter deer), but mild and flavorful after cooking. Seeds are available from her website, www.caroldeppe.com, or from Johnny’s Selected Seeds (www.johnnyseeds.com).
Unlike spinach, Green Wave has real substance after cooking, like kale, so it is good for freezing. And the leaves and stems both are edible when grown in a dense planting (which also shades out weeds). If grown as well spaced out individual plants, the stems are tough and not edible.
The Tao of Vegetable Gardening has a chapter on cooking greens that can be grown like Green Wave, a technique she calls “the Eat-All Garden Greens Method”. The fact that the greens are fast growing means you can harvest 2 crops on the same spot, even here in frigid New England. Carol suggested to me that I plant ‘Green Wave’ after the summer solstice to avoid bolting.
So if you’re still housebound and bored, get a copy of this book and gather some new ideas. It’s good reading in addition to being technically useful. And visit Carol’s website for other seeds, books, articles and further information.
Henry is the author of 4 gardening books, and lectures on gardening. His website is www.Gardening-Guy.com.