-

Now available for $24.95 including shipping. -

Now available for $21.00 including postage. Vendors I Like
 Click Here to buy from Cobrahead
Getting Ready for Winter
Summer is nearly over. Those big yellow school buses are beginning their morning ambles and cool nights call for blankets on the bed. It’s time for me to get serious about putting up veggies for the winter.
With the exception of lettuce, most vegetables can be saved for the winter – and beyond. Freezing them is one of the easiest ways of doing so and, if done properly, your veggies will be splendid when cooked and eaten on a cold winter night. But home-frozen vegetables won’t be the texture and flavor you like unless properly prepared. Do small batches to make it easier and quicker.
For starters, only use your best vegetables for freezing. Beans that are oversized and woody when you pick them will only be worse 6 months later. Pick things at their prime, and freeze them within 24 hours of picking. Sitting in the fridge for a few days will not improve them.
Many vegetables have enzymes that promote ripening of seeds – and general aging. Unless you drop them briefly in boiling water to kill those enzymes – a process called blanching – they may get woody or tough. Knowing how long to blanch your vegetables is very important. Boil them too long and you’ll have mushy beans or zucchini. In my experience a brief blanching – a minute or so – is perfect.
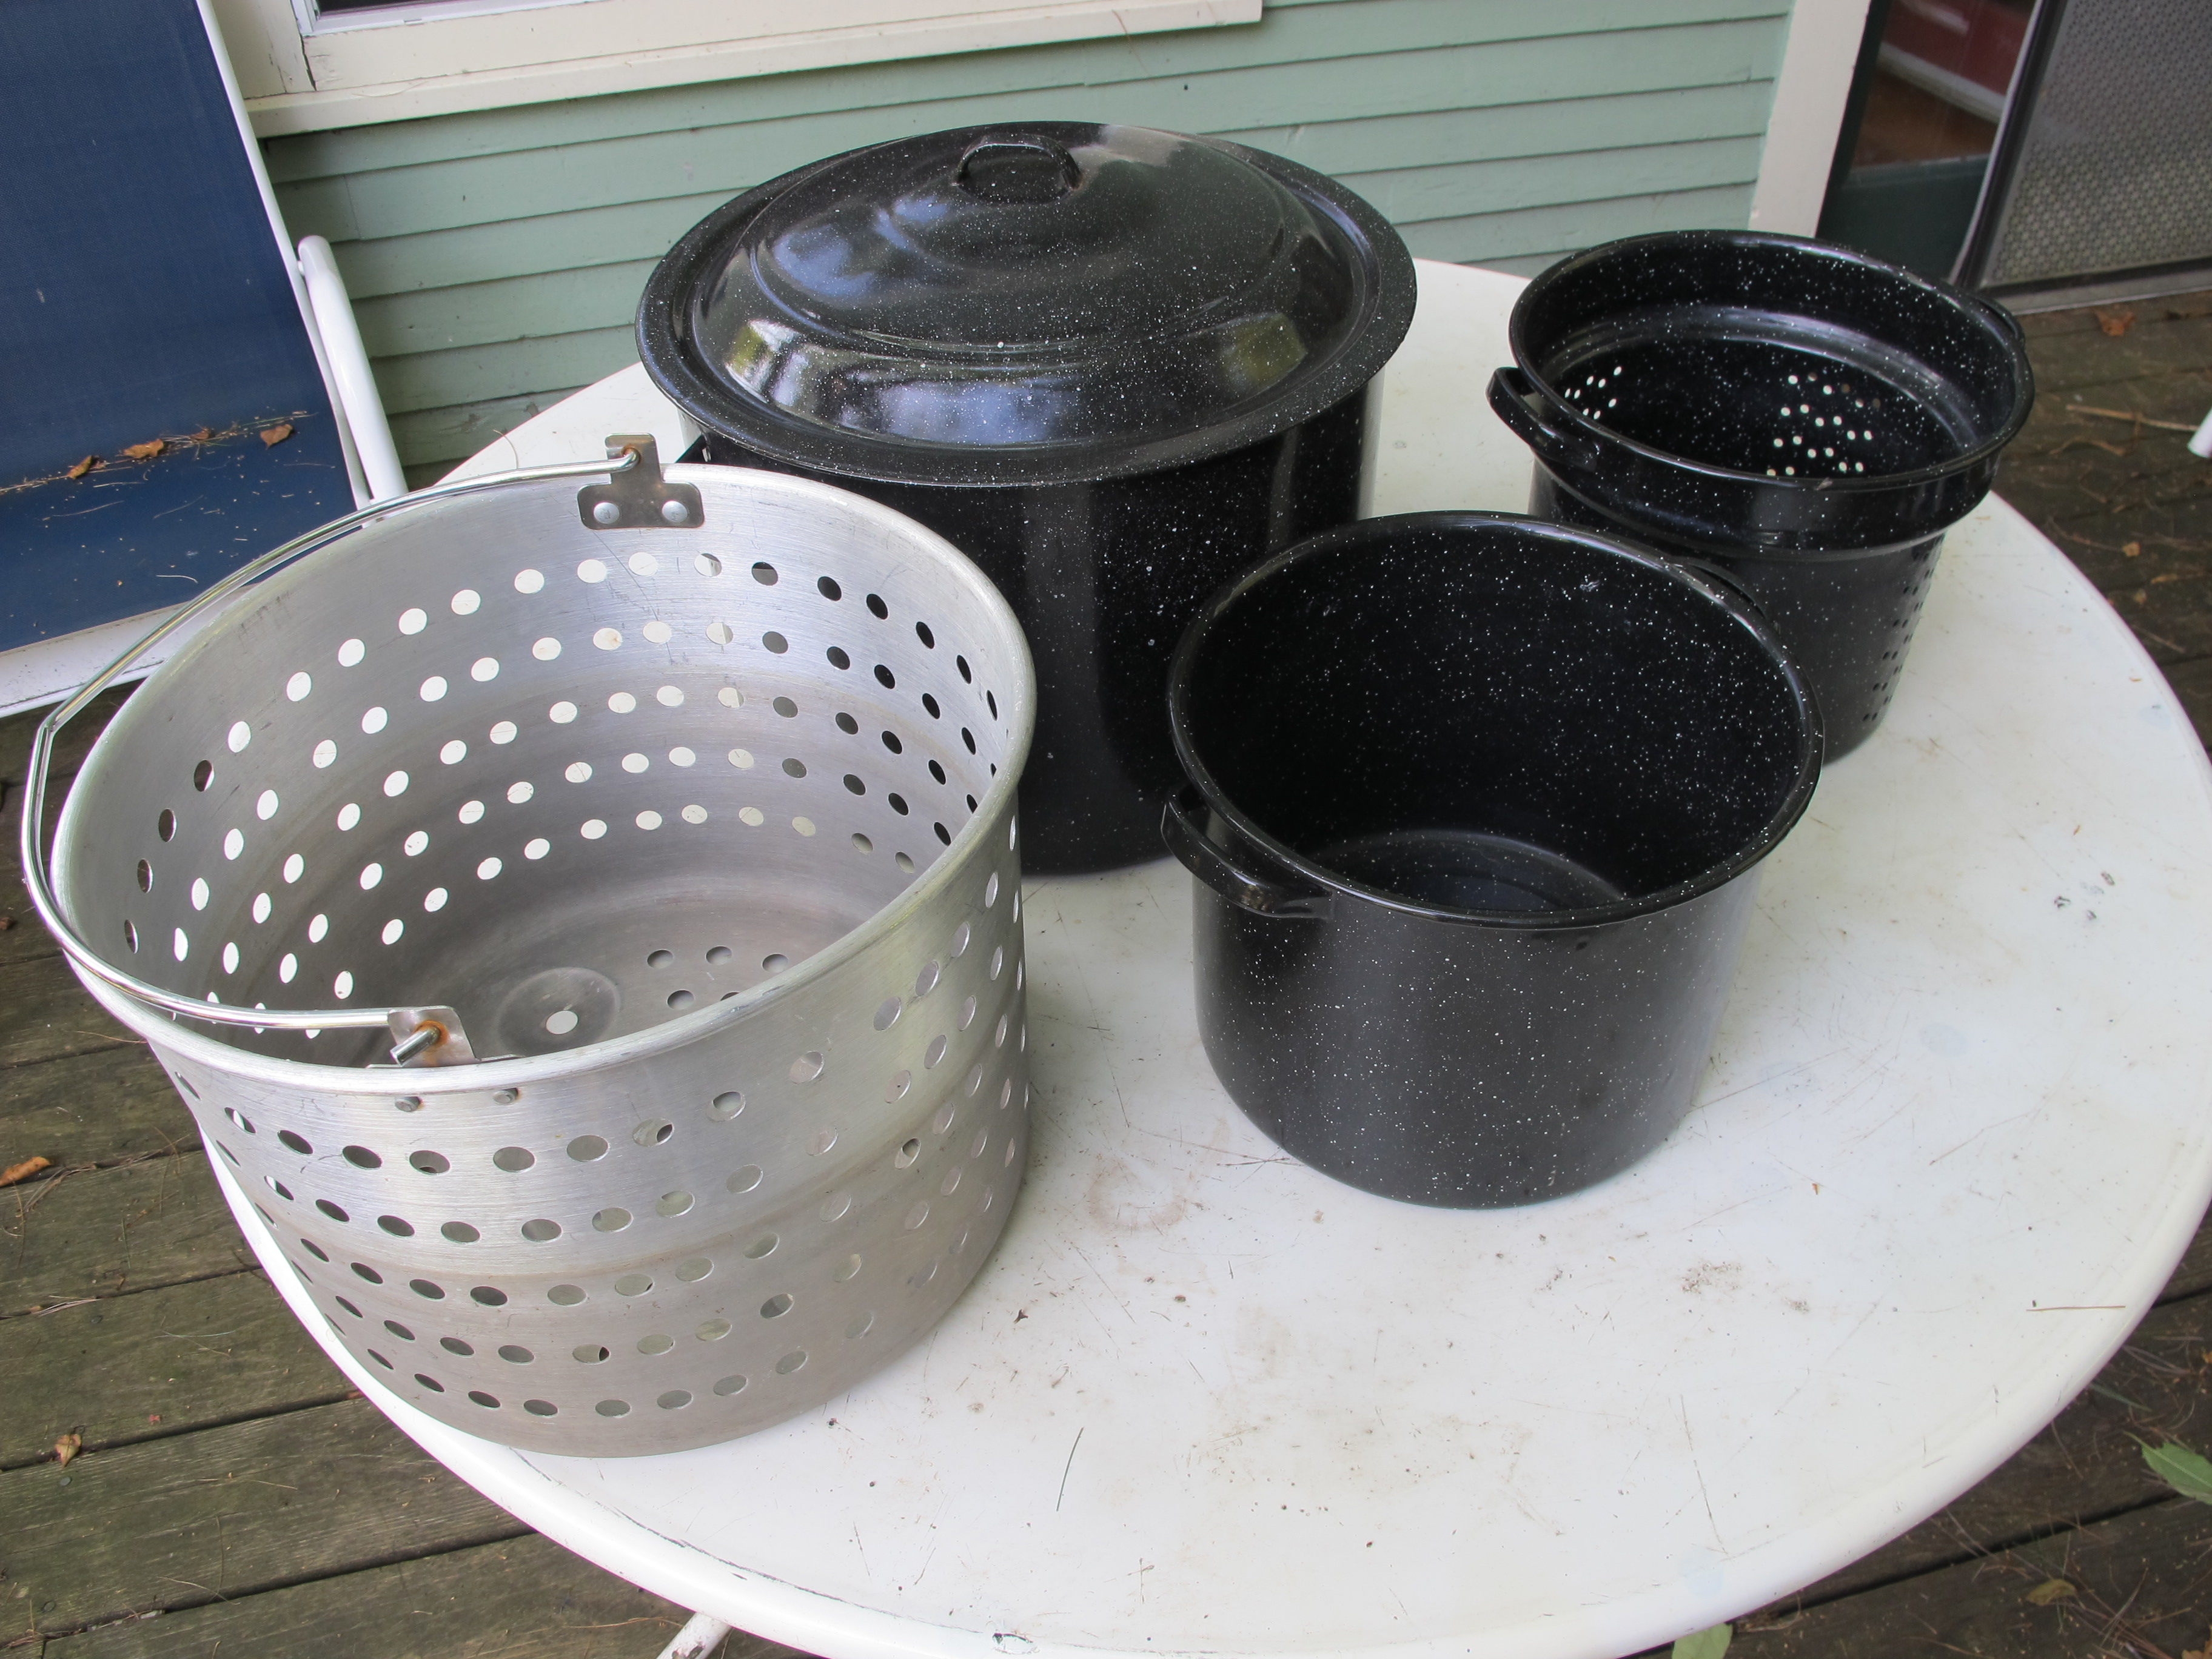
Blanching pots
It’s worth buying a blanching pot if you want to freeze vegetables. This is an enameled tin pot with an interior pot that is full of holes for drainage. I fill my pot –complete with its inner section – roughly half full of water and bring it to a rolling boil. Then I drop my veggies into the water and time how long they are in, while watching them change color. Vegetables like beans, broccoli and kale will noticeably turn a lighter, brighter green when they are adequately blanched.
Generally 60-90 seconds of blanching is all that is required, even though the water may not even return to a full rolling boil. Use lots of water and not too many veggies for a quick return to boiling. Vegetables should still be crunchy, not mushy when they come out of the hot water. Brussels sprouts take a little longer in the hot water because they are larger and denser than most veggies.
But taking veggies out of the hot water is not enough. You need to cool them quickly in a cold water bath. I fill the sink with cold water and drop them in for a few minutes to cool them quickly, drain them, and spin them in my salad spinner. I like the kind of spinner that has a pull string (mine is a Zyliss brand). Finally I spread them out on a cloth tea towel and blot them with another. They are then ready to go in freezer-grade zipper bags. I always use new bags for freezing, not ones I’ve washed and recycled.
When freezing vegetables it’s a good idea to remove the excess air from the bags. There are machines sold that will do so, but I just use a common drinking straw. I get the bag closed around the straw, suck out the air, and then push the bag shut as I pull out the straw. The bag should cling to the vegetables if done right.
What should you blanch? Beans, beets, broccoli, Brussels sprouts, carrots, cauliflower, corn, kale, spinach, squash and Swiss chard. What does not need it? Apples, pears, peppers, leeks, and tomatoes do not seem to need blanching, in my experience. Tomatoes, beans and Brussels sprouts freeze well whole, the others I cut up. Summer squash freezes well in half-inch cubes and is a great addition to winter soups. Winter squash I often steam or roast, then scoop out of the skins and into bags.
If you haven’t picked your garlic yet, pull it today! If left in the ground too long, the outer skins deteriorate and the garlic won’t store as well. But don’t cut off the tops just yet: let them cure in a dry, shady place. I’ve read that they absorb some nutrients from the stalks and leaves while curing. They store well anywhere – a cool dry spot is good, but you can hang them in the kitchen or keep them in the garage if the garage doesn’t get below freezing. Freezing and thawing would not be good for the garlic.
Onions are ready to harvest when their tops flop over. Like garlic, they need to cure for awhile before storing. Some gardeners just pull them and let them dry in the garden for several days. I prefer to put them on the shady deck to dry out. Then I store them on my wooden drying rack that I got from Gardeners Supply (www.gardeners.com). They sell them as “orchard racks” for $199. It has nine large wooden drawers with excellent ventilation. I generally use mine for onions, garlic and winter squash.
In addition to freezing, I also store potatoes, carrots, kohlrabi and rutabagas in a spare fridge or in a cold cellar with high humidity. I dry fruits, hot peppers and cherry tomatoes in a dehydrator. I do some canning, including my grandmother Lenat’s bread-and-butter pickles and some tomato sauce. But more about all of that on another day. I gotta get down to the garden and pick some veggies!
Henry Homeyer is the author of 4 gardening books and a fantasy-adventure for children. His Web site is www.Gardening-Guy.com.
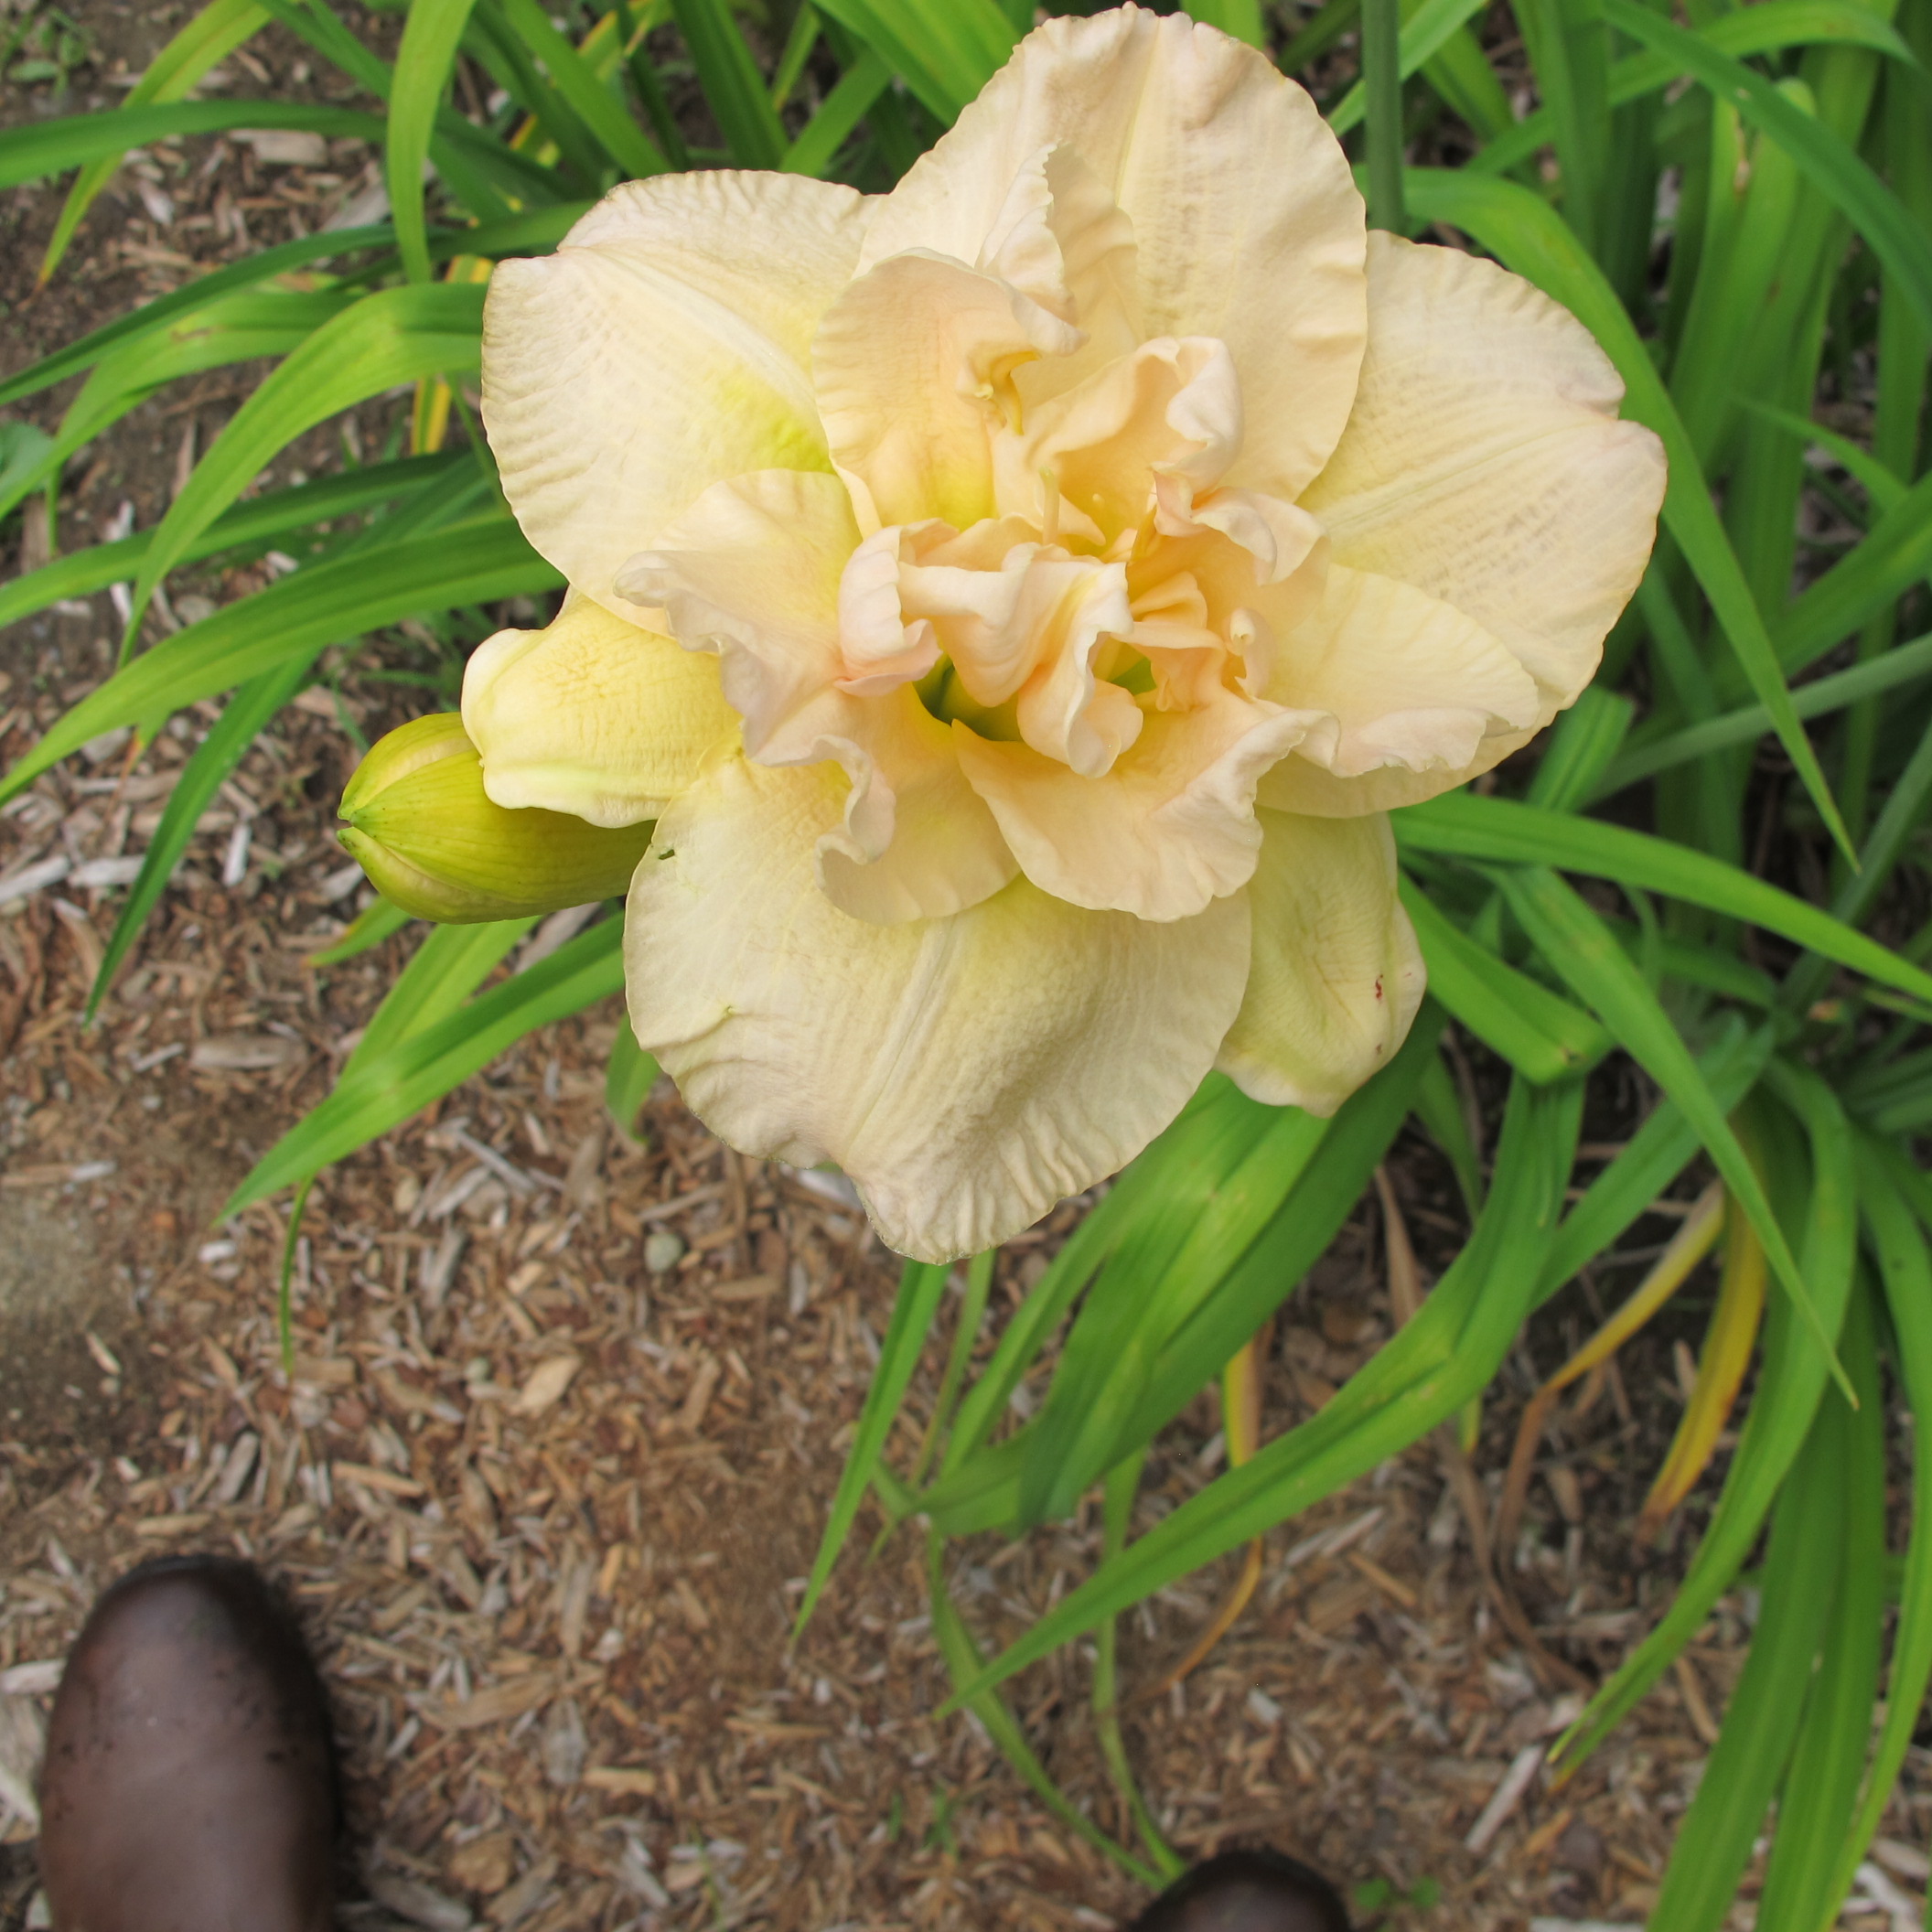
Daylilies
What one kind of flower would you bring with you if you were being sentenced to life on a deserted island? Would you pick peonies for their big, bold blossoms and tantalizing smell? Or perhaps primroses for their bountiful blossoms and willingness to spread? A better choice might actually be daylilies. They’ll grow just about anywhere, are generally untroubled by pests and diseases – and you can eat them! This is daylily season, and a good time to buy some more for your garden.
Frans Hals
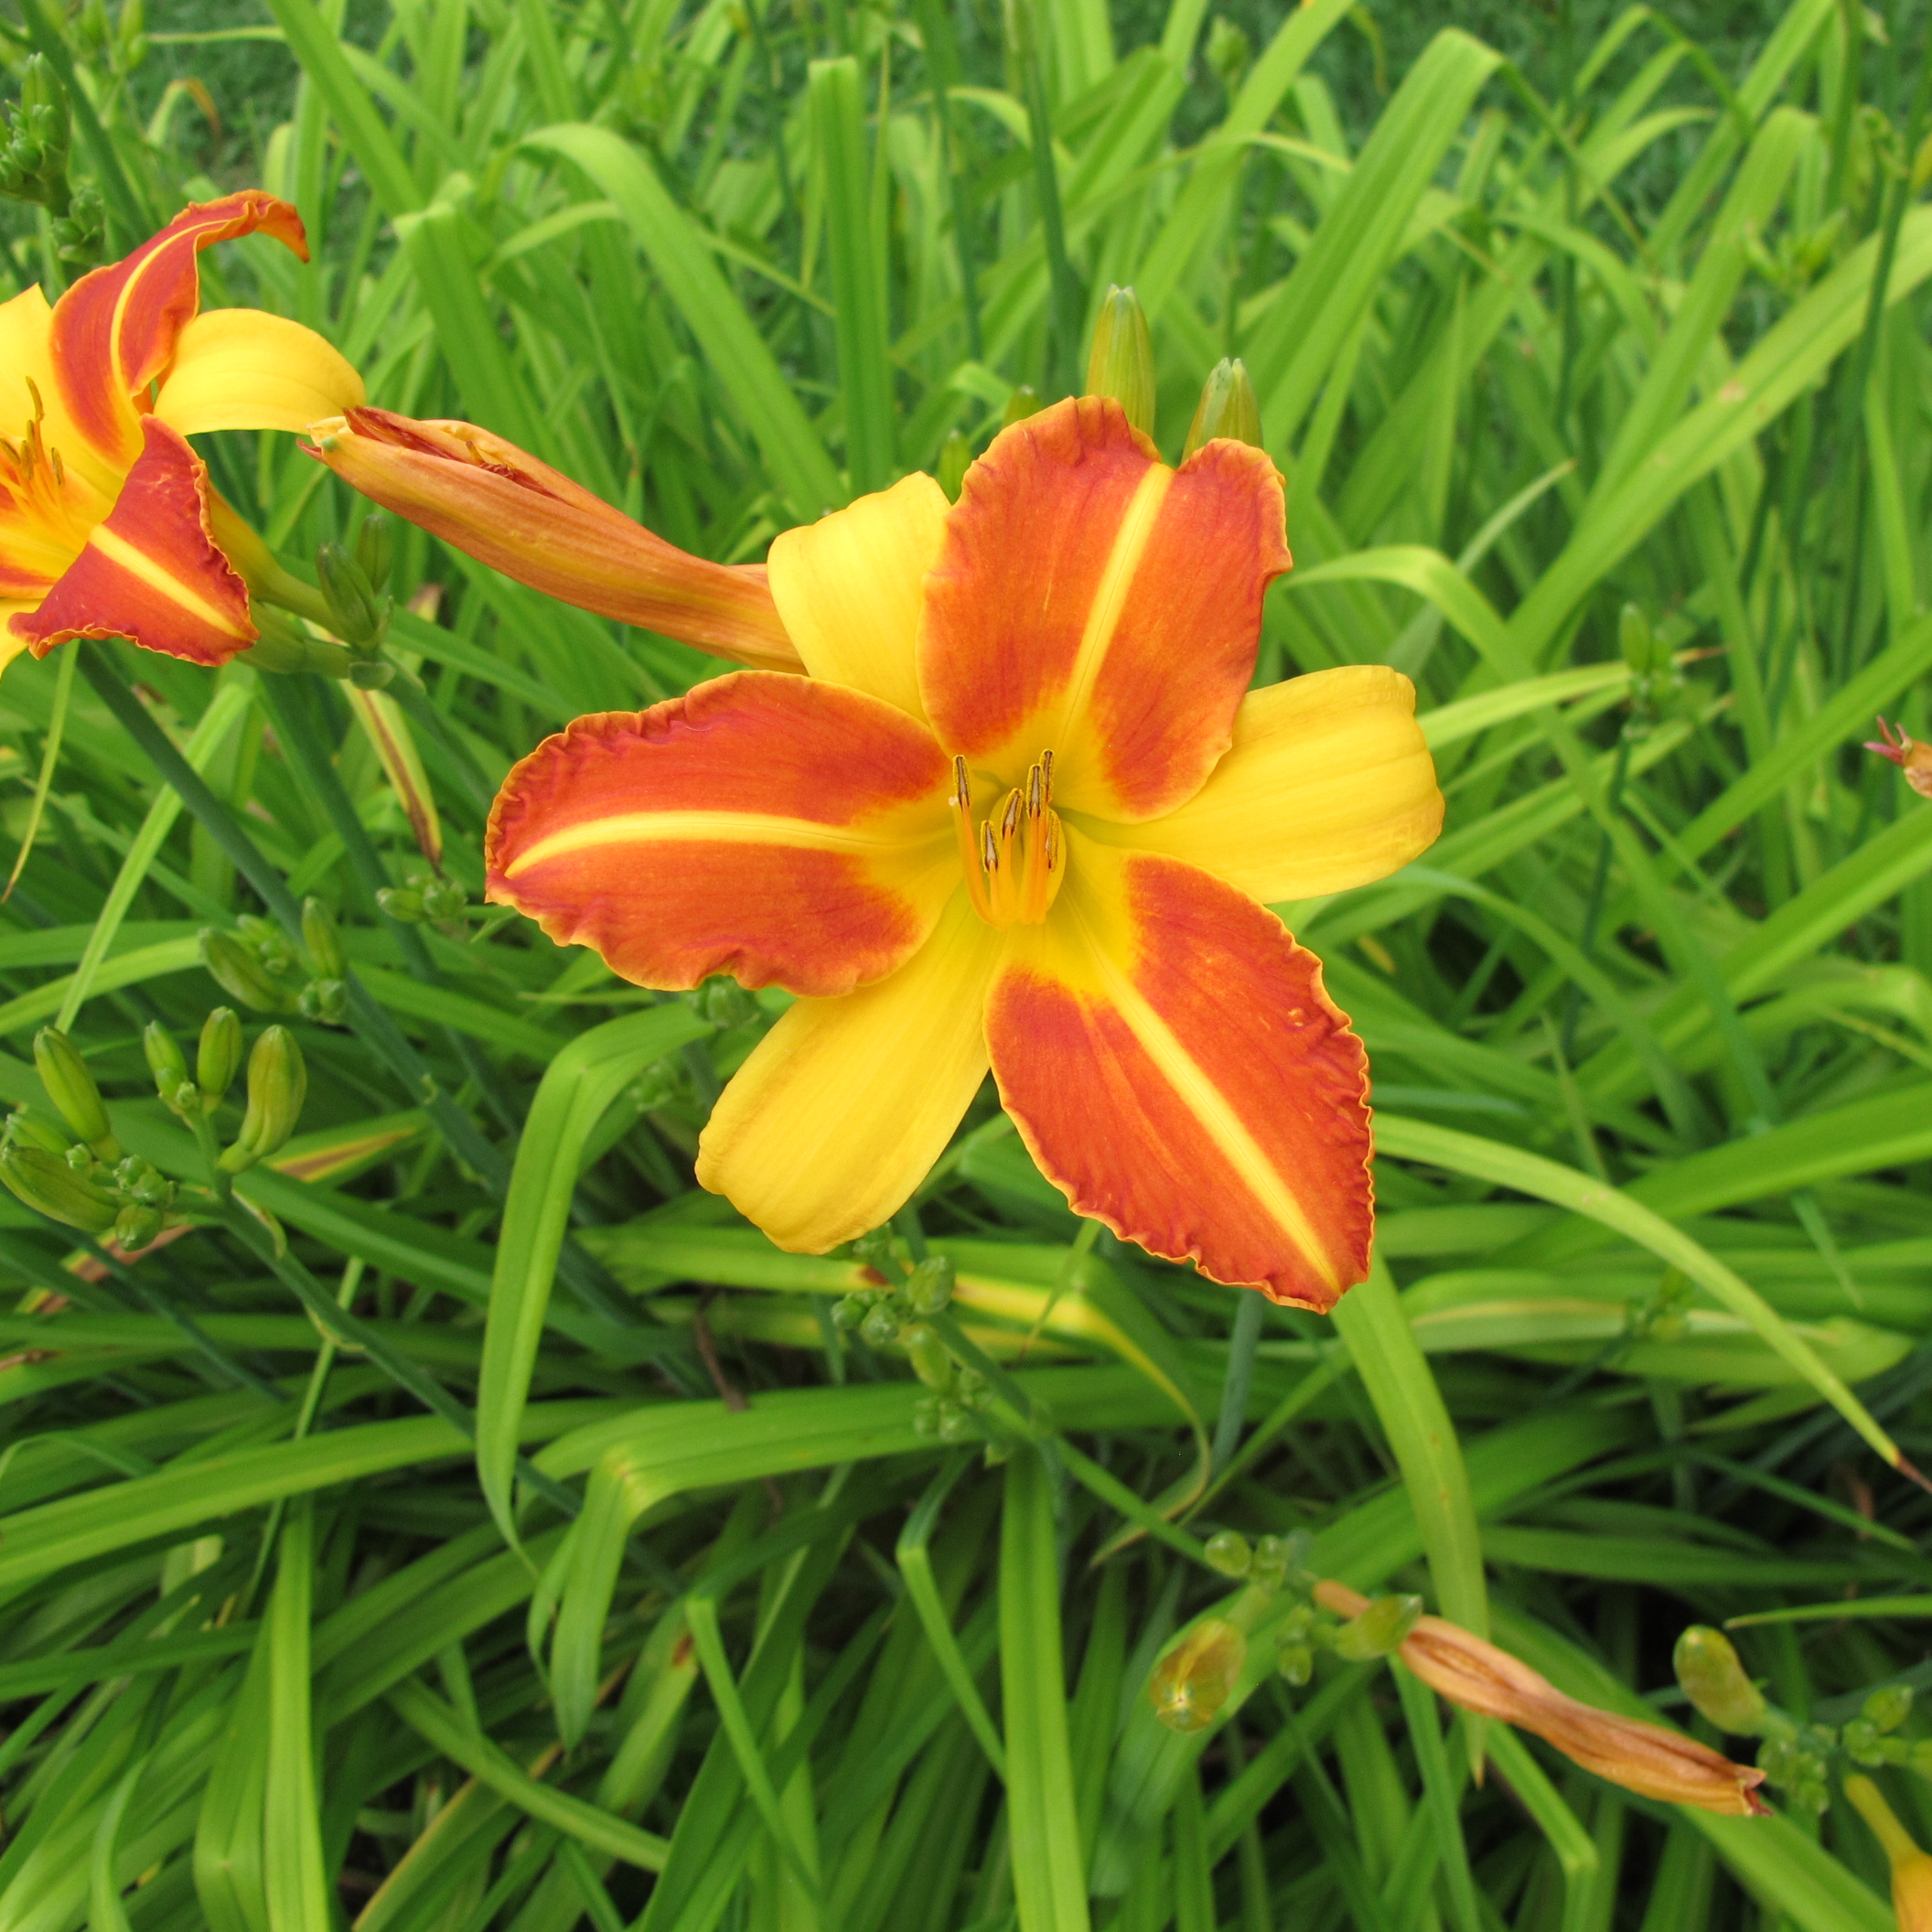
Let’s start with the common orange daylily (Hemerocallis fulva). Most gardens have some. You’ll also see them by the side of the road as if gardeners – having too many, but unwilling to compost them – have heaved them out the windows of their cars. These sturdy perennials will grow anywhere, and will even bloom in the shade. They were introduced from Asia in the late 1800’s and were admired as exotic at the time, I’m sure. But now they are too common for most gardeners’ taste. And they do spread by root, which can be bothersome.
In the Chinese market in Montreal daylily tubers are for sale for cooking. I’ve tried cleaning and cooking the roots of my own orange daylilies, but have decided that it’s too much work to get them clean enough to eat. They were tasty enough, but fry up almost anything with garlic and onions, and it will be yummy.
The flowers are edible and surprisingly delicious. Make a big green salad and add daylily petals for color. Don’t use the stamens and pistils (the little stuff inside the blossoms) as they’re not tasty. Chop or tear the petals. And toss in a few buds, which taste a bit like asparagus or green beans.
Blueberry Breakfast
For a nice vegetable dish, sauté chopped onions, shallots or garlic in olive oil or butter. Add a little chopped tarragon and black pepper. When the onions are almost cooked, drop in buds from those common orange daylilies you have been meaning to manage, but haven’t. Select buds an inch to an inch and a half long. They will start to open when they are cooked – in just a minute or two.
For dessert you can take a wine glass and place in it a fully open, brightly-colored daylily blossom. Put in a scoop of sherbet in the blossom and garnish with a few fresh berries and a mint leaf if you have one. Yum!
Daylilies are great cut flowers. Because each blossom only lasts a day – hence the name – most people don’t use them in flower arrangements. But I cut scapes (leafless stems) that are just starting to bloom and have numerous fat, unopened buds. The buds will open one at a time for up to a week, depending on number of buds. This works most reliably if the arrangement gets some sunshine each day.
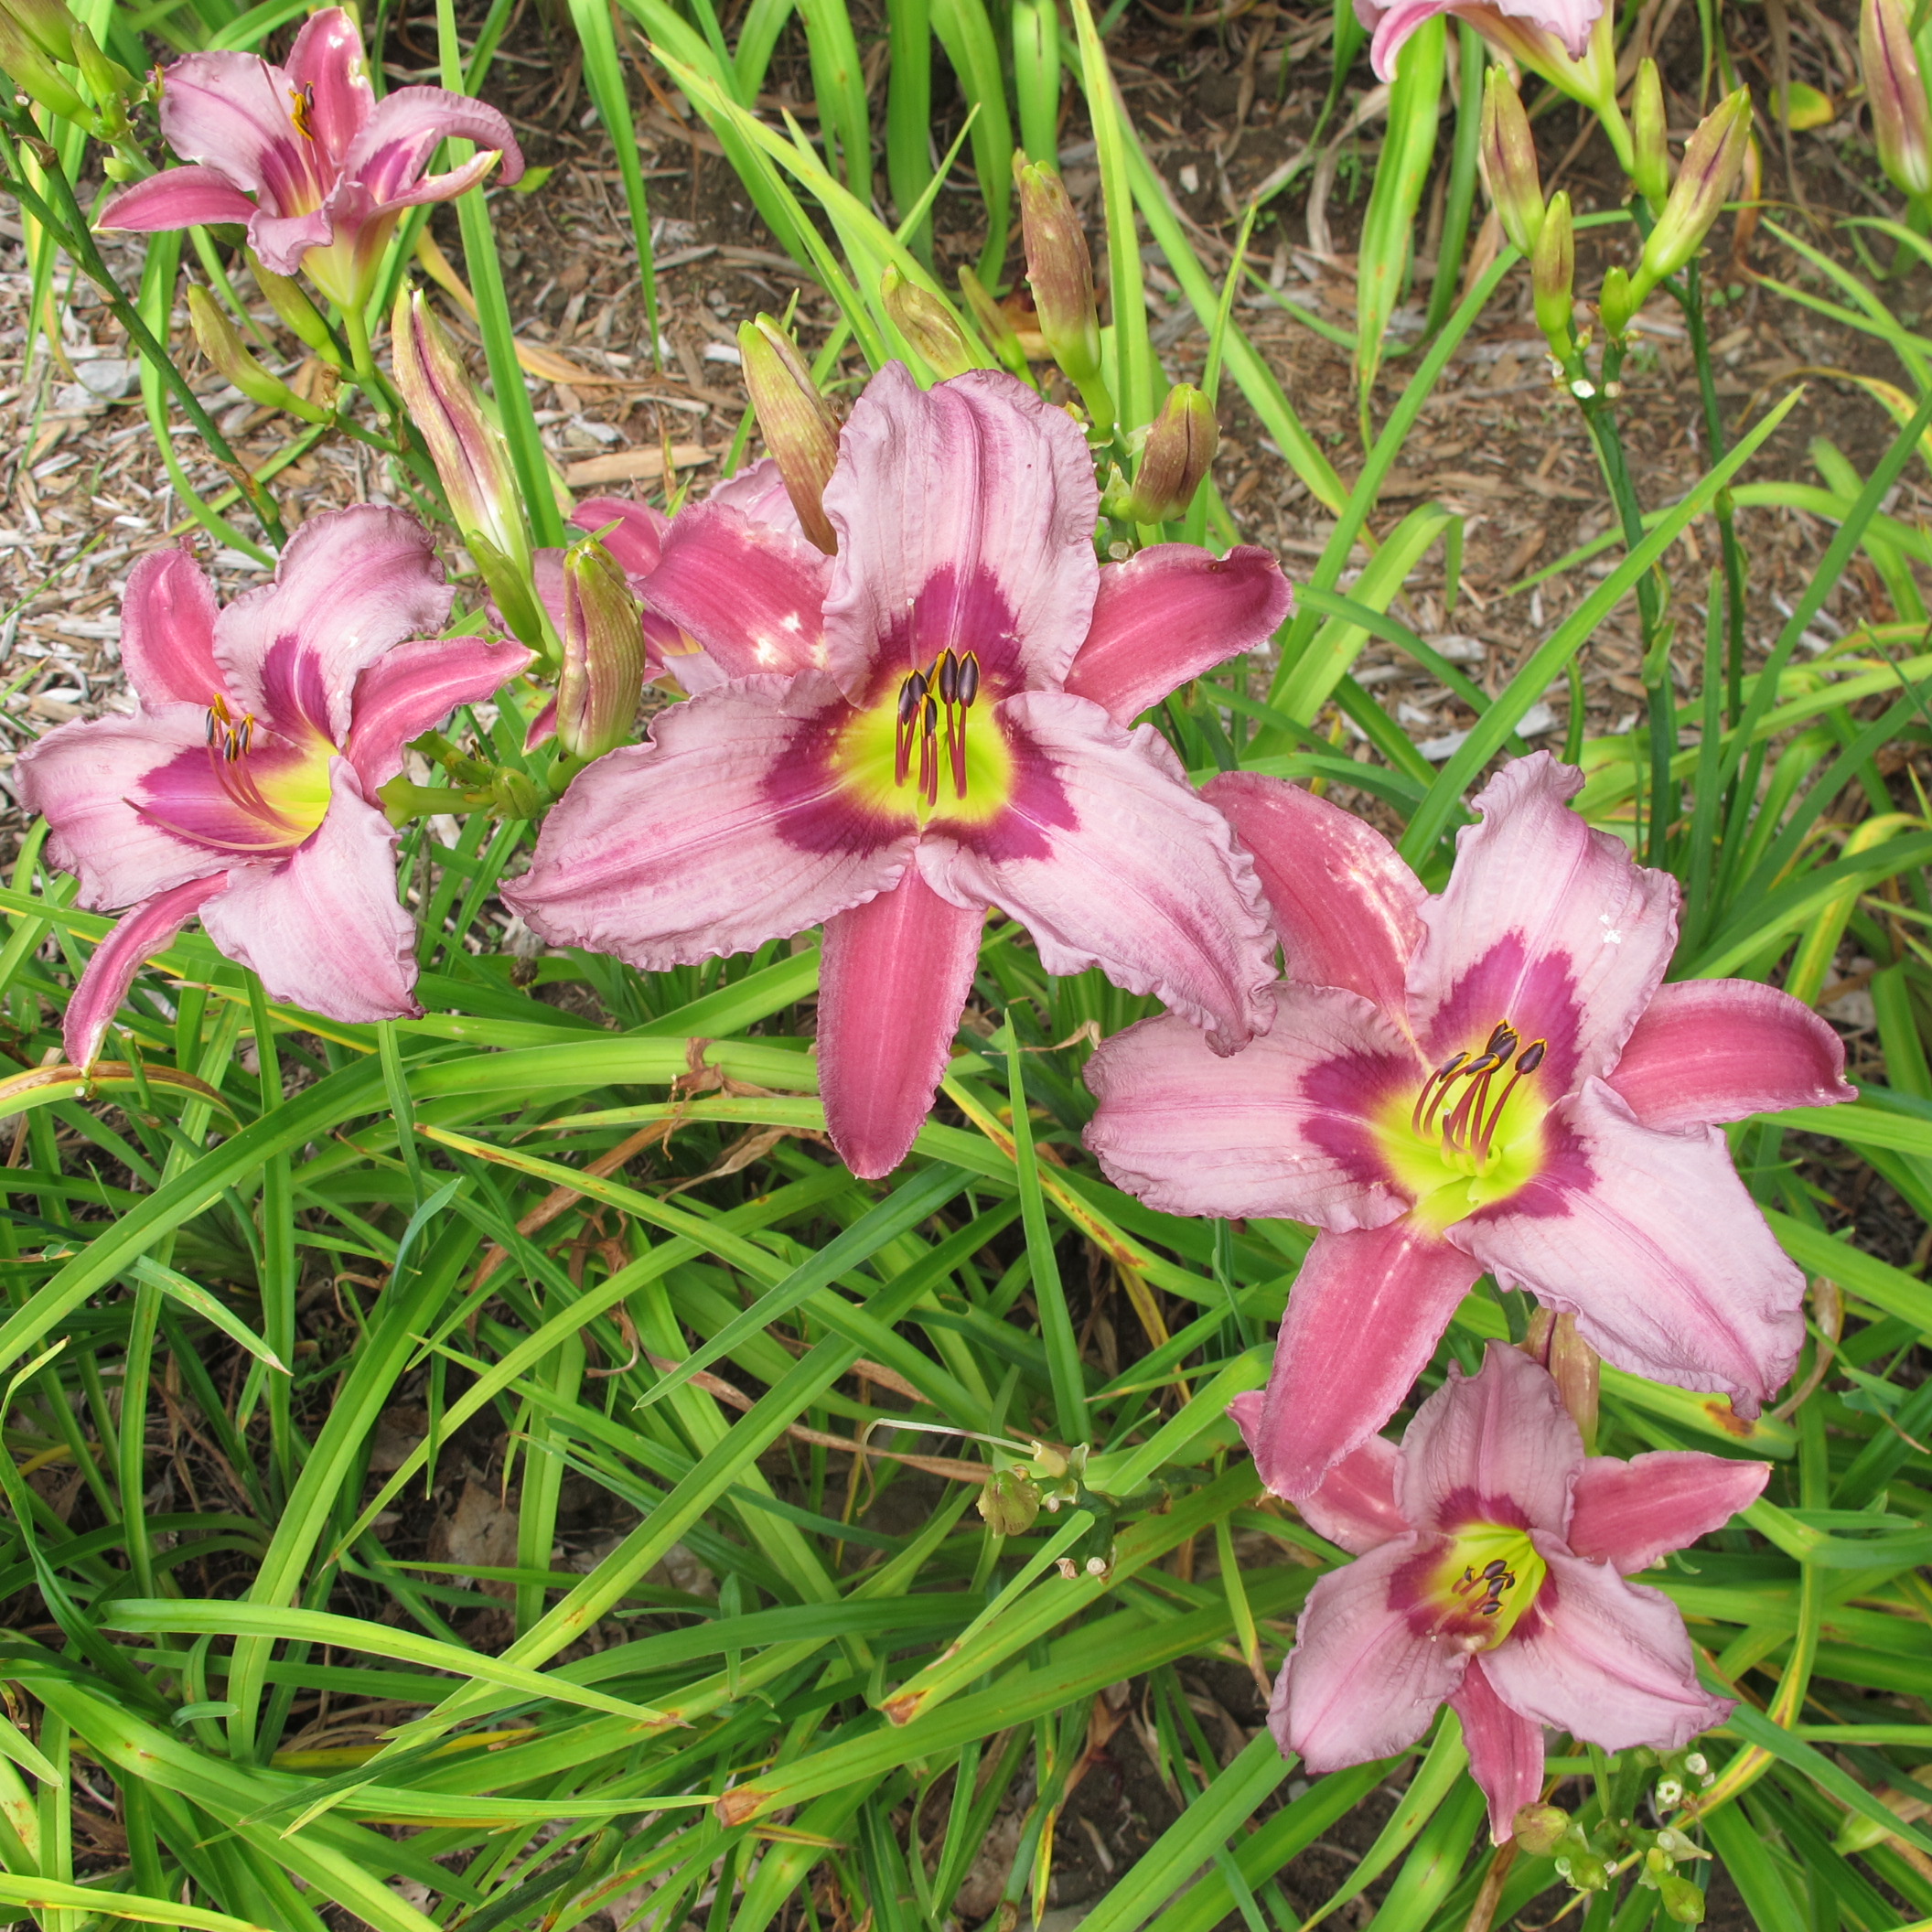
I recently visited Cider Hill Gardens in Windsor, VT to admire their collection of daylilies. They have daylilies in a wide range of colors, from nearly white (‘Ice Carnival’) to deep reds that border on black. They have daylilies that are pink, creamy yellow or light orange, lilac, lavender, bluish and red. Some come in one color, but most are bi-colored, with a throat or eye of a second color. Each flower has both petals and sepals, and in some, like ‘Frans Hals’, the petals and sepals can be different colors – a look I like.
Kindly Light a spider dayllily
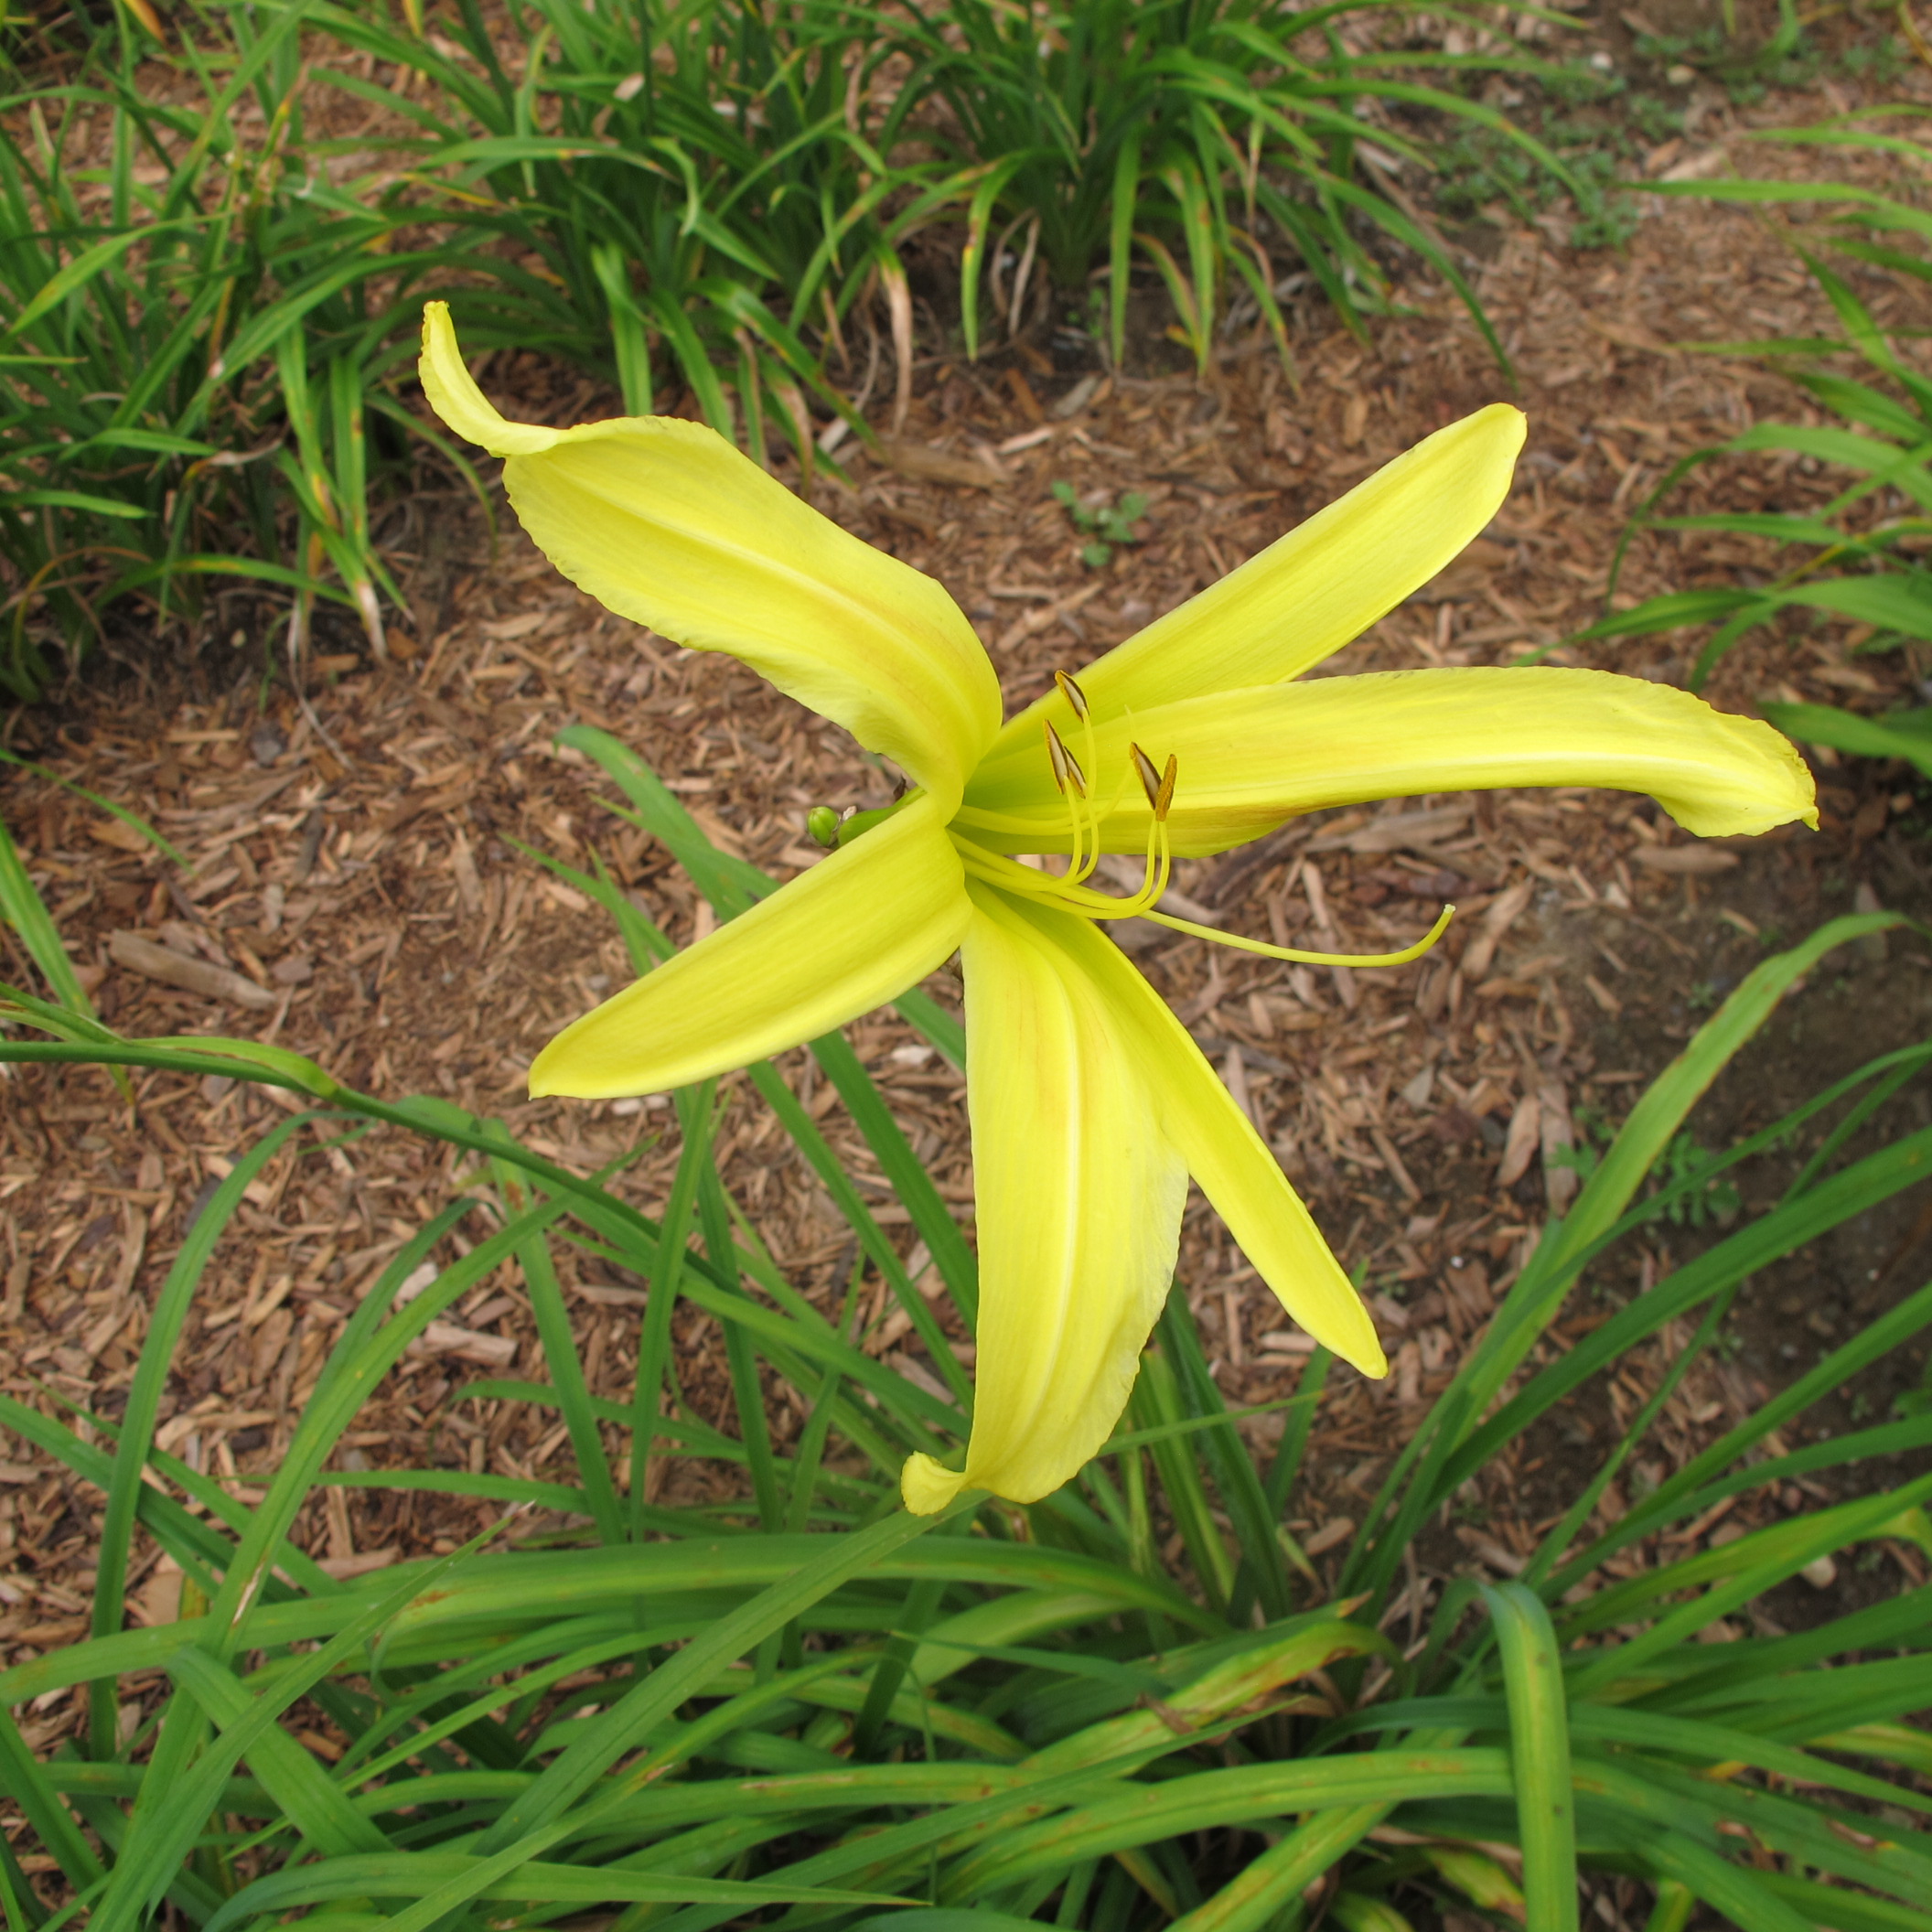
Flower shape varies as much as the colors. There is the standard trumpet. Then there are those with ruffled edges (‘Here She Comes’ is a good one). And the so-called ‘spiders’, whose petals are narrow and spaced apart a little – like the legs of a spider. ‘Kindly Light’ is a nice yellow one. ‘Doubles, such as ‘Jean Swann’ have their centers filled in with lots of extra petals. And some are worth buying for their great names like ‘Blueberry Breakfast’ or ‘Bodacious’.
Then there are the re-blooming daylilies, like Stella de Oro, a gold-colored daylily that is very popular because it blooms off and on all summer. I’ve seen pictures of a re-bloomer called Purple de Oro that I simply must have. So many kinds, so little garden space!
Jean Swann
What do daylilies want in life? Sunshine, dark rich soil, and adequate moisture. But they will settle for less – even a lot less- and bloom almost anywhere. Yes, slugs will sometimes nibble on the leaves, but they are not a magnet for bugs the way some roses are.
Over time clumps of daylilies get bigger, and you can divide them to start new clumps. Simply slice through a big clump with a spade to make two or four new plants, pry them apart and re-plant. I’ve been known to take out a chunk shaped like a piece of pie with a serrated knife – and the mother plant never even seemed to notice I’d done so. So run to your neighborhood plant center and have a look – you’ll likely come home with something wonderful.
Henry Homeyer is the author of 4 gardening books, and a children’s fantasy-adventure, Wobar and the Quest for the Magic Calumet. Contact Henry through his Web site, www.Gardening-Guy.com.
Composting
Most of us have our own insecurities. We might be insecure about some aspect of our looks, or how we did in school, or perhaps about our athletic abilities. For gardeners, our compost piles are often a source of mild angst. We think we should be able to make compost that looks and smells like the black rich soil in just three months. Some go to great lengths: turning their compost piles and adding grass clippings or manure to get their compost piles to heat up. Yet most of us never have a “textbook perfect pile”. I say, “So what?” I buy it by the truckload as I can’t make enough with kitchen scraps – and it’s not convenient to dig it out from under a pile of freshly pulled weeds.
That being said, all of us should have a compost pile, or more than one. Compost piles keep food scraps out of the waste stream, and weeds eventually break down and turn to that magical dark compost. But I say 2 or 3 years is a reasonable time to let a pile slowly digest its contents. In fact, I recently harvested some black gold from a pile I had made and abandoned about 20 years ago. I used it as soil for a new planting of hostas, and they seem very pleased it.
I have a dog, Daphne, a corgi that is quite a rascal. She loves to eat anything, and will roll in almost anything – the stinkier the better. I always need to have a way to keep her out of the compost pile that I use for kitchen scraps, and recently built a new one using pallets I got for free. Wood pallets are generally available – everything these days is shipped on them.
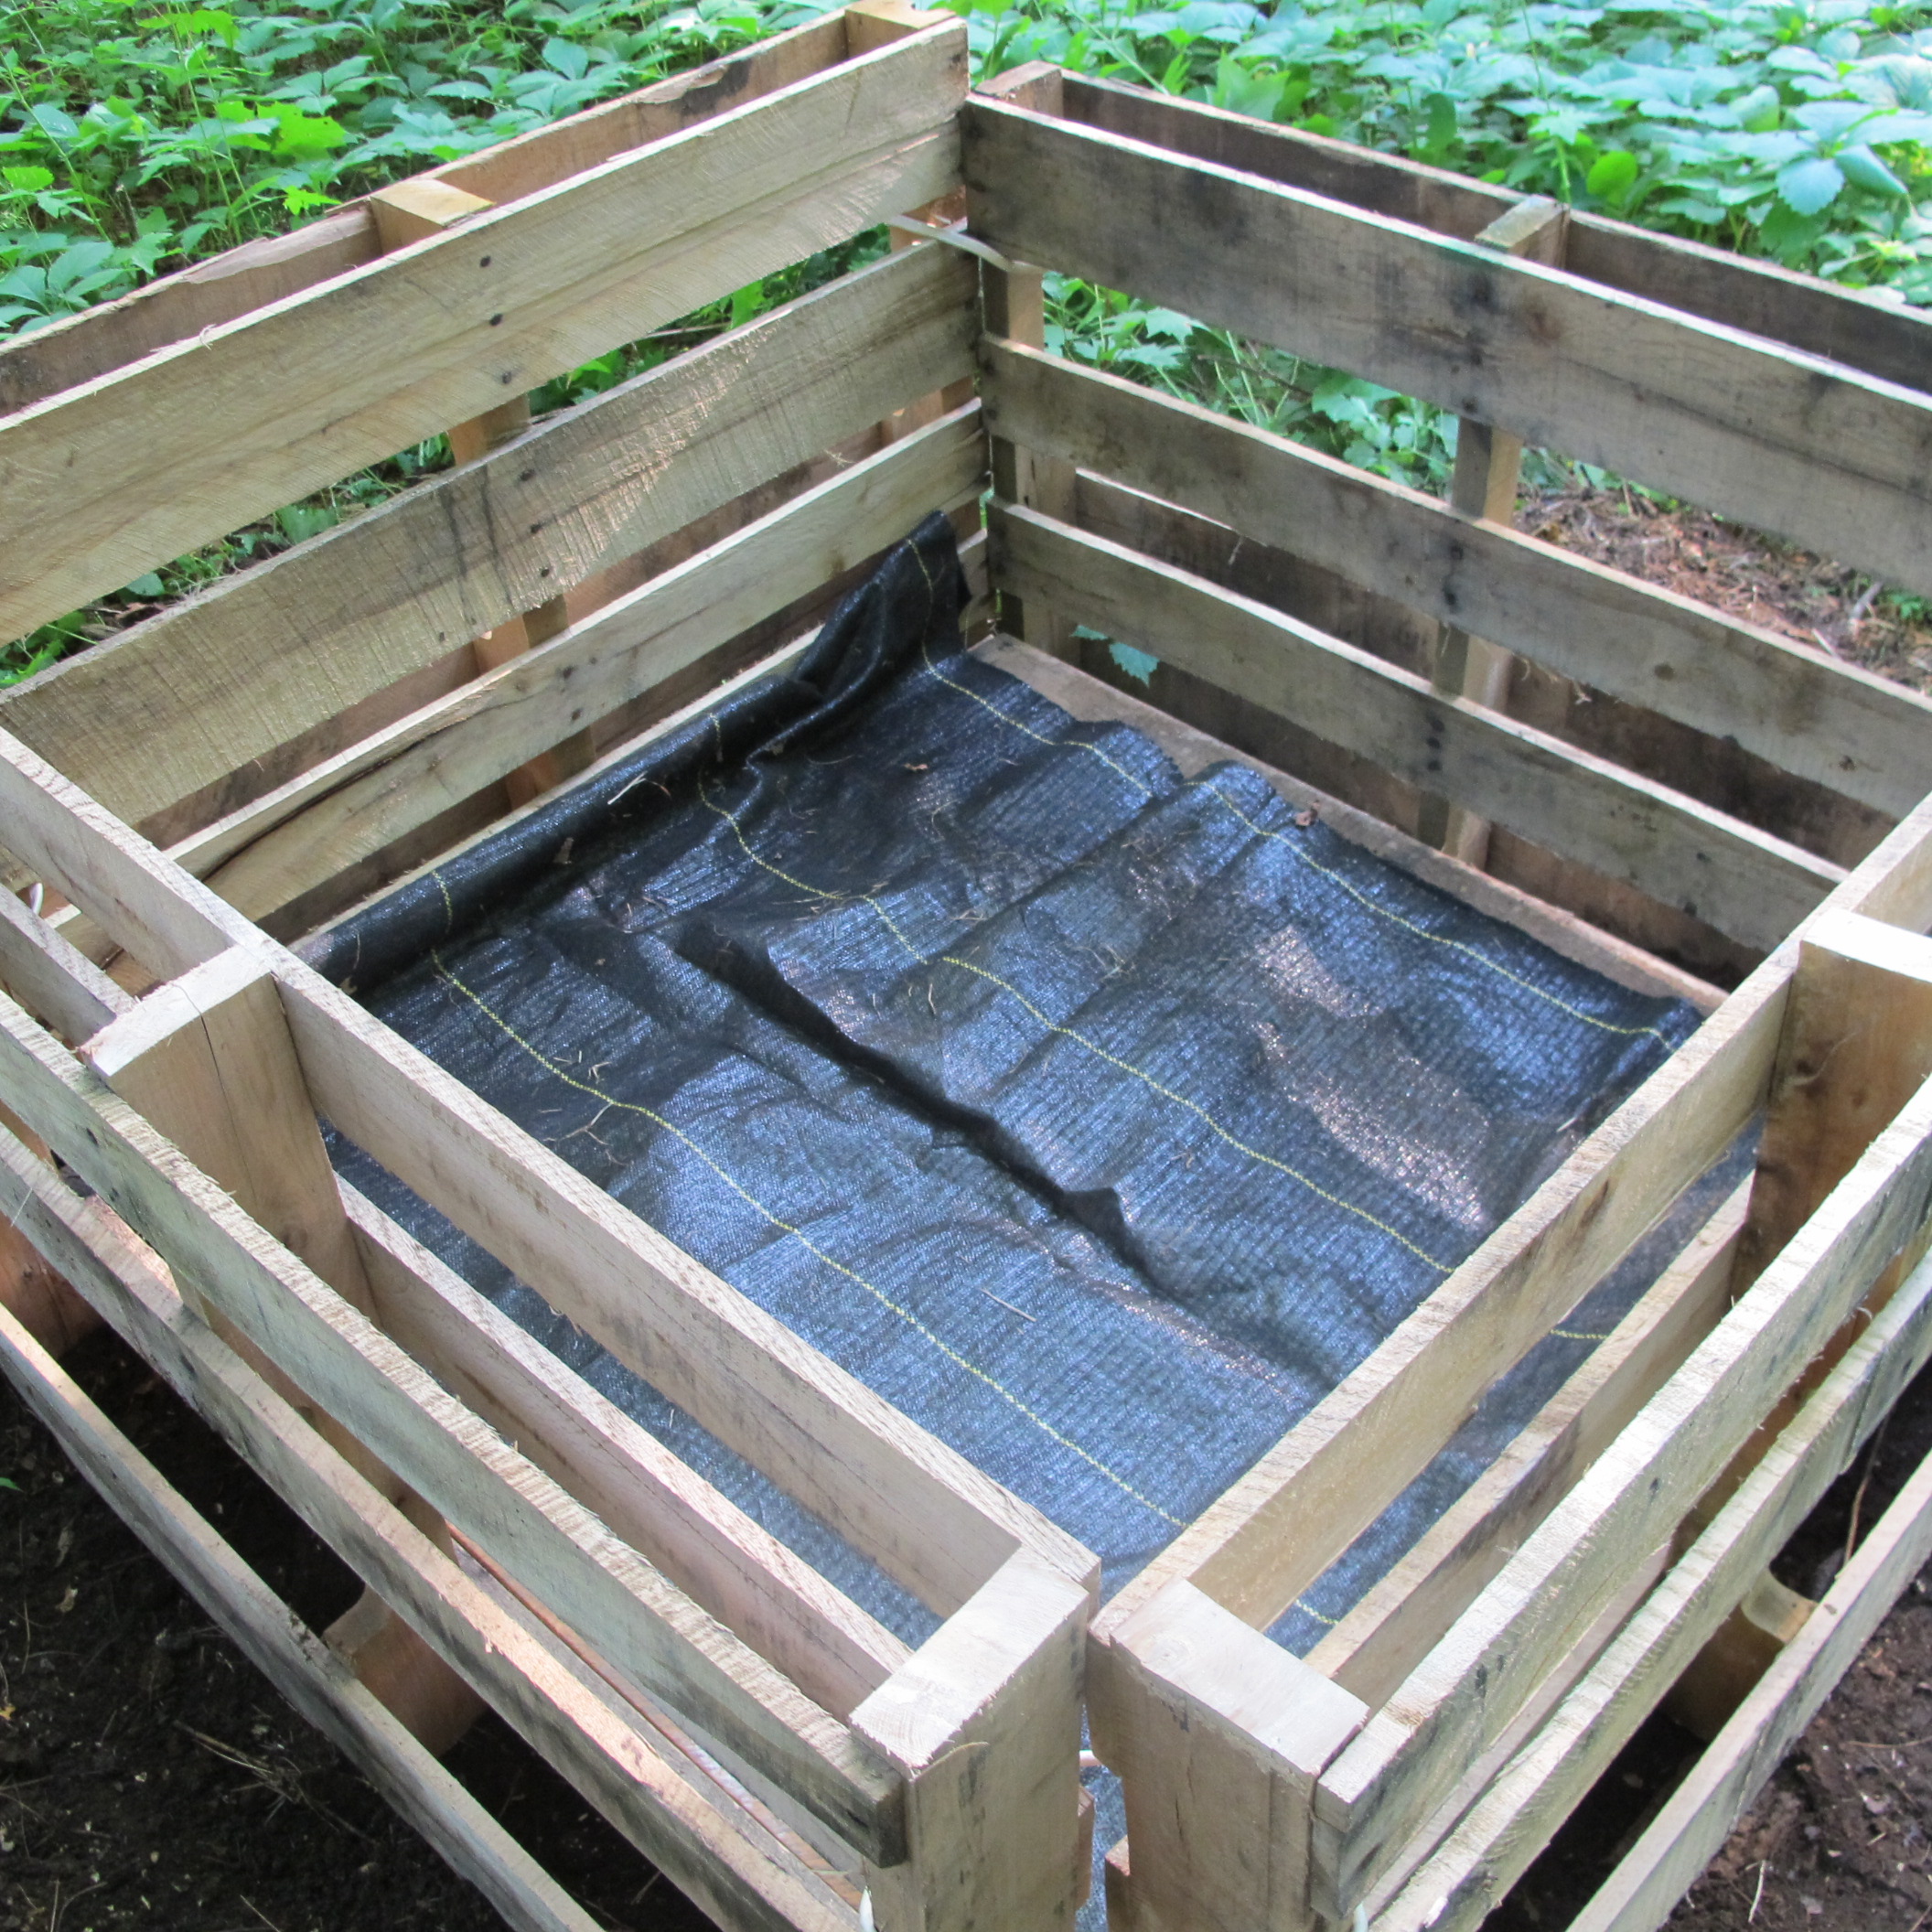
Finished compost bin
I decided to make a compost bin with a low profile – Daffy is short and not much of a jumper. I used a reciprocating saw to cut the pallets down to a more manageable size – instead of building a bin that is 4 feet tall, I only needed one half that height.
I placed one full-sized pallet on the ground and arranged four shortened pallets around it. The bottom pallet keeps the pile from sitting in collected water or on soggy soil in rainy times. Compost does not want to be soggy. I connected the four sides using building wire – either 14-2 or 12-2 wire is fine, or nylon rope would work. I just twisted the wire around the vertical corner pieces. When done, I put landscape fabric on the bottom to keep material from falling through between the slats.
What will go in that new compost pile? I’ll toss in vegetable by-products like carrot tops and moldy broccoli. Old flower arrangements. Any organic matter that can break down with time: stale bread, tea bags, egg shells, and peanut shells and corn husks will go in mine. But no meat products, vegetable oil, dog poop or kitty litter – the latter two could carry diseases or parasites.
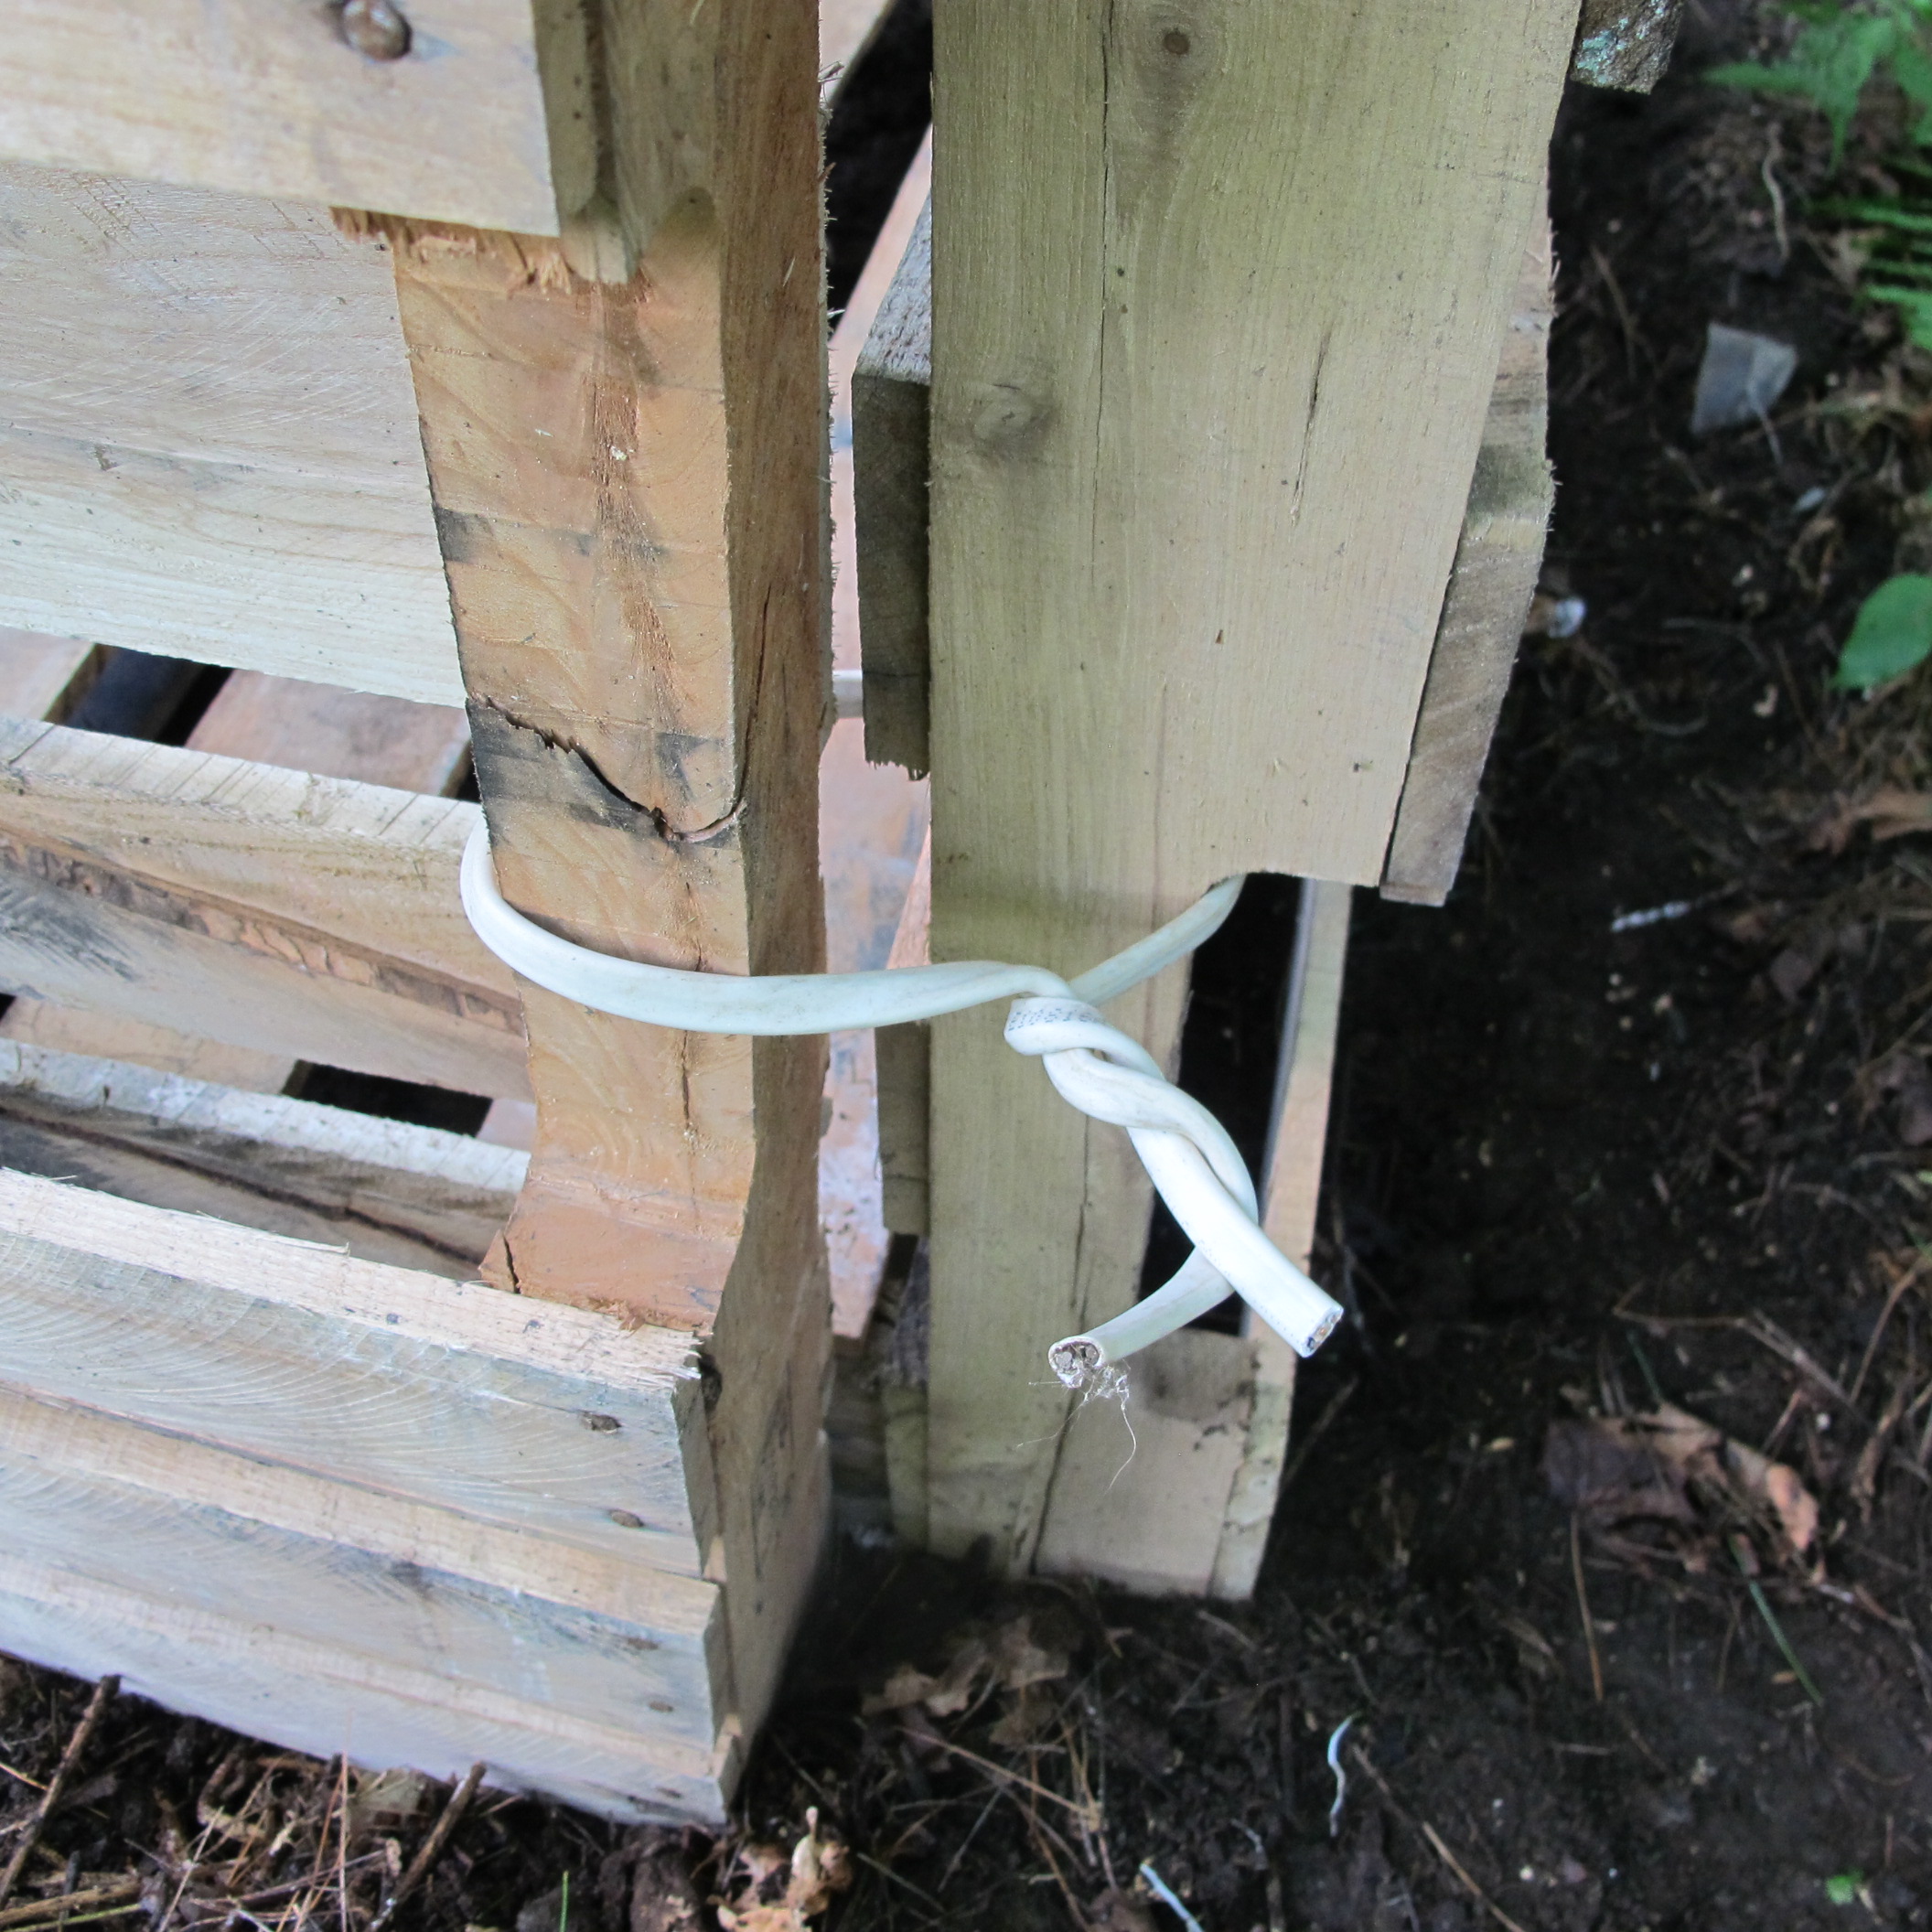
Detail of corner connection
According to the experts, most of what goes in a compost pile should be carbon-based: brown leaves and dried grass or weeds, for example. A little nitrogen-rich material should also be added – things like fresh cut green grass, cow or chicken manure, fresh vegetable scraps. The ideal ratio is 30 parts brown matter to 1 part green matter. But our kitchen waste is generally high in green matter, low in brown matter, so it doesn’t break down as well as it should. In addition to the kitchen compost, I have separate piles for garden waste and these are easier to get “cooking” and breaking down the organic matter.
What can you do to improve the balance in your kitchen compost? Rake up some dry lawn clippings and put a layer in the compost bin before adding a bucket of kitchen scraps. Or if you have a leaf pile, occasionally add some to the bin. You could even buy a bale of hay to layer into your compost bin. You are trying to encourage microorganisms to break down the vegetable material, and they need lots of carbon and only a little nitrogen to build their little bodies and reproduce.
A compost pile needs oxygen in order to encourage aerobic bacteria, which are the good ones. Anaerobic bacteria thrive in a low-oxygen environment and are the ones that produce foul odors. The smell of rotten eggs, for example, can be produced in a compost pile that is wet and compacted and doesn’t have a good carbon-nitrogen ratio. If yours smells bad, fluff it up and layer in some hay or dry leaves.
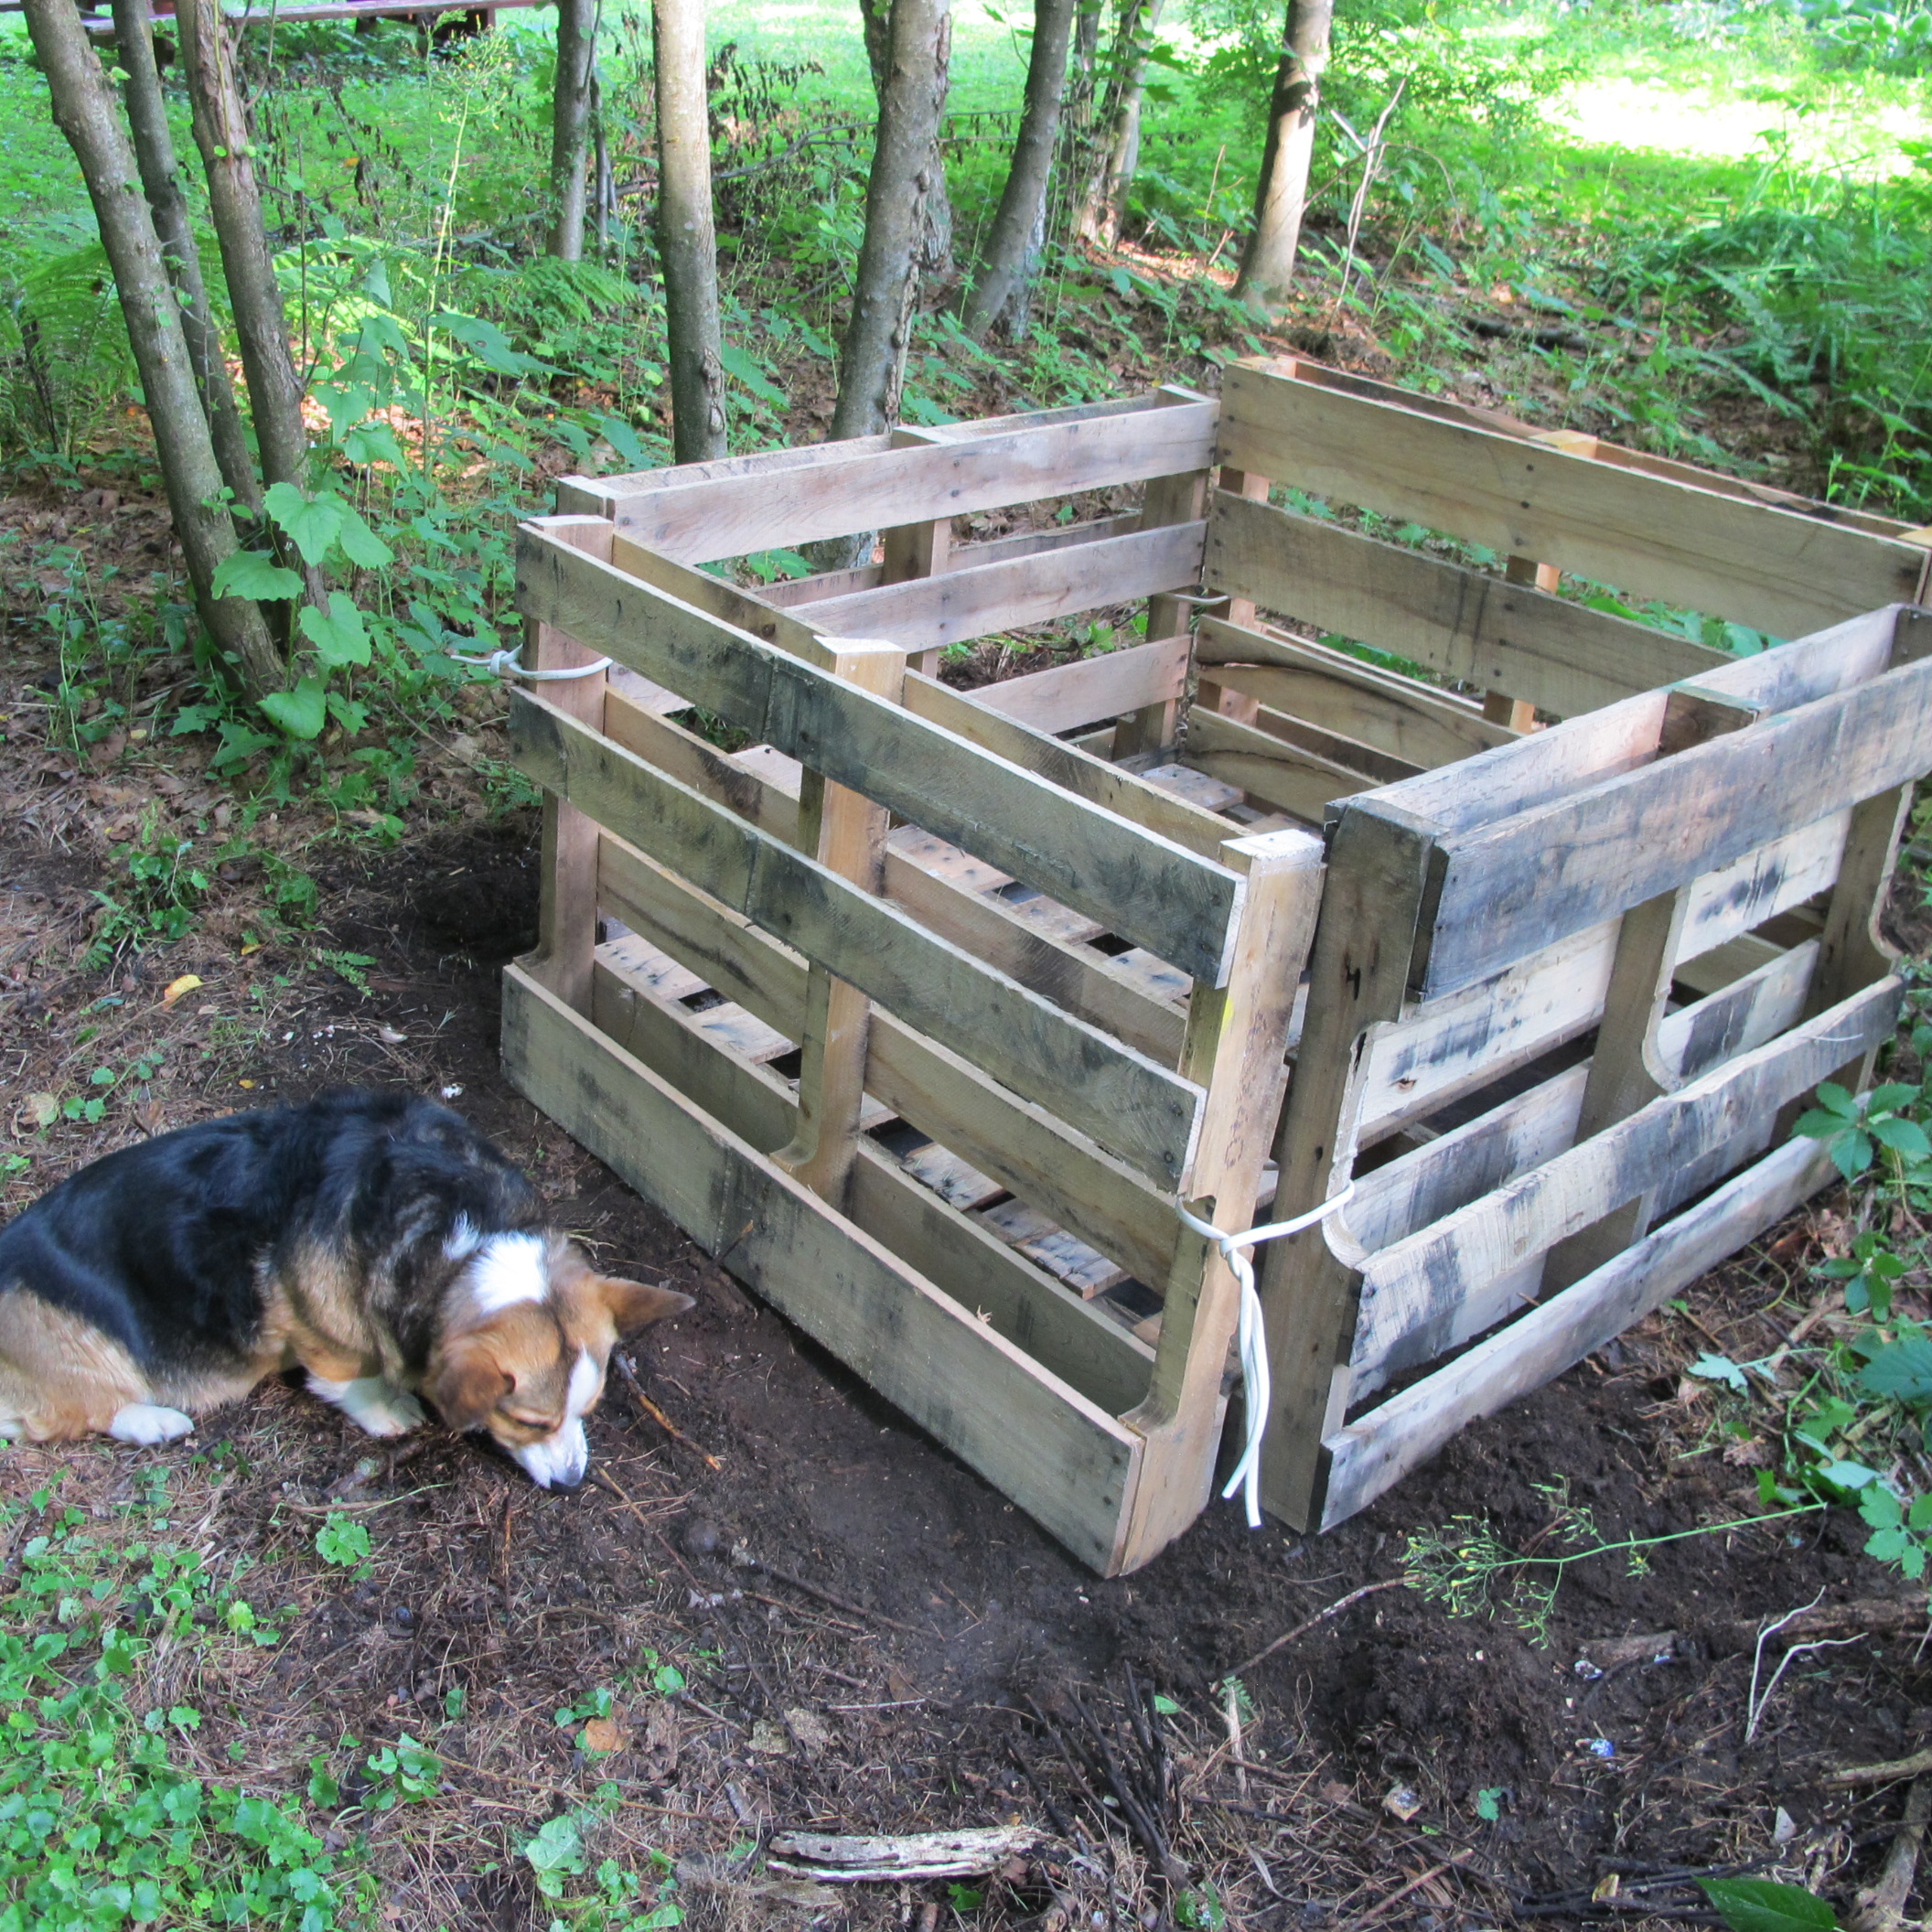
Daphne and the new compost bin
There are plastic compost bins available and even rotating compost bins. Those are great for urban gardeners – they do a great job of keeping out skunks and raccoons. But they are relatively expensive and do not necessarily make compost any faster than the simple bin described above.
If you really want fast action, you’ll need to have multiple bins and turn the fermenting compost from one to another, adding carbon or nitrogen as needed. A compost pile that is working well heats up past 130 degrees, killing most seeds. But, as I said in my first book, you may need to quit your day job to tend a compost pile that works perfectly. I’d rather spend my time weeding – or goofing off.
Henry Homeyer will not be answering questions this week. His web site is www.Gardening-guy.com. He is the author of 4 gardening books.
Going on Vacation? What’s a Gardener to Do?
Sometimes life interferes with being a gardener. Here it is, mid-summer and most of my vegetables are nearly ready to be eaten or to be put up for the winter. But I was invited to a wedding of a dear friend in Tanzania, and I am going! So I will be leaving my gardens for nearly two weeks in August. If you are going away, there are things you can do that will help your garden thrive in your absence. Here are some of the things I am doing.
First, I am thinking about the deer. I have a vegetable plot this year that was lent to me nearby, but it is not adjacent to my house. At home the deer rarely bother my garden – there is plenty of activity every day, and a vicious corgi, Daphne, lurking around, ready to take them on. (Unless she is asleep indoors, which is most of the time). But this vegetable plot is more remote, and I have been battling deer all summer. Untended for 2 weeks? It might get munched to the ground.
Because the garden is about 250 feet long and 15 feet wide, I haven’t fenced it in. Fences 8 feet tall are the best defense against deer. Even light-weight bird fencing is generally effective, especially if you hang strips of cloth or reflective tape on the fencing so that they can see there is a fence.
Instead of fencing, I have tried various smelly things to make them think poorly of my garden. I tried hanging bars of Irish Spring soap, but that did not deter them. Then I sprayed Garlic Barrier on foliage. This is a garlic and water spray that comes in a quart bottle. Diluted and sprayed on, it is quite stinky, and deer, like vampires, generally avoid garlic. The garlic oils are supposed to penetrate the leaves, repelling insects. But why not deer, too? It can’t hurt, and if it repels some bugs, too, all the better. The directions suggest spraying every 2 weeks, so I’ll spray my plants just before I go.
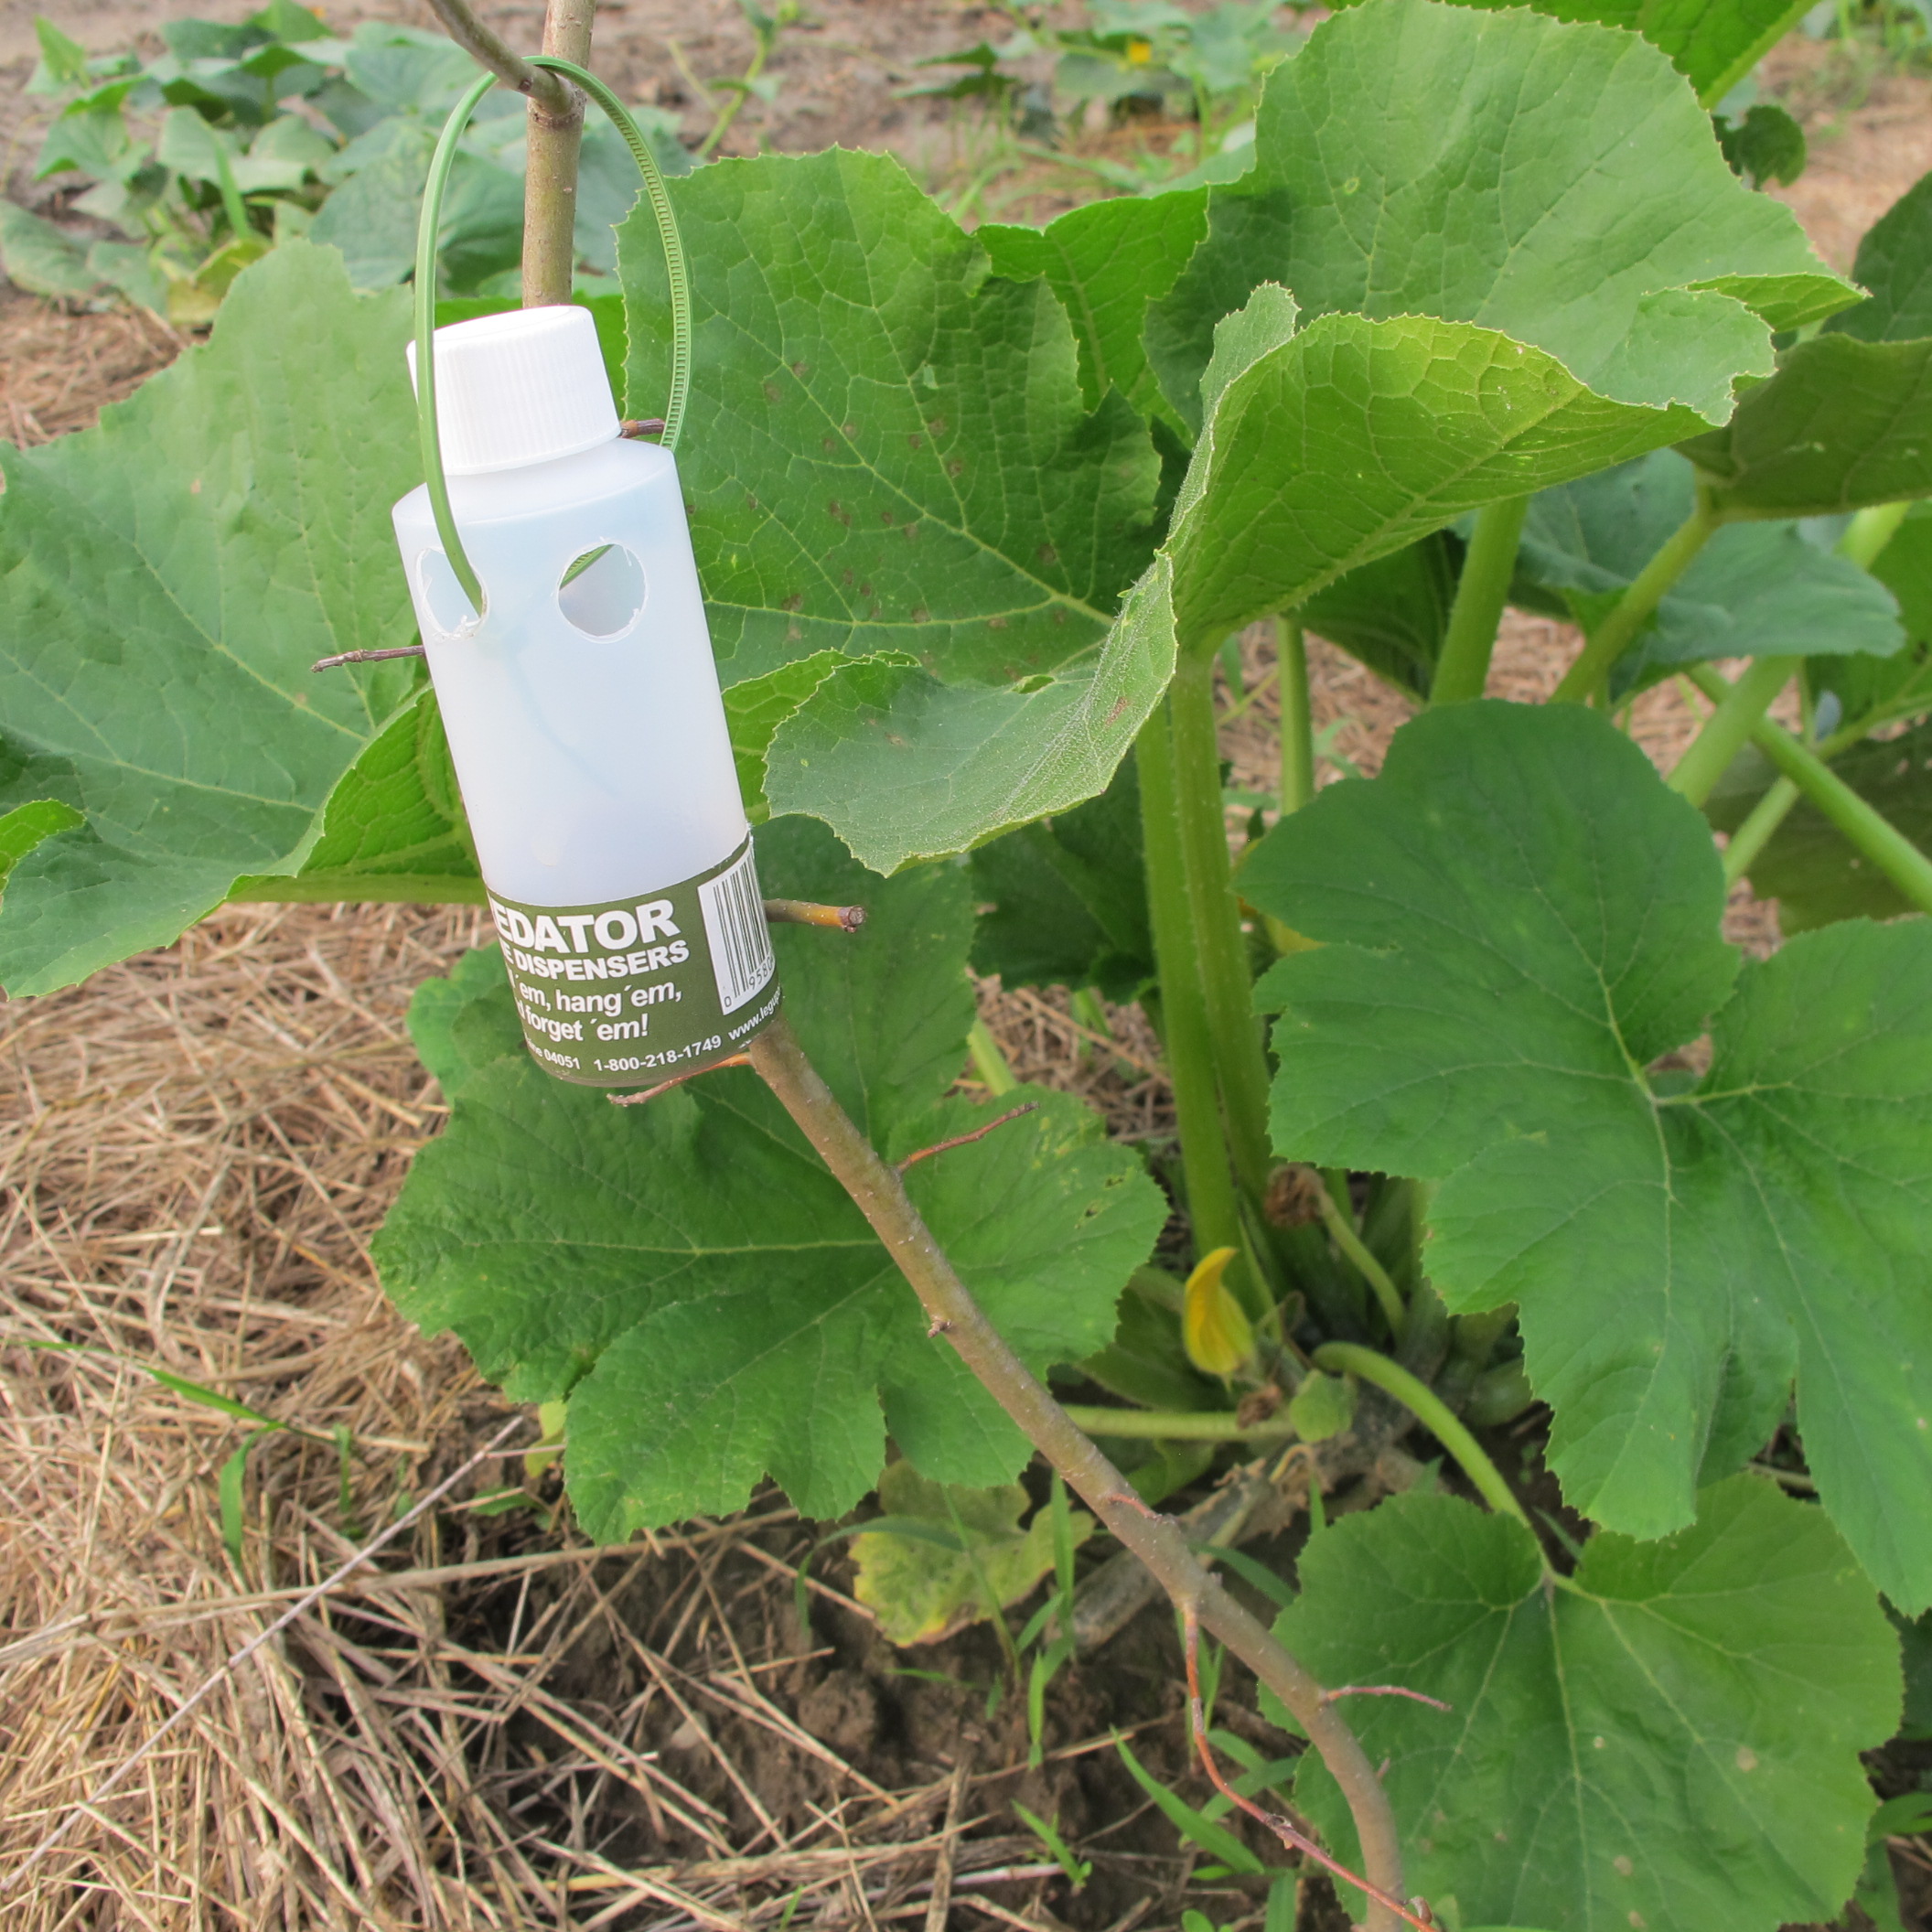
Containers for coyote urine
The last resort, and one which so far this summer seems to have helped, is coyote urine. It is sold along with little plastic bottles with holes drilled in the sides near the top, cotton balls in the bottom, and wire loops for hanging. I poured some coyote urine on the cotton balls, and hung them from short forked sticks in the garden. Since I have done that, I’ve had no losses to deer in the garden. Deer are creatures of habit, and I am hoping they have decided that my big plot is one to avoid. We’ll see. I’ve also heard that aluminum pie plates hung on strings in the garden will ward off the deer, but haven’t tried them.
I have 50 sweet potato plants in that plot, and the deer ate some of the foliage the first night after I planted the slips (some of which had leaves). Most plants recovered, and I covered them with “row covers” to keep away the deer and to hold in heat. Row cover is a spun agricultural fabric that breathes and lets rain and air pass through it. I use stiff wire hoops to keep it above the plants and give them space to grow. So now my sweet potatoes are not available to the deer.
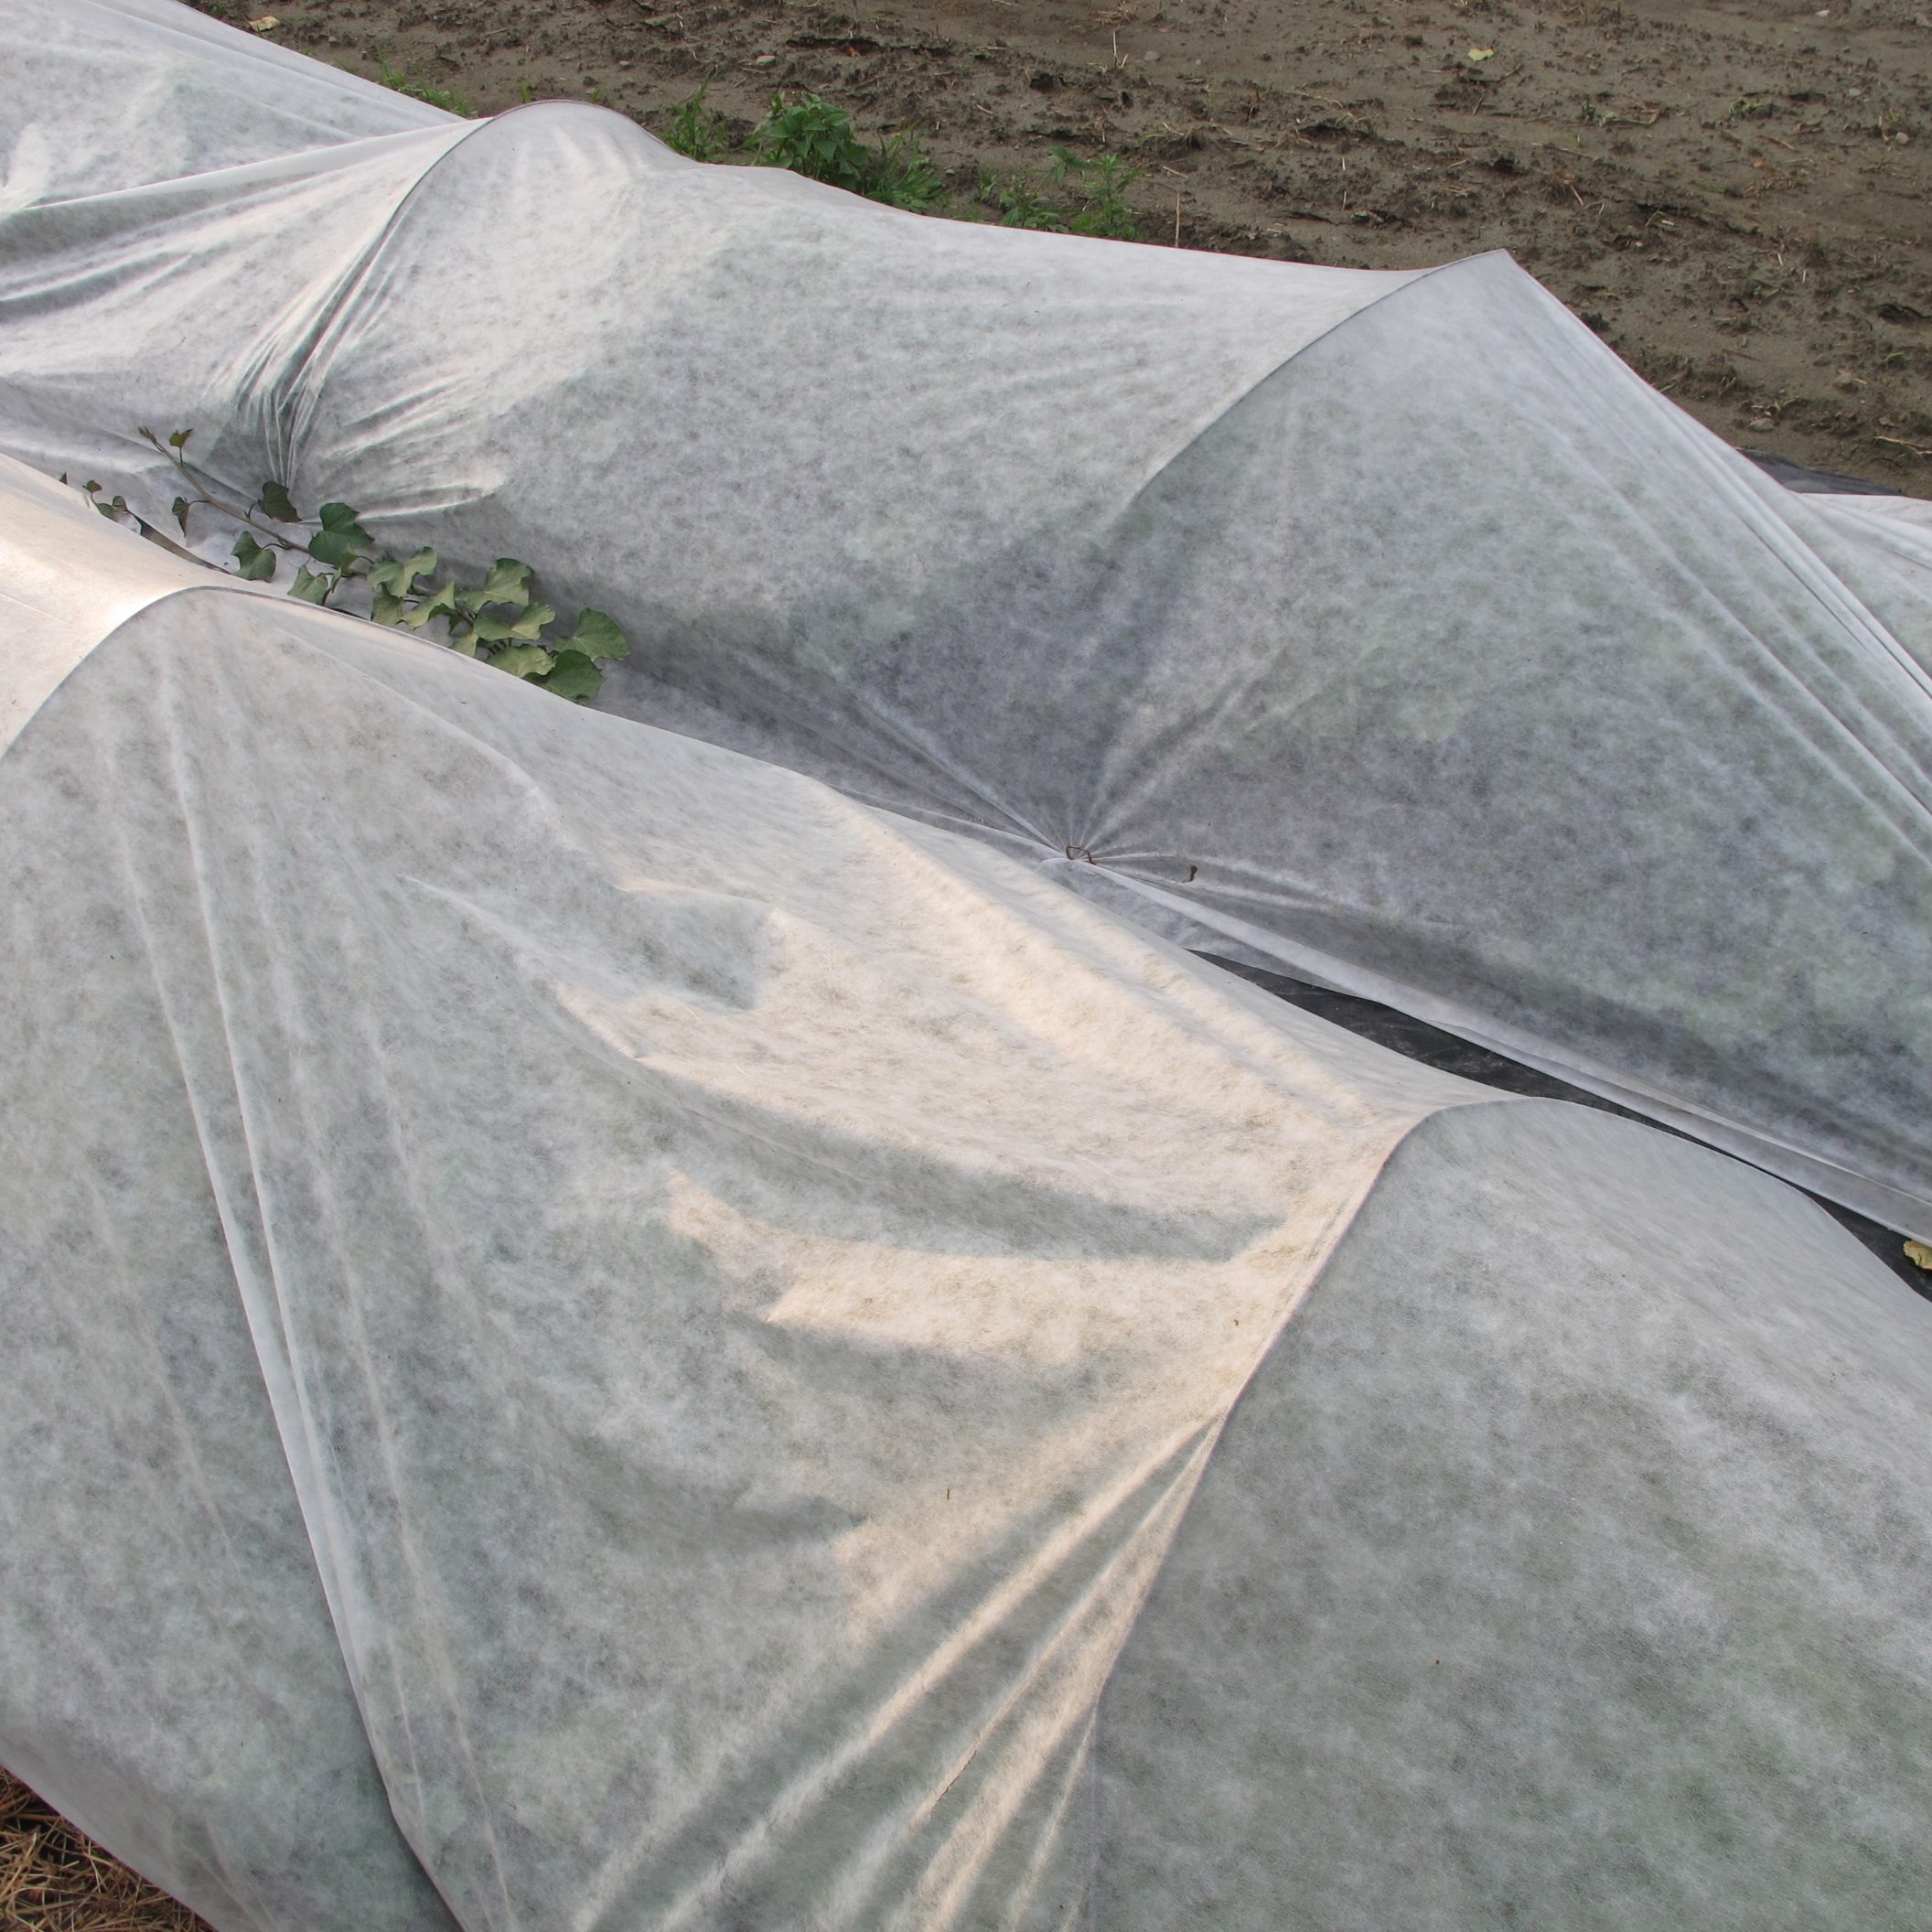
Row covers
Writing this article in yet another thunder storm, I have to admit that I am not worried about watering my garden while I am away. Still, if you have a dry garden and we get a dry spell, there are timers that will turn you hose on and off . They are battery operated and will turn off and on every day, or every other day, or once a week for a predetermined period. I have used timers made by Melnor and they are easy to program and use. You just need to have sprinklers or soaker hoses set up to water your garden.
It helps to have a friend or neighbor who will turn the timer on if you get a dry period, or turn it off after a big rain. Presumably there are now phone apps that will allow you to turn timers on or off from a smart phone. I’m just not that smart – nor is my phone (which is not an old fashioned rotary, but close)..
Potted plants often suffer in August when people leave without giving them thought. It’s best to move them out of the sun to keep them cool and reduce their water needs. Give them a good soaking before you leave – I find submerging pots in a big bin of deep water is best. Hold them down until they stop bubbling.
And I know you are not going to like this piece of advice: weed your garden well before you leave. Yes, you’re busy getting ready to go. But if you let weeds get big, flower, and make seeds, you will be paying a price for a long time to come. Seeds can live a long time – some even for decades, or centuries. So have a good look around for weeds getting ready to produce seeds.
Lastly, remember if you offer your neighbor free beans or tomatoes or lettuce, they are more likely to come and fuss with your watering device, or even water the potted plants. And veggies need to be picked in order to keep on producing. Have a great trip!
Henry Homeyer will not be answering e-mail questions this month. His Web site is www.Gardening-Guy.com.