-

Now available for $24.95 including shipping. -

Now available for $21.00 including postage. Vendors I Like
 Click Here to buy from Cobrahead
Transplanting Tomato Starts
This year I started my tomatoes indoors much earlier than I usually do. Normally I start them on April 10 at 10:14. Only kidding. I start them, most years, during the second week of April. That way they are well established by the time they are planted outdoors 8 weeks later – but not crowding the root space provided by a standard flat.
But this year I started most on March 24, 3 weeks earlier. Why? Because the winter was so long and harsh I was ready to see little green things growing under lights – and was willing to take on the responsibilities of nurturing them. But this year I will have to transplant my seedlings into 3-inch pots in May to avoid root crowding.
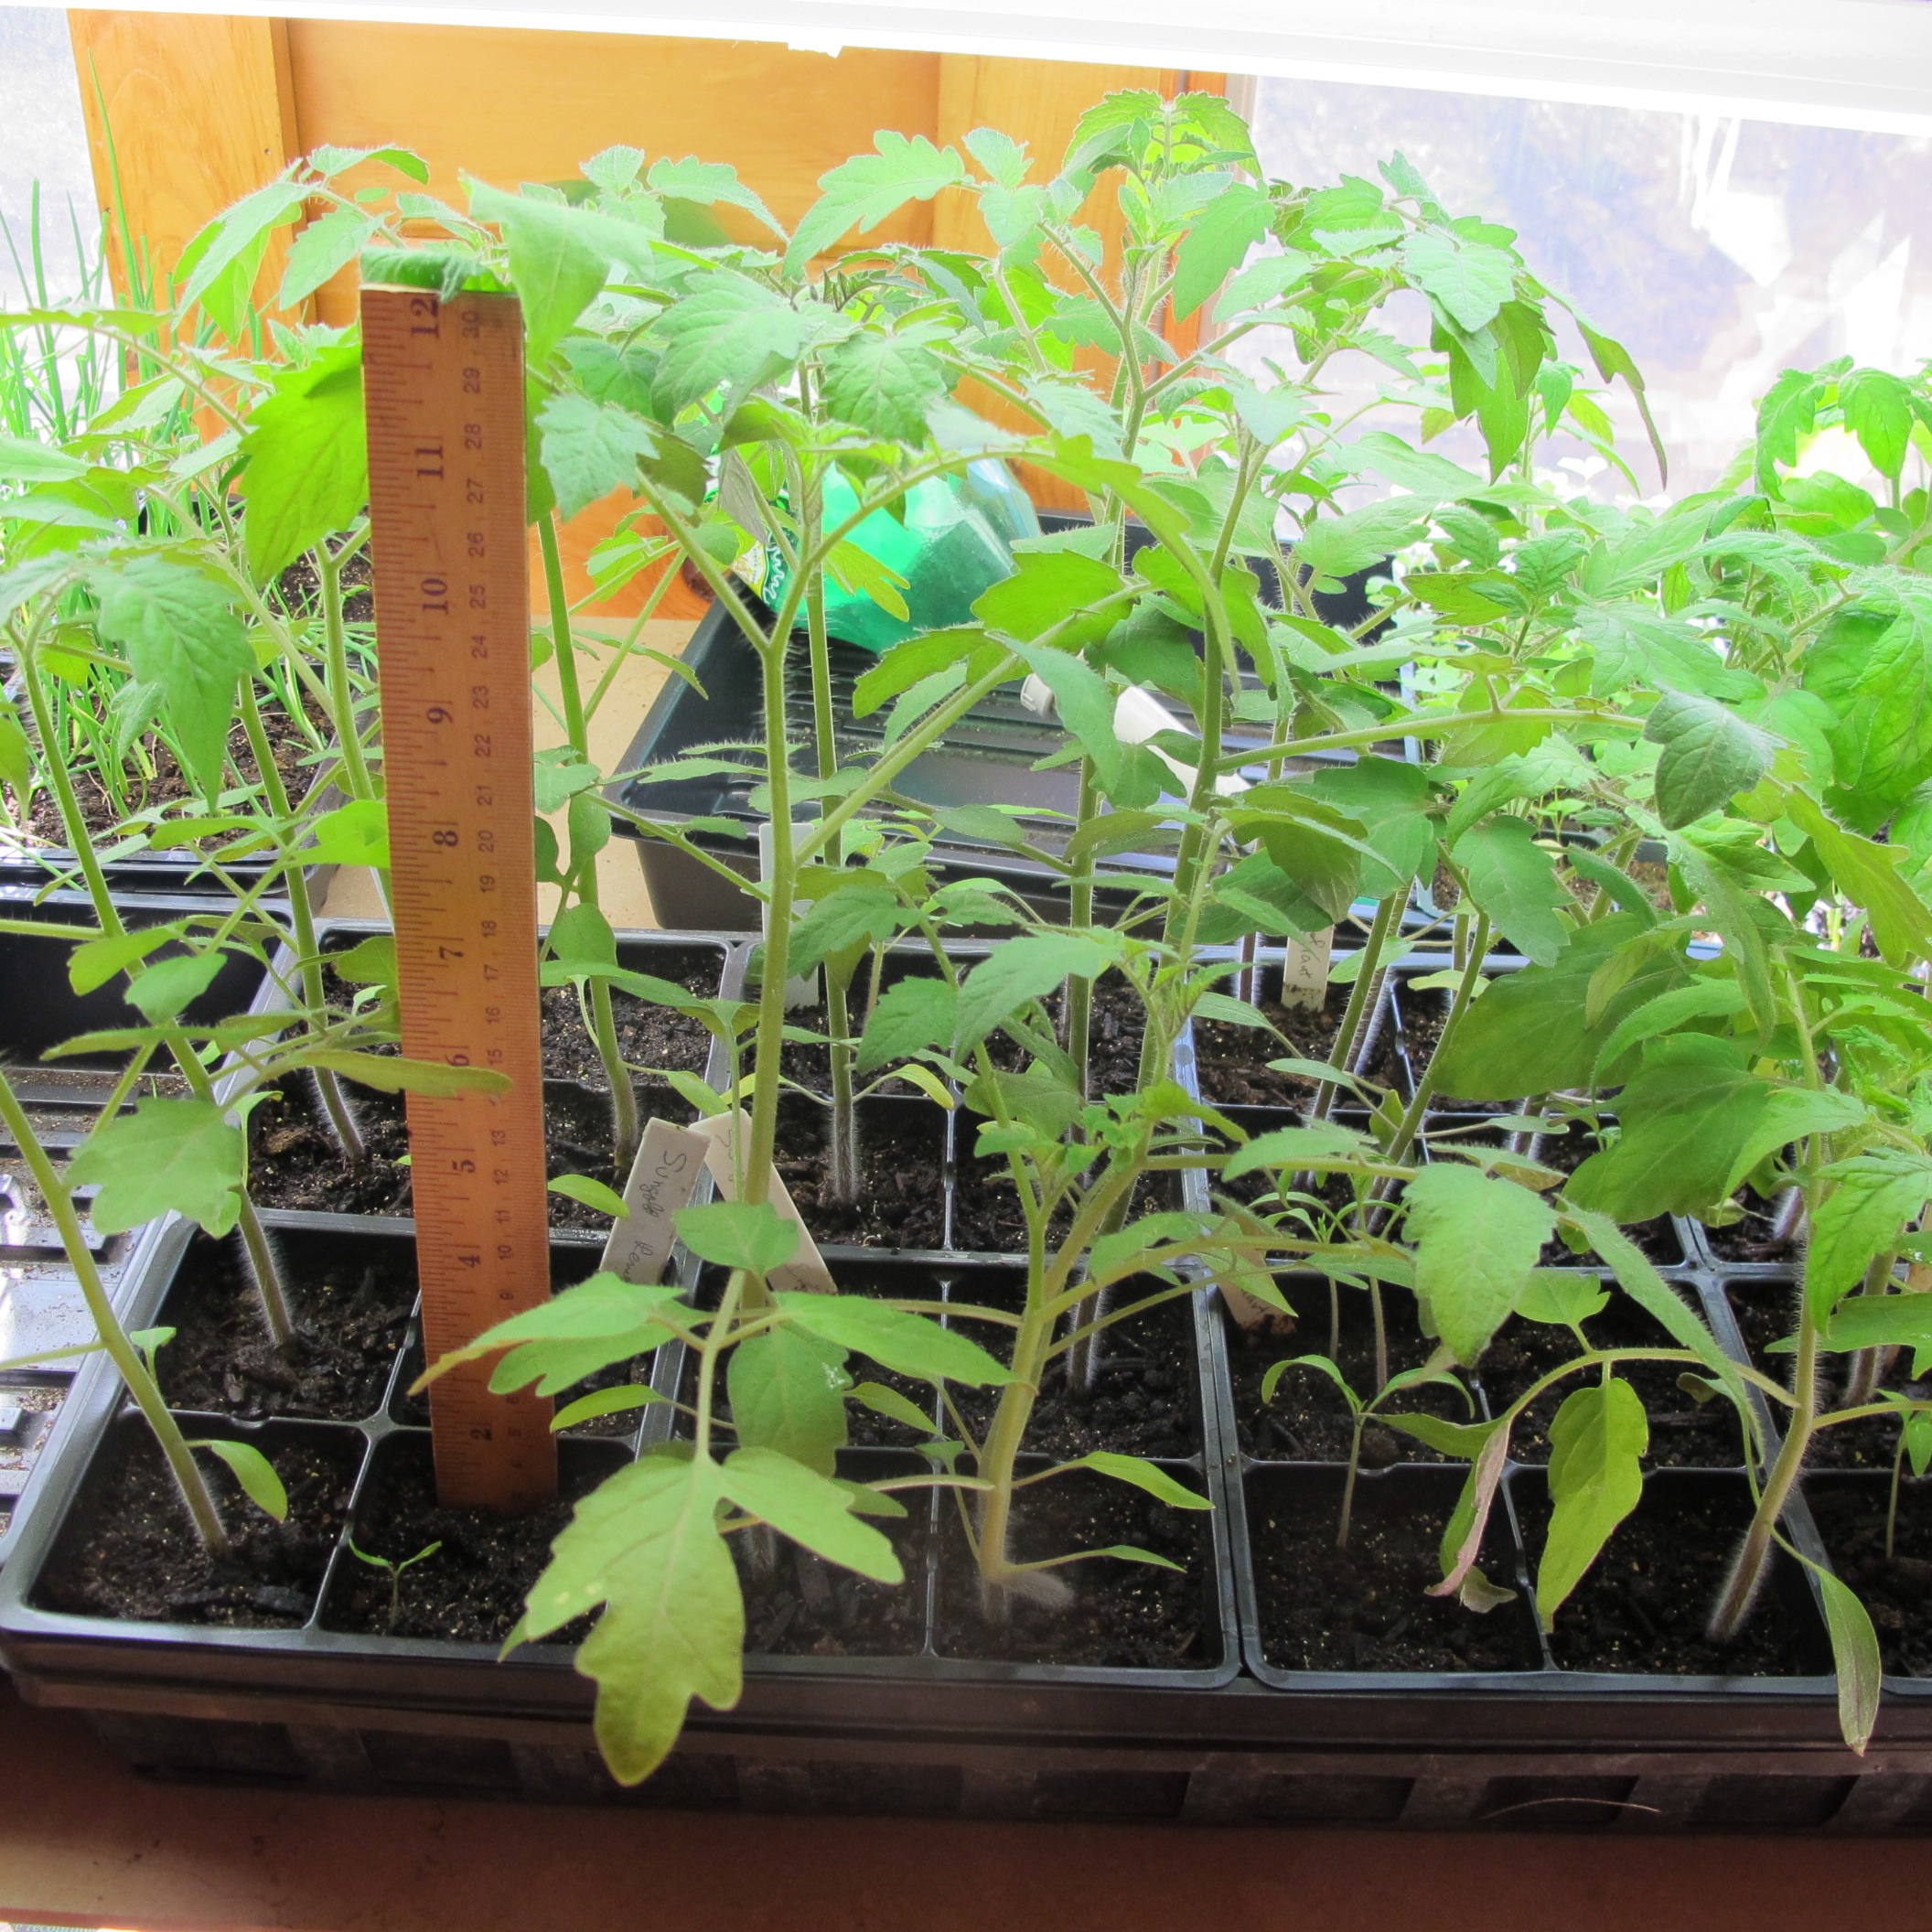
Tomato seedlings ready for bigger pots
I will pick a date for transplanting according to the Stella Natura calendar (www.stellanatura.com). This is a biodynamic planting calendar that is “supported by lunar and planetary rhythms”. For each day of the year, and every hour, the calendar designates one of 5 categories: good for working with or planting flowers, fruit, roots, leafs, or none of those – a “black-out day”. I will pick a fruit day for my transplanting .
I’ve done just a little testing of the recommendations of the Stella Natura calendar, but enough so that I feel obliged to follow it. Probably you have had times when you planted seeds and got a bad germination rate. I have. I blamed the seeds – or my planting technique. But a few years ago I tried planting a 6-pack of lettuce on a leaf day, and then again the following day, which my biodynamic calendar indicated was a blackout day. The first lettuce germinated at close to 100%, while the second at considerably less than 50% and many of the plants that grew were stunted or died. Same soil mix, same temperatures, same watering. So now I follow the calendar – at least as far as avoiding the black out days.
According to the calendar, “scientific studies showing that plant metabolism, growth rate and water absorption tend to peak around full moon. …The full moon enhances germination. Sow seeds 2 or 3 days before the full moon to receive its optimal drawing power”.
It’s important, when transplanting seedlings to bigger containers, to use a planting mix that is warmed indoors for a day or so. Potting mix coming right from the barn might be chilly enough to shock tender little roots. I use a 2 quart juice pitcher and measure out 10 quarts of commercial seed-starting or potting mix and 10 quarts of compost in a plastic recycling bin.
I stir in a cup of Pro-Gro or other organic fertilizer and a cup of Azomite or other rock powder, then moisten the mixture enough so that the dryness of the commercial potting mix, which contains peat moss or coir, is overcome. Then I let it sit for a day or more to warm up indoors.
Azomite is a rock powder mined in Utah that contains 70 naturally occurring minerals and trace elements harvested from a layer of volcanic ash that was later inundated with sea water. Although I do not have scientific proof of its ability to improve growth and vigor of plants, I have done some informal experiments with rock powders, and believe that they help.
If you use the same plot every year for decades, as I have, trace minerals of the soil may well get used up, so adding a wide variety of minerals makes sense to me. I add Azomite or finely ground granite powder to increase mineral diversity in my planting mix and also in my soil.
I re-use plastic pots each year, and believe it is a good practice to clean them before re-using. I wash them in the sink with soapy water, or sometimes fill the top shelf of the dishwasher to clean them. This helps to eliminate any bacterial residues that might not be good for my seedlings.
Also key to success with indoor seedlings is a good light source. I use ordinary fluorescent lights that I hang over my seedlings. I keep them about 6 inches above the seedlings, Light intensity diminishes exponentially with distance. My lights hang on chains, and I raise the lights as the seedlings grow. I have the lights on a timer so they are on just 14 hours a day. Little plants need rest, too.
Don’t keep your seedlings too warm. Sixty-five degrees is good for the day time, but leave a window ajar at night to let temperatures drop to 55 degrees – though I admit that don’t do that most nights.
Growing seedlings from seed requires some work, but I do it every year because I love tending my seedlings. I save money doing it, and can grow plants I would never find for sale at a garden center, too.
Henry Homeyer can be reached at P.O. Box 364, Cornish Flat, NH 03746. Please include a self-addressed, stamped envelope if you want a question answered by mail. Henry’s e-mail address is henry.homeyer@comcast.net. His website is www.Gardening-Guy.com.
Pussy Willows
In general, I don’t sing. I can’t carry a tune, and words to even the simplest of songs seem to disappear from my brain in about 20 minutes. Always have. So it was a surprise to me when, walking by a clump of pussy willows, I remembered a simple childhood tune about them and was inspired to sing it – and to ponder the joys of pussy willows. They are cheerful flowers that appear just when we need something lovely in the garden. To me they are pure fun, and not just for little children. We should all have some.
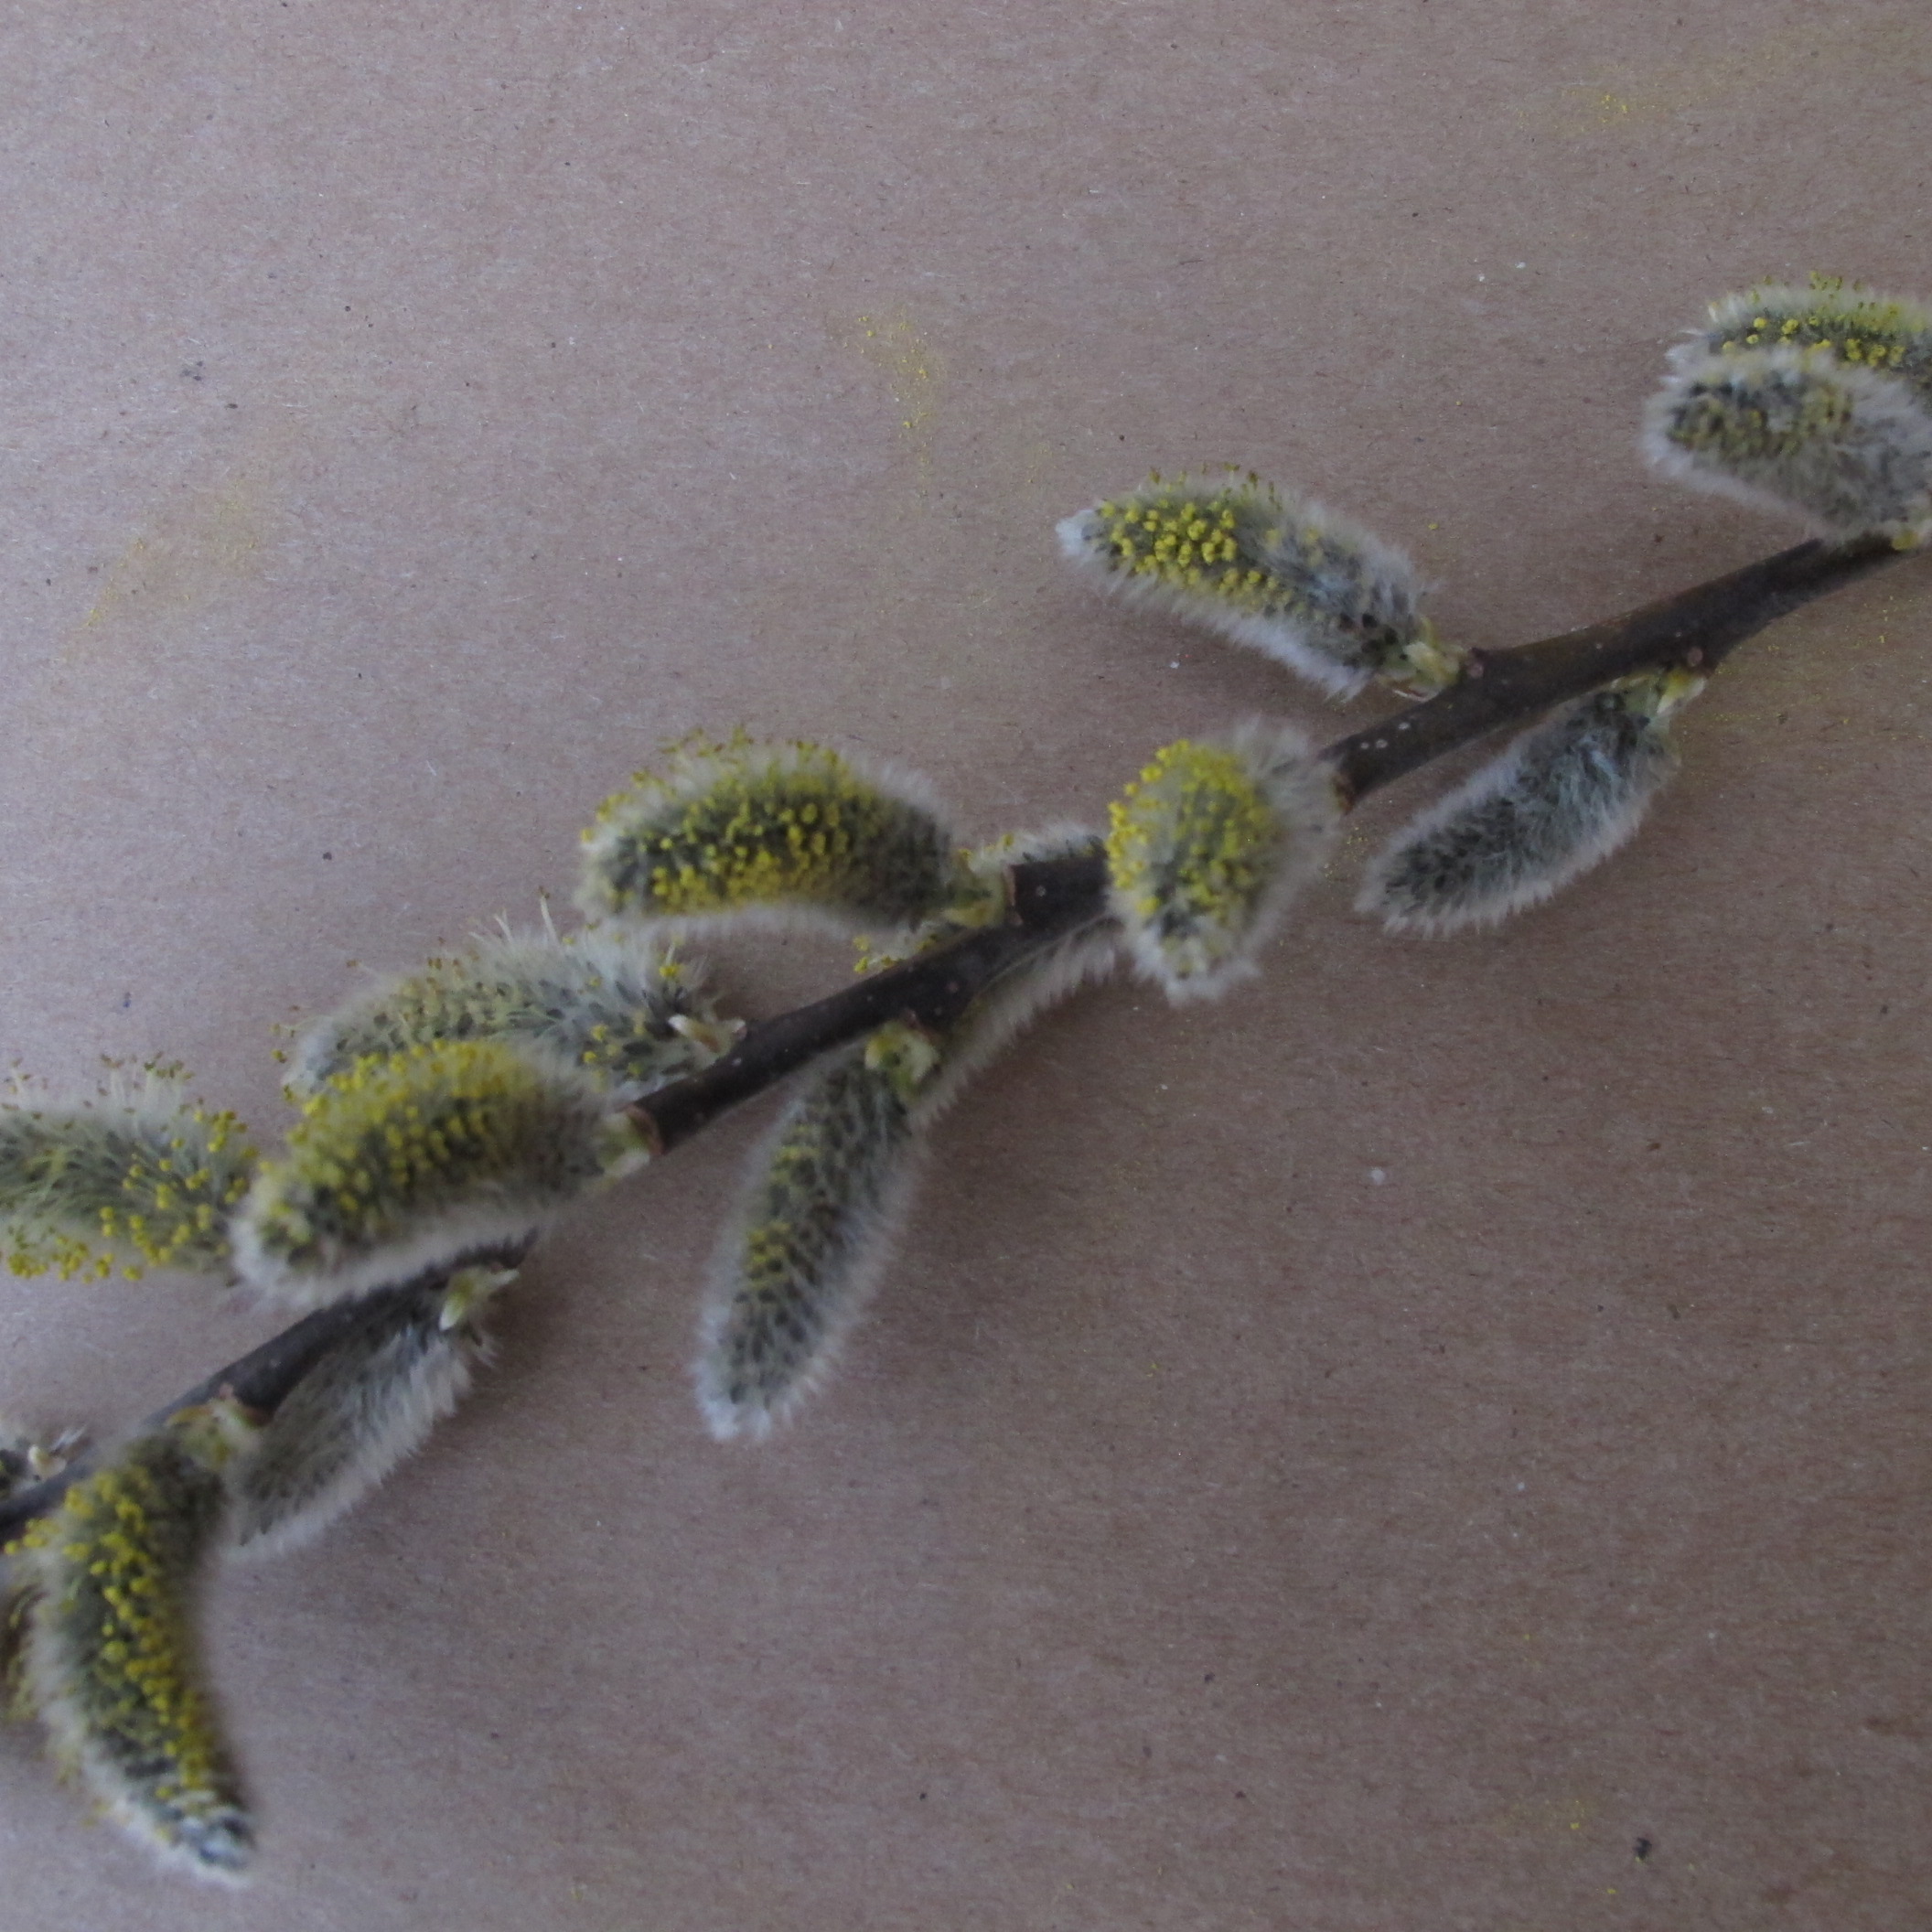
Pussy willow showing pollen
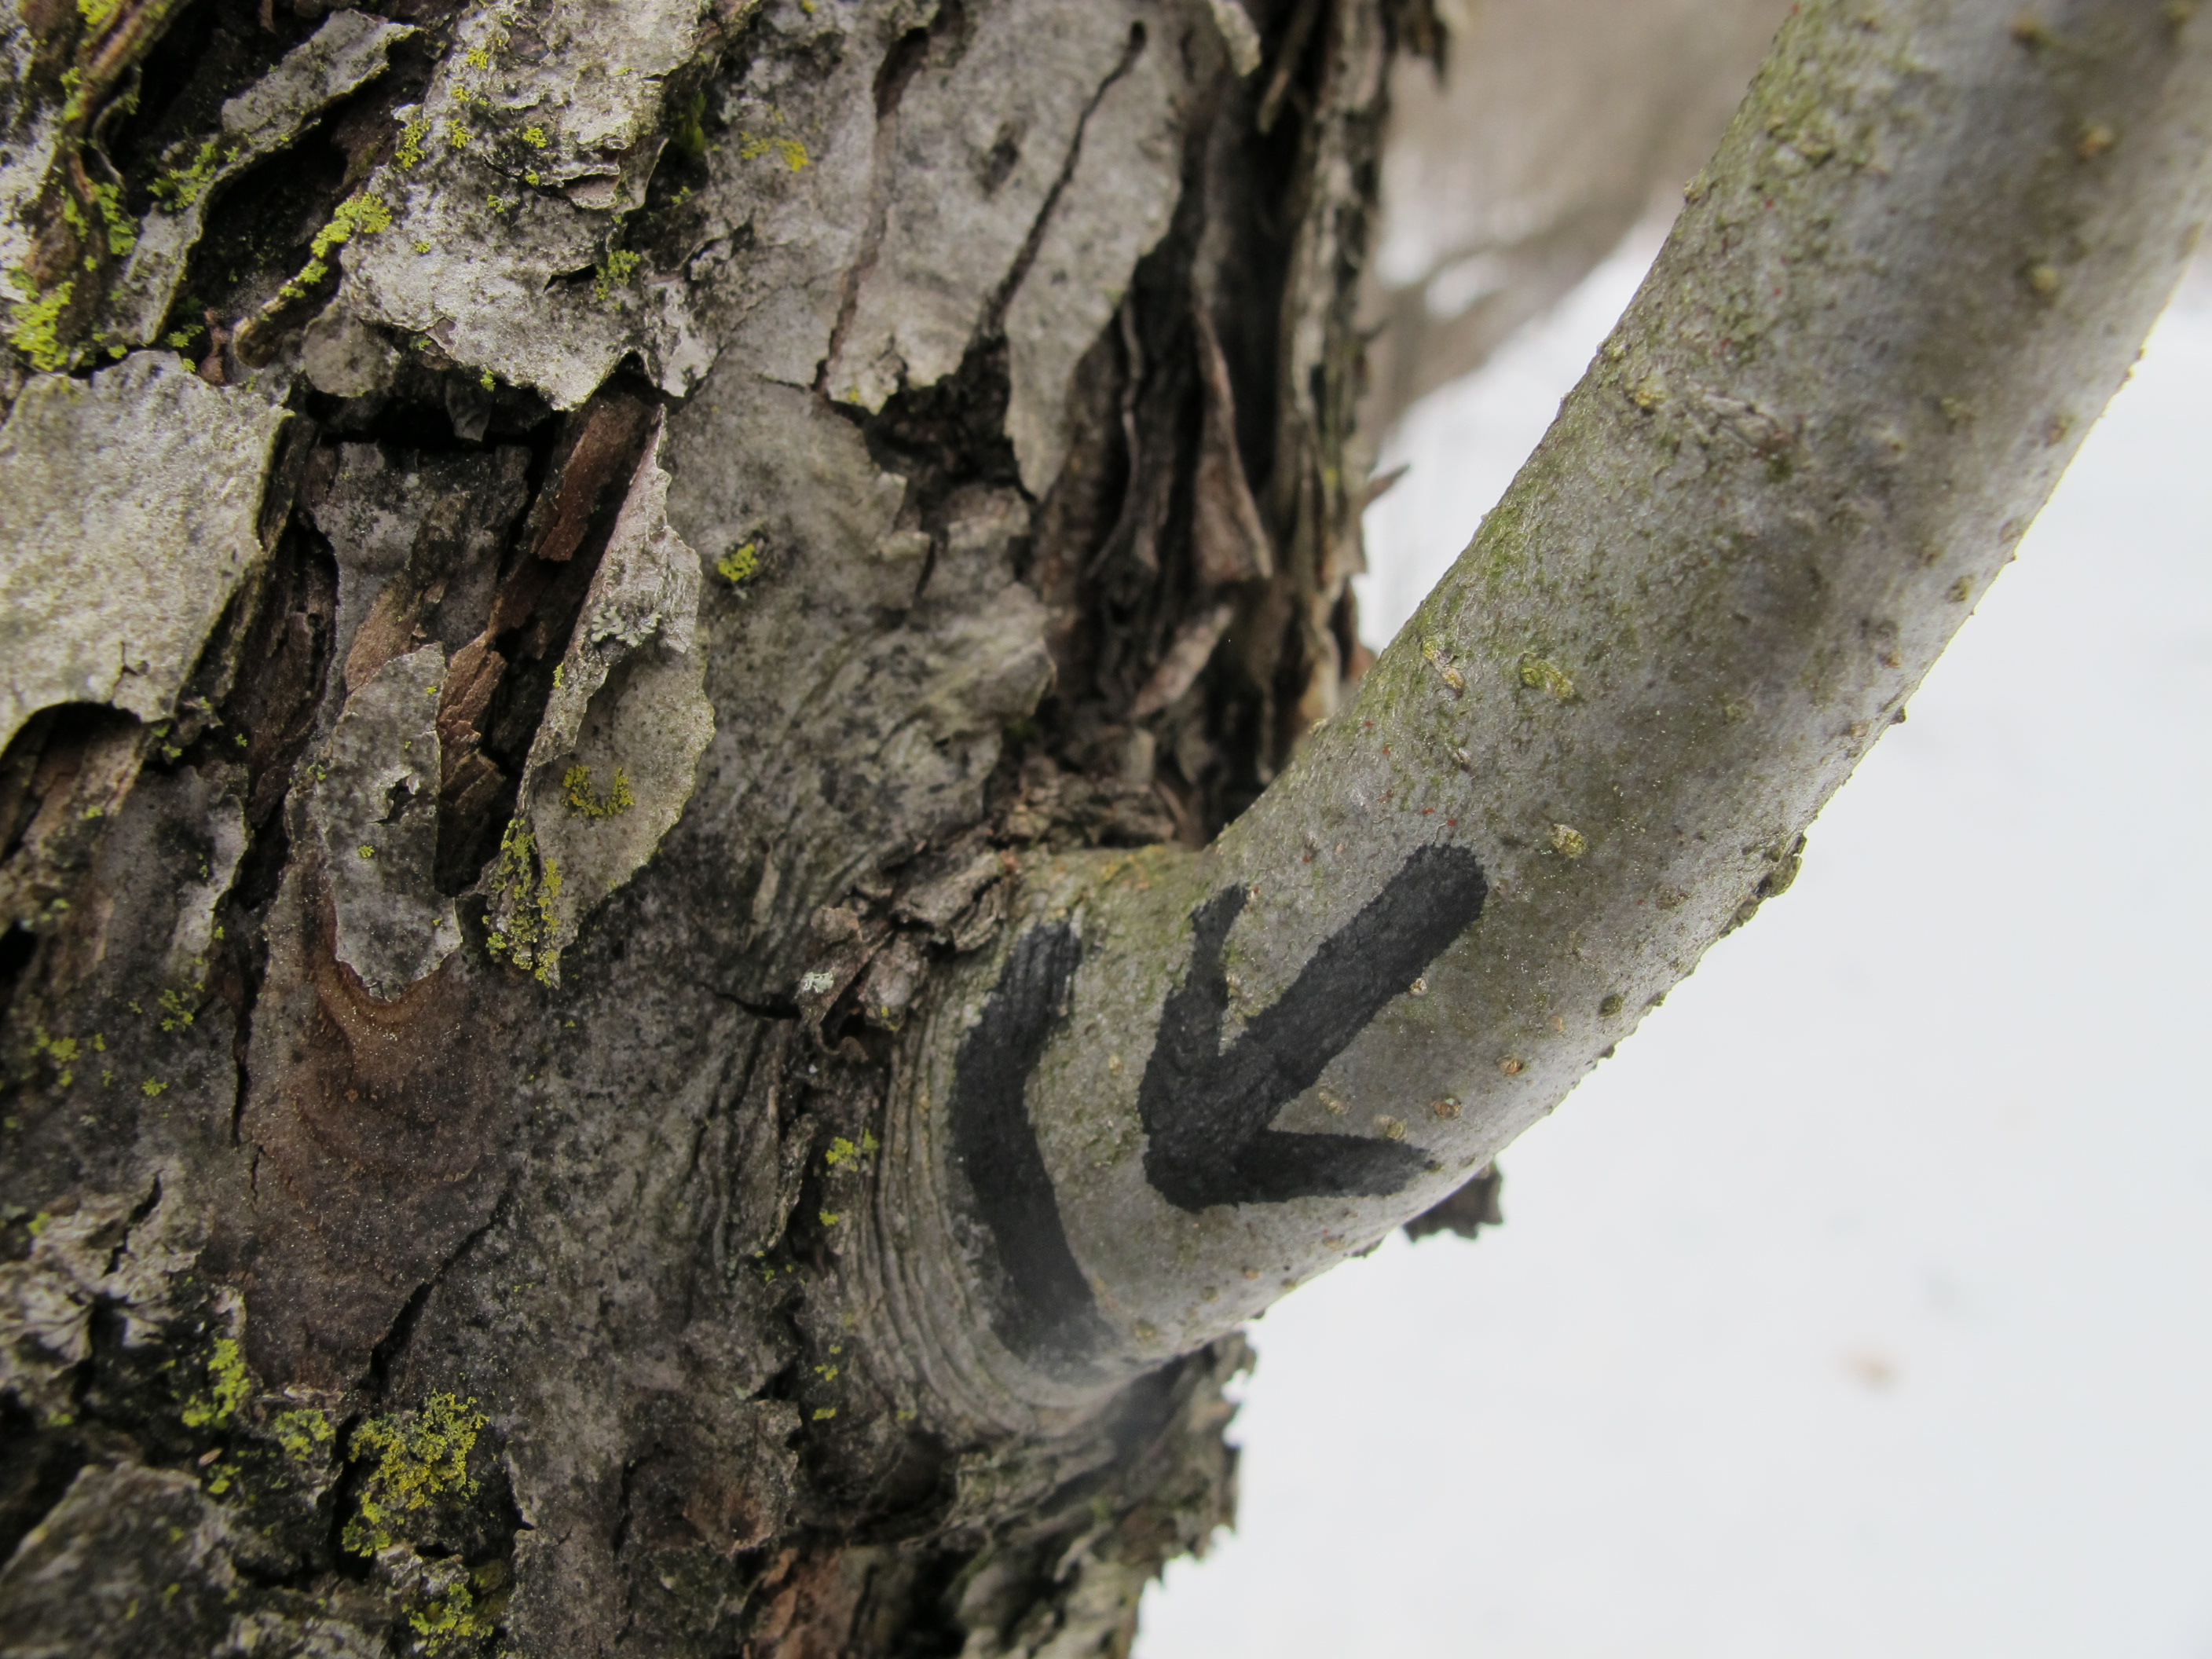
What we call pussy willows are actually the male catkins – pollen-producing parts – of two species of willows (Salix caprea and Salix discolor). Both grow wild, and are available at nurseries. Pussy willows, like all willows, like wet, swampy areas. They will grow up to be small trees, but can be kept to a manageable size with yearly pruning – and now is a good time to do so.
Fortunately for those of us who depend on pussy willow bouquets to chase away the mud season blues, the more you trim your pussy willows, the more vigorous and productive they will be. Left un-pruned, pussy willows can easily reach 20 feet tall. Since they bloom on their upper branches, picking good-looking stems can be next to impossible if the bushes are allowed to get too tall.
When harvesting pussy willows in the wild I bring along a pole pruner. Any type will work, but I like mine best: it’s an ARS brand, model 180L 1.8. Unlike other pole pruners I’ve tried, this has a handle to squeeze, just like regular pruners (not a string or handle to pull). That feature allows me to have great control. With it I can reach up and nip off pussy willows that are 12 feet or more above ground.
The pole pruner in question is made by a Japanese company, ARS, and is available from OESCO, a tool dealer in Massachusetts (www.oescoinc or 800-634-5557). Not only that, it weighs less than 2 pounds, so it is easy to maneuver with one hand. It is not designed for use on anything thicker than about three quarters of an inch in diameter. Cost? About $95 plus shipping and worth every penny. I also use it to cut the dead stems in my blackberry patch. I can reach in with it to cut ta cane, then grab it and pull it out.
In addition to bringing spring into the house, pussy willows are great for honeybees. According to beekeeper Margot Maddock of Lyme, NH, pollen from pussywillows is one of the first sources of food for honeybees in the spring. It is even earlier than that nuisance in the garden, chickweed, which is also good for the bees.
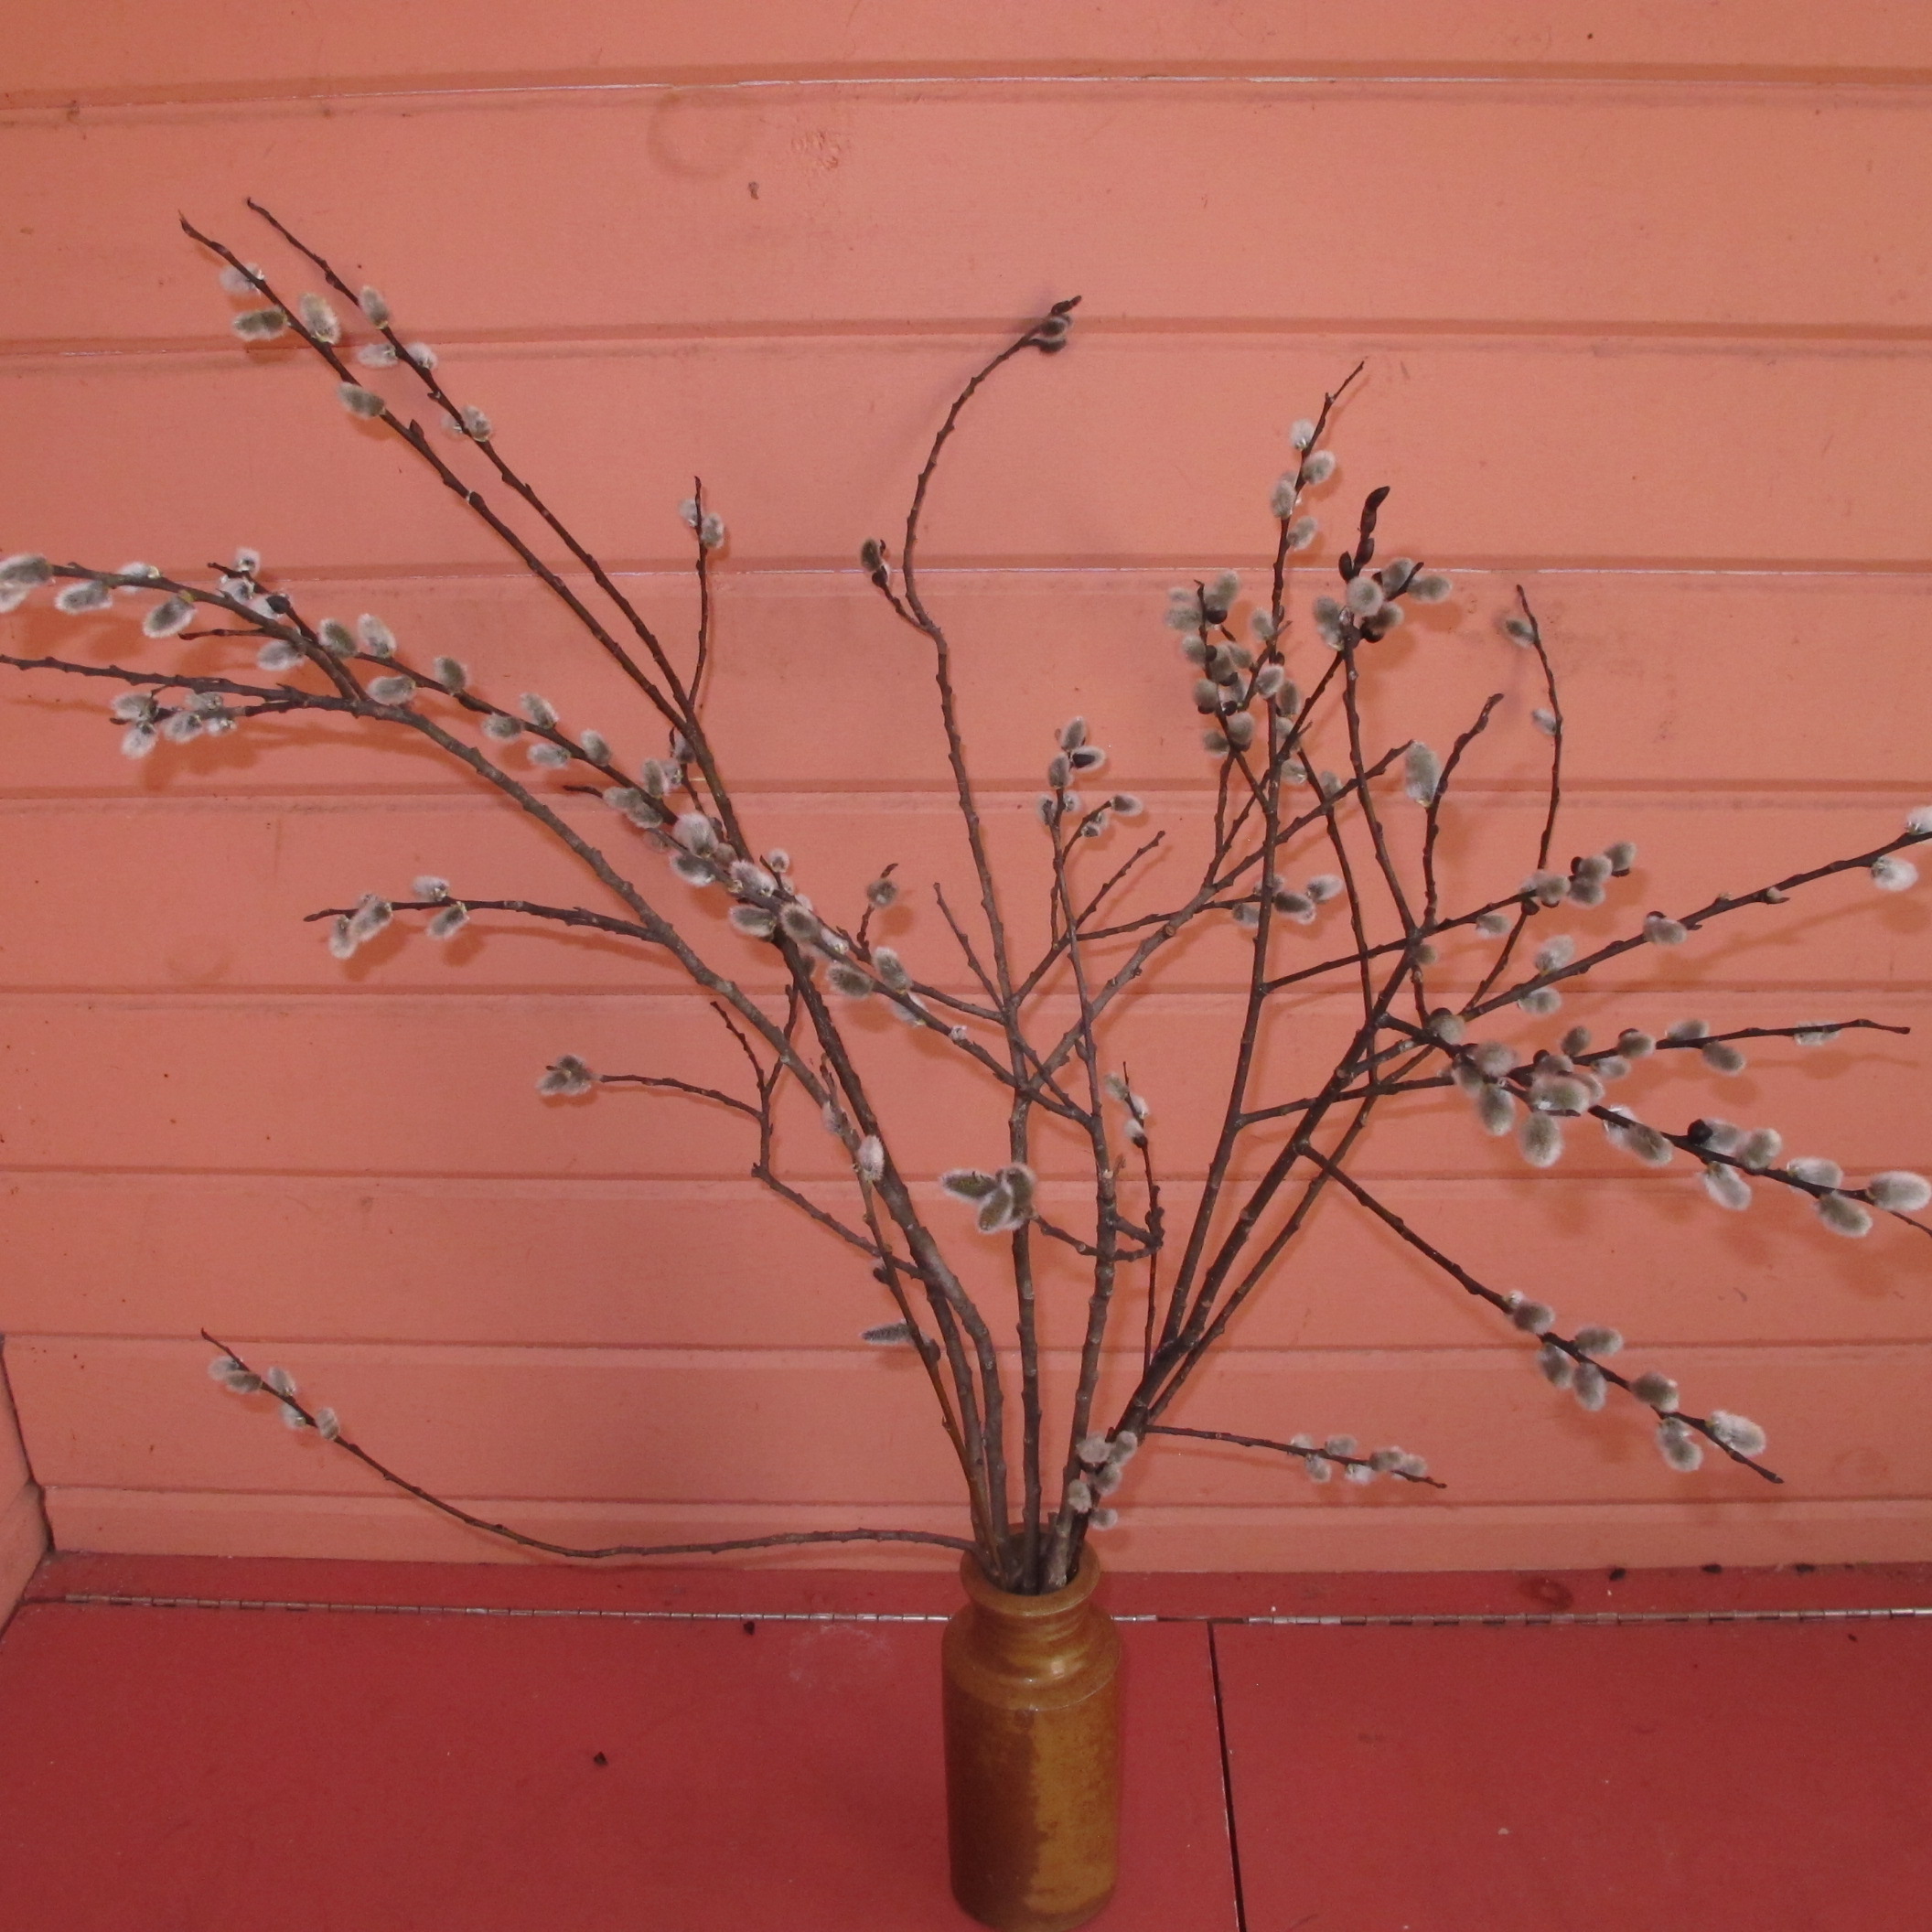
Pussy willows in a dry vase
If you put your cut stems of pussywillows in a vase and add water, they will continue to mature and produce a yellow pollen that will eventually fall on your tablecloth. But if you put them in a dry vase, they will stay frozen in time. I’ve been known to keep pussy willows looking good on my desk for months that way.
Rooting pussywillows is easy. Cut a stem about a foot long and push most of it into the soil where you would like to have pussy willow growing. But be sure that you keep track of which end is up, and leave a couple of inches sticking out of the ground. If leaves or side shoots have started to grow by the time you do this, rub them off before you push the stem into the ground. Although pussywillows grow best in moist soil, they will grow in ordinary garden soil, too. You will just need to be sure the soil does not dry out until the stem is well rooted.
Because pussy willow is so easy to root, you can easily make a living wall or windbreak. I worked on a willow farm in France a few years ago. The farmers grew willow for basket making, but also created living sculpture. Young willows – two to 3 years old – are so flexible you can braid or weave them if they are planted close enough together. You can also tie stems together to create a tunnel for kids to play in.
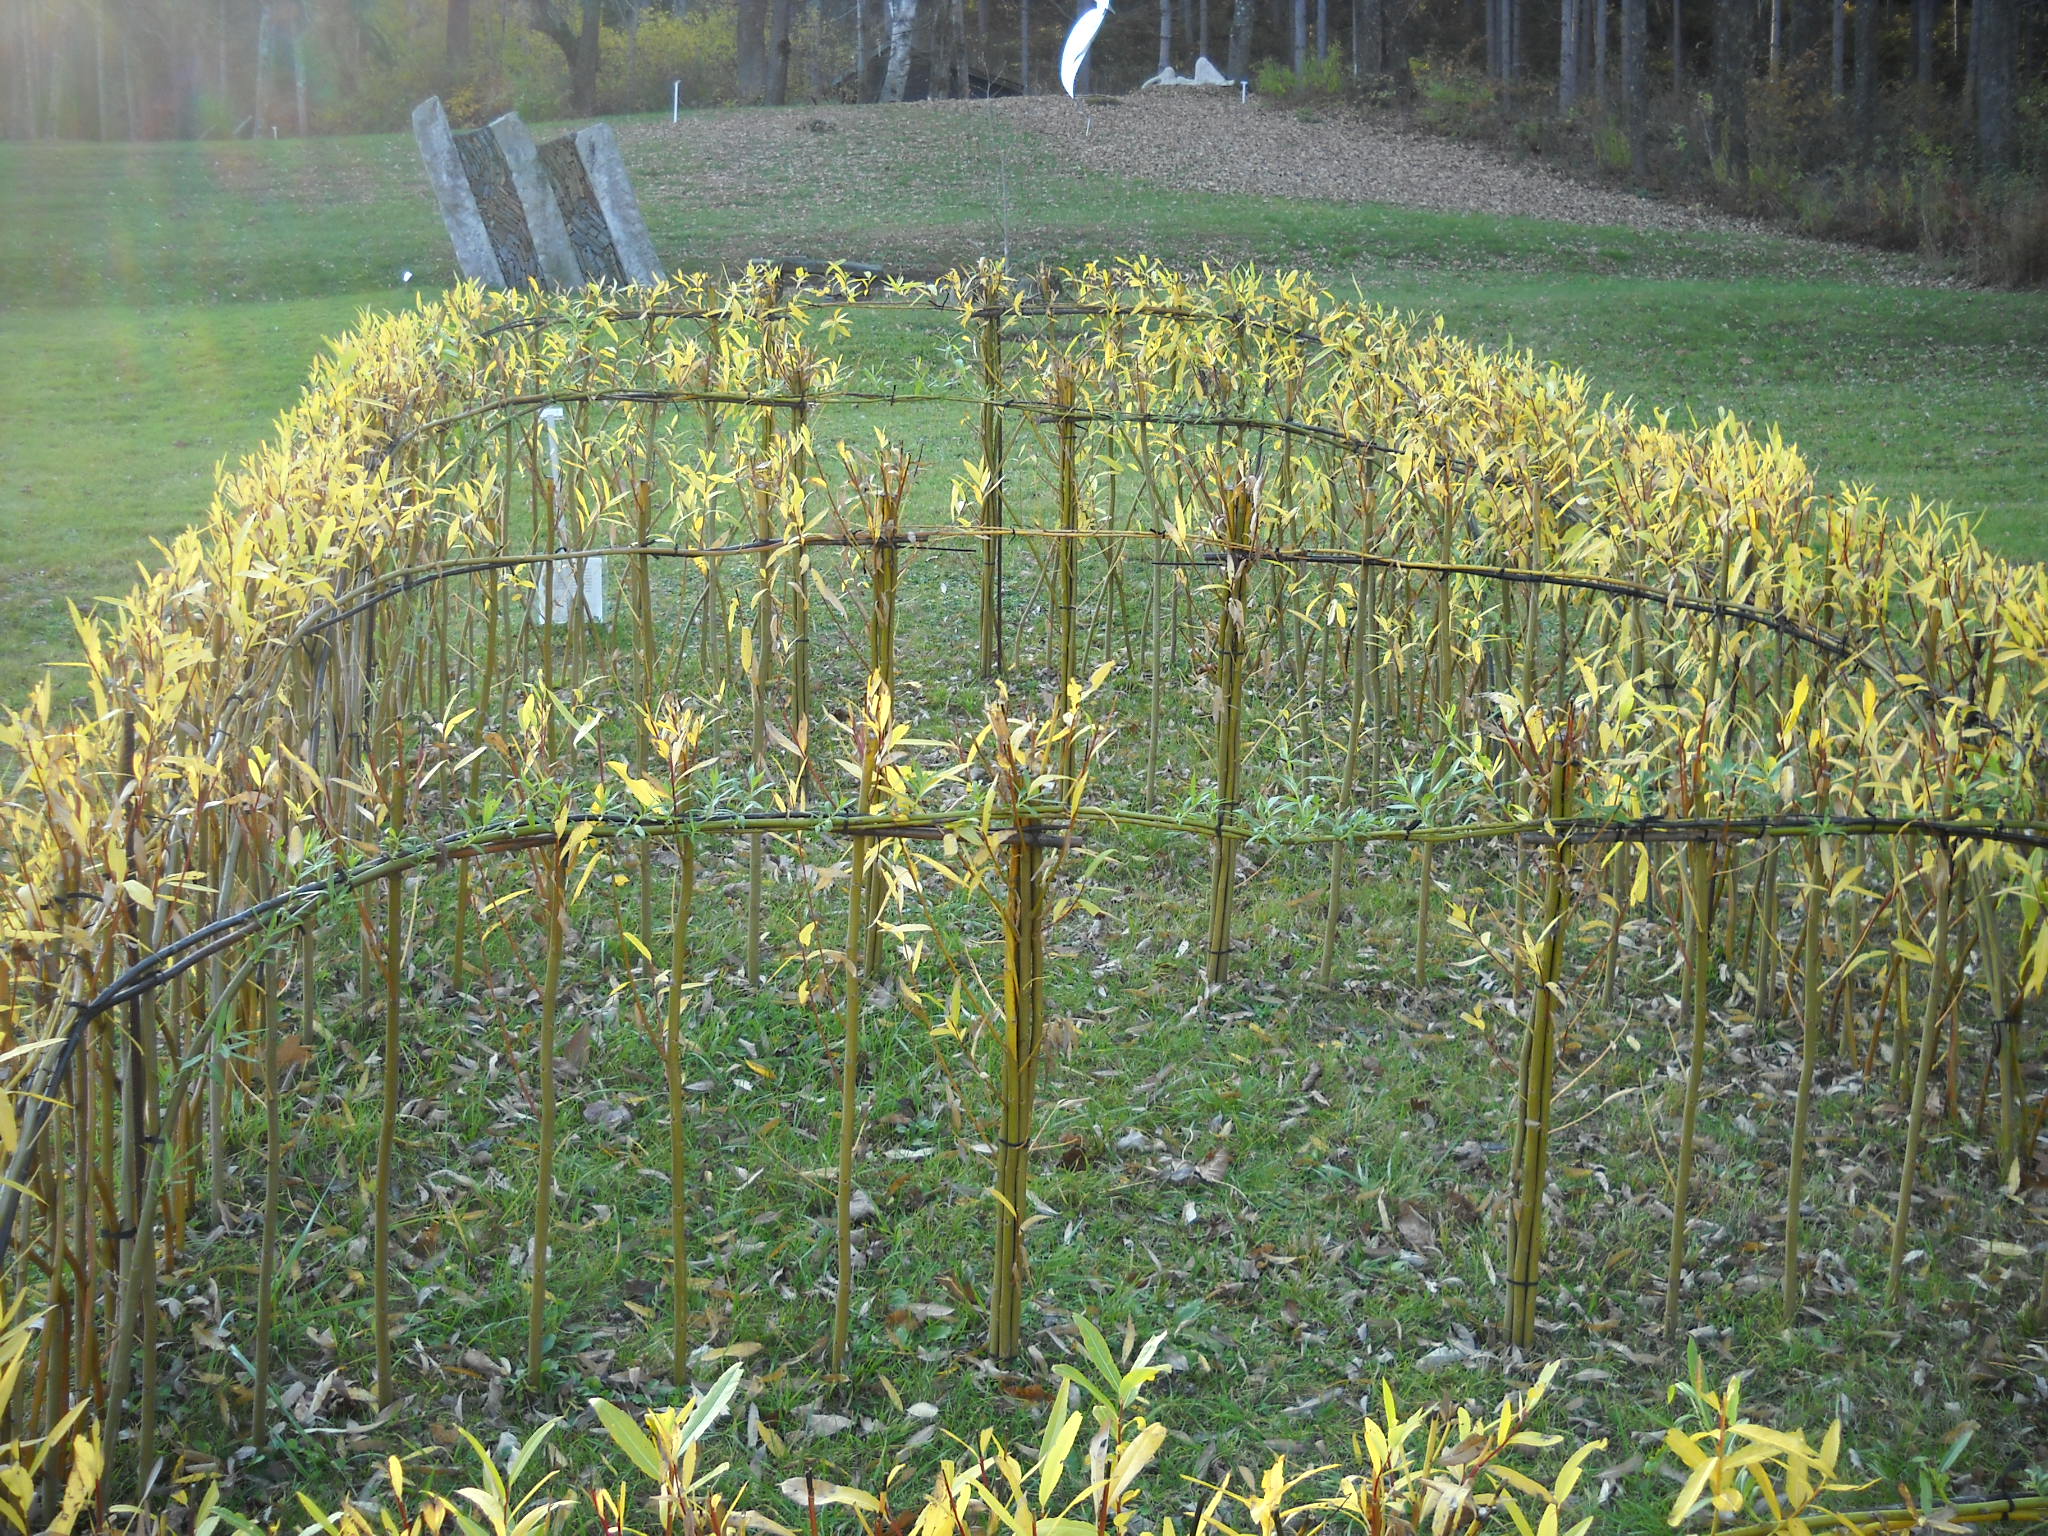
Living willow sculpture at SculptureFest 2012
Charlet Davenport of Woodstock, Vermont, commissioned a work of art using living willow for her Sculpturefest that is held each year in August (www.sculpturefest.org). Early spring is best time to root willows, but the artist who made the sculpture for Sculpturefest keeps willow stems in big coolers so that she always has dormant willows to root for art projects.
You don’t have to depend on nurseries and greenhouses for all your plants. If you want to pick some willow stems and plant them, they will probably grow – for free. You just need a little patience for them to reach full size.
Henry Homeyer can be reached by e-mail at henry.homeyer@comcast.net or by mail at P.O. Box 364, Cornish Flat, NH 03746. He is a UNH master Gardener and the author of 4 gardening books. His Web site is www.Gardening-Guy.com.
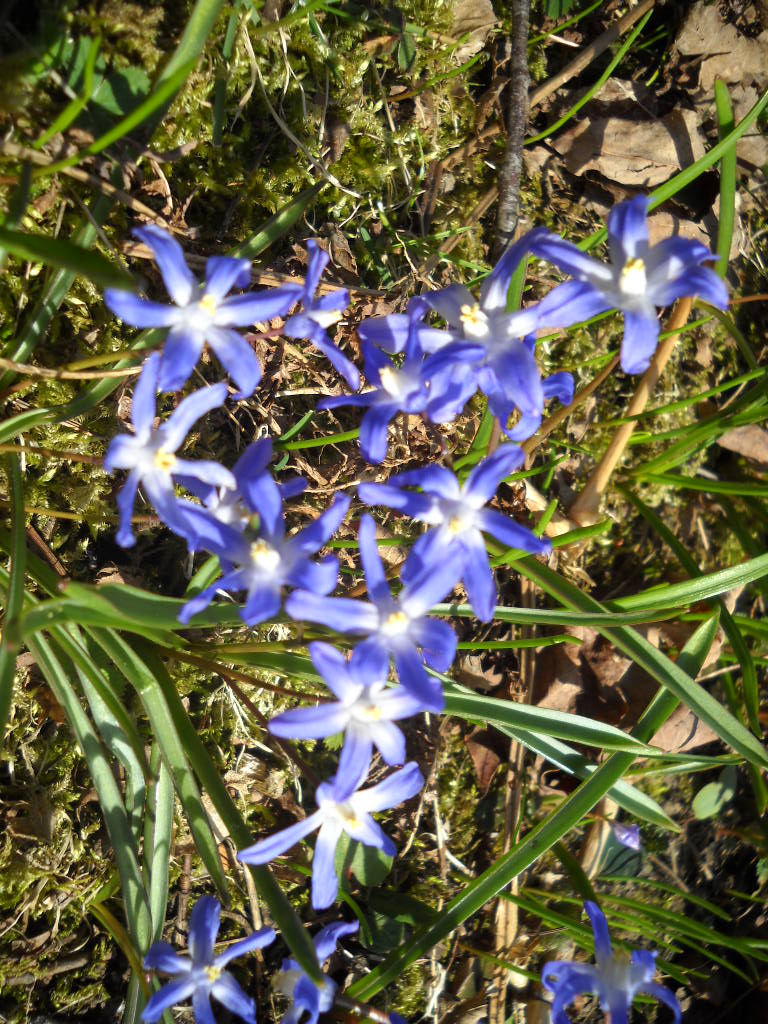
The Spring Bulb Flowers
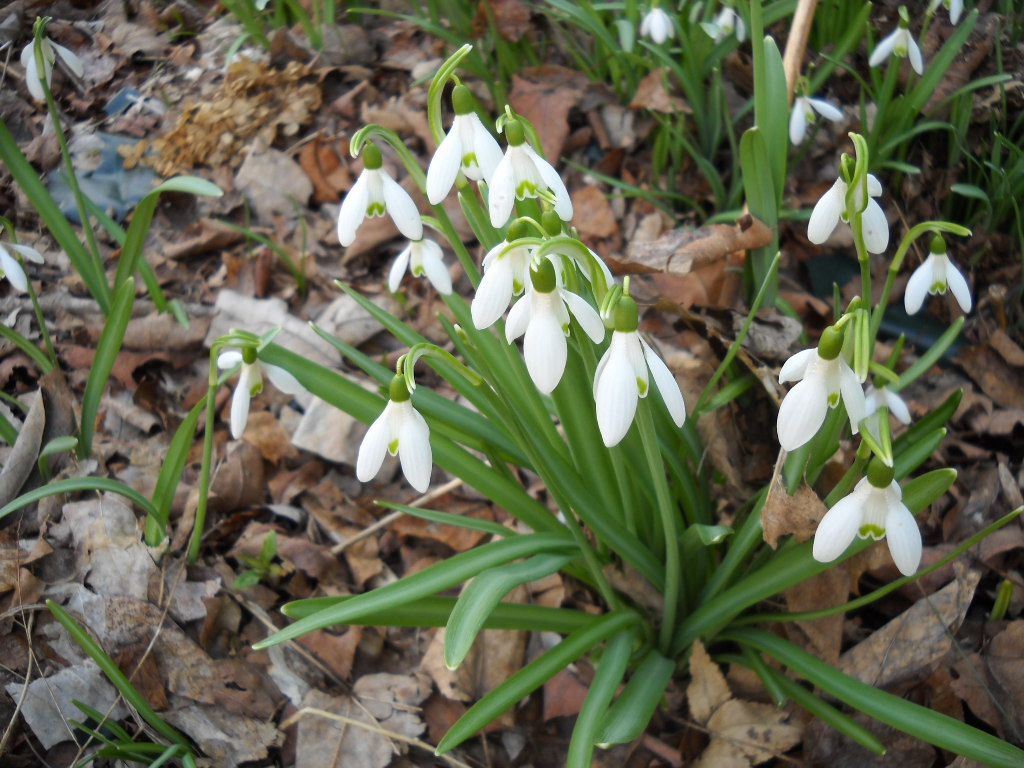
Snow drops in April
I’ve been paying attention to snowdrops and crocus since I was 9 years old – I recently found entries in my diary that tell me so. My entry for March 7, 1956, in its entirety was this: “Spring is getting here at last the snow drops are in bud + will bloom in a few days.” Then on April 5 I wrote,” Today our first crocus was in bloom it is very pretty.” I still pay attention to them, and generally note when they come into bloom. Now is the time to decide where you should plant bulbs next fall.
Here’s what I do. I wander around my property each year in the spring to see what spots are bare of bulb flowers. I bring along those white plastic markers used for labeling, and write “add crocus here”, for example. Then in the fall, when it’s time to plant more bulbs I don’t have to rely on my memory.

Early crocus
When planting bulbs, I label what I‘ve planted. That way I’ll see what has performed well, and be able to buy more of the same. For example, I’m always eager to get color in the garden at the same time that the snowdrops bloom. Glory –of-the-snow is one plant that overlaps with snowdrops, but is a bit later, as is scilla. This spring I saw that a crocus I planted last fall, ‘Blue Pearl, is blooming with my snowdrops – and before those other two. So I’ll buy 100 of those for fall planting. I bought them at Brent and Becky’s Bulbs– I know because they include tags with each bag of bulbs.
Writing this in early April, I haven’t seen any of my winter aconite appear, though I would have thought they would be up by now. It is a very early bright yellow flower that has one-inch wide, six-petaled flowers. I’ve grown it before but lost it to cold or rodents or poor drainage. I’m still optimistic that it will show up.
I tend to blame bulb failure on drainage problems even though I mix in lots of compost at planting time and favor hillsides. South facing hillsides are great for early bulbs as the snow melts off weeks earlier than north-facing plots. But rodents might be the culprits, too.
Glory of the Snow early April 005
A bulb plant that I’ve considered fussy is a low-growing iris, Iris reticulata. It is a lovely iris that blooms near the ground level and has medium-sized blue, purple or (sometimes) yellow flowers. Doing some research I found out why I thought they are fussy: after they bloom, the bulbs divide, producing several little bulblets. These won’t bloom for a few years. So I need to plant some every year until I have a mature colony of them. I also read that they like soil that dries out well in summer, such as in a rock garden or sandy hillside.
My lawn is full of snowdrops that have planted themselves. I assume that they produce seeds that wash into the lawn with early summer rains. The bulk of my snowdrops are planted on a hillside above the lawn. But you can plant early spring bulbs in the lawn, too. Just don’t plant daffodils or anything with large leaves because you won’t be able to mow the lawn where they are growing until the leaves yellow and dry off – around July 4th. Bulb plants need to re-charge their batteries, if you will, by getting sunshine and storing energy.
Little bulbs like snowdrops, crocus and grape hyacinths have short leaves that disappear early and won’t disrupt your early mowing. You can always set the lawn mower blades high to protect the leaves if they are still green when you need to cut the lawn.
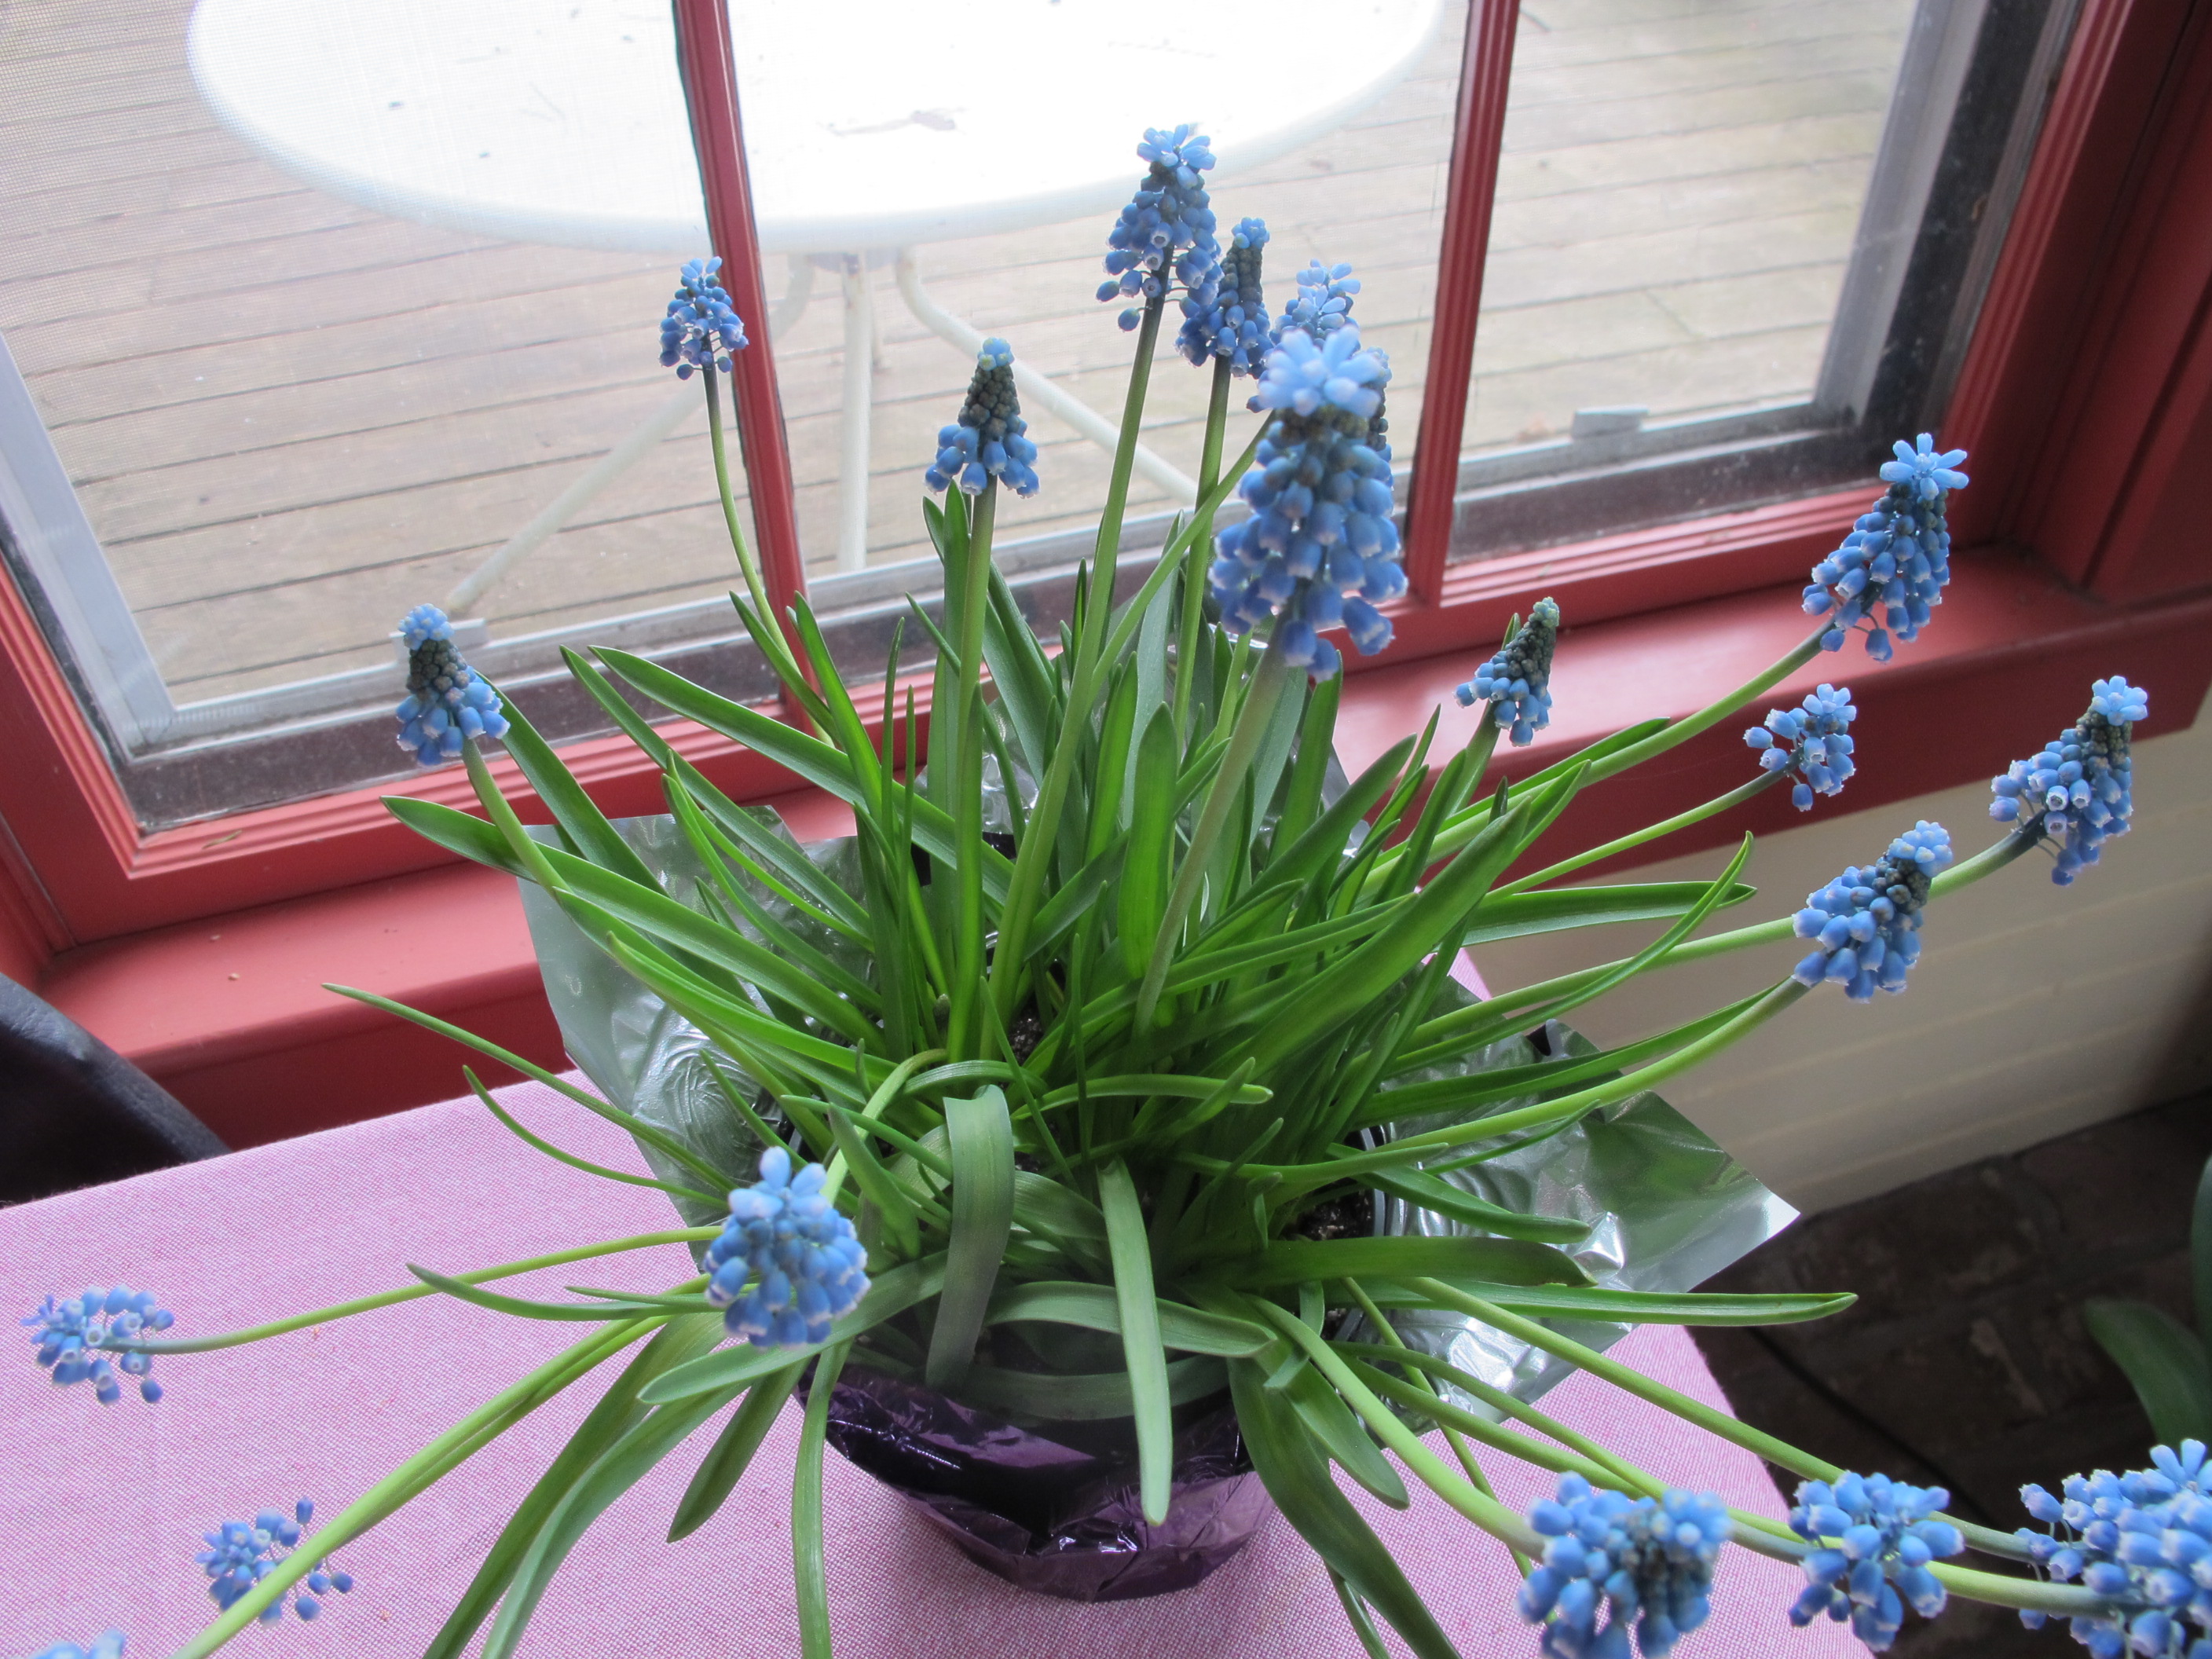
Grape hyacinths
Grape hyacinths (Muscari spp.) are great little flowers that come in many different shades of blue and purple. I’ve planted many dozens in my day, but find they tend to lose vigor and disappear with time. So I plant them again. This spring I bought a pot of them at a garden center and have been enjoying them immensely in the house. Later, when the soil is thawed, I’ll plant them outside. I keep the pot in a cool space indoors, as if they get too warm, they flop over.
Tulips I treat like annuals. I plant 100 most years in a bed that I reserve for them – and later zinnias. If I had depended on bulbs planted in 2012 for this year, the number of blooms might be just 50, and maybe 25 the following spring. So I don’t bother to coddle them. In fact, I often pull the flower stem instead of cutting it, as I can get an extra 2-3 inches of stem for my vase, and I love tall tulips. I compost the spent bulbs. I find that adding a few pennies to the water in the vase helps the tulips to last longer before losing their petals, or opening if picked in bud.
Daffodils are slightly poisonous to deer and rodents, so they aren’t eaten – and can bloom for years. You can plant them in open woodlands and they will do fine. I grew up with daffodils planted along paths in our woods, and I still delight in the memory of them. By the way, if you forced paperwhites this winter, don’t bother planting them outdoors – they’re not hardy here.
Bulbs are a great investment. Most come back year after year, bringing me pleasure each year before the garden gets going.
Henry Homeyer is a gardening coach living in Cornish Flat, NH. His Web site is www.Gardening-Guy.com.
Early Spring Chores
Spring finally seems to be coming to Cornish Flat – about a month late, this year. My snowdrops are just starting to bloom and large patches of snow are still on the lawn and garden – though there are bare spots. I really want to get outside and start cleaning up the yard and garden beds, but will try to hold myself back until things have dried out.
Why is it important to wait before doing much gardening? It’s all about soil structure. Soil is made up of ground rock, organic matter and air spaces. The mineral component is about 45%, organic matter can be from 1% to 10% or more, and the rest consists of air spaces. That last component is as important as the first two.
Plant roots that we can see when we dig up a weed or plant a shrub are only a part of the entire root. The parts of the root that absorbs water, oxygen and minerals are so fine that we cannot see them. They are called root hairs, but they are even finer than human hair, microscopically fine. And there are lots of them. Most plants have branch roots that spread out and branch again and again. Root hairs are short protuberances attached to those branching roots. But fine roots cannot push through packed soil as easily as through fluffy soil. The total length of root tissues in a single rye plant is around 380 miles.
As you know, if you walk on soggy lawn you leave foot prints. That means that you have squeezed air out of the soil and compacted it – making it all the harder for roots and root hairs to extend and thrive. Not only that, green plants get their oxygen from the soil via their roots. If the oxygen is squeezed out, plants can’t get it.
So what can a gardener do? Wait. Don’t walk on your lawn if you see footprints or hear a squish. Don’t rake winter debris from the lawn while the lawn is still dormant. If you do, you risk pulling up the grass, roots and all. And stay out of flower beds even later into the spring – they are more susceptible to compaction than your lawn.
So what can you do in early April? Clean and sharpen your tools, including the handles. I have a potato hoe, a 5-tined rake-like tool that has been in my family for over 50 years. It has its original wood handle, which is still in perfect condition – even though I use it for weeding and soil prep every week, often every day, all summer. How is that possible? I try to oil the handle every year either in the fall or the early spring. And I don’t leave the tool outside in the sun or rain. No matter how tired I am at the end of the day I walk the potato hoe back to the barn before I go to the house.
To clean up a wooden handle, first I use fine steel wool (or a green scrubbie) to polish up the handle and remove any rough spots. Then I apply a coat of boiled linseed oil with a brush or rag. I let it soak in for a few hours, then rub off any excess. Or if the oil soaks right in, I might even apply a second coat. The steel tines I clean with steel wool and apply a light coat of sewing machine oil.
This year I need to oil the wood on my wooden wheel barrow and tighten up all the bolts. One of my first memories in my life is of my Grampy picking me up, plunking me down in his wooden wheelbarrow on a pile of weeds, and racing us back to the barn ahead of a fast-approaching thunderstorm. I might have been just two years old. The ride was bumpy – there was a steel-rimmed wooden wheel – but it was exciting!
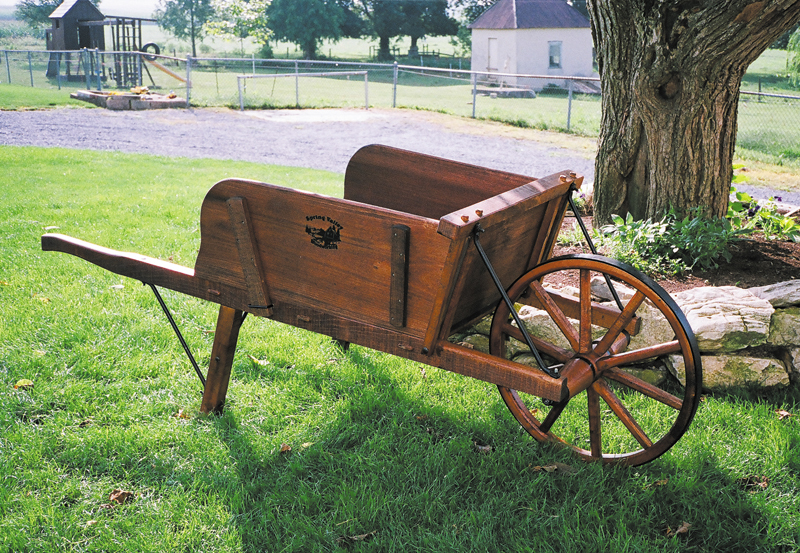
Wooden wheelbarrow
Photo Credit: Spring Valley Woodworking
Unfortunately that wooden wheelbarrow disappeared after Grampy went off to the great garden in the sky. But many years later I tracked down an Amish woodworker in Pennsylvania, Ike Lapp, who still makes wooden wheelbarrows and got myself one. It’s pretty much the same wheelbarrow I remember my grandfather using. When I finished assembling it I pushed it across the lawn for a test drive and it made the same squeak that my grandfather’s wheelbarrow did.
I called Ike Lapp at his home in Gordonville, PA recently. He is old order Amish, so does not have a phone in his house or workshop. Instead he has a phone and answering machine in a separate 4-foot square building in a field. (He checks messages once a day and calls customers back. He’s at 717-355-9366![]() 717-355-9366). He told me he is still making the wheelbarrows and in addition to mine, a large premium grade wheelbarrow for around $300, he has smaller ones, and some in “rustic grade”. He does not have a web site, but you can see his wheelbarrows at www.lehmans.com.
717-355-9366). He told me he is still making the wheelbarrows and in addition to mine, a large premium grade wheelbarrow for around $300, he has smaller ones, and some in “rustic grade”. He does not have a web site, but you can see his wheelbarrows at www.lehmans.com.
Later, when your ground has dried out and you are raking and weeding flower beds, try to reach in with your rake, keeping your feet out of the beds. If you must walk in flower beds, bring along a couple of short planks. Place them in the flower bed and step on the boards to distribute your weight. Or if you are not worried about what the neighbors will say, you could wear your snowshoes. After the winter we’ve had, that seems appropriate!
Henry Homeyer is a gardening consultant and the author of 4 gardening books. His web site is www.Gardening-Guy.com.