-

Now available for $24.95 including shipping. -

Now available for $21.00 including postage. Vendors I Like
 Click Here to buy from Cobrahead
Thinking of Spring, Starting a Few Seeds
I’m not sick of winter yet. But I have to admit that recent warm, sunny days got me thinking about spring. I love to start seedlings in the house but recognize that it is still too early for most things. I have a couple of artichoke seedlings growing in a large pot, and will start some onions and peppers by mid-March.
The problem with starting seeds too early is that it is hard to meet the needs of your seedlings until the soil warms up enough to plant them outdoors. I have fluorescent lights and a nice plant stand. But as plants grow, they need bigger pots for their roots. As I start about 300 plants most years, I cannot give each of my babies its own 3- or 4-inch pot after they outgrow the six-packs many of them are started in. The solution? Start most things just six to eight weeks before they go outside – which for tomatoes and other frost sensitive plants is, for me, June 1oth even later.
Most commercial seed starting mixes are made of peat moss, perlite (a fluffy white substance that looks like Styrofoam), and some soluble chemical fertilizer. The assumption is that the mix will get plants off to a good start by providing a fluffy medium for young roots – but that you, the grower, will supply the “food” that your seedlings want after the first month.
After a month the chemical fertilizer will have either washed away or been used up. So what should an organic gardener do? There are fish or seaweed derived liquid fertilizers that you can dilute and add to the water you apply. They will supply the nitrogen, phosphorus and potassium found in a chemical fertilizer, and they will also supply calcium, magnesium, and many other chemical elements needed by your seedlings in small quantities.
Another solution, and one I favor, is to make a 50-50 mix of commercial potting mix with compost. My compost pile is frozen solid, but a good commercial compost such as Moo-Doo will do just fine – it will have healthy microorganisms in it. These bacteria and fungi help to process organic matter and turn it into chemicals that are easily absorbed and used by your seedlings.
Making Soil Blocks
Another technique is to make soil blocks using a small metal press that allows you to make 2-inch cubes of a packed soil mixture. This technique is more work, but provides high quality nutrition to your plants, and minimizes root shock when planted outdoors – seedlings grown in plastic six packs usually have tangled roots by the time they go outdoors, but plants started in soil blocks will not.
To make enough mix for about 300 blocs, mix the following ingredients in a wheelbarrow:
10 quarts of dry peat moss
1/4 cup limestone
1 cup azomite or granite dust (optional)
Then add and mix well:
10 quarts coarse sand,
10 quarts of peat humus,
1/2 cup colloidal or rock phosphate
1/2 cup green sand
1/2 cup organic blood meal
Finally add and mix well :
8 quarts of compost (your own or purchased)
8 8 quarts of garden soil or purchased topsoil.
The mix is somewhat dry, and needs to be moistened and used in small batches. For a start, mix 4 quarts of mix with 1-2 quarts of water, stirring it with your hand (wearing a rubber glove). It should be gooey, but firm, not watery. Experiment with it until you find just the right consistency.
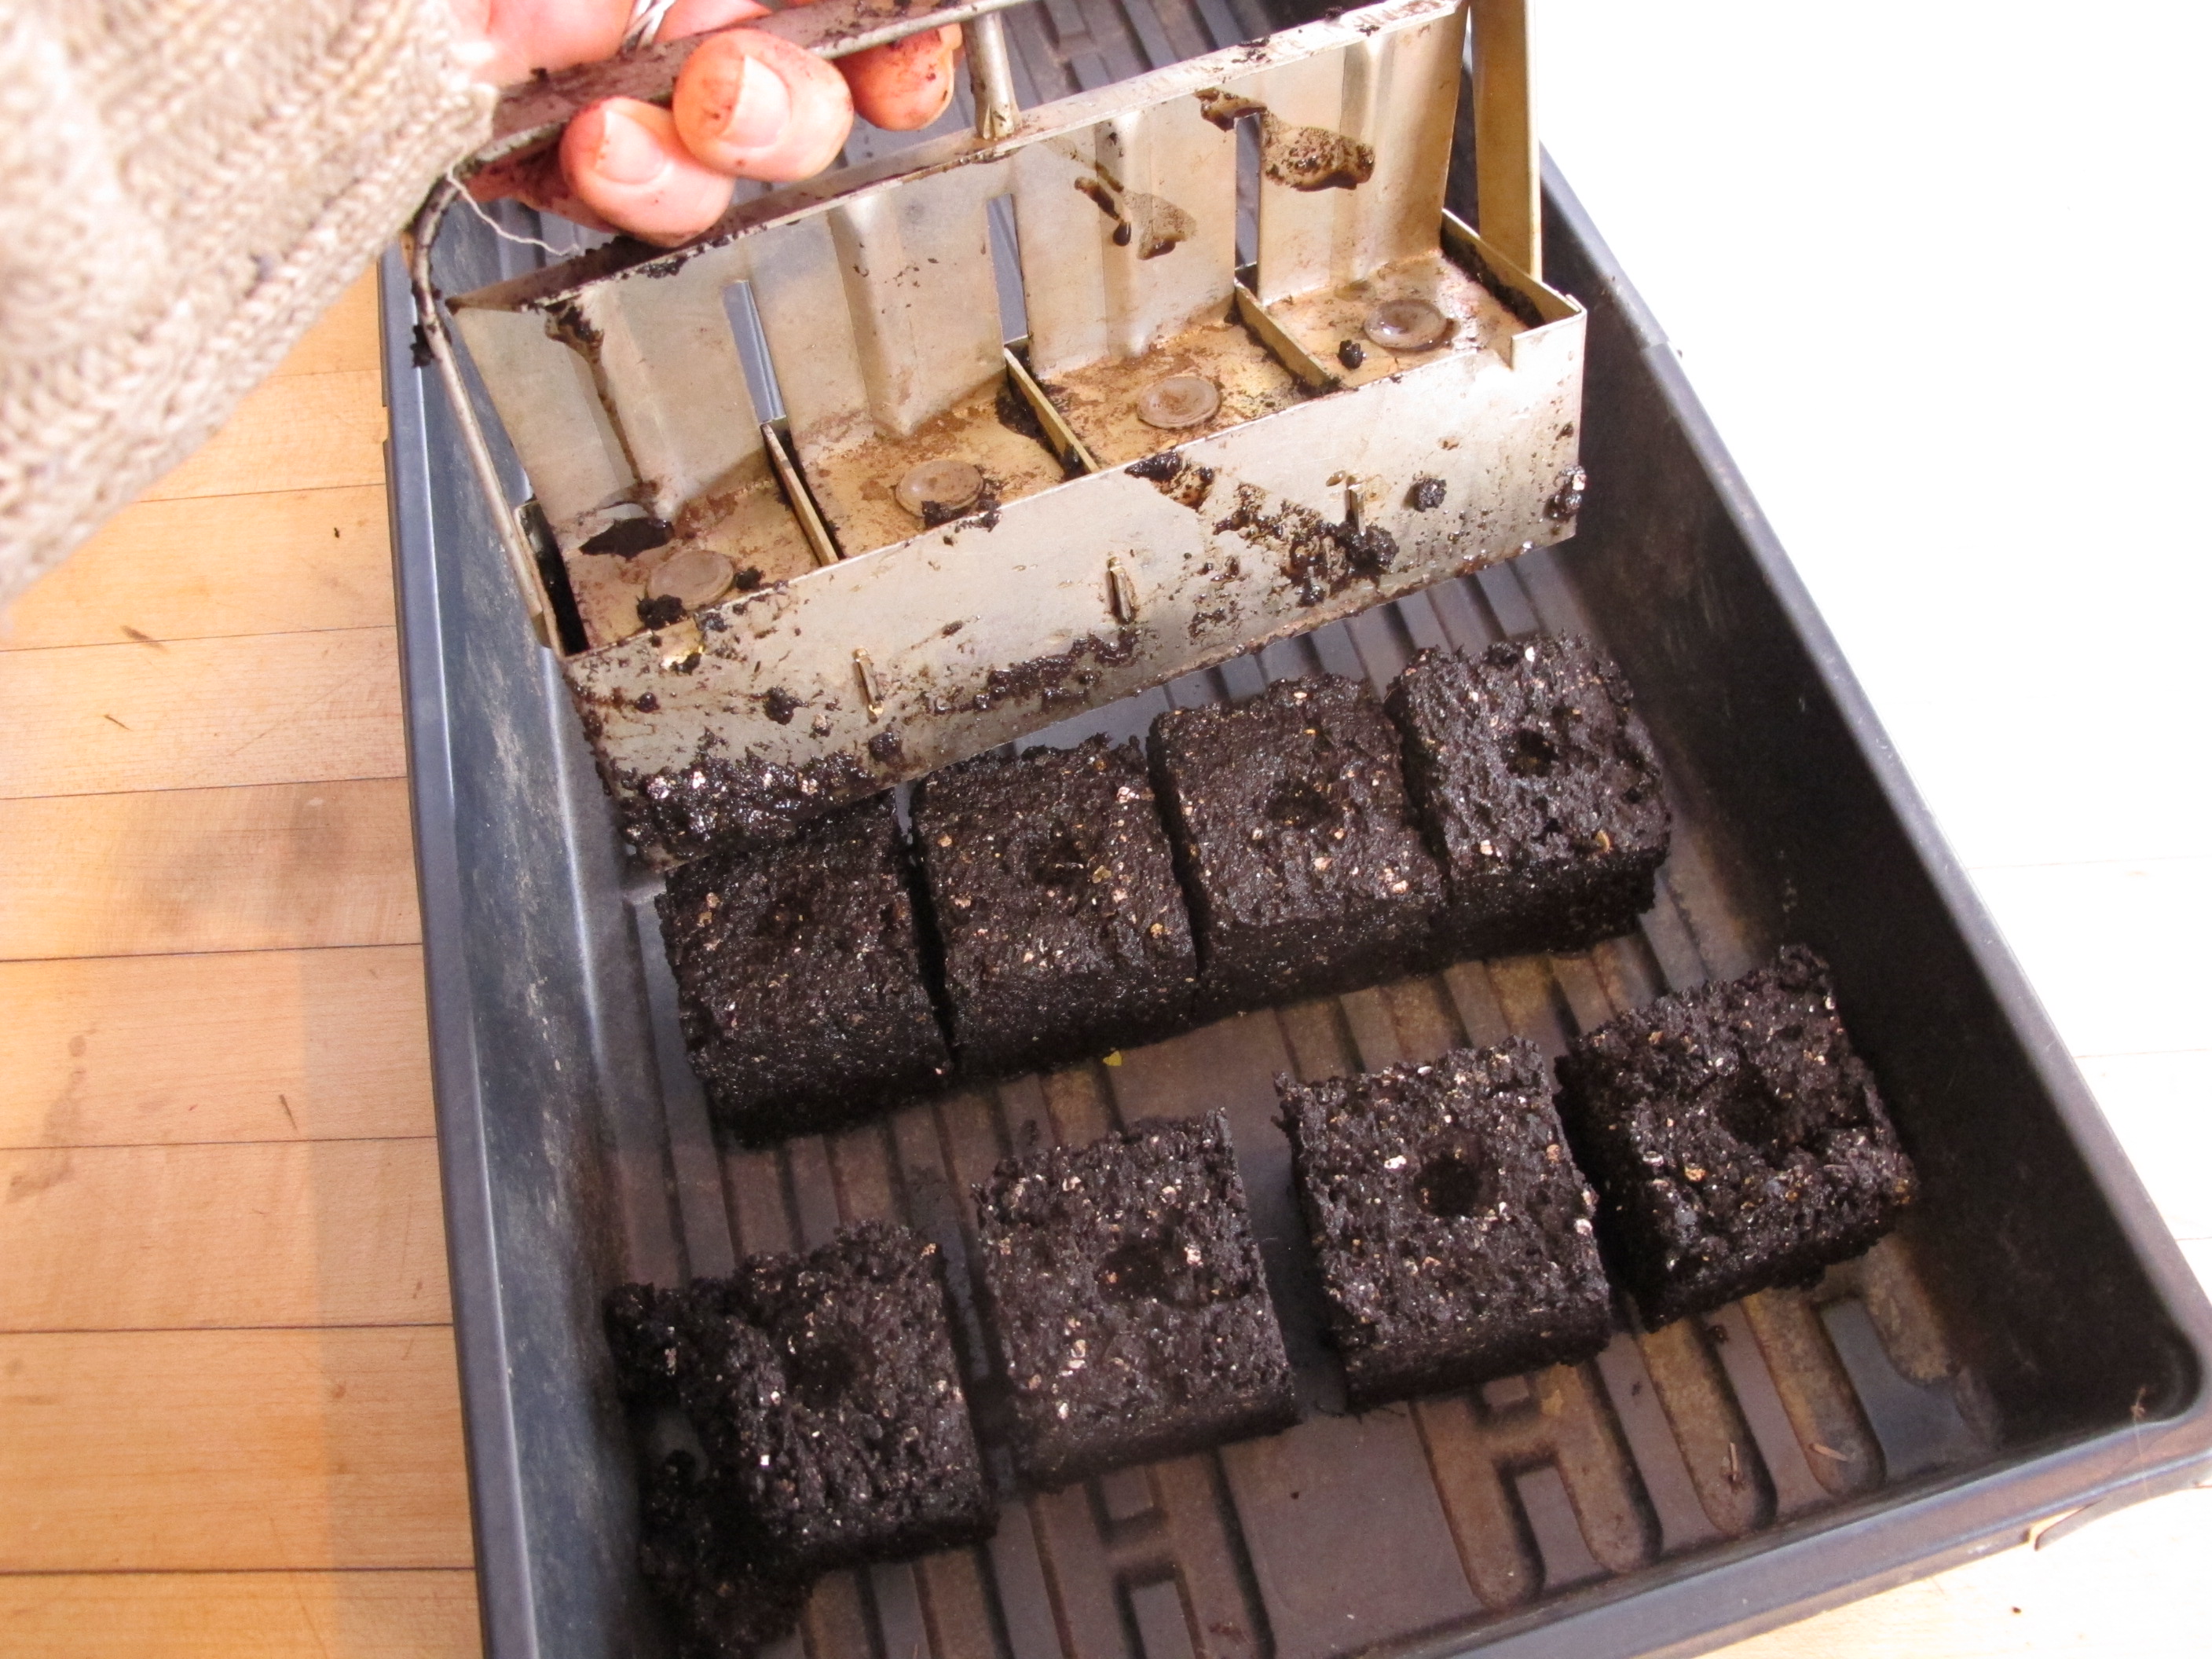
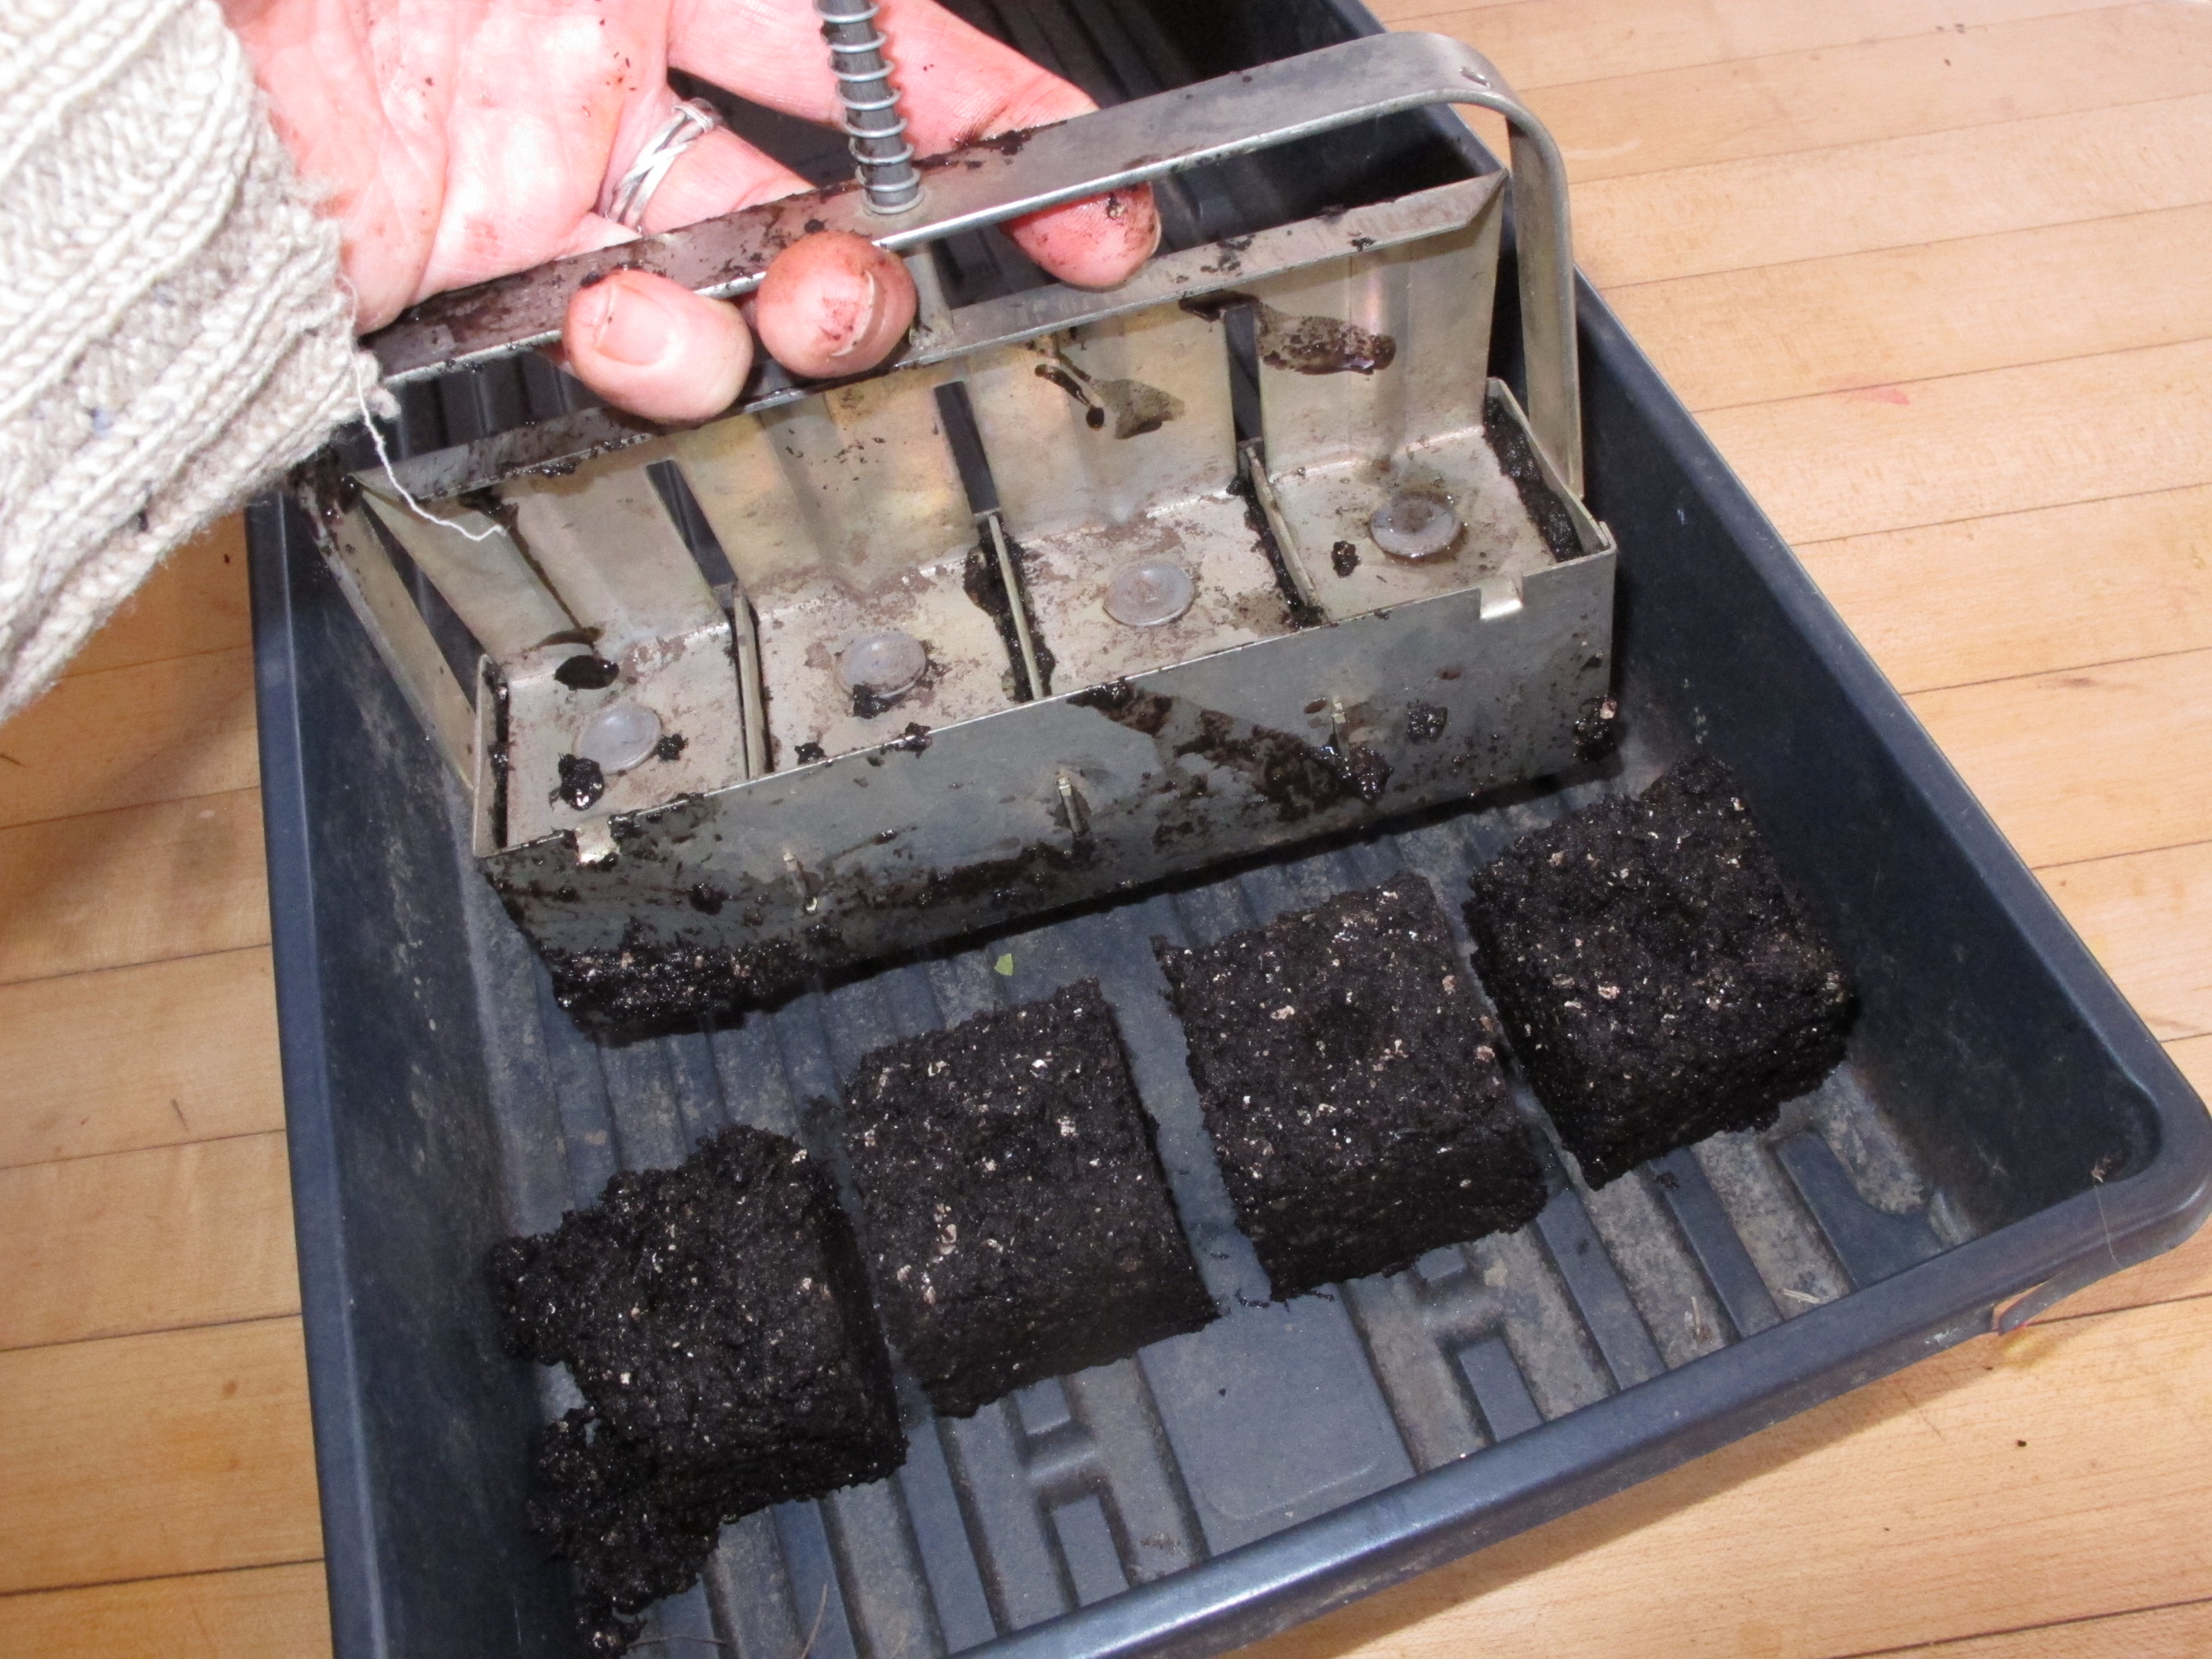
Soil Blocks
To make the blocs, make a pile of the gooey stuff 4-5 inches deep in a recycling bin or other flat-bottomed container. Then compress it by squishing it with the block maker, which makes four 2-inch cubes at a time. Fill up the cavities of the blocker, and then get rid of any excess by pushing the block maker down and rotating it against the bottom of the bin.
You can eject the blocks with the squeeze of the spring-equipped handle into in a standard black plastic flat, which will just hold 32 blocks. Line up the rows of blocs so that they do not touch. Block makers are available from Johnny’s Seeds and the Fedco Seed Company. And if you don’t want to make your own mix, some companies such as Grow Compost of Vermont are making a mix suitable for block makers.
Starting seeds is not for everyone, but I love it. It keeps me from getting squirrely as winter morphs into mud season while waiting for the snow and ice to disappear. Give it a try if you haven’t.
Henry teaches gardening and pruning to groups and individuals. His web site is www.Gardening-Guy.com.